1. Introduction
Thank you for choosing the SPYMINNPOO Marine Tachometer Gauge. This instrument is designed to provide accurate engine speed readings and track engine operating hours, essential for optimal performance monitoring of marine vessels and other compatible machinery. Its robust construction ensures reliable operation in challenging environments.
Key Features:
- Accurate engine speed display from 0 to 3000 RPM.
- Integrated hourmeter with a display range of 0-99999.9 hours.
- IP67 waterproof and dustproof rating, suitable for submerged conditions up to 1 meter.
- Constructed with 316L stainless steel bezel and anti-fog glass for durability.
- Red backlight for clear visibility in various lighting conditions.
- Operates on 9-32VDC.
2. Safety Information
- Always disconnect power before installation or maintenance to prevent electrical shock.
- Ensure all wiring connections are secure and properly insulated to avoid short circuits.
- Do not attempt to disassemble or modify the gauge, as this may void the warranty and cause damage.
- Install the gauge in a location where it will not obstruct visibility or interfere with safe operation of the vehicle.
- Refer to your vehicle's service manual for specific wiring diagrams and safety precautions.
3. Package Contents
Verify that all items are present in the package:
- 1 x Marine Tachometer Gauge
- 1 x User Manual (this document)
4. Product Overview
The SPYMINNPOO Marine Tachometer Gauge features a clear black dial with white markings and a red needle for RPM indication. An integrated LCD displays the hourmeter. The gauge is designed for flush mounting and includes a robust bezel for secure installation.
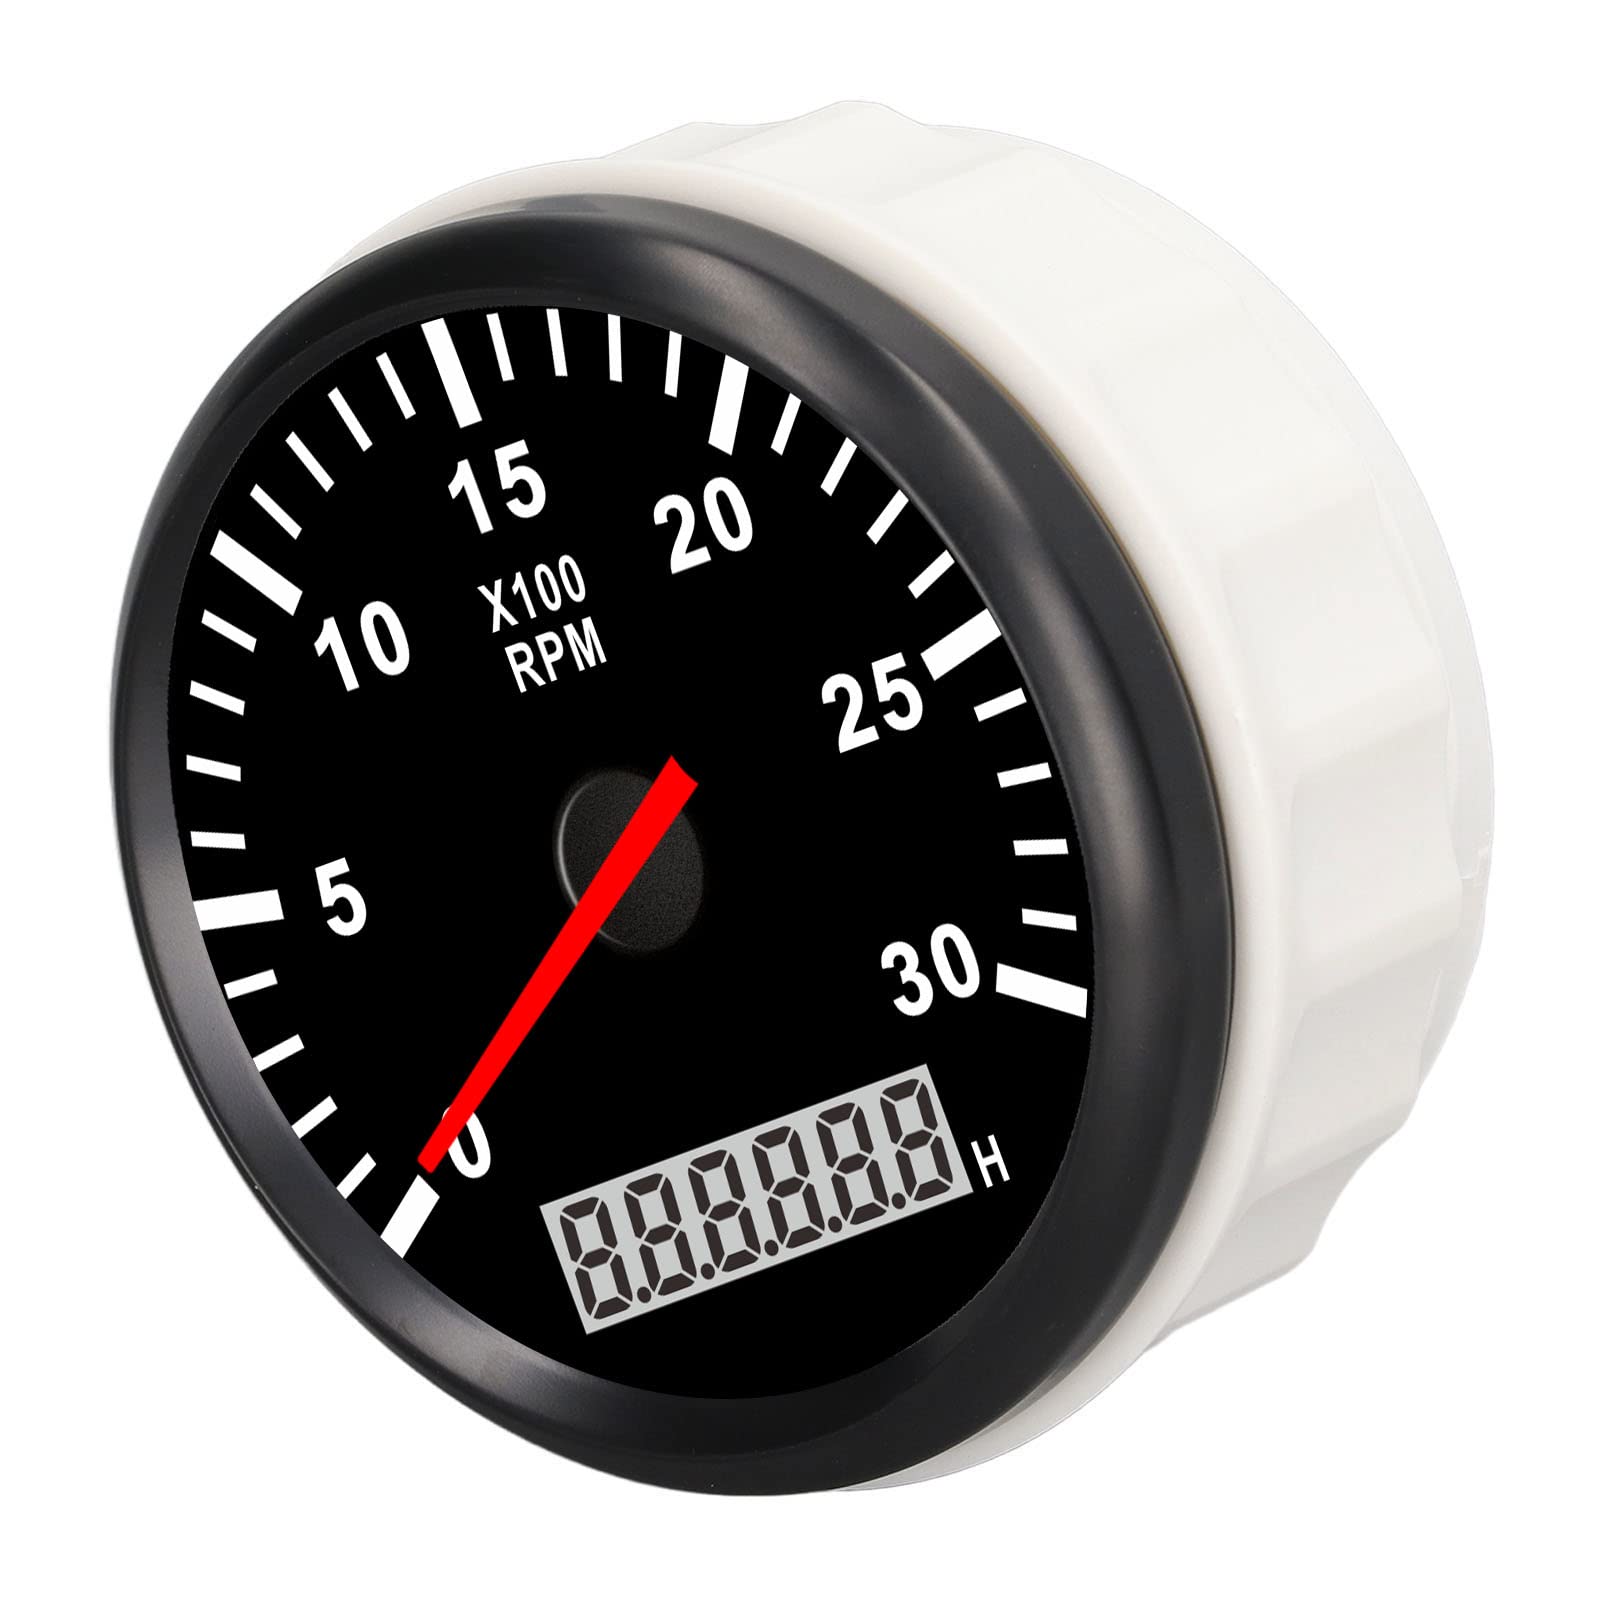
Figure 4.1: Front view of the SPYMINNPOO Marine Tachometer Gauge, showing the RPM scale, needle, and digital hourmeter display.

Figure 4.2: Close-up view of the tachometer's dial, highlighting the 'X100 RPM' indicator and the digital hourmeter at the bottom.
The gauge is constructed with a 316L stainless steel bezel, known for its corrosion resistance, and features anti-fog glass for clear readings in varying weather conditions. The high transparency PC material ensures durability.

Figure 4.3: Image illustrating the 316L stainless steel bezel, anti-fog glass, and high transparency PC construction of the tachometer for durability.
5. Specifications
| Parameter | Value |
|---|---|
| Item Type | Tachometer |
| Material | 316L stainless steel, anti-fog glass, PC |
| Input Signal | Pulse |
| Tachometer Display Range | 0-3000 RPM |
| Hourmeter Display Range | 0-99999.9 H |
| Protection Grade | IP67 (Waterproof, can work in 1m underwater) |
| Backlight Color | Red |
| Operating Voltage | 9-32VDC |
| Operating Current | ≤60mA |
| Operating Temperature | -30℃ to +75℃ |
| Storage Temperature | -40℃ to +85℃ |
| Operation Mode | LCD display, stepper motor |
| Item Weight | 207 g |
| Parcel Dimensions | 10 x 10 x 8 cm |
6. Setup and Installation
The tachometer is designed for user-friendly installation. Follow these general steps for proper setup. Specific wiring details may vary based on your engine and vessel's electrical system.
- Choose Mounting Location: Select a flat surface on your dashboard or control panel that is clear of obstructions and allows for easy viewing. Ensure there is sufficient space behind the panel for wiring and the gauge body.
- Prepare Mounting Hole: Drill a circular hole of the appropriate diameter (refer to the gauge's physical dimensions for exact size, typically around 85mm or 3.35 inches) in the chosen location.
- Wiring Connections:
- Connect the positive power supply (9-32VDC) to the designated terminal on the gauge.
- Connect the negative/ground wire to the designated terminal.
- Connect the signal input wire from your engine's ignition coil, alternator, or W-terminal to the signal input terminal on the gauge. The gauge uses a pulse input signal.
- Ensure all connections are tight and properly insulated to prevent corrosion and electrical issues.
- Secure the Gauge: Insert the tachometer into the prepared mounting hole. Use the provided mounting bracket and nuts to secure the gauge firmly from the rear of the panel.
- Test Functionality: Reconnect power to your vessel. Start the engine and verify that the tachometer needle moves and displays RPM accurately. Check that the hourmeter is functioning.
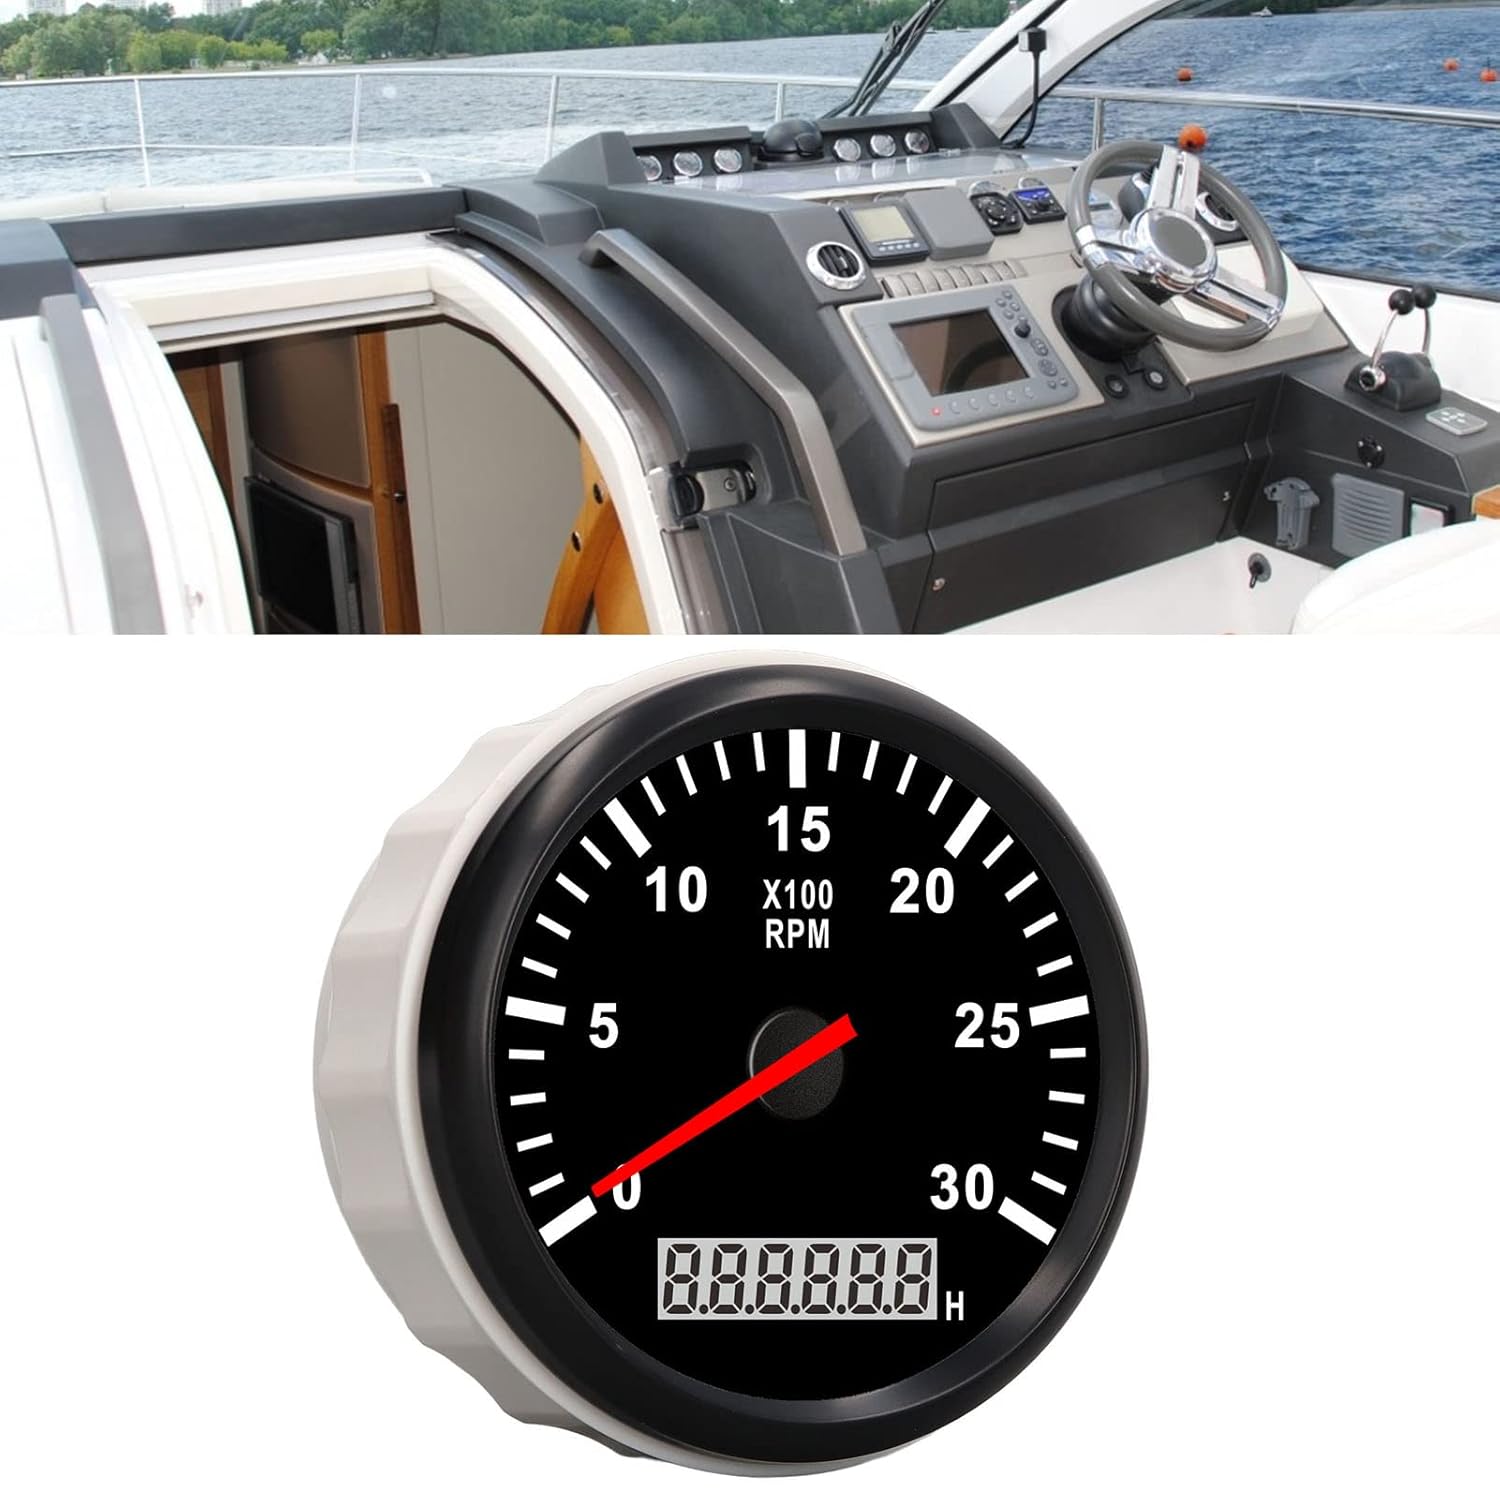
Figure 6.1: Example of the tachometer gauge integrated into a boat's dashboard, demonstrating a typical installation environment.
7. Operating Instructions
Once properly installed and powered, the SPYMINNPOO Marine Tachometer Gauge operates automatically.
- RPM Display: The red needle indicates the current engine revolutions per minute (RPM). The scale is marked in increments of 100 RPM (e.g., '10' on the dial represents 1000 RPM).
- Hourmeter: The digital LCD at the bottom of the dial displays the total accumulated engine operating hours. This value is stored even when power is off.
- Backlight: The red backlight will illuminate when the gauge receives power, ensuring visibility in low-light conditions.
No user calibration or adjustments are typically required for standard operation.
8. Maintenance
The SPYMINNPOO Marine Tachometer Gauge is designed for minimal maintenance due to its durable construction.
- Cleaning: Clean the gauge's front face and bezel with a soft, damp cloth. Avoid abrasive cleaners or solvents that could damage the anti-fog glass or finish.
- Inspection: Periodically inspect the wiring connections for any signs of corrosion or looseness. Ensure the mounting remains secure.
- Waterproofing: The IP67 rating provides excellent protection. However, avoid prolonged submersion beyond 1 meter or high-pressure water jets directly on the gauge.
9. Troubleshooting
If you encounter issues with your tachometer, consider the following:
- Gauge Not Powering On / No Backlight:
- Check the power supply connection (positive and negative) to ensure they are secure and receiving the correct voltage (9-32VDC).
- Verify any inline fuses in the power circuit are intact.
- Tachometer Needle Not Moving / Incorrect RPM Reading:
- Ensure the signal input wire is correctly connected to the engine's RPM signal source.
- Check for any damage or breaks in the signal wire.
- Confirm the engine's RPM signal source is functioning correctly (e.g., ignition coil, alternator W-terminal).
- Hourmeter Not Advancing:
- The hourmeter advances when the engine is running and the tachometer is receiving an RPM signal. If the tachometer is working, the hourmeter should also function.
- If the hourmeter is stuck, ensure continuous power supply to the gauge when the engine is running.
If troubleshooting steps do not resolve the issue, contact customer support for further assistance.
10. Warranty and Support
For warranty information and technical support, please refer to the documentation provided at the time of purchase or contact your retailer. Keep your purchase receipt as proof of purchase.