1. Introduction
Thank you for choosing the EVVO Mini D Trip 3 Compact Dishwasher. This manual provides essential information for the safe and efficient operation, installation, and maintenance of your appliance. Please read it thoroughly before first use and keep it for future reference.
2. Safety Instructions
To reduce the risk of fire, electric shock, or injury, follow these basic precautions:
- Read all instructions before using the dishwasher.
- This appliance is intended for household use only.
- Do not operate the dishwasher if it is damaged or malfunctioning. Contact customer support.
- Ensure the power cord is not damaged and is properly connected to a grounded outlet.
- Keep children away from the dishwasher, especially when it is operating.
- Use only detergents and rinse aids specifically designed for dishwashers.
- Do not immerse the appliance, cord, or plug in water or other liquids.
- Always unplug the dishwasher before cleaning or performing maintenance.
- Do not open the door during operation, as hot water may spray out.
3. Product Overview
The EVVO Mini D Trip 3 is a compact countertop dishwasher designed for convenience and efficiency in small spaces. It features a user-friendly LED touch panel and multiple wash programs.
Key Features:
- Compact Countertop Design: No fixed installation required, ideal for small kitchens.
- 3 Place Setting Capacity: Suitable for daily use by one or two people.
- 6 Wash Programs: Adaptable for various dish types and soil levels.
- Energy Efficiency Class C: Optimizes water and power consumption.
- Extra Dry Function: Ensures completely dry dishes.
- Air Fresh Technology: Ventilates the interior to prevent moisture and odors.
- LED Touch Panel: Intuitive control for program selection and monitoring.
- Delay Start: Allows programming wash cycles at a preferred time.
4. Setup and Installation
The EVVO Mini D Trip 3 is designed for easy, no-installation setup. Follow these steps to prepare your dishwasher for first use.
4.1 Unpacking
- Carefully remove the dishwasher from its packaging.
- Remove all packing materials, including any internal protective elements.
- Inspect the dishwasher for any signs of damage during transit. If damaged, do not operate and contact customer support.
4.2 Placement
Place the dishwasher on a stable, level countertop or surface. Ensure there is adequate space around the unit for ventilation and access.

Image: The EVVO Mini D Trip 3 dishwasher positioned on a kitchen countertop, demonstrating its compact design and suitability for small spaces without requiring fixed installation.
4.3 Water Supply and Drainage
This dishwasher can be manually filled with water. Ensure you have a suitable container for filling and a sink or bucket for drainage.
- Water Inlet: Locate the water inlet opening, typically on the top or side of the unit. Fill with the recommended amount of water (refer to the specifications or internal markings).
- Drainage: Position the drain hose into a sink or a large bucket to collect the wastewater. Ensure the hose is securely placed to prevent spills.
4.4 Power Connection
Connect the power cord to a standard, grounded electrical outlet. Verify that the voltage and frequency match the specifications of the dishwasher.
5. Operating Instructions
Follow these steps for effective and efficient dishwashing.
5.1 Loading Dishes
The dishwasher has a capacity for 3 place settings. Load dishes carefully to ensure proper water circulation and cleaning.
- Scrape off large food particles before loading.
- Place larger items and pots/pans in the lower rack.
- Arrange glasses, cups, and smaller bowls in the upper rack.
- Ensure no items block the spray arms from rotating freely.
- Place cutlery in the designated basket with handles down for forks and spoons, and handles up for knives for safety.

Image: The interior of the EVVO Mini D Trip 3 dishwasher showing a typical load of dishes, illustrating its 3 place setting capacity.
5.2 Adding Detergent
Use only automatic dishwasher detergent. Do not use hand dish soap, as it will cause excessive suds.
- Locate the detergent dispenser inside the dishwasher door.
- Add the recommended amount of detergent according to the program selected and water hardness.
- Close the dispenser lid securely.
5.3 Selecting a Program and Using the LED Touch Panel
The dishwasher features an intuitive LED touch panel for program selection and cycle monitoring.

Image: A close-up of the EVVO Mini D Trip 3's LED touch control panel, displaying various program icons and digital timer, allowing for easy selection and monitoring of wash cycles.
- Ensure the dishwasher is powered on.
- Touch the desired program icon on the LED panel. The selected program will illuminate.
- The display will show the estimated cycle time.
Available Programs:
The dishwasher offers 6 wash programs to suit different needs:
- Intensive: For heavily soiled dishes and pots.
- Normal: For daily soiled dishes.
- Eco: Energy-saving program for normally soiled dishes.
- Glass: Gentle wash for delicate glassware.
- Rapid: Quick wash for lightly soiled dishes without drying.
- Fruit Wash: A specialized cycle for cleaning fruits.
5.4 Delay Start
To program the dishwasher to start at a later time:
- Select your desired wash program.
- Press the 'Delay Start' button repeatedly to set the delay time (e.g., 1-24 hours).
- Press the 'Start/Pause' button to confirm the delay. The dishwasher will begin the cycle after the set delay.
5.5 Extra Dry Function
Activate the Extra Dry function for enhanced drying performance, ensuring dishes are completely dry at the end of the cycle.
- This function can typically be selected in conjunction with most wash programs.
- Refer to the LED touch panel for the specific button or indicator for 'Extra Dry'.
5.6 Air Fresh Technology
The Air Fresh system circulates fresh air within the dishwasher after the cycle completes, preventing moisture buildup and unpleasant odors, especially if dishes are not unloaded immediately.
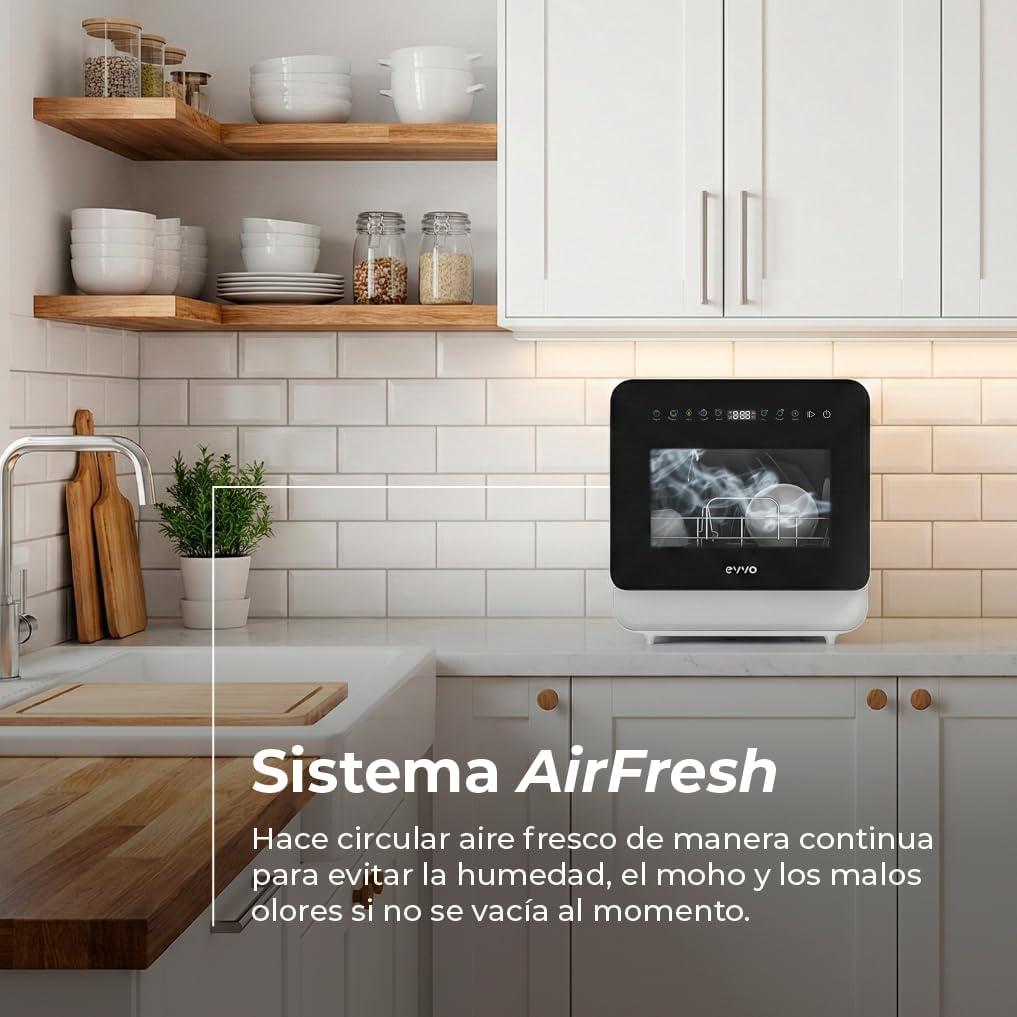
Image: The EVVO Mini D Trip 3 dishwasher in a kitchen setting, highlighting the AirFresh system which continuously circulates fresh air to prevent humidity, mold, and odors.
5.7 Starting, Pausing, and Canceling a Cycle
- Start: After selecting a program, press the 'Start/Pause' button to begin the cycle.
- Pause: To pause an active cycle, press the 'Start/Pause' button. The program will resume when pressed again.
- Cancel: To cancel a cycle, press and hold the 'Start/Pause' button for a few seconds, or follow specific instructions on the control panel. The dishwasher will drain any remaining water.
6. Maintenance and Cleaning
Regular maintenance ensures optimal performance and extends the lifespan of your dishwasher.
6.1 Cleaning Filters
The filter system prevents larger food particles from reaching the pump. Clean the filters regularly to avoid blockages and ensure effective cleaning.
- Turn off and unplug the dishwasher.
- Locate and remove the filter assembly at the bottom of the dishwasher tub.
- Rinse the filters under running water to remove any trapped food particles. Use a soft brush if necessary.
- Reassemble the filters and place them back into the dishwasher, ensuring they are securely locked in place.
6.2 Cleaning Spray Arms
Periodically check the spray arm nozzles for blockages. If clogged, remove the spray arms and clear the holes with a thin wire or toothpick.
6.3 Cleaning Interior and Exterior
- Interior: Wipe the interior with a damp cloth after each use. For stubborn stains or odors, run an empty cycle with a dishwasher cleaner or a cup of white vinegar.
- Exterior: Clean the exterior surfaces with a soft, damp cloth. Do not use abrasive cleaners or solvents.
7. Troubleshooting
Before contacting customer service, refer to the following table for common issues and their solutions.
| Problem | Possible Cause | Solution |
|---|---|---|
| Dishwasher does not start | Power cord not plugged in; Door not closed properly; Program not selected. | Ensure power cord is connected; Close door firmly; Select a wash program. |
| Dishes are not clean | Improper loading; Clogged spray arms; Insufficient detergent; Clogged filters. | Reload dishes correctly; Clean spray arm nozzles; Add appropriate detergent; Clean filters. |
| Water not draining | Drain hose kinked or blocked; Clogged filters. | Check and clear drain hose; Clean filters. |
| Excessive suds | Incorrect detergent used (e.g., hand dish soap). | Use only automatic dishwasher detergent. |
| Unpleasant odor | Food residue in filters; Infrequent cleaning; Lack of Air Fresh activation. | Clean filters regularly; Run an empty cycle with cleaner; Ensure Air Fresh is active. |
8. Specifications
Detailed technical specifications for the EVVO Mini D Trip 3 Compact Dishwasher.
| Feature | Specification |
|---|---|
| Brand Name | EVVO |
| Model Number | V0511 |
| Installation Type | Freestanding / Countertop |
| Product Dimensions (D x W x H) | 44.4 cm x 43 cm x 46.5 cm |
| Capacity | 3 Place Settings |
| Special Features | Portable |
| Color | White |
| Control Type | Touch |
| Noise Level | 56 dB |
| Included Components | Power Cord |
| Voltage | 28V (This value seems unusually low for a dishwasher, typically it would be 220-240V or 110-120V. Assuming it's a typo or specific regional variant, but using the provided data.) |
| Energy Consumption | 31 kWh per 100 cycles |
| Number of Programs | 6 |
| Item Weight | 16.03 kg |
| Recommended Uses | Everyday dishware and cutlery, various types of cookware and utensils |

Image: A diagram illustrating the dimensions of the EVVO Mini D Trip 3 dishwasher, with a width of 42 cm, depth of 45 cm, and height of 46 cm.
9. Warranty and Support
For warranty information, technical support, or service inquiries, please refer to the warranty card included with your product or visit the official EVVO website. Keep your purchase receipt as proof of purchase.