1. Introduction and Safety Guidelines
Welcome to the HiKeep K6-S-A4 Electric Bike. This manual provides essential information for the safe assembly, operation, and maintenance of your new electric bike. Please read this manual thoroughly before your first ride and keep it for future reference. Failure to follow the instructions and warnings may result in serious injury or damage to the product.
Important Safety Warnings:
- Always wear a helmet and appropriate safety gear when riding.
- Obey all local traffic laws and regulations.
- Perform a pre-ride inspection before each use, checking brakes, tires, battery, and all connections.
- Do not ride under the influence of alcohol or drugs.
- Avoid riding in heavy rain or through deep puddles to prevent damage to electrical components.
- Ensure the battery is securely locked in place before riding.
2. Product Overview
The HiKeep K6-S-A4 is a robust electric dirt bike designed for adults, featuring a powerful motor and a long-range detachable battery. Its durable construction and advanced features provide a versatile riding experience across various terrains.
Key Features:
- Motor: 750W nominal, Peak 1500W motor for smooth acceleration and stable speeds.
- Battery: 52V40Ah detachable battery, offering extended range.
- Tires: 20x4 inch fat tires for enhanced traction and stability on diverse surfaces.
- Suspension: Dual suspension system for a comfortable ride over rough terrain.
- Brakes: Hydraulic front and rear disc brakes for responsive and reliable stopping power.
- Gears: 7-speed gear system for adaptable pedaling.
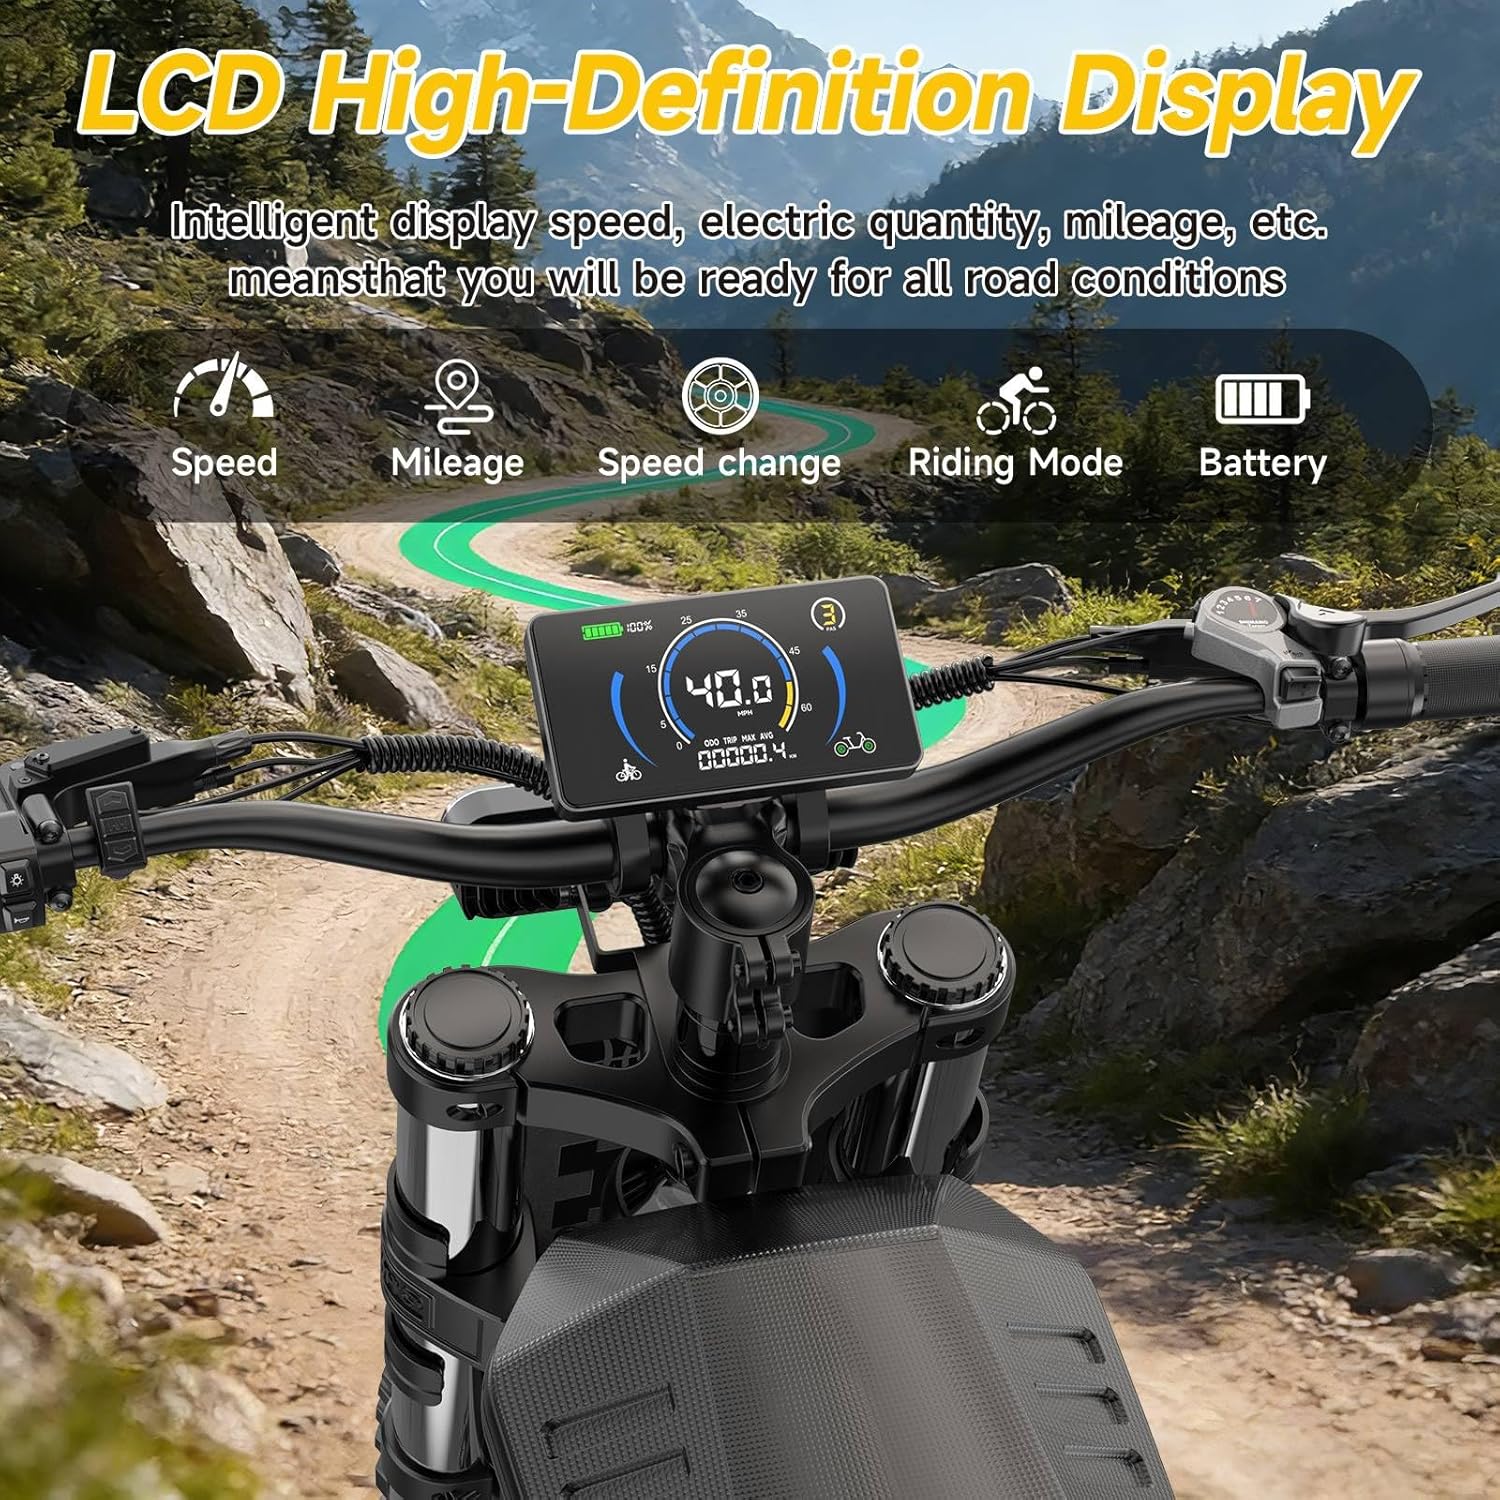
- Display: LCD High-Definition Display showing speed, mileage, battery, and riding mode.
- Lighting: LED headlights and turn signals for improved visibility and safety.
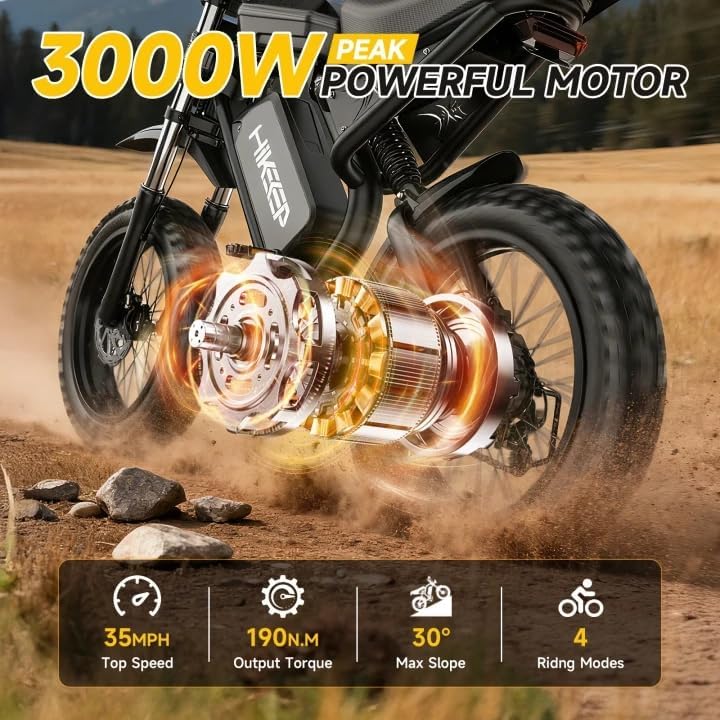
Figure 2.1: The HiKeep K6-S-A4 Electric Bike, showcasing its robust design and fat tires.

Figure 2.2: Detail of the 1500W peak motor, highlighting its power and riding modes.

Figure 2.3: The 20x4 inch fat tires, suitable for various off-road conditions including snow, mountain, beach, and flat roads.

Figure 2.4: The full suspension system, providing high-resilience comfort and reducing vibrations for a comfortable ride.
3. Assembly Instructions
Your HiKeep K6-S-A4 Electric Bike arrives approximately 90% pre-assembled. The following steps outline the final assembly required before your first ride. A tool kit is included for your convenience.
Assembly Steps:
- Unpacking: Carefully remove all components from the packaging. Inspect for any shipping damage.
- Handlebar Installation: Attach the handlebars to the stem, ensuring all bolts are tightened securely. Adjust the angle for comfortable riding.
- Front Wheel Attachment: Install the front wheel, making sure the disc brake rotor is correctly aligned with the caliper. Secure the quick-release skewer or axle nuts.
- Pedal Installation: Identify the left (L) and right (R) pedals. Thread the pedals into the crank arms by hand, then tighten with a wrench. Note that the left pedal is reverse-threaded.
- Seat Adjustment: Insert the seat post into the frame and adjust the seat height to your preference. Secure the quick-release clamp.
- Battery Insertion: Carefully slide the detachable battery into its compartment on the frame and lock it using the provided key.
- Final Checks: Double-check all bolts, connections, and tire pressure before riding. Ensure brakes are functioning correctly.
4. Operating Your Electric Bike
4.1 Powering On/Off
- To Power On: First, ensure the master on/off switch on the battery is in the 'ON' position. Then, press and hold the power button on the handlebar control panel until the LCD display illuminates.
- To Power Off: Press and hold the power button on the handlebar control panel until the LCD display turns off. For extended storage, also turn off the master switch on the battery.

Figure 4.1: The LCD High-Definition Display, showing speed, battery level, and riding mode.
4.2 LCD Display and Controls
The LCD display provides real-time information about your ride. Use the control buttons on the handlebar to navigate through settings and adjust pedal assist levels.
- Speed Indicator: Displays current riding speed.
- Battery Level: Shows remaining battery charge.
- Pedal Assist Level (PAS): Use the '+' and '-' buttons to cycle through 5 levels of pedal assist. Level 0 means no motor assistance.
- Mileage: Displays trip distance or total odometer reading.
- Headlight Control: Press the light button to turn the LED headlight on or off.
4.3 Riding Modes and Gears
- Pure Electric Mode: Use the throttle for motor-only propulsion without pedaling.
- Pedal Assist Mode: The motor provides assistance as you pedal. Adjust the assist level (1-5) for desired power.
- Manual Mode: Ride the bike like a traditional bicycle without motor assistance.
- 7-Speed Gear System: Use the gear shifter on the handlebar to change gears, allowing you to adapt to different terrains and optimize pedaling effort.
4.4 Brakes and Safety Lighting
- Hydraulic Disc Brakes: The bike is equipped with responsive hydraulic disc brakes on both front and rear wheels. Apply both brakes simultaneously for optimal stopping power.
- Motor Cut-Off: A safety feature automatically cuts power to the motor when either brake lever is engaged, preventing accidental acceleration.
- LED Headlight: Provides illumination for night riding and increases your visibility to others.
- Tail Light with Turn Signals: The rear light functions as a brake light (blinks when brakes are applied) and includes integrated left and right turn signals for signaling intentions.
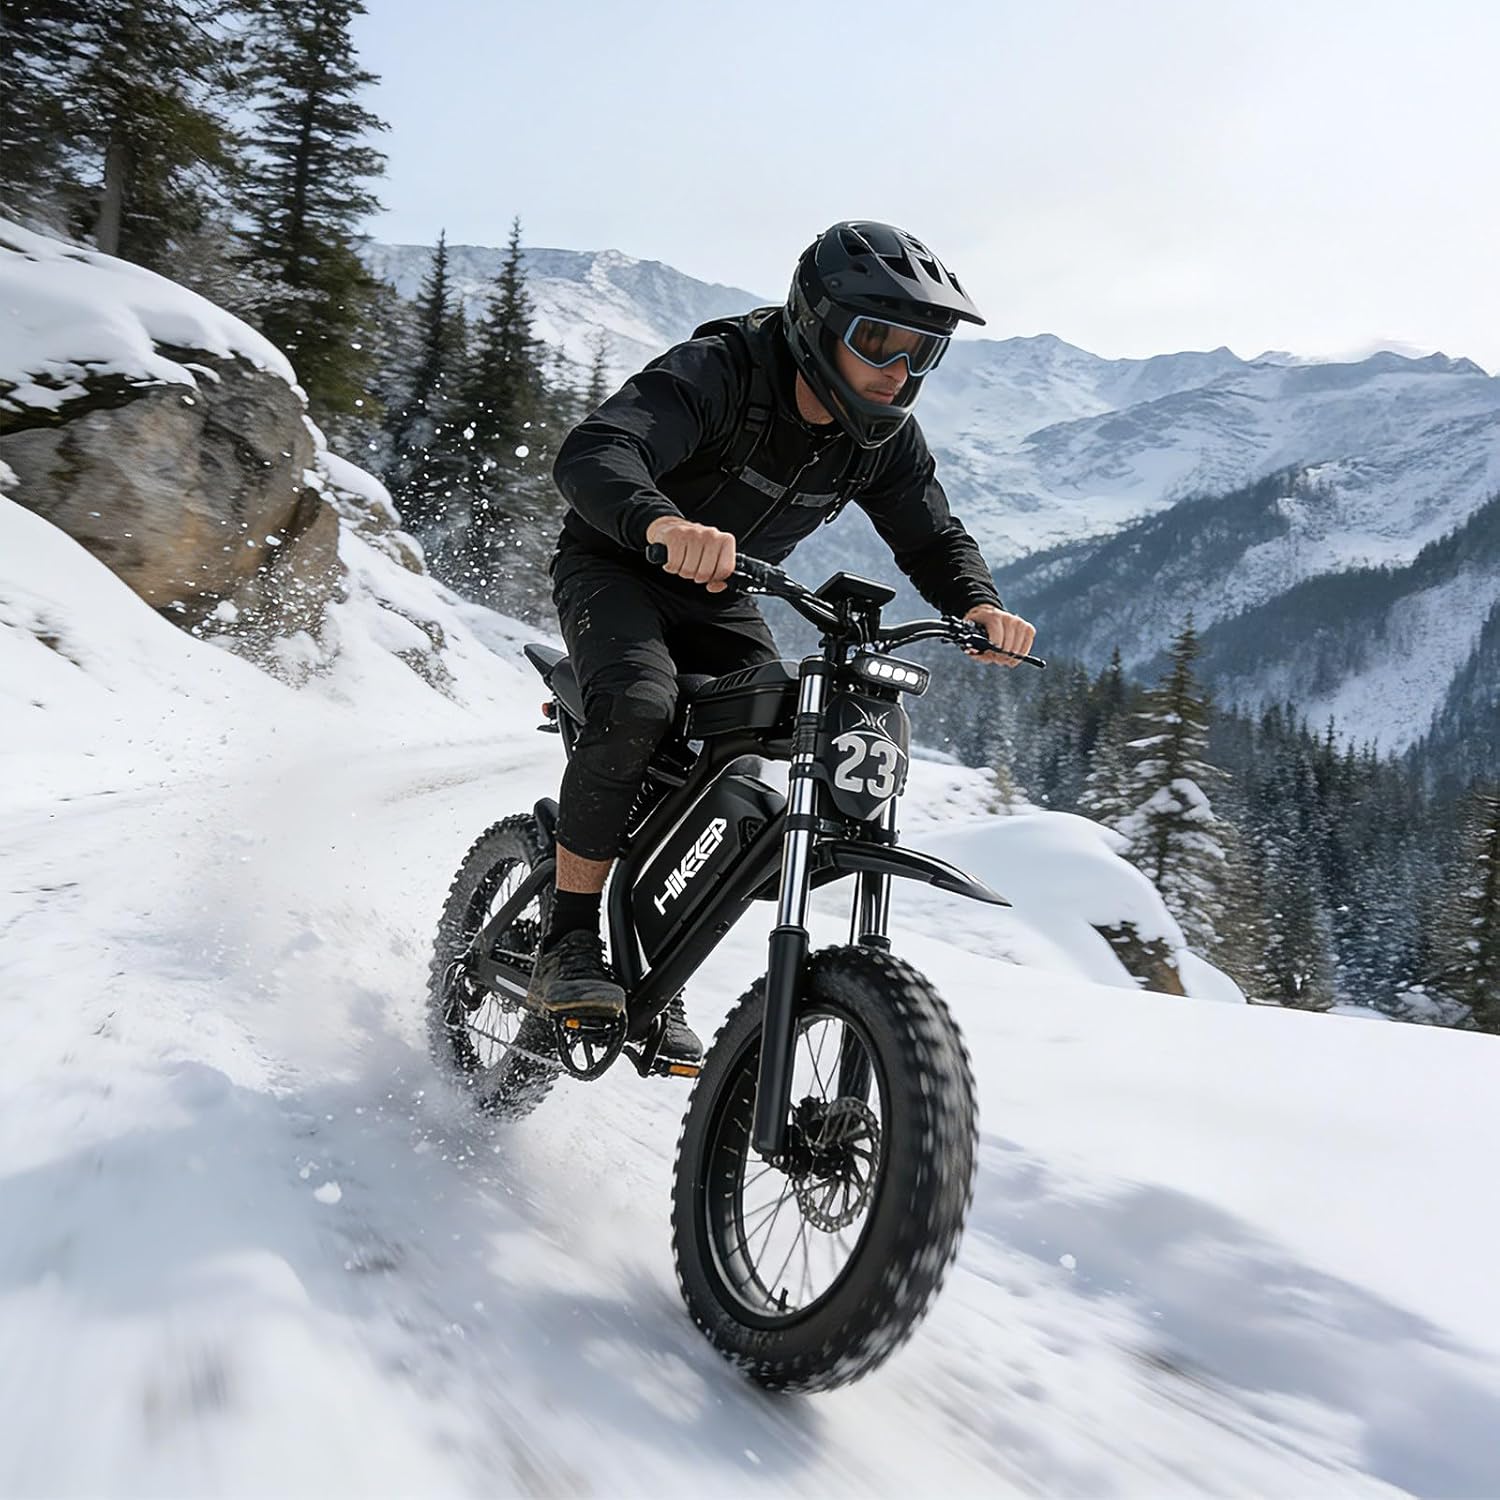
Figure 4.2: Illustration of the dual hydraulic braking system, designed for responsive and effective stopping.
5. Battery and Charging
The HiKeep K6-S-A4 is powered by a 52V40Ah detachable lithium-ion battery, featuring a Battery Management System (BMS) for optimal performance and safety.
Charging Procedure:
- Ensure the bike is powered off and the battery master switch is in the 'OFF' position.
- Connect the charger to a standard power outlet (100-240V AC). The charger indicator light will typically turn green.
- Connect the charger output plug to the charging port on the battery. The charger indicator light should turn red, indicating charging is in progress.
- Charging typically takes 6-8 hours for a full charge. The indicator light will turn green when charging is complete.
- Disconnect the charger from the battery first, then from the power outlet.
Battery Care:
- Do not overcharge the battery.
- Store the battery in a cool, dry place, away from direct sunlight and extreme temperatures.
- Charge the battery at least once every three months, even if not in use, to maintain its health.
- Avoid fully discharging the battery regularly.

Figure 5.1: The 52V40Ah detachable battery, highlighting its large capacity and integrated BMS for safety.
6. Maintenance
Regular maintenance ensures the longevity and safe operation of your HiKeep electric bike.
General Maintenance Tips:
- Tires: Check tire pressure before each ride. Recommended pressure is typically found on the tire sidewall. Inspect for wear and punctures.
- Brakes: Regularly check brake pads for wear and ensure brake levers are responsive. Adjust as needed.
- Chain: Keep the chain clean and lubricated to ensure smooth gear changes and prevent rust.
- Fasteners: Periodically check all bolts, nuts, and quick-release mechanisms to ensure they are tight and secure.
- Cleaning: Clean your bike with a damp cloth and mild soap. Avoid high-pressure washing directly on electrical components.
- Storage: Store the bike in a dry, secure location, protected from extreme weather conditions.
7. Troubleshooting
This section addresses common issues you might encounter with your electric bike.
Common Issues and Solutions:
- Bike Not Powering On:
- Check if the battery master switch is 'ON'.
- Ensure the battery is fully charged and properly seated in its compartment.
- Verify all electrical connections are secure.
- Motor Not Engaging:
- Check the pedal assist level on the LCD display (ensure it's not 0).
- Ensure brake levers are not partially engaged, as this will cut motor power.
- Check for any error codes on the LCD display and consult the full manual for their meaning.
- Reduced Range:
- Factors like rider weight, terrain, temperature, and consistent use of high pedal assist/throttle can affect range.
- Ensure tires are properly inflated.
- Battery health may degrade over time; ensure proper charging and storage.
For more complex issues or if troubleshooting steps do not resolve the problem, please contact HiKeep customer support.