1. Product Overview
The ONBRILL L4 Wall Mounted Industrial Pipe Clothing Rack is designed to provide a robust and versatile storage solution for your clothing and accessories. This system features a heavy-duty metal construction, ensuring durability and stability. Its wall-mounted design helps prevent tipping, offering a more secure setup compared to freestanding units.
Key features include ample storage space with multiple hanging rods and shelves, a customizable and modular design to fit various room layouts, and an upgraded assembly method for quicker and more secure installation.
2. Components List
Before beginning assembly, please ensure all components listed below are present in your package:
- 6 x Clothing Rods (including 4 expandable rods)
- 8 x Mesh Shelves
- Wall Screw Fittings (various types for different wall materials)
- Pipes and Connectors
- Adjustable Feet
3. Setup and Installation
Careful assembly and secure wall mounting are crucial for the stability and safety of your clothing rack. It is recommended to have two people for installation.
3.1 Assembly Steps
- Unpack and Identify Components: Lay out all parts and compare them with the components list to ensure everything is present.
- Plan Your Layout: Determine the desired configuration (L-shape, 45-degree, horizontal, or combination) and placement on your wall. Consider the height of your ceiling and the types of garments you will be hanging.
- Connect Pipes: The poles connect directly via threaded joints. Twist the pipes securely into the connectors until they are firm. This upgraded connection method is designed for faster and more secure assembly.
- Attach Shelves: Install the mesh shelves at your desired heights. The shelves are height-adjustable to accommodate various items.
- Attach Wall Mounts: Secure the wall mounting brackets to the assembled frame.
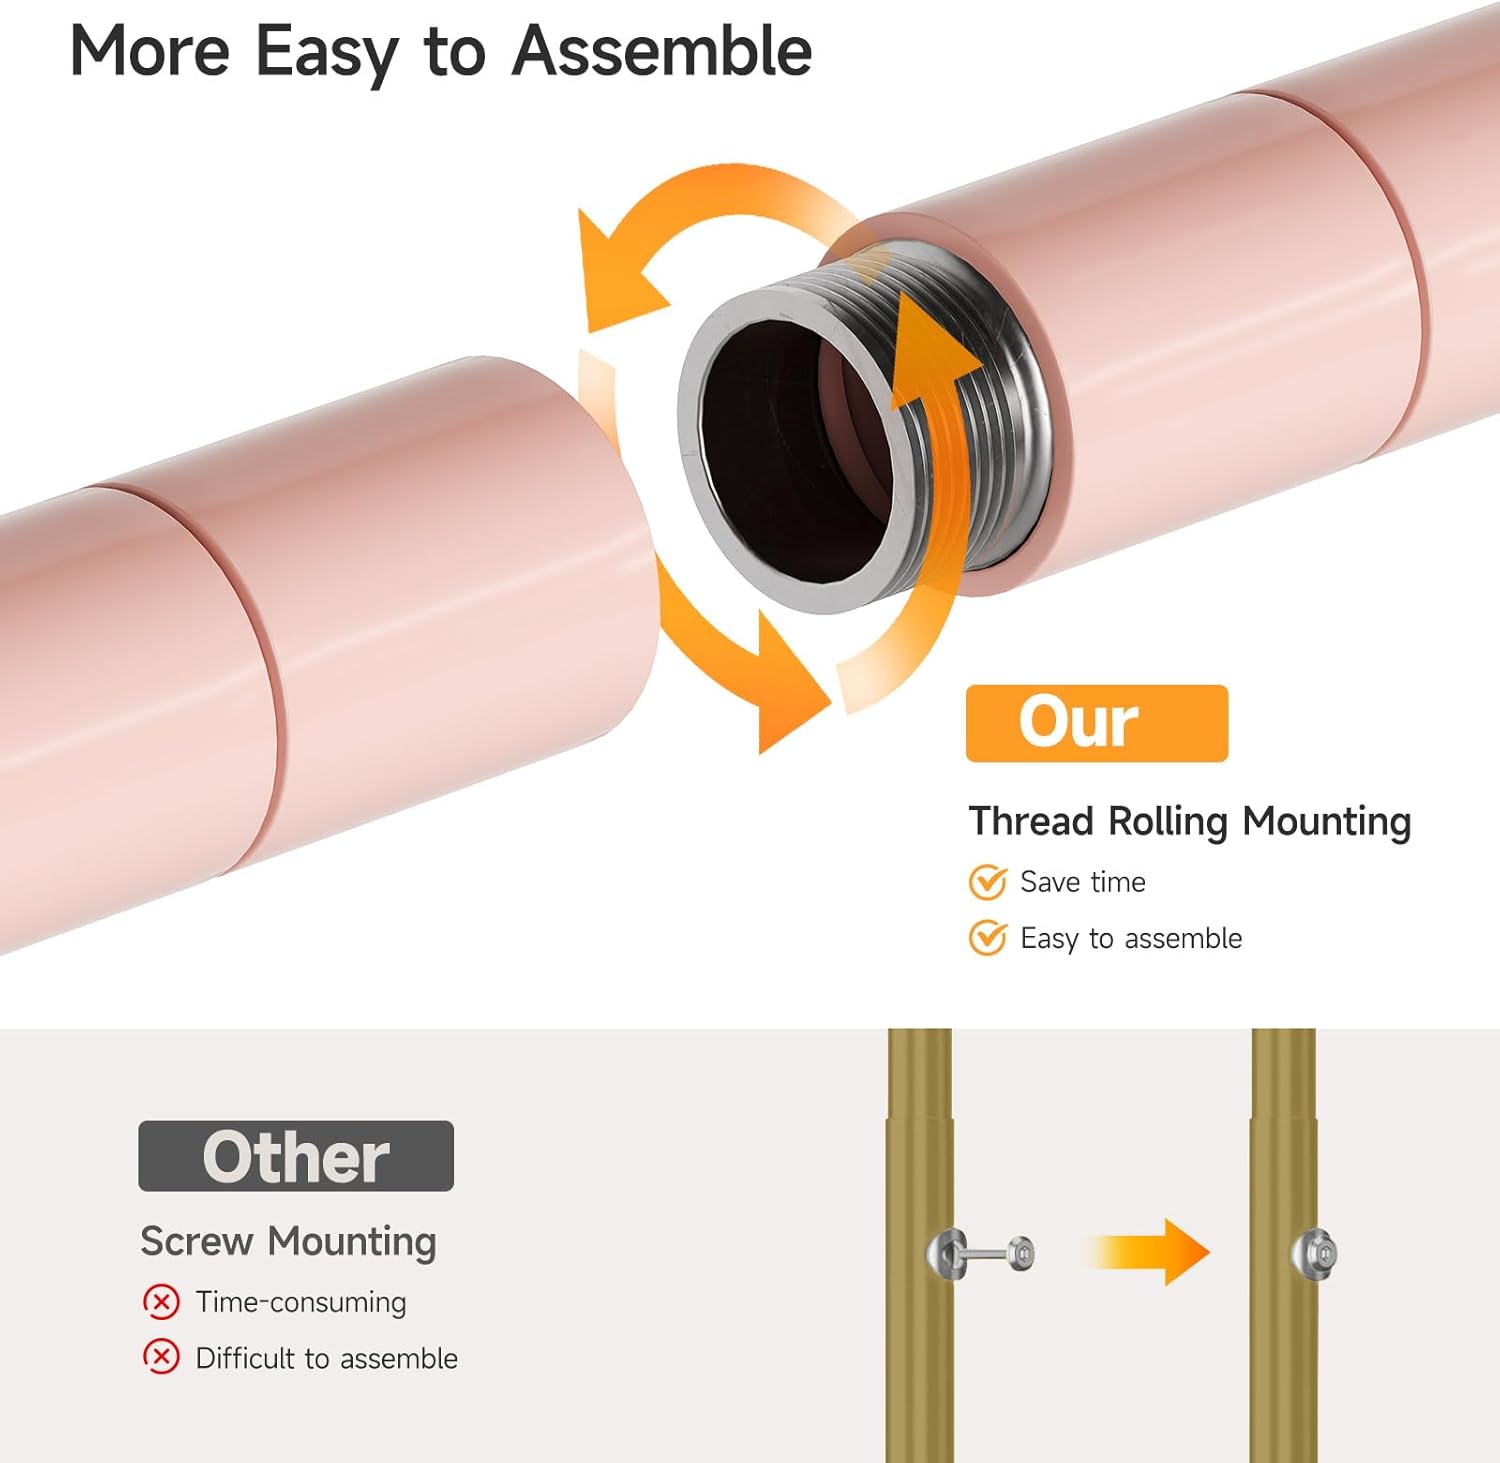
Image: Threaded Joint Connection for Easy Assembly. Ensure pipes are twisted firmly for a secure fit.
3.2 Wall Mounting
The wall-mounted design provides superior stability. Choose the appropriate anchors and screws for your specific wall type.
- For Drywall, Hollow Wall, Wood Paneling: Use the provided anchors and screws suitable for these materials.
- For Concrete, Masonry, Tiled Wall: Use the provided anchors and screws designed for hard surfaces.
Use a drill, level, and measuring tape to ensure accurate and secure installation. A rubber mallet may be useful for fitting components.
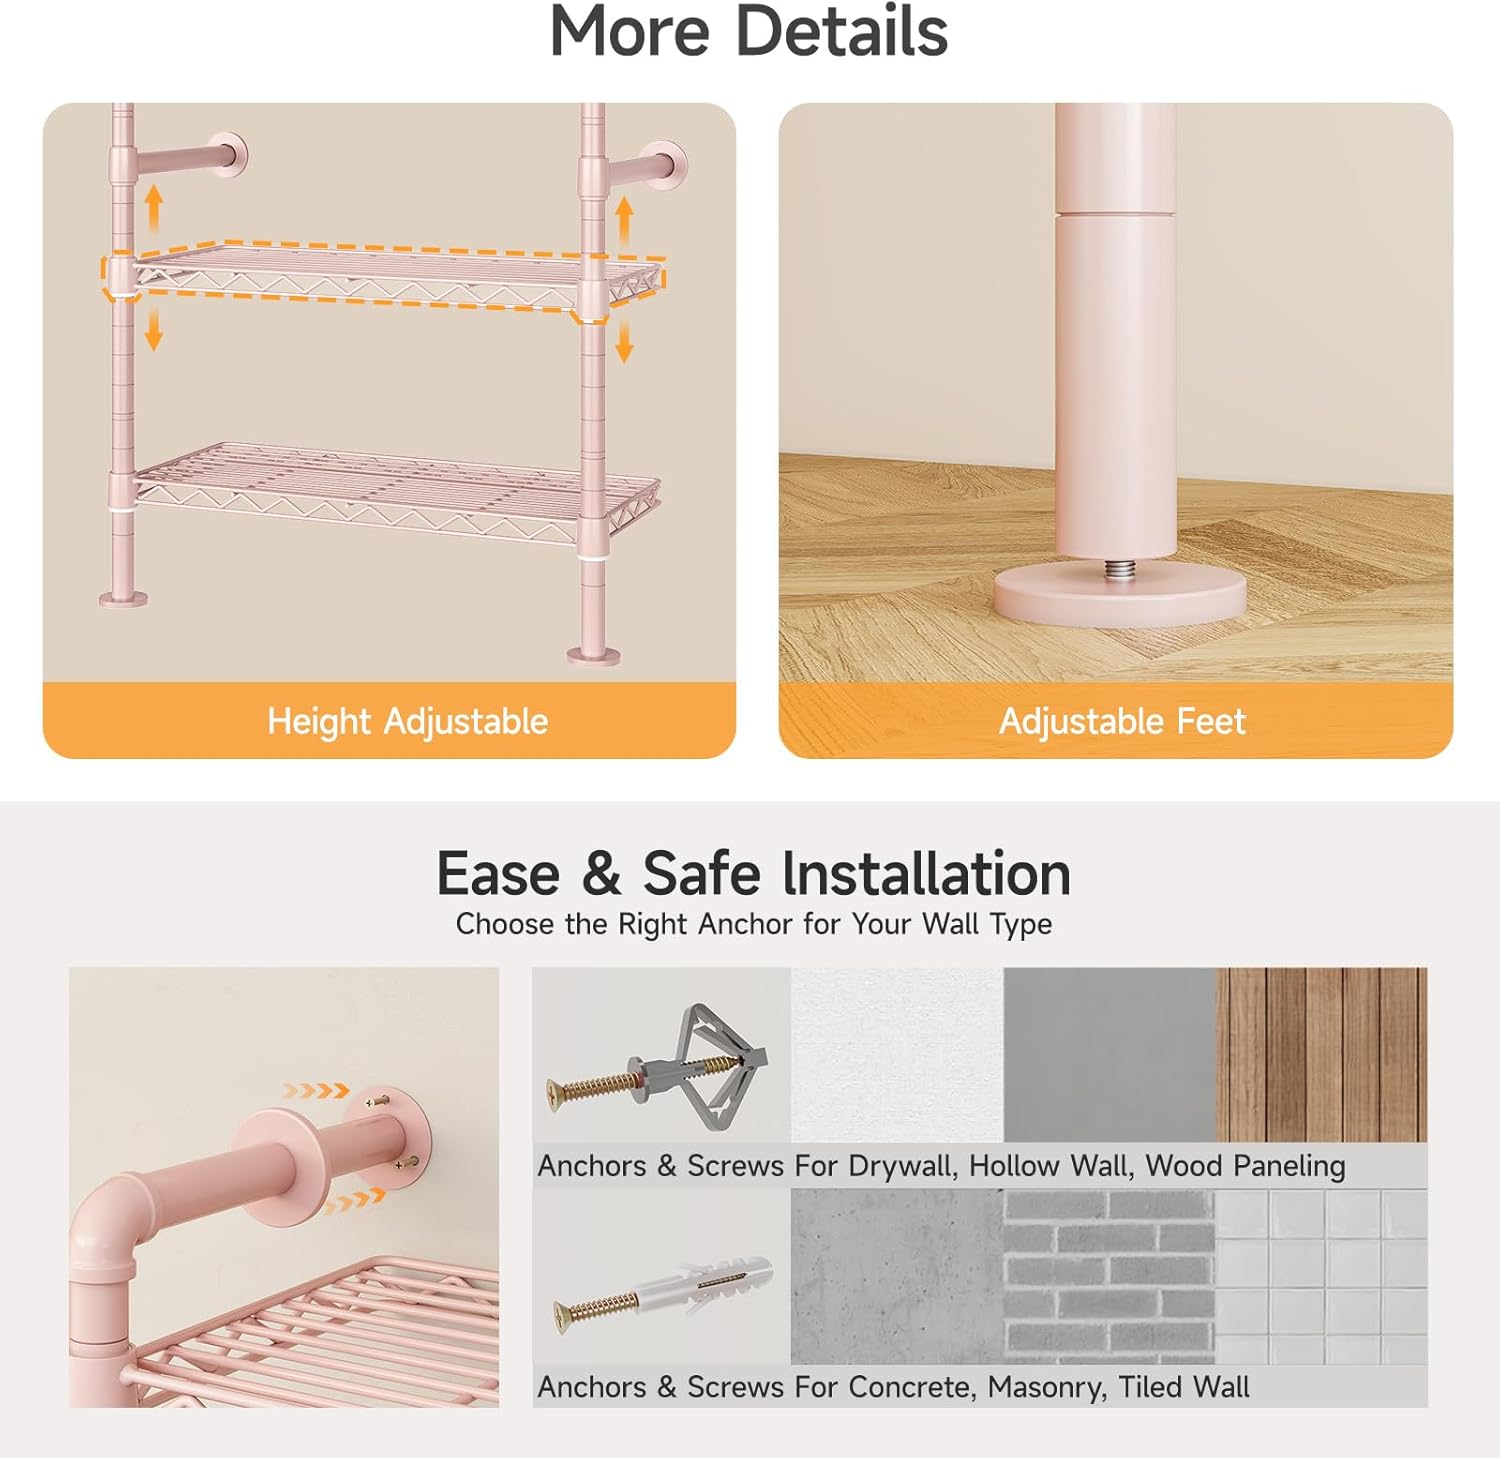
Image: Wall Anchors and Screws for Various Wall Types. Select the correct hardware for your wall material.

Image: Assembly Diagram with Dimensions. Ensure your space has at least a height of 7'6" for installation. The rack has a weight capacity of 950 lbs.
4. Operating Instructions
The ONBRILL L4 system offers high flexibility to adapt to your storage needs.
4.1 Customizable Layouts
The modular design allows for various configurations to best suit your space and requirements. Adjustable angles (180°, 90°, 45°) enable you to create L-shape, 45-degree, horizontal, or combination layouts.

Image: Adjustable Angles for Flexible Layouts. Configure the rack to fit any room layout.
4.2 Adjustable Rods and Shelves
The system includes 4 expandable rods, allowing you to increase hanging capacity as needed. Shelves are also height-adjustable to accommodate different clothing sizes, folded items, bags, or boxes.

Image: Expandable Rods for Increased Hanging Capacity. Expand rods to support more garments.

Image: Height Adjustable Shelves and Adjustable Feet. Customize shelf height and ensure stability on uneven floors.
5. Maintenance
To ensure the longevity and appearance of your ONBRILL L4 clothing rack, follow these simple maintenance guidelines:
- Cleaning: Wipe down the metal pipes and mesh shelves with a soft, damp cloth. Avoid abrasive cleaners or harsh chemicals that could damage the matte powder-coated finish.
- Inspection: Periodically check all threaded connections and wall mounts to ensure they remain tight and secure. Re-tighten if necessary.
- Weight Distribution: Distribute weight evenly across the rods and shelves to prevent undue stress on any single point. Adhere to the maximum weight capacity.
6. Troubleshooting
If you encounter any issues with your ONBRILL L4 clothing rack, consider the following:
- Instability: Ensure all wall mounts are securely fastened and the adjustable feet are properly leveled on the floor. Check that all pipe connections are tightly screwed.
- Difficulty Adjusting: If shelves or rods are difficult to adjust, ensure no weight is currently on them. Check for any obstructions or debris in the adjustment mechanisms.
- Damaged Components: If any part appears damaged or defective, do not attempt to force assembly or use the product. Contact customer support for assistance.
7. Specifications
| Feature | Detail |
|---|---|
| Model Number | 105-1 |
| Brand | ONBRILL |
| Mounting Type | Wall Mount |
| Material | Metal (Matte Powder Coated) |
| Item Weight | 46.2 pounds (21 Kilograms) |
| Included Components | 6 rods, 8 pieces of mesh, Wall Screw Fittings |
| Special Features | Adjustable Shelf, Expandable Rods, Modular Design |
| Maximum Load Capacity | 1100 lbs (as per product description) |
8. Warranty and Support
For any questions, concerns, or warranty claims regarding your ONBRILL L4 Wall Mounted Industrial Pipe Clothing Rack, please contact ONBRILL customer support. Refer to your purchase documentation for specific warranty details and contact information.


