
1. Introduction
This manual provides comprehensive instructions for the safe and efficient use of your CRYBY Jewellery Jump Ring Maker. Please read this manual thoroughly before operating the machine to ensure proper function and longevity of the product. Keep this manual for future reference.
2. Product Overview
The CRYBY Jewellery Jump Ring Maker is a professional tool designed for creating jump rings for various jewelry projects. It features durable construction and a versatile set of mandrels to accommodate different ring sizes.
Key Features:
- Premium Materials: Constructed from aluminum, steel, and high-speed steel for wear resistance and durability.
- Multi-Size Compatibility: Includes 20 mandrels ranging from 2.5-12mm (0.1-0.47 inches) for diverse jewelry making needs.
- Simple Operation: Features a motorized assist handle mechanism for easy coiling and cutting.
- Superior Craftsmanship: Oxidized chrome-plated finish resists fading and rusting, extending product life.
- Compact and Portable: Measures 23.5 x 12 x 15 cm (9.25 x 4.72 x 5.91 inches) and weighs 2.5 kg (5.51 lbs) for convenient storage and transport.

Figure 2.1: Assembled CRYBY Jewellery Jump Ring Maker.
3. What's in the Box
Verify that all components are present and undamaged upon unpacking.
- Handle
- Base
- 20 Mandrels (various sizes)
- 1 Rod
- 1 Thick Rod
- All Accessories for Installation (screws, etc.)

Figure 3.1: Unpacked components of the Jump Ring Maker.
4. Setup
Follow these steps to set up your jump ring maker:
- Secure the Base: Place the base unit on a stable, flat surface. For enhanced stability, it is recommended to secure the base using clamps or screws if your workspace allows.
- Attach the Handle Mechanism: Insert the handle mechanism into its designated slot on the base. Ensure it is firmly seated and secured with any provided fasteners.
- Select and Insert Mandrel: Choose the desired mandrel size from the 20 available options (2.5-12mm). Insert the mandrel into the chuck of the handle mechanism. Tighten the chuck securely to hold the mandrel in place.

Figure 4.1: Handle and chuck assembly.
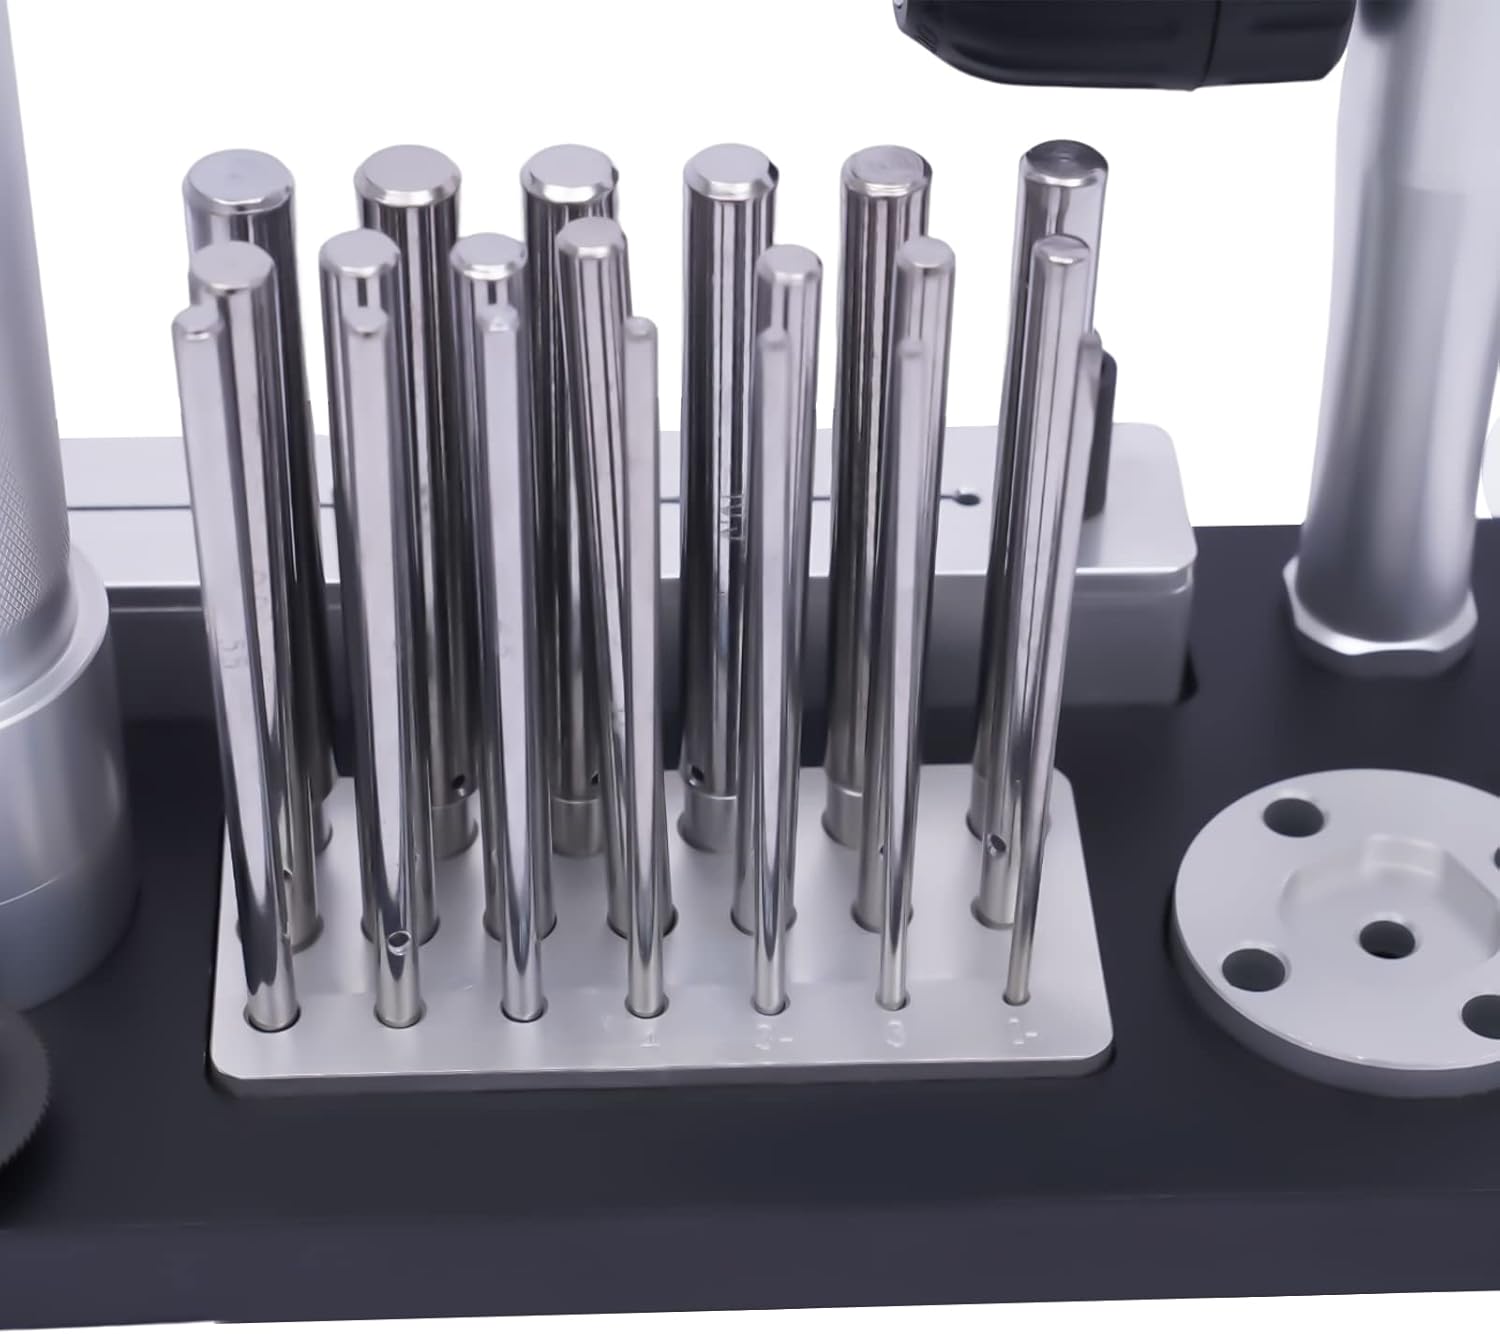
Figure 4.2: Mandrels for different ring sizes.
5. Operating Instructions
This section details the process of coiling wire and cutting jump rings.
5.1 Coiling Wire
- Prepare Wire: Select the desired jewelry wire. Ensure the end of the wire is straight for easy insertion.
- Insert Wire: Feed the end of the wire into the small hole at the tip of the chosen mandrel.
- Begin Coiling: While holding the wire taut, slowly turn the handle of the machine. The wire will begin to coil around the mandrel. Maintain consistent tension for even coils.
- Continue Coiling: Continue turning the handle until the desired length of coiled wire is achieved.
- Remove Coiled Wire: Once coiling is complete, loosen the chuck and carefully slide the coiled wire off the mandrel.
Video 5.1: Demonstration of wire coiling using the jump ring maker. This video illustrates the process of feeding wire into the mandrel and rotating the handle to create a coil.
5.2 Cutting Jump Rings
After coiling the wire, use the cutting tool to create individual jump rings.
- Position Coiled Wire: Place the coiled wire into the cutting guide slot on the base unit. Ensure the coil sits snugly within the guide.
- Prepare Cutting Tool: Insert the cutting blade into the flexible shaft holder.
- Cut Rings: Carefully guide the cutting blade along the coiled wire in the slot. Apply steady pressure and move the blade smoothly to cut individual jump rings.
- Collect Rings: Once cut, the jump rings will be separated. Collect them for your jewelry projects.

Figure 5.1: Examples of jump ring applications and the cutting process.
Video 5.2: Demonstration of cutting coiled wire into individual jump rings. This video shows how to use the cutting tool with the coiled wire.
6. Maintenance
Regular maintenance ensures optimal performance and extends the lifespan of your jump ring maker.
- Cleaning: After each use, wipe down the machine with a soft, dry cloth to remove any wire residue or dust.
- Lubrication: Periodically apply a small amount of light machine oil to moving parts, such as the handle mechanism and chuck, to ensure smooth operation.
- Mandrel Care: Keep mandrels clean and free of scratches. Store them in their designated slots to prevent damage.
- Blade Sharpening/Replacement: If the cutting blade becomes dull, sharpen it or replace it with a new one to ensure clean cuts.
7. Troubleshooting
This section addresses common issues you might encounter.
| Problem | Possible Cause | Solution |
|---|---|---|
| Wire not coiling evenly | Inconsistent wire tension; Mandrel not secured; Wire gauge too thick/thin for mandrel. | Maintain steady tension on the wire; Ensure mandrel is tightly secured in the chuck; Use appropriate wire gauge for the selected mandrel. |
| Difficulty turning handle | Lack of lubrication; Wire binding; Mandrel stuck. | Apply light machine oil to moving parts; Check for wire tangles; Ensure mandrel is correctly inserted and not bent. |
| Jump rings are not cleanly cut | Dull cutting blade; Improper blade alignment; Coiled wire not seated correctly. | Sharpen or replace the cutting blade; Ensure the blade is correctly aligned in the holder; Verify coiled wire is snugly in the cutting guide. |
8. Specifications
Detailed specifications for the CRYBY Jewellery Jump Ring Maker.
- Brand: CRYBY
- Model Name: Jump Ring Maker
- Model Number: Lohong00001405
- Material Type: Aluminum, Steel, and High-speed Steel
- Color: Black+Silver
- Item Dimensions (L x W x H): 23.5 x 12 x 15 cm (9.25 x 4.72 x 5.91 inches)
- Item Weight: Approximately 2.5 kg (5.51 lbs)
- Mandrel Sizes: 2.5-12mm (0.1-0.47 inches), 20 pieces included

Figure 8.1: Product dimensions.
9. Warranty and Support
Warranty: The manufacturer's specifications indicate that there is no explicit warranty provided for this product.
Customer Support: For any questions, concerns, or assistance with your CRYBY Jewellery Jump Ring Maker, please contact the seller or manufacturer directly through your purchase platform. Provide your model number (Lohong00001405) and a detailed description of your inquiry for efficient support.