1. Introduction
Welcome to the Generic A15 Pro Max Camera Drone user manual. This guide provides essential information for operating and maintaining your drone safely and effectively. Please read this manual thoroughly before your first flight to ensure proper setup and operation.
1.1 Safety Guidelines
- Always operate the drone in open areas, away from people, animals, and obstacles.
- Do not fly near airports, restricted airspace, or sensitive facilities.
- Ensure batteries are fully charged and securely installed before each flight.
- Perform pre-flight checks, including propeller inspection and calibration.
- Maintain visual line of sight with the drone at all times.
- Avoid flying in strong winds, rain, or other adverse weather conditions.
- Follow all local regulations and laws regarding drone operation.
2. Package Contents
Verify that all items are present in your package:
- Drone
- Remote Control With Screen
- 3 Batteries
- 4 Drone Blades (Propellers)
- Charging Cable
- Screwdriver
- Storage Bag
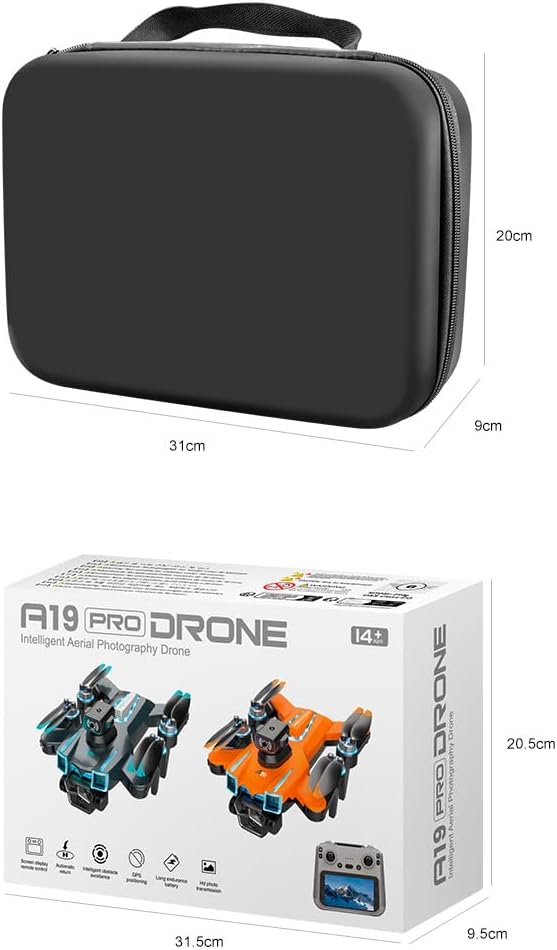
Image: All components included in the package, along with the storage bag and retail box.
3. Product Overview
3.1 Drone Components
The A15 Pro Max drone features a compact, foldable design with a robust brushless motor system for stable flight. It is equipped with an 8K ESC dual camera, GPS module, and intelligent obstacle avoidance sensors. Colorful LED marquee lights enhance visibility during operation.
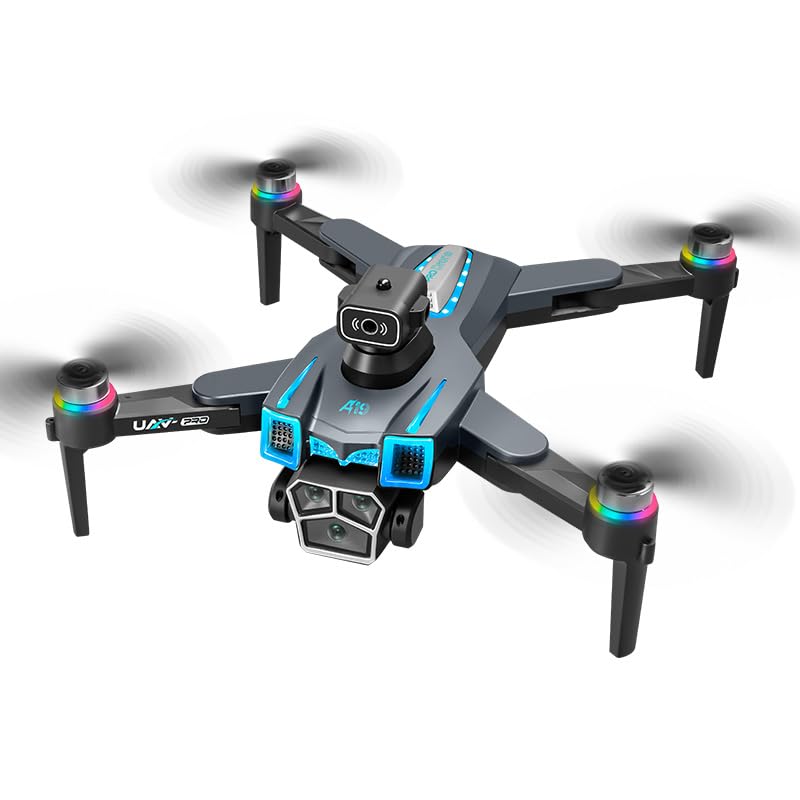
Image: Overview of the A15 Pro Max drone and its remote control, highlighting key features.
3.2 Remote Control Components
The 5G remote control features a built-in 5.9-inch HD screen, eliminating the need for a separate mobile device. It provides real-time FPV viewing and intuitive control sticks for precise maneuvering. Buttons for various functions like GPS return, photo/video capture, and speed modes are clearly labeled.

Image: User holding the remote control with integrated screen, showing the drone in flight.
4. Setup
4.1 Battery Installation and Charging
- Charge Batteries: Connect the charging cable to each drone battery and a suitable USB power adapter (not included). Charge until the indicator light turns solid green.
- Install Drone Battery: Open the battery compartment on the drone, insert a charged battery, and close the compartment securely.
- Charge Remote Control: Connect the charging cable to the remote control's charging port and a USB power adapter.
4.2 Drone Preparation
- Unfold Drone Arms: Gently unfold all four arms of the drone until they click into place.
- Check Propellers: Ensure all propellers are securely attached and free from damage. Replace any damaged propellers using the provided screwdriver.
- Power On Drone: Press and hold the power button on the drone until the indicator lights illuminate.
4.3 Remote Control Pairing
- Power On Remote: Press and hold the power button on the remote control until the screen turns on.
- Pairing Process: The drone and remote control should automatically attempt to pair. Wait for the drone's indicator lights to stop flashing rapidly and become solid, indicating a successful connection.
- Calibrate Gyroscope: Follow the on-screen instructions or refer to the quick start guide for gyroscope calibration, typically involving specific stick movements.
- GPS Signal Acquisition: Place the drone in an open outdoor area. Wait for the GPS icon on the remote control screen to indicate a sufficient number of satellites have been acquired (usually 7 or more).
5. Operating
5.1 Basic Flight Controls
Familiarize yourself with the remote control sticks:
- Left Stick (Throttle/Yaw): Up/Down controls altitude; Left/Right controls rotation (yaw).
- Right Stick (Pitch/Roll): Up/Down controls forward/backward movement (pitch); Left/Right controls left/right movement (roll).
Use the one-key takeoff/landing button for automated ascent and descent. Practice hovering and gentle movements in a safe, open environment before attempting more complex maneuvers.
5.2 Intelligent Flight Features
GPS Positioning
The integrated GPS module provides stable hovering, precise positioning, and enables advanced features like GPS Return to Home. Ensure a strong GPS signal before takeoff for optimal performance of these features.
Intelligent Obstacle Avoidance
The drone is equipped with four-way perception obstacle avoidance sensors that detect surrounding obstacles in real-time, helping to prevent collisions. This feature enhances flight safety, especially for beginners.
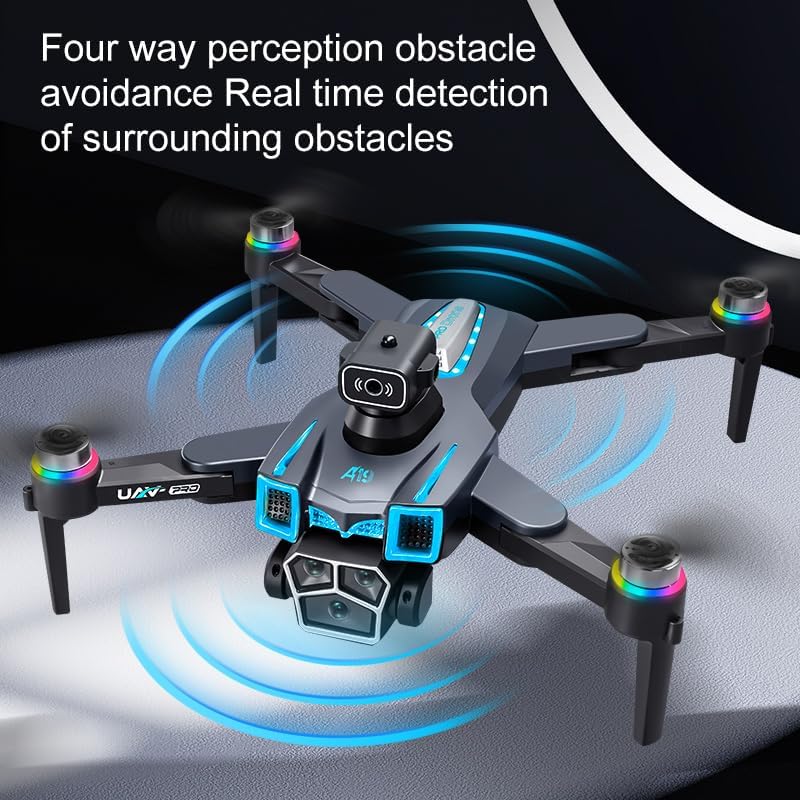
Image: Drone demonstrating its four-way obstacle avoidance capability.
Optical Flow Positioning
For indoor flights or when GPS signal is weak, optical flow positioning assists in maintaining stable hovering by analyzing ground patterns. This provides additional stability and control.
One-Key Roll Function
Execute aerial stunts with the one-key roll function. Refer to the remote control diagram for the specific button to activate this feature.
5.3 Camera Operation
The drone features an 8K ESC dual camera setup with electronic adjustment. Use the dedicated buttons on the remote control to:
- Capture Photos: Press the photo button to take still images.
- Record Videos: Press the video button to start/stop recording.
- Adjust Camera Angle: Use the gimbal control wheel/button to electronically adjust the camera's vertical angle during flight.

Image: Detail of the drone's electric dual cameras and their adjustable features.
6. Maintenance
6.1 Cleaning
Regularly clean your drone and remote control. Use a soft, dry cloth to wipe down surfaces. Avoid using harsh chemicals or solvents. Ensure no dust or debris accumulates in the motor areas or camera lens.
6.2 Storage
When not in use, store the drone and its accessories in the provided storage bag in a cool, dry place, away from direct sunlight. Remove batteries from the drone and remote control if storing for extended periods.
6.3 Propeller Replacement
If a propeller is damaged, replace it immediately. Use the provided screwdriver to carefully remove the damaged propeller and install a new one, ensuring it is securely fastened. Match the propeller type (A or B) to the corresponding motor arm.
7. Troubleshooting
| Problem | Solution |
|---|---|
| Drone does not power on. | Ensure the battery is fully charged and correctly installed. Press and hold the power button for a few seconds. |
| Remote control does not connect to drone. | Ensure both drone and remote are powered on. Restart both devices. Ensure they are within range and there is no strong interference. |
| Drone drifts during flight. | Perform gyroscope calibration. Ensure flight is in an area with minimal wind. Check for damaged propellers. |
| Poor image/video quality or no signal. | Ensure drone and remote are within 5G transmission range. Check for obstructions. Ensure camera lens is clean. |
| GPS features not working. | Ensure drone is in an open outdoor area with a clear view of the sky. Wait for the GPS icon on the remote to show sufficient satellite acquisition. |
8. Specifications
| Feature | Detail |
|---|---|
| Brand | Generic |
| Model Name | A15 Pro Max |
| Special Features | 8K ESC Dual Camera, Brushless Motor, GPS Positioning, Intelligent Obstacle Avoidance, Optical Flow Hovering |
| Video Capture Resolution | 1080p, 4K, 8K |
| Effective Still Resolution | 10 MP |
| Connectivity Technology | 5G, Wi-Fi |
| Skill Level | Beginner |
| Item Weight | 1.5 Pounds |
| Battery Capacity | 3000 mAh (per battery) |
| Remote Control Technology | 5G Wireless Transmission with Integrated HD Screen Display |
| Material | Electronic Components, Metal Alloy, Plastic |
| Item Dimensions (L x W x H) | 7.87"L x 7.87"W x 2.5"H (folded dimensions may vary) |
9. Warranty and Support
This product comes with a standard manufacturer's warranty. For specific warranty details, please refer to the documentation included with your purchase or contact the retailer. For technical support, troubleshooting assistance, or spare parts, please reach out to the customer service provided by your point of purchase.


