Introduction
This manual provides detailed instructions for the assembly, operation, and maintenance of your Outsunny 6' x 4' x 6' Crop Cage. Designed to protect your plants from pests and harsh weather, this crop cage offers a secure environment for vegetables, fruits, and flowers. Please read this manual thoroughly before assembly and use to ensure proper setup and safe operation.
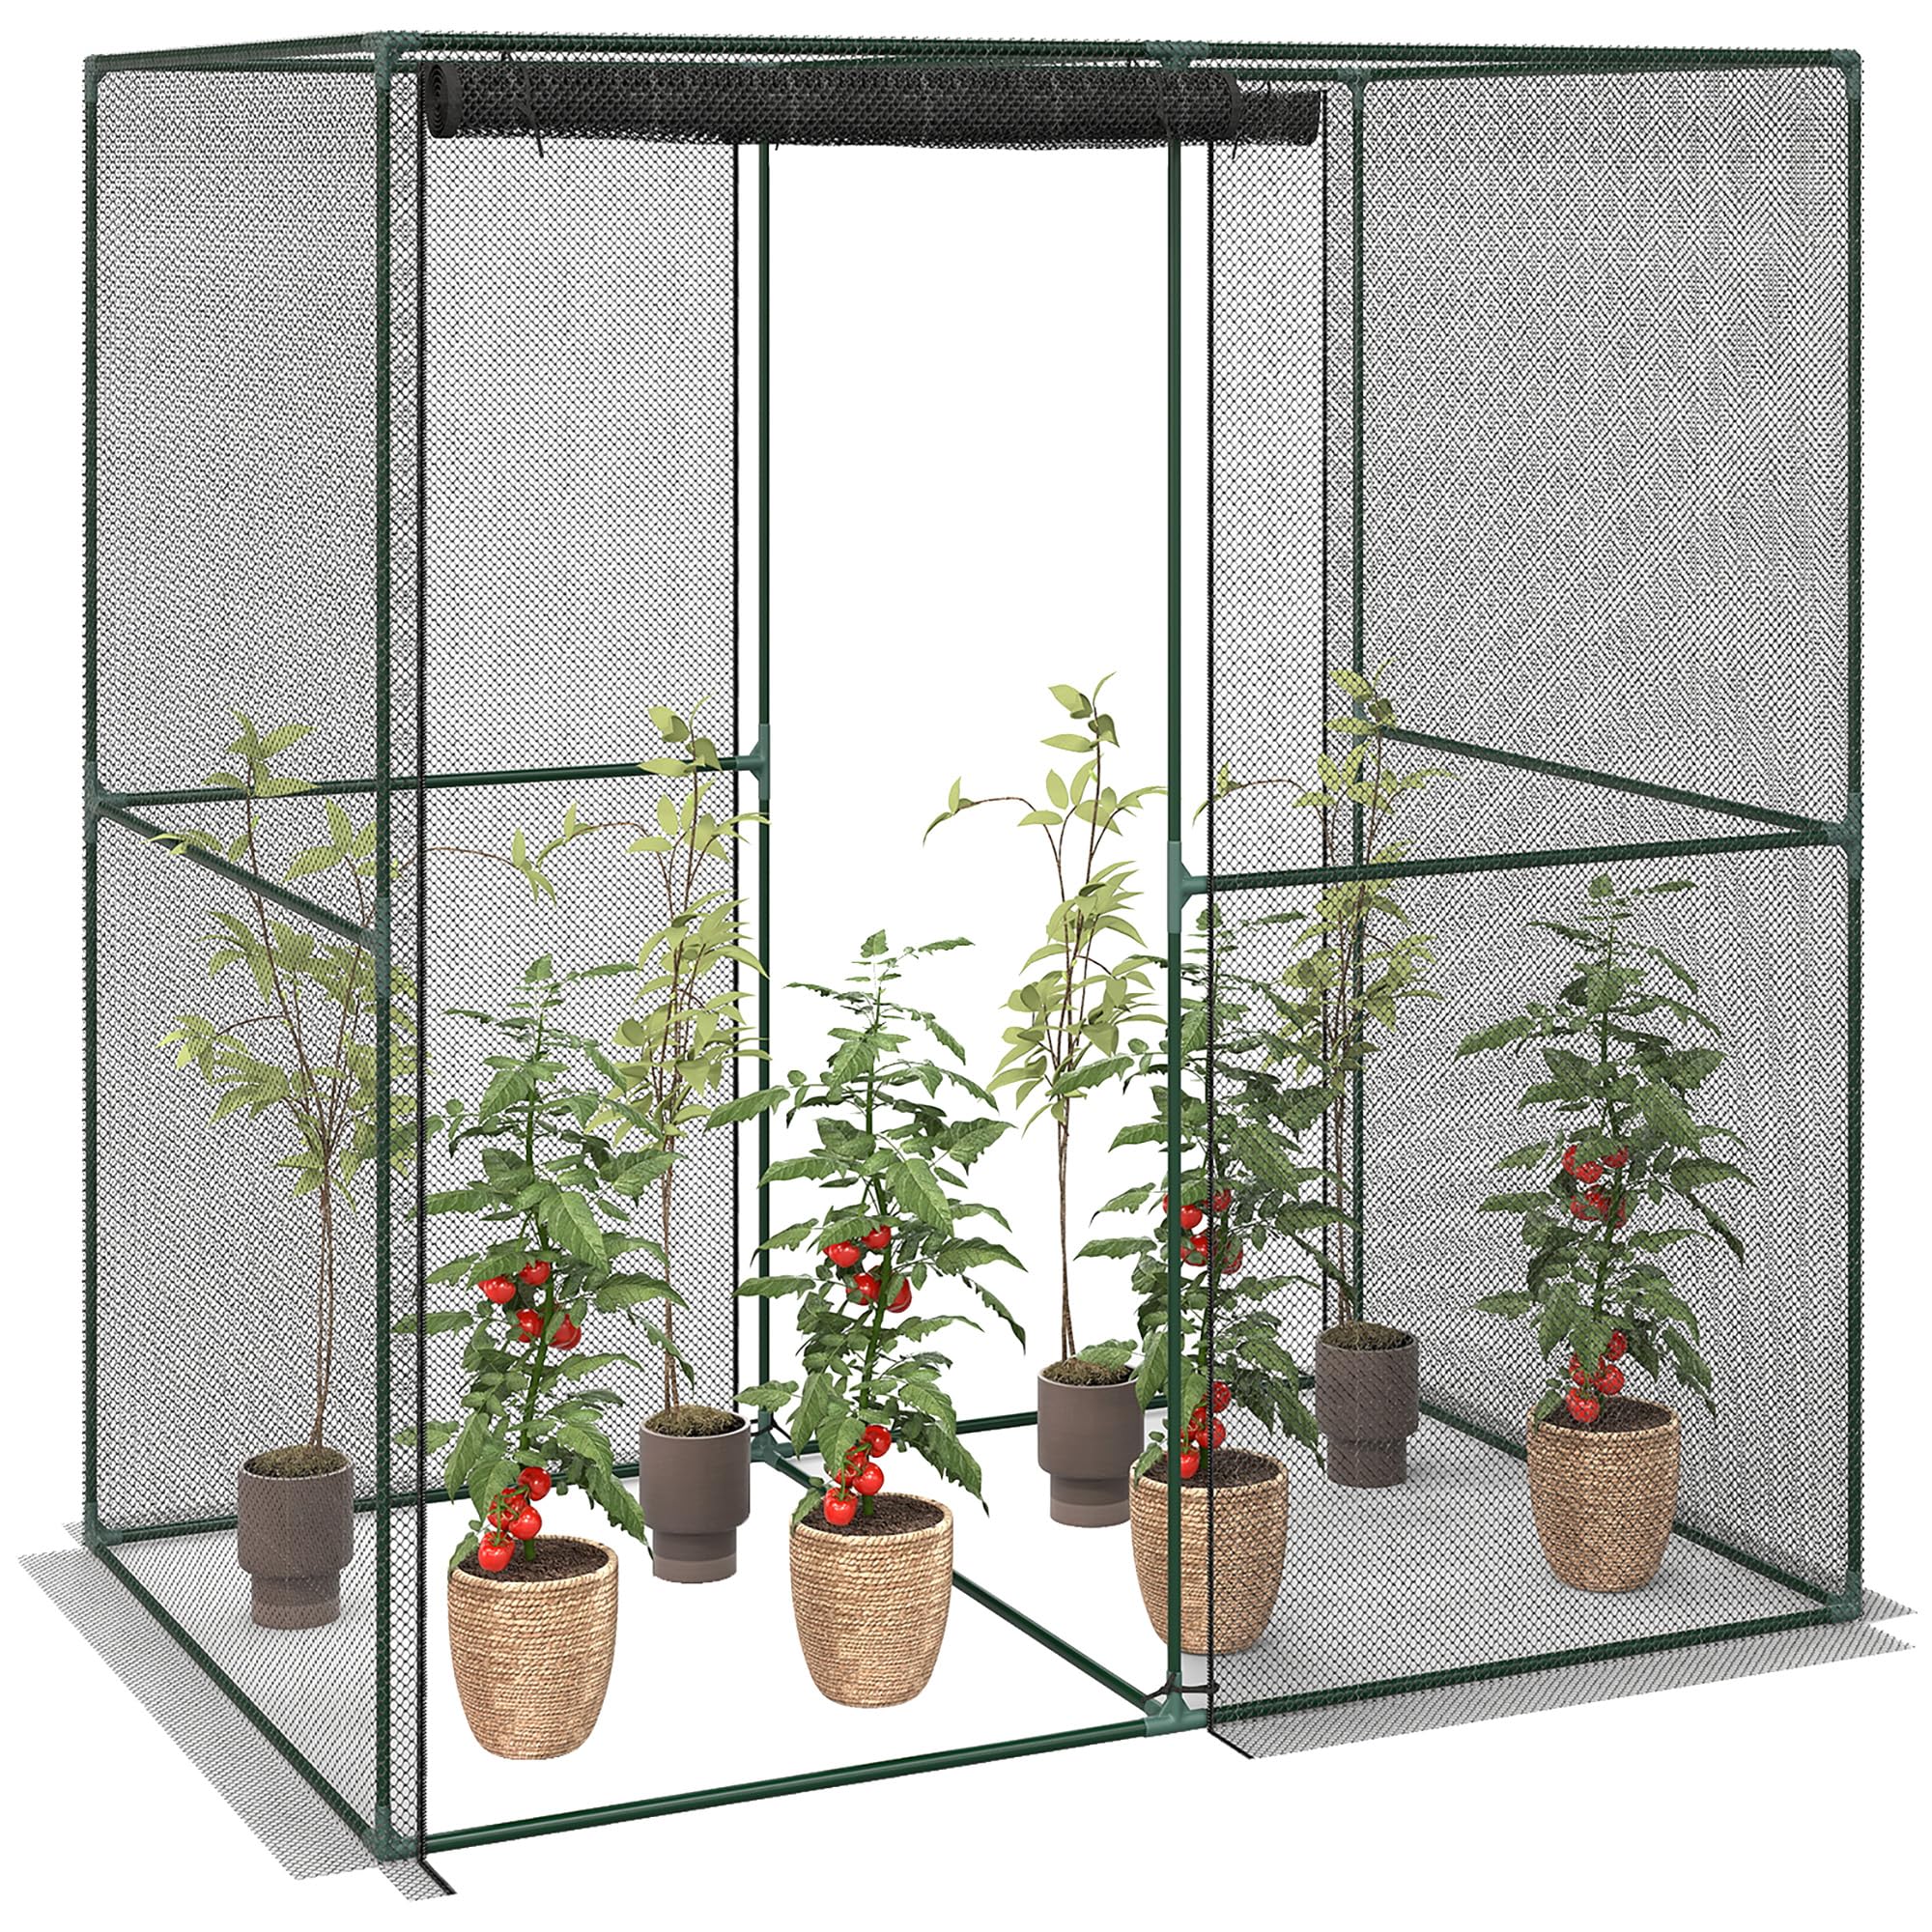
Image: The Outsunny 6' x 4' x 6' Crop Cage, fully assembled and protecting plants in a garden setting.
Safety Information
- Always assemble the crop cage on a flat, stable surface.
- Ensure all connections are secure before use.
- Bury the frame deep into the soil or use additional anchoring methods (not included) to secure the cage, especially in windy conditions.
- Keep children and pets away during assembly.
- Do not hang heavy objects from the frame.
- Regularly inspect the frame and netting for damage. Replace damaged parts immediately.
Package Contents
Verify that all components are present before beginning assembly.
- Steel Frame Tubes (various lengths)
- Plastic Connectors
- Tear-resistant Mesh Netting with Zippered Doors
- Ground Stakes (if included, check packaging)

Image: An illustration showing the typical components included in the package, such as frame tubes and connectors.
Setup and Assembly
Assembly is recommended for two people. Follow these steps carefully:
- Prepare the Base: Lay out the bottom frame tubes and connect them using the plastic connectors to form the base rectangle (approximately 70.9" L x 47.2" W). Ensure all poles are firmly seated into the connectors.
- Install Vertical Poles: Insert the vertical poles into the connectors at each corner and along the sides of the base frame.
- Add Mid-Level Cross Members: Connect the mid-level horizontal cross members between the vertical poles.
- Assemble Top Frame: On the ground, assemble the top frame section (70.9" L x 47.2" W) using the remaining tubes and connectors.
- Attach Top Frame: Carefully lift the assembled top frame and connect it to the top of the vertical poles. Ensure all connections are secure.
- Drape Netting: Drape the mesh netting over the assembled frame. Align the zippered doors with the desired access points.
- Secure Netting: Secure the netting to the frame using any integrated ties or clips. Ensure the netting is taut and fully covers the frame.
- Anchor the Cage: For stability, bury the bottom frame deep into the soil. If ground stakes are provided, use them to further secure the base. Additional anchoring (e.g., weights, ropes) may be necessary in high-wind areas.

Image: A close-up view illustrating the strong push-fit power-coated steel pipe frame and tear-resistant mesh construction.
Operating Instructions
The Outsunny Crop Cage is designed for ease of use and effective plant protection.
- Accessing Plants: Use the zippered doors to enter and exit the crop cage. The zippers are heavy-duty for durability.
- Securing Doors: The doors can be rolled up and fixed at the top to keep them open for extended access or ventilation.
- Plant Protection: The fine mesh prevents birds, small animals, and many insects from reaching your plants while allowing sunlight and rain to pass through.
- Ventilation: The mesh design ensures adequate airflow, reducing the risk of overheating or fungal issues.
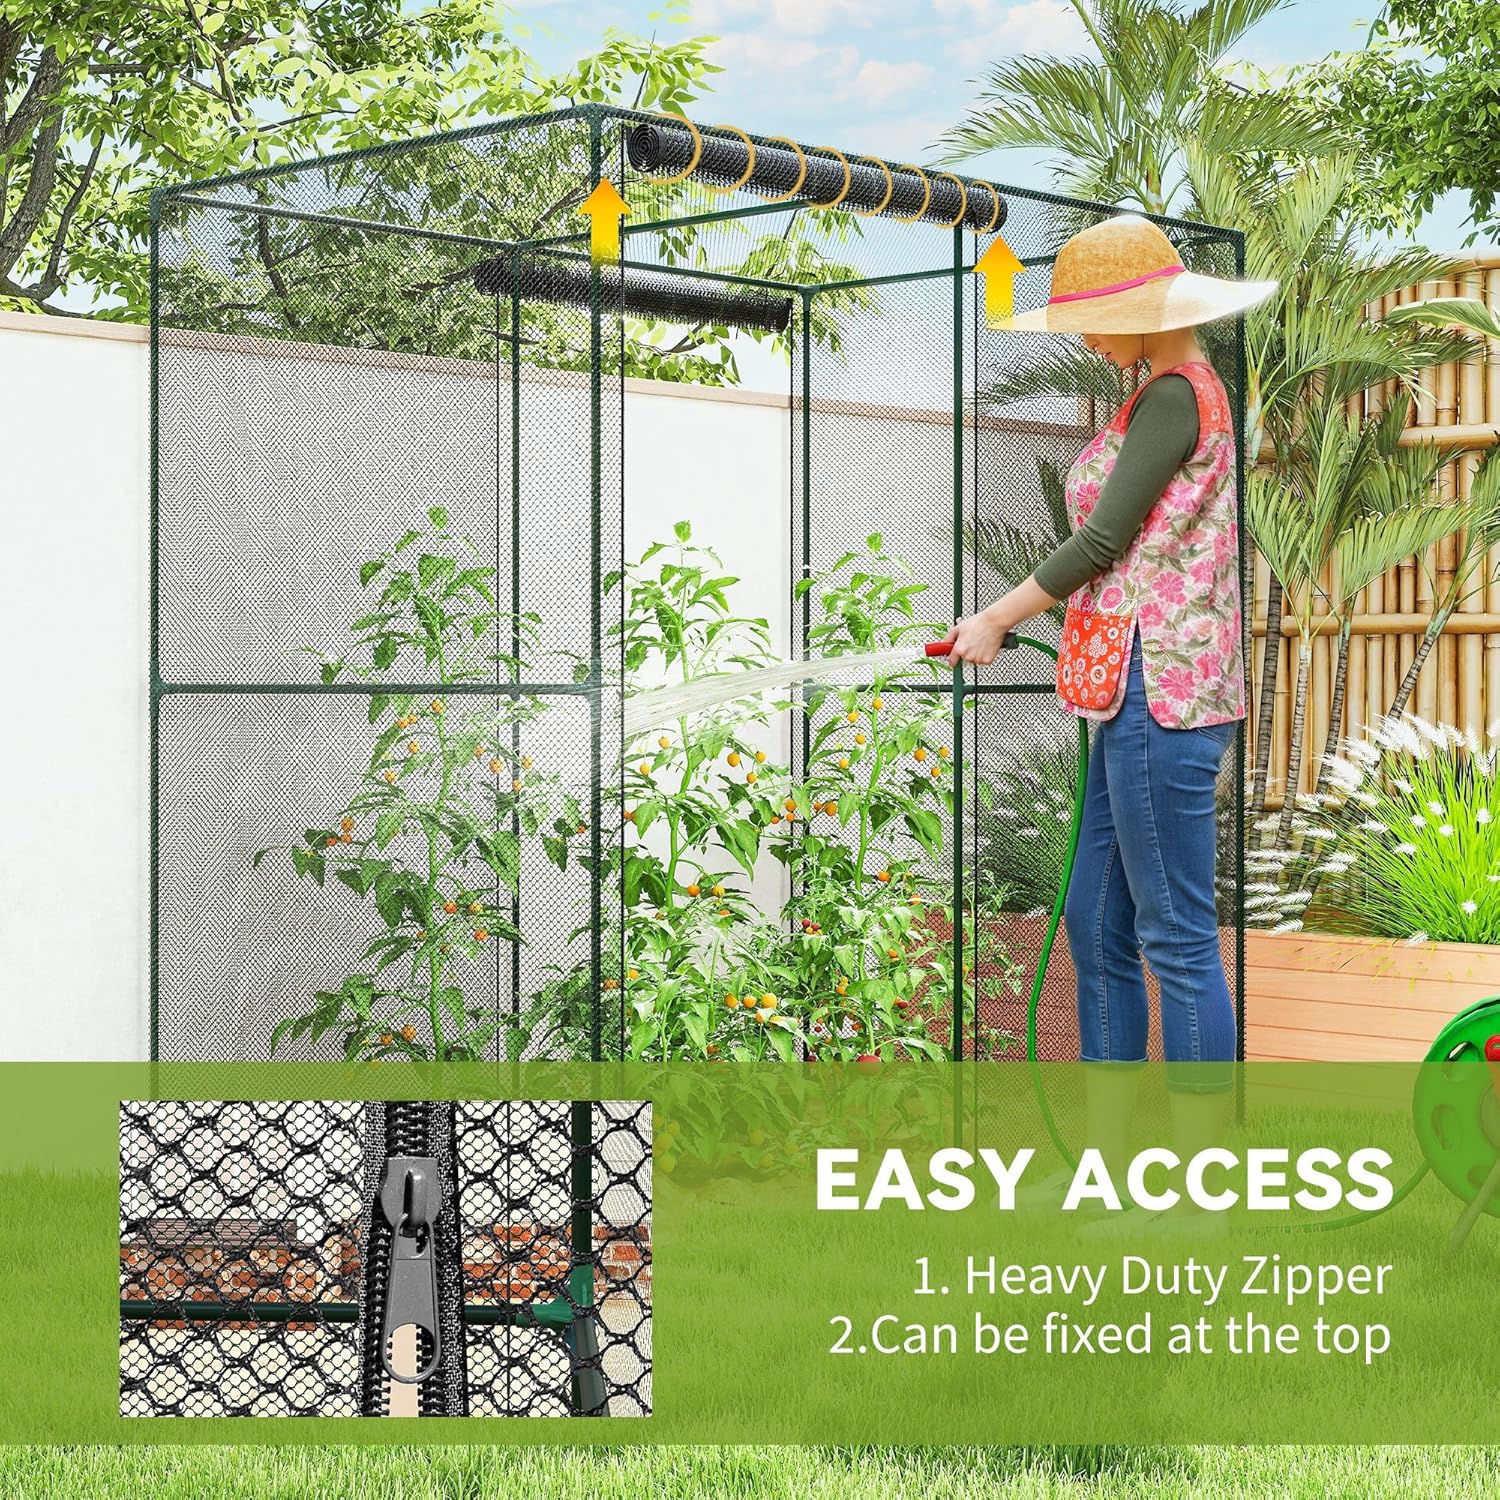
Image: A user watering plants inside the crop cage, demonstrating the easy access provided by the heavy-duty zippered door, which can be fixed open at the top.

Image: A visual comparison illustrating how the crop cage effectively protects plants from birds and insects, showing healthy plants inside the cage versus damaged plants outside.
Maintenance
- Cleaning: Periodically clean the mesh netting with a soft brush and mild soap solution. Rinse thoroughly with water.
- Inspection: Regularly check the steel frame for any signs of rust or damage. Inspect the netting for tears or holes.
- Repair: Small tears in the netting can be repaired with mesh repair tape. Damaged frame components should be replaced to maintain structural integrity.
- Winter Storage: In areas with heavy snow or extreme cold, it is recommended to disassemble and store the crop cage indoors to prolong its lifespan.
Troubleshooting
| Problem | Possible Cause | Solution |
|---|---|---|
| Cage is unstable or sways in wind. | Insufficient anchoring. | Ensure the bottom frame is buried deep into the soil. Use additional ground stakes or weights (e.g., bricks) on the base poles. |
| Zipper is stuck or difficult to operate. | Dirt or debris in zipper teeth; zipper misalignment. | Clean zipper teeth with a small brush. Apply a silicone-based lubricant. Ensure the netting is not pulling too tightly on the zipper. |
| Netting has small holes or tears. | Wear and tear; animal damage. | Patch small holes with mesh repair tape. For larger damage, consider replacing the netting if available. |
| Plants inside are not pollinated. | Mesh is too fine for pollinators. | The mesh is designed to keep out small insects. For plants requiring pollination, manual pollination may be necessary, or consider temporarily opening the doors during peak pollination times. |
Specifications
- Model: 845-402V01BK
- Overall Dimensions: 70.9" L x 47.2" W x 70.9" H (6' L x 4' W x 6' H)
- Door Size: 35.4" W x 68.5" H
- Frame Material: 16mm Alloy Steel (Powder-coated)
- Netting Material: Tear-resistant Mesh
- Color: Black
- Item Weight: 8 Pounds
- Brand: Outsunny
- Manufacturer: Aosom LLC

Image: A diagram illustrating the key dimensions of the crop cage, including length, width, height, and door size.
Warranty and Support
For warranty information or technical support, please refer to the contact details provided with your purchase documentation or visit the official Outsunny website. Keep your purchase receipt for warranty claims.