
1. Introduction
The Gustard Audalytic DR70N is a high-performance R2R Digital-to-Analog Converter (DAC) designed for audiophiles. It features a proprietary discrete R-2R module, native 1-bit DSD conversion, and advanced FPGA technology to deliver a natural and pure sound experience. This manual provides detailed instructions for setting up, operating, and maintaining your DR70N DAC.
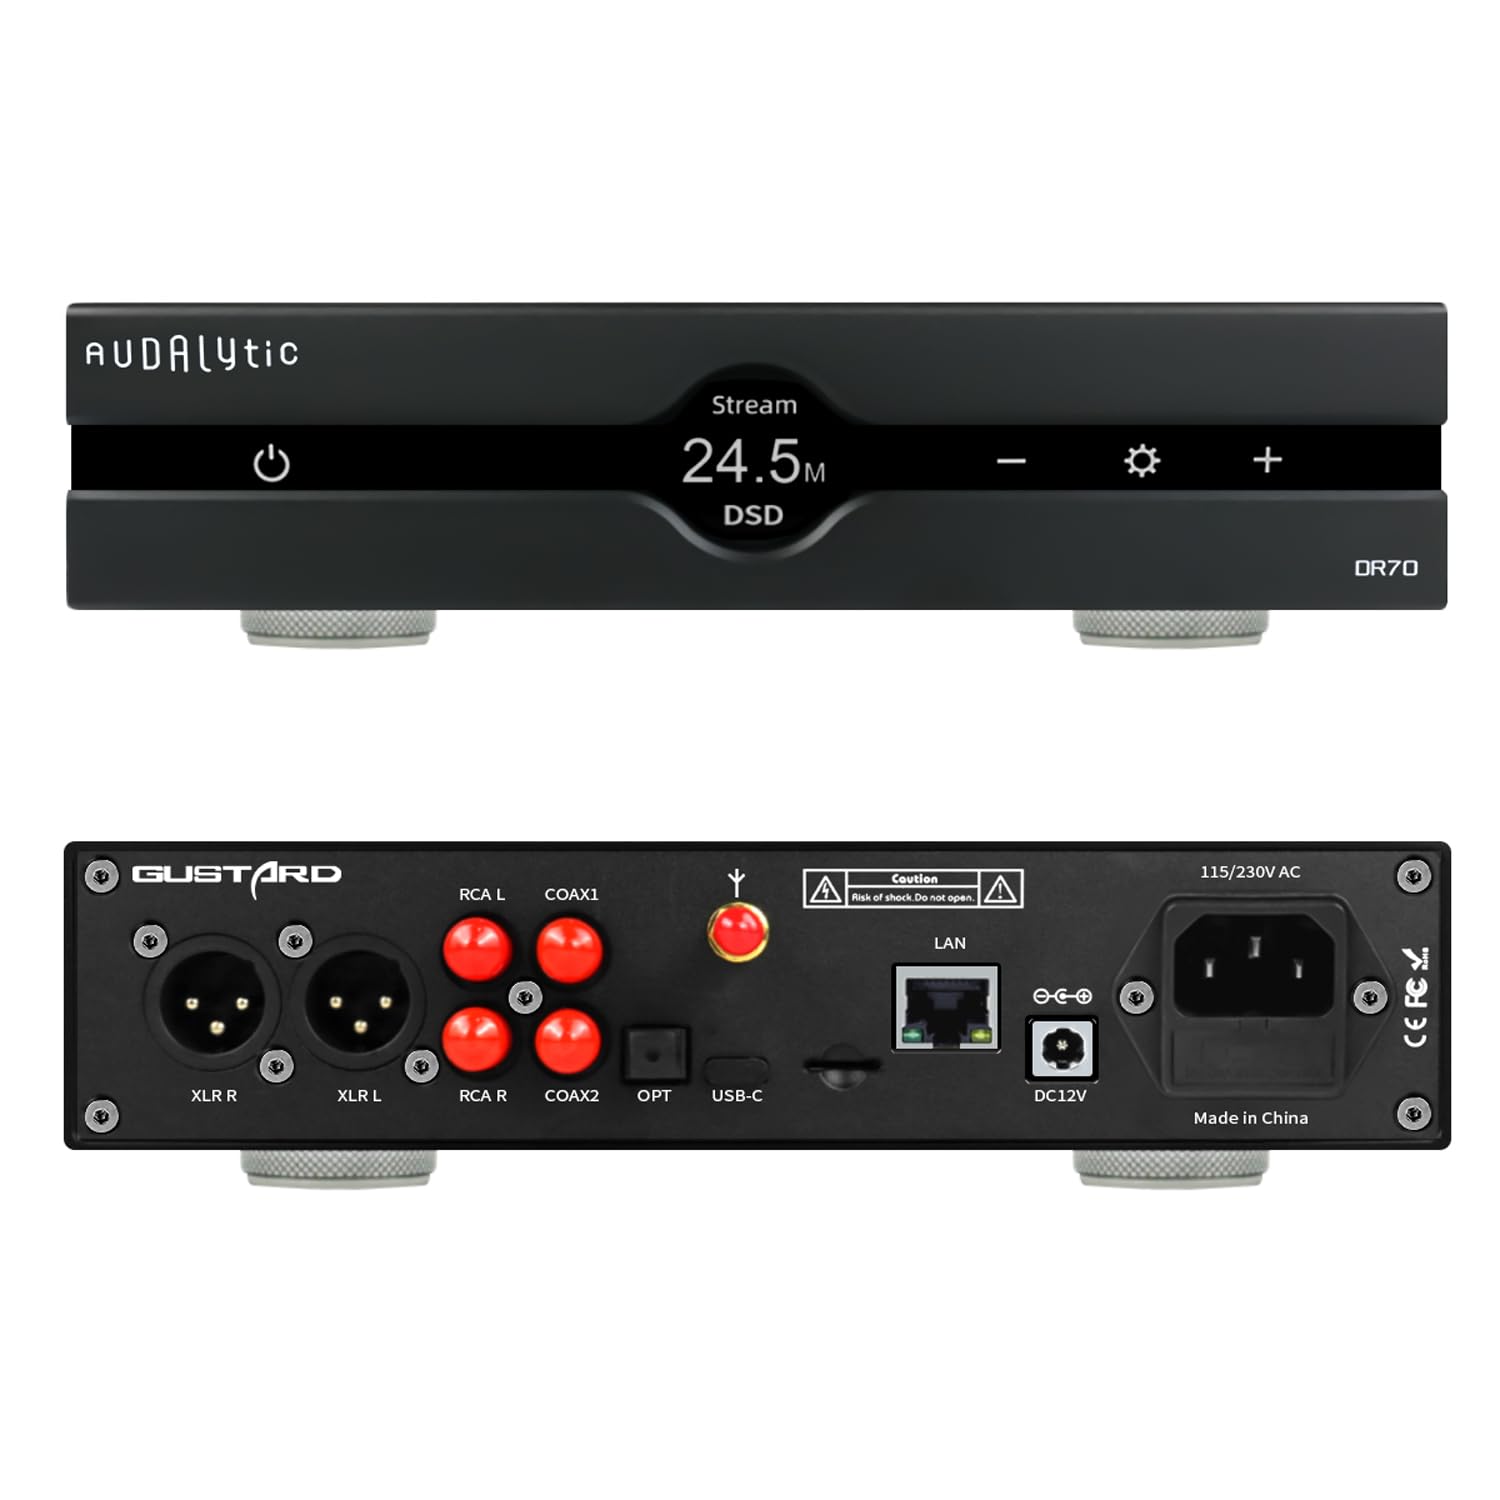
Image 1.1: The Gustard Audalytic DR70N R2R DAC unit.
2. Package Contents
Please verify that all items listed below are included in your package. If any items are missing or damaged, please contact your retailer.
- Gustard Audalytic DR70N Main Unit
- USB Cable
- Power Cord
- Remote Control
- Bluetooth Antenna
- Warranty Card

Image 2.1: Contents of the DR70N package.
Video 2.1: An unboxing video demonstrating the contents of the Audalytic DR70 R2R DAC package, including the main unit, cables, remote, and antenna.
3. Product Overview
3.1 Front Panel
The front panel features the power button, display screen, and control buttons for navigation and volume adjustment.

Image 3.1: Front panel layout of the DR70N.
3.2 Rear Panel
The rear panel provides all input and output connections, including balanced XLR, single-ended RCA, coaxial, optical, USB, and LAN ports.

Image 3.2: Rear panel connections of the DR70N.
3.3 Internal Components
The DR70N's internal design incorporates advanced components for optimal audio performance.

Image 3.3: Internal view of the DR70N.
4. Setup
4.1 Power Connection
- Ensure the DR70N is placed on a stable, well-ventilated surface.
- Connect the provided power cord to the AC input on the rear panel of the DR70N.
- Plug the other end of the power cord into a suitable AC power outlet (110V/220V, 50/60Hz). The unit automatically detects voltage.
4.2 Audio Connections
Connect your audio source devices and amplifier/speakers to the DR70N using appropriate cables.
- USB Input: Connect a computer or smartphone via the USB-C port.
- Optical/Coaxial Inputs: Connect CD players, TVs, or other digital audio sources using optical or coaxial cables.
- LAN Input: Connect to your network for streaming capabilities.
- Analog Outputs: Connect to your amplifier or active speakers using XLR (balanced) or RCA (single-ended) cables.
4.3 Bluetooth Antenna Installation
Screw the provided Bluetooth antenna into the designated port on the rear panel for optimal wireless performance.
5. Operation
5.1 Power On/Off and Mute
- Power On: Press the power button on the front panel or remote control.
- Power Off: Press and hold the power button on the front panel or remote control.
- Mute/Unmute: Short press the power button on the front panel or the mute button on the remote control.
5.2 Display Screen
The display screen shows the current input source, audio format, sampling rate, and volume level in real-time.
5.3 Input Selection
To change the input source:
- From the home screen, briefly press the Settings button (gear icon) on the front panel or remote control to enter input source selection.
- Use the Volume +/- buttons to navigate through the available inputs (USB Audio, Network Stream, Coaxial 1, Coaxial 2, Optical, BT Bluetooth).
- Press the Settings button again to confirm your selection.
5.4 Volume Control
Adjust the output volume using the Volume +/- buttons on the front panel or remote control. The volume level is adjustable from 0 to 100 steps.
5.5 Settings Menu
To access the main settings menu:
- From the home screen, press and hold the Settings button.
- Use the Volume +/- buttons to navigate through menu items.
- Short press the Settings button to cycle through and select different menu items.
- Press the Volume + button to enter a submenu.
- Press and hold the Settings button to return to the home screen.
Menu items include:
- Digital Filter: Select from four digital filter modes (Fast, Medium, Slow, NOS).
- DSD Direct: Enable or disable DSD signal passthrough. Note: When enabled, switching between DSD formats may cause clicking sounds.
- Display Brightness: Adjust display brightness (three levels).
- Screensaver: Configure screensaver settings.
- Auto Standby: Set automatic standby timer.
- Language: Select display language (Chinese, English, Japanese).
- Firmware Update: Update the control program.
- Factory Reset: Restore factory settings.

Image 5.1: Web interface for controlling bridge protocols. Access via '//dr70.local' in a browser.
Video 5.1: An overview of the Gustard Audalytic DR70 Discrete R-2R DAC, highlighting its features and design.
6. Key Features
6.1 Proprietary Discrete R-2R Module
The DR70N utilizes a proprietary discrete R-2R module for digital-to-analog conversion. This resistor-switching technology offers a direct conversion process, resulting in a more natural and pure sound quality compared to traditional Delta-Sigma DACs.

Image 6.1: The proprietary discrete R-2R module.
6.2 Native 1-Bit DSD Conversion
The DR70N supports true 1-bit DSD DAC conversion, natively handling up to DSD512. In DIRECT DSD mode, the signal bypasses PCM conversion, preserving the full dynamic range and detail of the original audio.

Image 6.2: Representation of 1-Bit DSD conversion.
6.3 Customized FPGA Technology
Equipped with customized FPGA (Field-Programmable Gate Array) technology, the DR70N manages clock functions and shapes digital signals. It integrates digital native demodulation (DoP) and PCM/DSD decoding switching, providing robust support for the R2R architecture and high-spec decoding.

Image 6.3: The FPGA chip.
6.4 CK01 Clock Module
The DR70N incorporates the CK01 clock, providing femtosecond-level timing accuracy for precise audio reproduction.

Image 6.4: The CK01 Clock Module.
6.5 Independent Voltage Regulation
Independent voltage regulation for each circuit group minimizes interference and ensures optimal performance and signal integrity.

Image 6.5: Independent voltage regulation circuitry.
6.6 Analog Output Driver Circuit
The analog output driver circuit features a low-impedance design, allowing it to seamlessly drive various audio devices while maintaining signal integrity.

Image 6.6: Analog Output Driver Circuit.
6.7 Bridge System for Network Streaming
The DR70N includes a dedicated hardware and software bridge system for music playback. Running on the CelWare 3.x music playback system, it optimizes audio I/O and scheduling to minimize latency and jitter. It supports software-controlled playback applications and allows deactivation of non-essential bridge processes for maximum playback efficiency. Supported streaming protocols include Roon Bridge, AirPlay, UPnP/DLNA, and HQPlayer NAA.

Image 6.7: The Bridge System for network streaming.
6.8 XMOS XU316 USB Interface
The DR70N utilizes the XMOS XU316 USB interface, providing robust and high-fidelity USB audio connectivity.

Image 6.8: The XMOS XU316 USB interface chip.
7. Specifications
7.1 D/A Converter Specifications

Image 7.1: D/A Converter Specification table.
7.2 General Specifications
| Category | Specification |
|---|---|
| Brand | AOSHIDA (Audalytic) |
| Model | DR70N |
| Digital Inputs | USB-C, Coaxial (x2), Optical, LAN |
| Wireless Input | Bluetooth 5.0 (LDAC, AAC, SBC, aptX, aptX LL, aptX HD) |
| USB/Streamer Input Support | PCM 16-32bit/44.1-768kHz, DSD DoP64-DoP256, Native DSD64-DSD512 |
| Coax/Opt Input Support | PCM 16-24bit/44.1-192kHz, DSD DoP64 |
| Audio Output Mode | Stereo |
| Analog Outputs | XLR (Balanced), RCA (Single-Ended) |
| Frequency Response | 20-20kHz (±0.2dB, OS Mode) |
| Dynamic Range | > 111dB |
| Signal-to-Noise Ratio (SNR) | > 113dB |
| Channel Crosstalk | -125dB @ 1kHz |
| THD+N | ≤ 0.0004% @ 1kHz |
| IMD | 0.0009% @ -2dBFS |
| RCA Output Level | 2Vrms (Volume Fixed) |
| RCA Output Impedance | 100Ω |
| XLR Output Level | 4Vrms (Volume Fixed) |
| XLR Output Impedance | 100Ω |
| Power Supply | AC 115V/230V, 50/60Hz; DC 12V-18V, > 2A |
| Power Consumption | <10W |
| Dimensions (W x H x D) | 220mm x 50mm x 170mm (Excluding protruding parts) |
| Item Weight | 1.5 kg |
| Compatible Devices | Computers, Smartphones, TVs, CD Players |
| OS Support (USB) | WIN7/WIN8/WIN10/WIN11 (32 & 64-bit), Mac OS X, Linux |

Image 7.2: Detailed specifications of the DR70N.
8. Troubleshooting
This section addresses common issues you might encounter with your DR70N DAC.
8.1 No Sound Output
- Ensure the DR70N is powered on and the correct input source is selected.
- Check all audio cable connections (USB, Coaxial, Optical, LAN, XLR, RCA) to ensure they are secure.
- Verify that your amplifier or active speakers are powered on and set to the correct input.
- Check the volume level on the DR70N and your amplifier; ensure neither is muted or set too low.
- If using a computer, ensure the DR70N is selected as the default audio output device in your operating system settings.
8.2 Intermittent Audio or Dropouts
- Check for loose cable connections.
- If using USB, try a different USB port or cable.
- If streaming over LAN, ensure your network connection is stable.
- If using Bluetooth, ensure the device is within range and there is no interference.
- Try restarting the DR70N and the audio source device.
8.3 Clicking Sounds During DSD Playback
- If you experience clicking sounds when switching between different DSD formats, this may occur when the 'DSD Direct' setting is enabled. This is normal behavior for direct DSD passthrough. If preferred, you can disable 'DSD Direct' in the settings menu.
8.4 Unit Runs Warm
- It is normal for the unit to generate some heat during operation. Ensure adequate ventilation around the DR70N to prevent overheating. Do not place it in an enclosed space without airflow.
9. Maintenance
To ensure the longevity and optimal performance of your DR70N DAC, follow these maintenance guidelines:
- Cleaning: Use a soft, dry cloth to clean the exterior of the unit. Avoid using abrasive cleaners, solvents, or chemical sprays, as they may damage the finish.
- Ventilation: Ensure the ventilation openings are not blocked. Proper airflow is crucial for dissipating heat and maintaining stable operation.
- Environment: Operate the unit in a clean, dry environment, away from direct sunlight, excessive heat, humidity, and dust.
- Power Off: Always power off the unit before disconnecting any cables or performing maintenance.
10. Warranty and Support
10.1 Warranty Information
The Gustard Audalytic DR70N R2R DAC comes with a 3-year warranty from the date of purchase. This warranty covers manufacturing defects and malfunctions under normal use. Please retain your proof of purchase for warranty claims. The warranty does not cover damage caused by misuse, accidents, unauthorized modifications, or improper installation.
10.2 Customer Support
For technical assistance, troubleshooting, or warranty inquiries, please contact your retailer or the manufacturer's customer support. Refer to the warranty card included in your package for specific contact details.


