1. Introduction
This manual provides comprehensive instructions for the installation, operation, and maintenance of the Baomain Nonprogrammable Thermostat, Model BM-J01-F. This device is specifically designed for controlling radiant floor heating systems in various settings, including commercial, residential, and light industrial buildings. Its nonprogrammable nature makes it ideal for applications requiring straightforward temperature control and intermittent use.
2. Safety Information
WARNING: Installation and wiring must be performed by a qualified electrician in accordance with all local electrical codes and regulations. Failure to follow these instructions may result in electric shock, fire, or damage to the product.
- Always disconnect power at the circuit breaker before installing or servicing the thermostat.
- Ensure the power supply voltage matches the thermostat's specifications (110-120V AC).
- Do not install in locations exposed to direct sunlight, drafts, or extreme temperatures.
- Keep the thermostat away from water and moisture.
- This thermostat is designed for indoor use only.
3. Product Overview
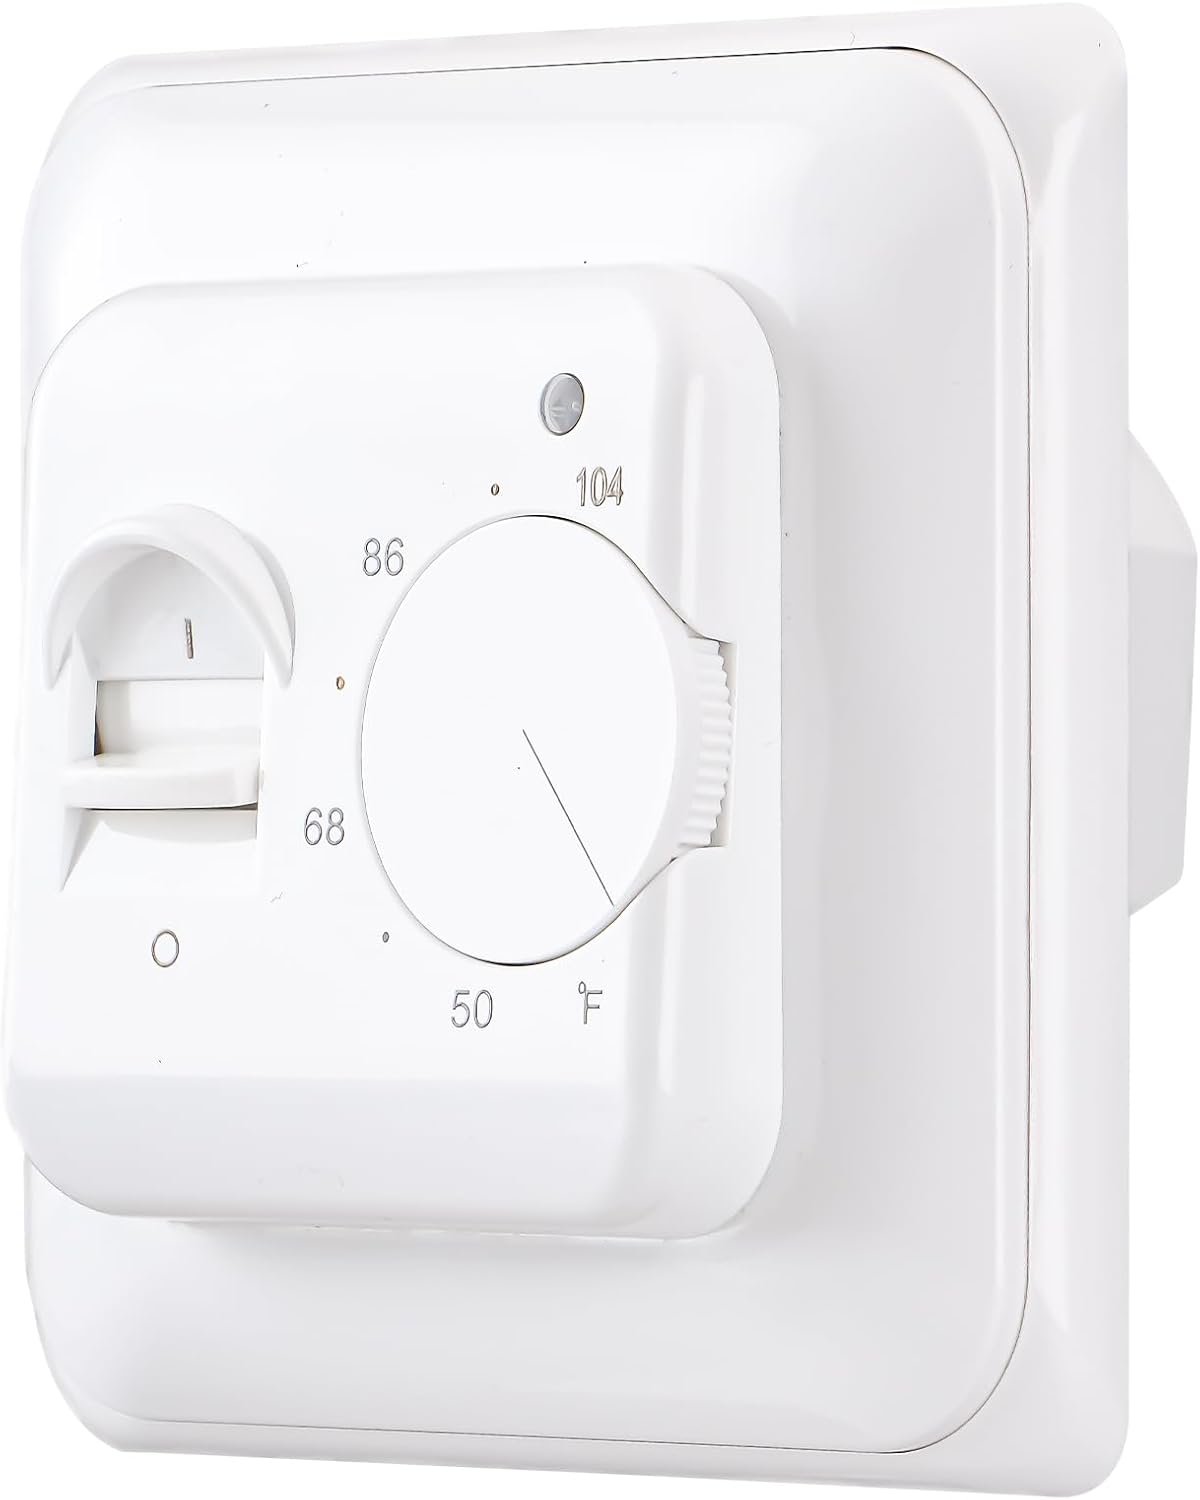
The Baomain BM-J01-F is a simple, reliable thermostat for managing your radiant floor heating. It features a rotary dial for temperature adjustment and an LED indicator for heating status.

Key Features:
- Temperature control range: 40°F-104°F (adjustable upper limit 95°F-140°F).
- Maximum switch rating of 16 Amps.
- LED indicator to show when heating is active.
- Includes a 3-meter floor temperature sensor cable.
- Anti-flammable PC housing material.
4. Setup and Installation
The thermostat is designed for concealed installation. Please ensure you have the necessary tools and expertise before proceeding.
Installation Steps:
- Disconnect Power: Turn off power to the heating system at the main circuit breaker. Verify power is off using a voltage tester.
- Mounting: The thermostat requires a mounting hole distance of 60mm. Note that this thermostat may not fit standard American electrical boxes without modification or an adapter plate.
- Wiring: Refer to the wiring diagram below. Connect the power supply and heating load wires to the appropriate terminals. The thermostat is a 4-wire device (Line, Neutral, Load 1, Load 2).
- Sensor Connection: Connect the floor temperature sensor cable to terminals 6 and 7. Ensure the sensor is properly placed in the floor according to your heating system's instructions.
- Secure Thermostat: Carefully push the thermostat into the wall box and secure it with screws.
- Attach Faceplate: Install the decorative faceplate.
- Restore Power: Turn on power at the circuit breaker.

Wiring Terminal Legend:
- 1 & 2: AC110V 50/60Hz Power Input (L & N)
- 3 & 4: N1 & L1 (Heating Load Output, Maxload 16A / 3600W)
- 6 & 7: Sensor Input (R25°C=10KΩ)

5. Operating Instructions
The Baomain BM-J01-F thermostat is designed for simple operation.
Setting the Temperature:
- Locate the rotary dial on the front of the thermostat.
- Rotate the dial clockwise to increase the desired floor temperature or counter-clockwise to decrease it. The temperature scale is marked in Degrees Fahrenheit (°F).
- The thermostat will automatically maintain the set temperature by turning the heating system on and off as needed.
LED Indicator:
A small LED light on the thermostat indicates the heating status:
- LED On: The heating system is currently active and providing heat to the floor.
- LED Off: The heating system is not active, either because the set temperature has been reached or the thermostat is not calling for heat.
6. Maintenance
The Baomain BM-J01-F thermostat requires minimal maintenance to ensure optimal performance.
- Cleaning: Periodically wipe the thermostat's surface with a soft, dry cloth to remove dust and dirt. Do not use abrasive cleaners or solvents.
- Inspection: Annually inspect the wiring connections for any signs of loosening or corrosion. Ensure the floor sensor is securely in place.
- Avoid Obstructions: Ensure that no objects are blocking the thermostat's vents (if present) or the area around the floor sensor, as this can affect temperature readings.
7. Troubleshooting
If you encounter issues with your thermostat, refer to the following common problems and solutions:
| Problem | Possible Cause | Solution |
|---|---|---|
| Heating system not turning on. | No power to thermostat. Incorrect wiring. Floor sensor faulty or disconnected. | Check circuit breaker. Verify wiring connections (refer to Section 4). Check sensor connection and resistance. |
| Temperature seems inaccurate. | Floor sensor improperly placed. Thermostat exposed to drafts or direct heat. | Ensure sensor is correctly embedded in the floor and not affected by external factors. Relocate thermostat if possible, or shield it from drafts/heat sources. |
| Thermostat does not fit standard electrical box. | Product designed for international standards. | Custom fabrication or adapter plate may be required. Consult a professional electrician. |
| LED indicator not working. | No power. Internal fault. | Check power supply. If power is present and heating is active but LED is off, contact support. |
If the problem persists after attempting these solutions, please contact Baomain customer support.
8. Specifications
| Parameter | Value |
|---|---|
| Model Number | BM-J01-F |
| Power Supply Voltage | 115 VAC ±10% 50/60Hz |
| Load Current | 16 Amp |
| Maximum Power Load | 3600W |
| Power Consumption | <2W |
| Temperature Unit | Degrees Fahrenheit (°F) |
| Temperature Control Range | 40°F-104°F (Adjustable upper limit 95°F-140°F) |
| Ambient Temperature Display Accuracy | ±0.1℃ |
| Temperature Control Accuracy | ±0.5℃ |
| Installation Method | Concealed installation |
| Installation Hole Distance | 60mm |
| Housing Material | Anti-flammable PC |
| Dimensions (H x W x D) | 86 mm x 90 mm x 43mm (approx. 3.39" x 3.54" x 1.69") |
| Weight | 248g |
| Levels of Protection | IP20 |
| Sensor Cable Length | 3m |
9. Warranty and Support
For warranty information and technical support, please refer to the documentation provided with your purchase or contact Baomain customer service directly. Keep your purchase receipt as proof of purchase.