SENIX 2000 PSI Electric Pressure Washer
Instruction Manual - Model: HPWE13-M2
Important Safety Instructions
Please read and understand all safety warnings and instructions before operating this pressure washer. Failure to follow these instructions may result in electric shock, fire, and/or serious injury.
- Electrical Safety: Always connect the pressure washer to a grounded outlet. Do not use with damaged cords or plugs. Keep all connections dry and off the ground.
- Water Safety: Ensure the water supply is clean and free of debris. Do not operate without water. Do not spray water towards electrical outlets or equipment.
- High Pressure Hazard: The high-pressure spray can cause serious injury. Never direct the spray at people, pets, or electrical devices. Always wear appropriate eye protection.
- Chemical Use: Use only pressure washer safe detergents. Follow detergent manufacturer's instructions for use and disposal.
- Stability: Operate the pressure washer on a stable, level surface to prevent tipping.
- Children and Bystanders: Keep children and bystanders away from the operating area.
- Total Stop System (TSS): This unit is equipped with a Total Stop System (TSS) which automatically shuts off the pump when the trigger is released. This saves energy and prolongs pump life.
Product Overview and Components
The SENIX 2000 PSI Electric Pressure Washer is designed for efficient outdoor cleaning. Familiarize yourself with its components before assembly and operation.
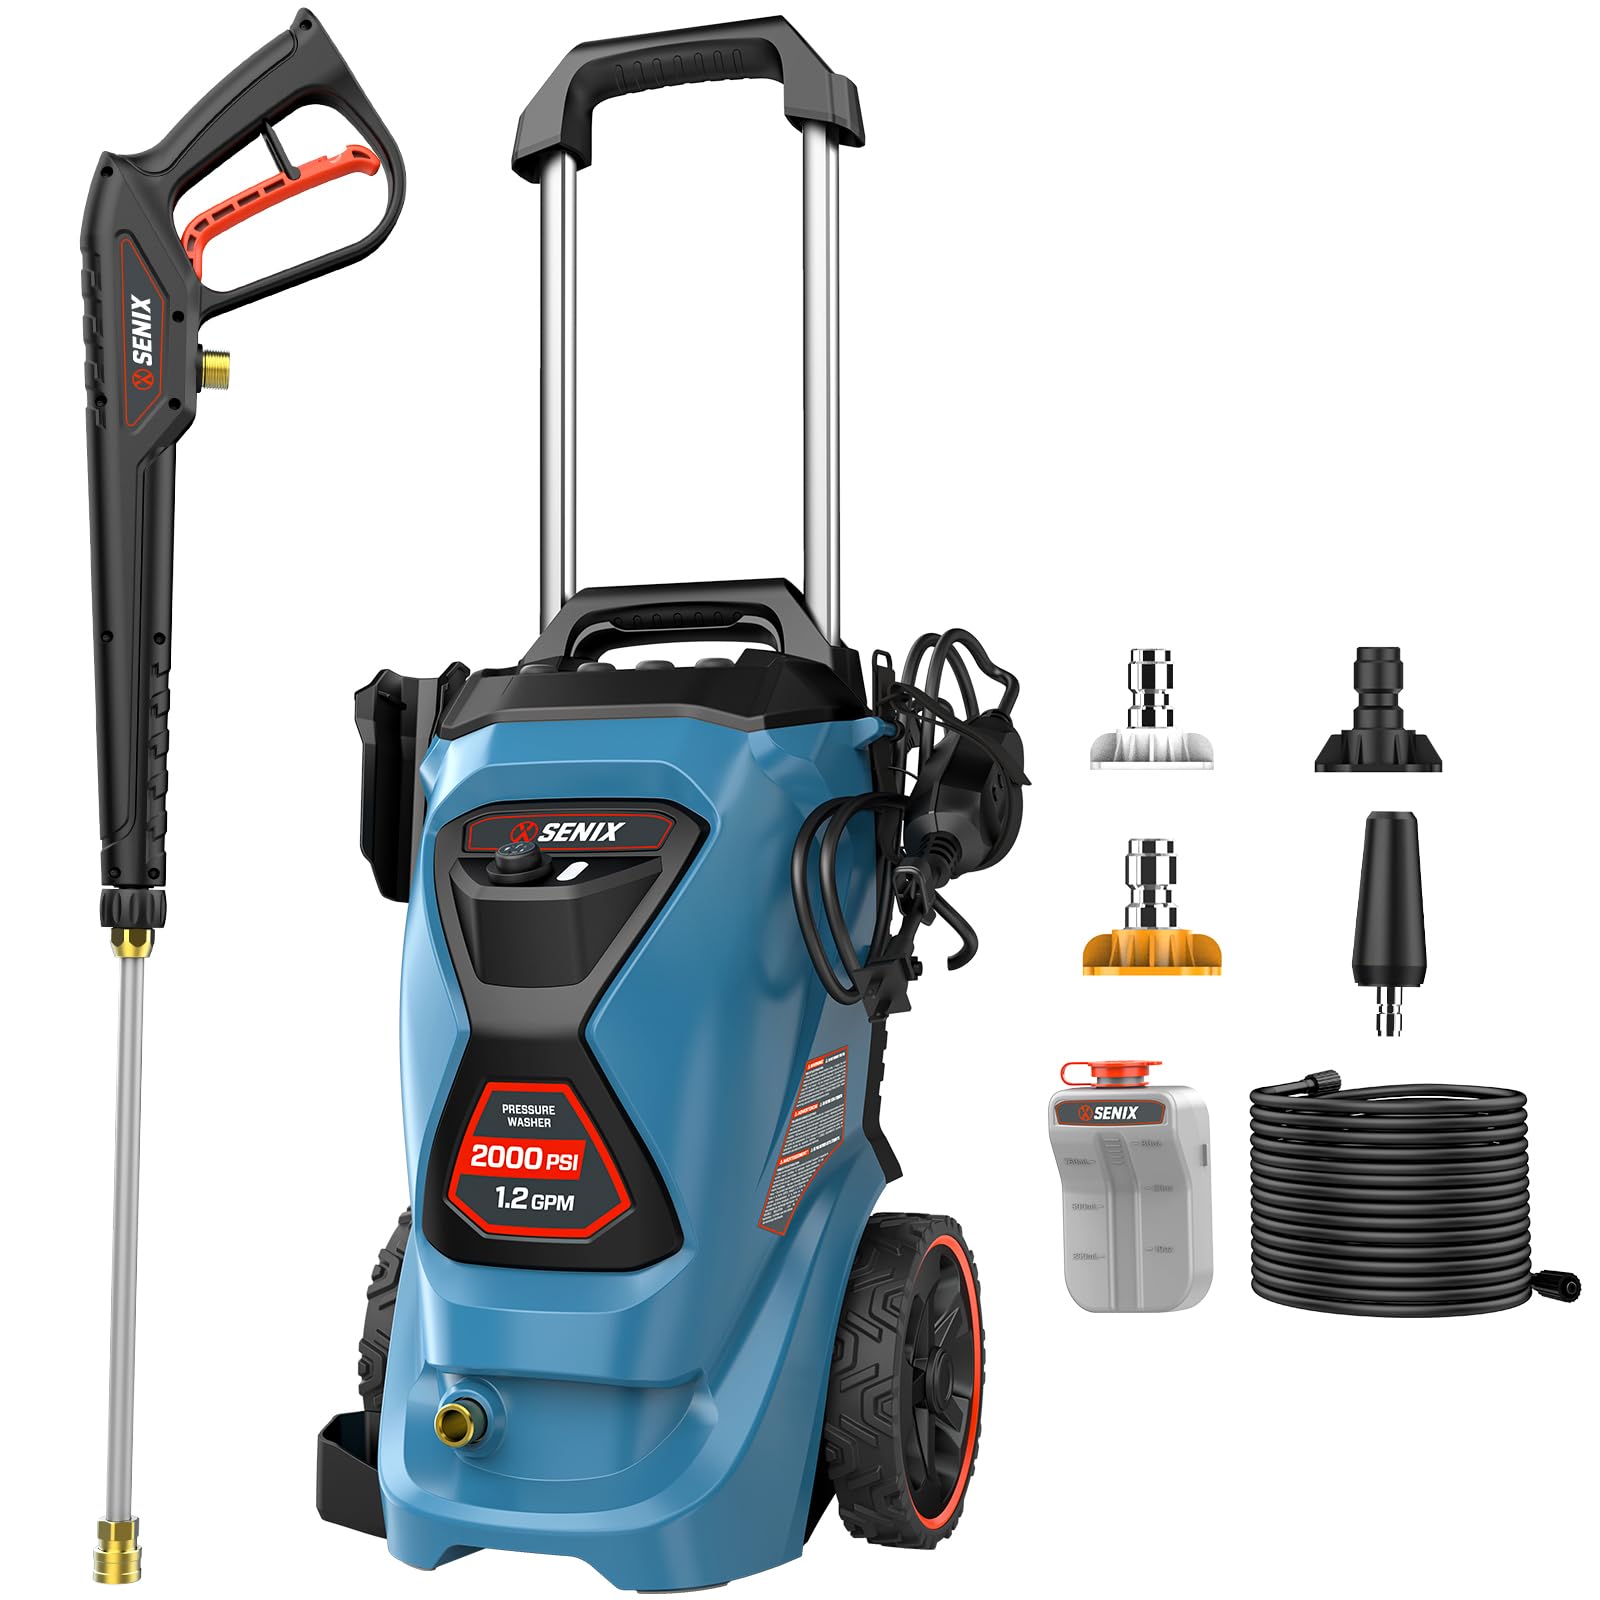
Figure 1: Overall view of the SENIX 2000 PSI Electric Pressure Washer.
Key Features and Components:
- Powerful 13-Amp Motor: Generates up to 2000 PSI for effective cleaning.
- 4 Quick-Connect Nozzles: Includes 15°, 40°, Soap, and Turbo nozzles for various cleaning tasks.
- 25-ft High-Pressure Hose: Provides ample reach for cleaning.
- 35-ft GFCI Cord: Ensures electrical safety and extended reach.
- Telescoping Handle & Wheels: For easy mobility and compact storage.
- Onboard Storage: Conveniently stores nozzles, spray gun, and power cord.
- Integrated Soap Tank: For easy application of detergents.
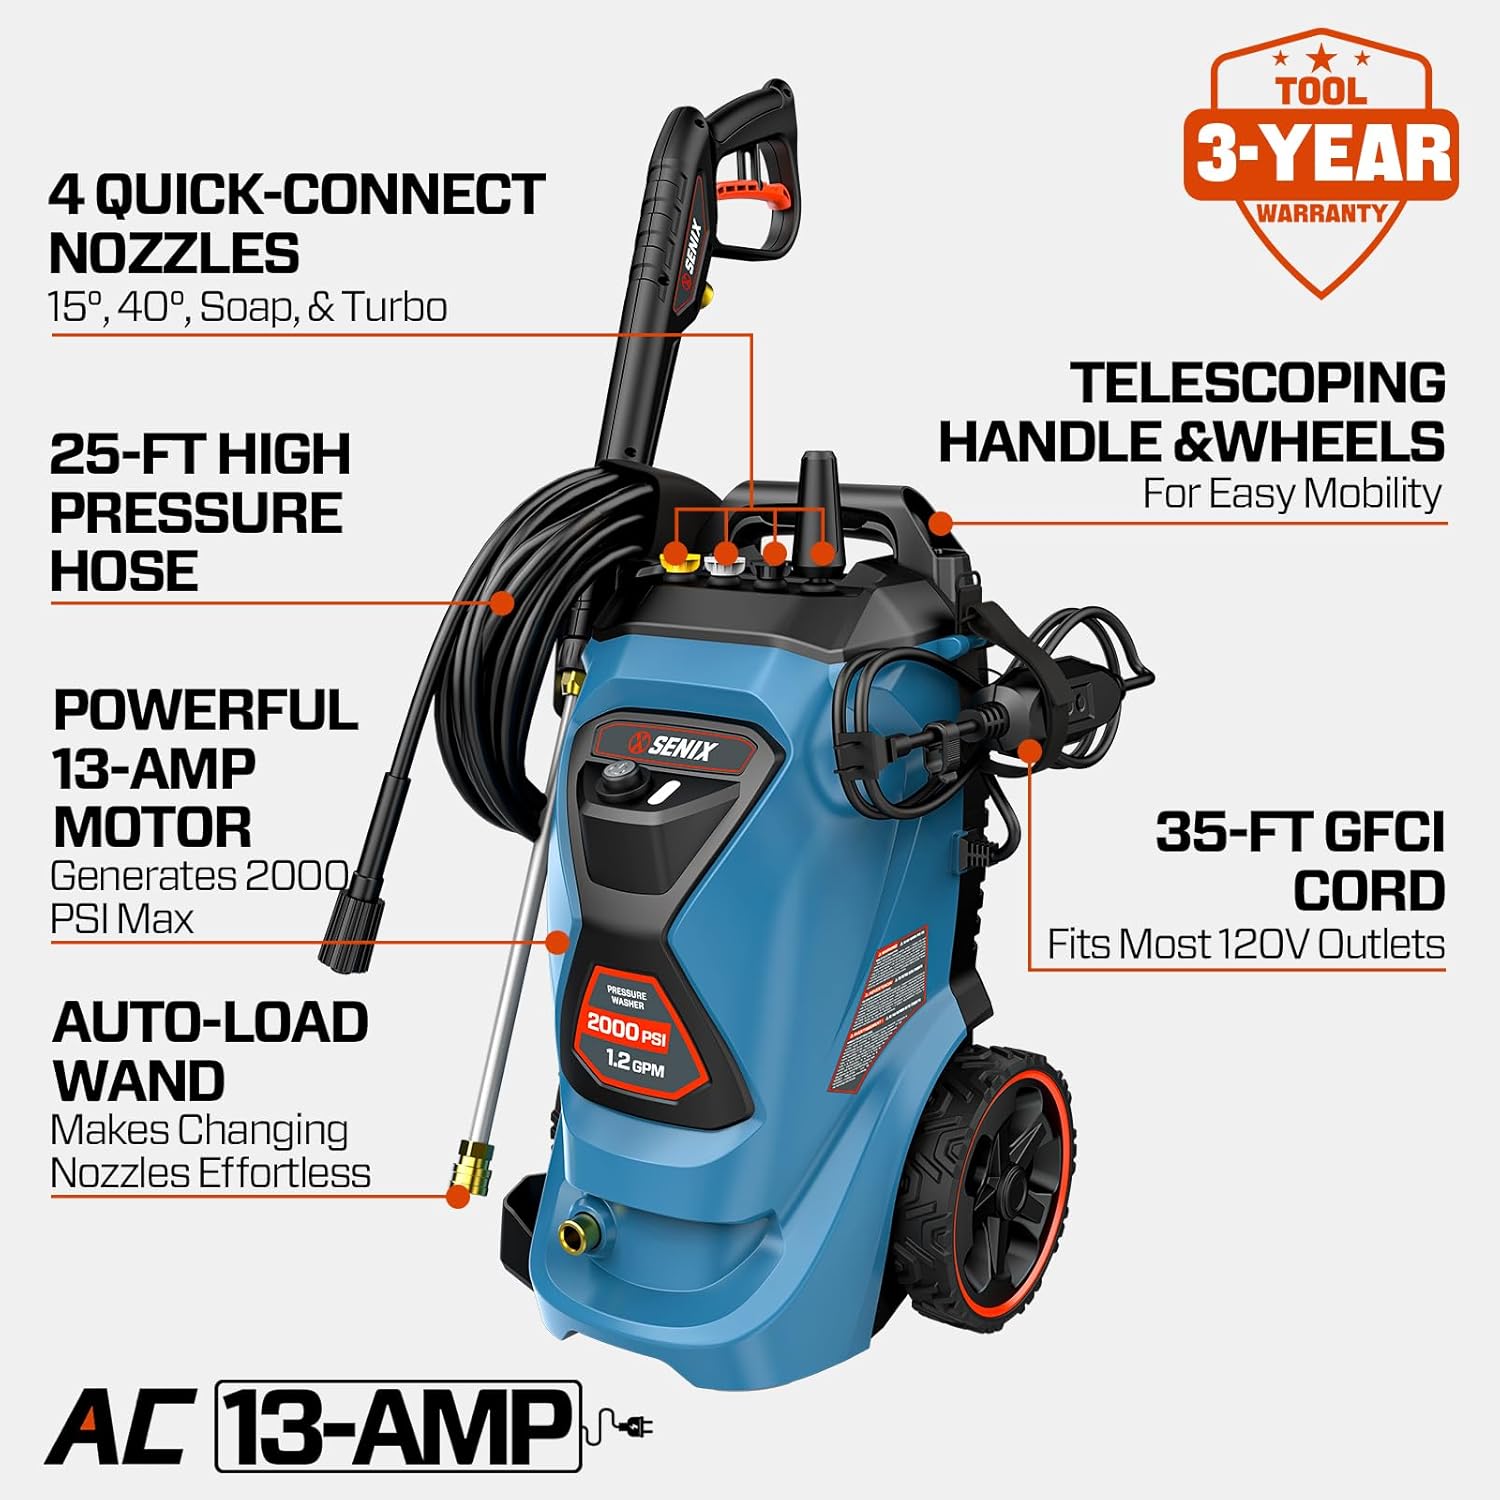
Figure 2: Labeled diagram highlighting key features such as nozzles, hose, motor, cord, and handle.
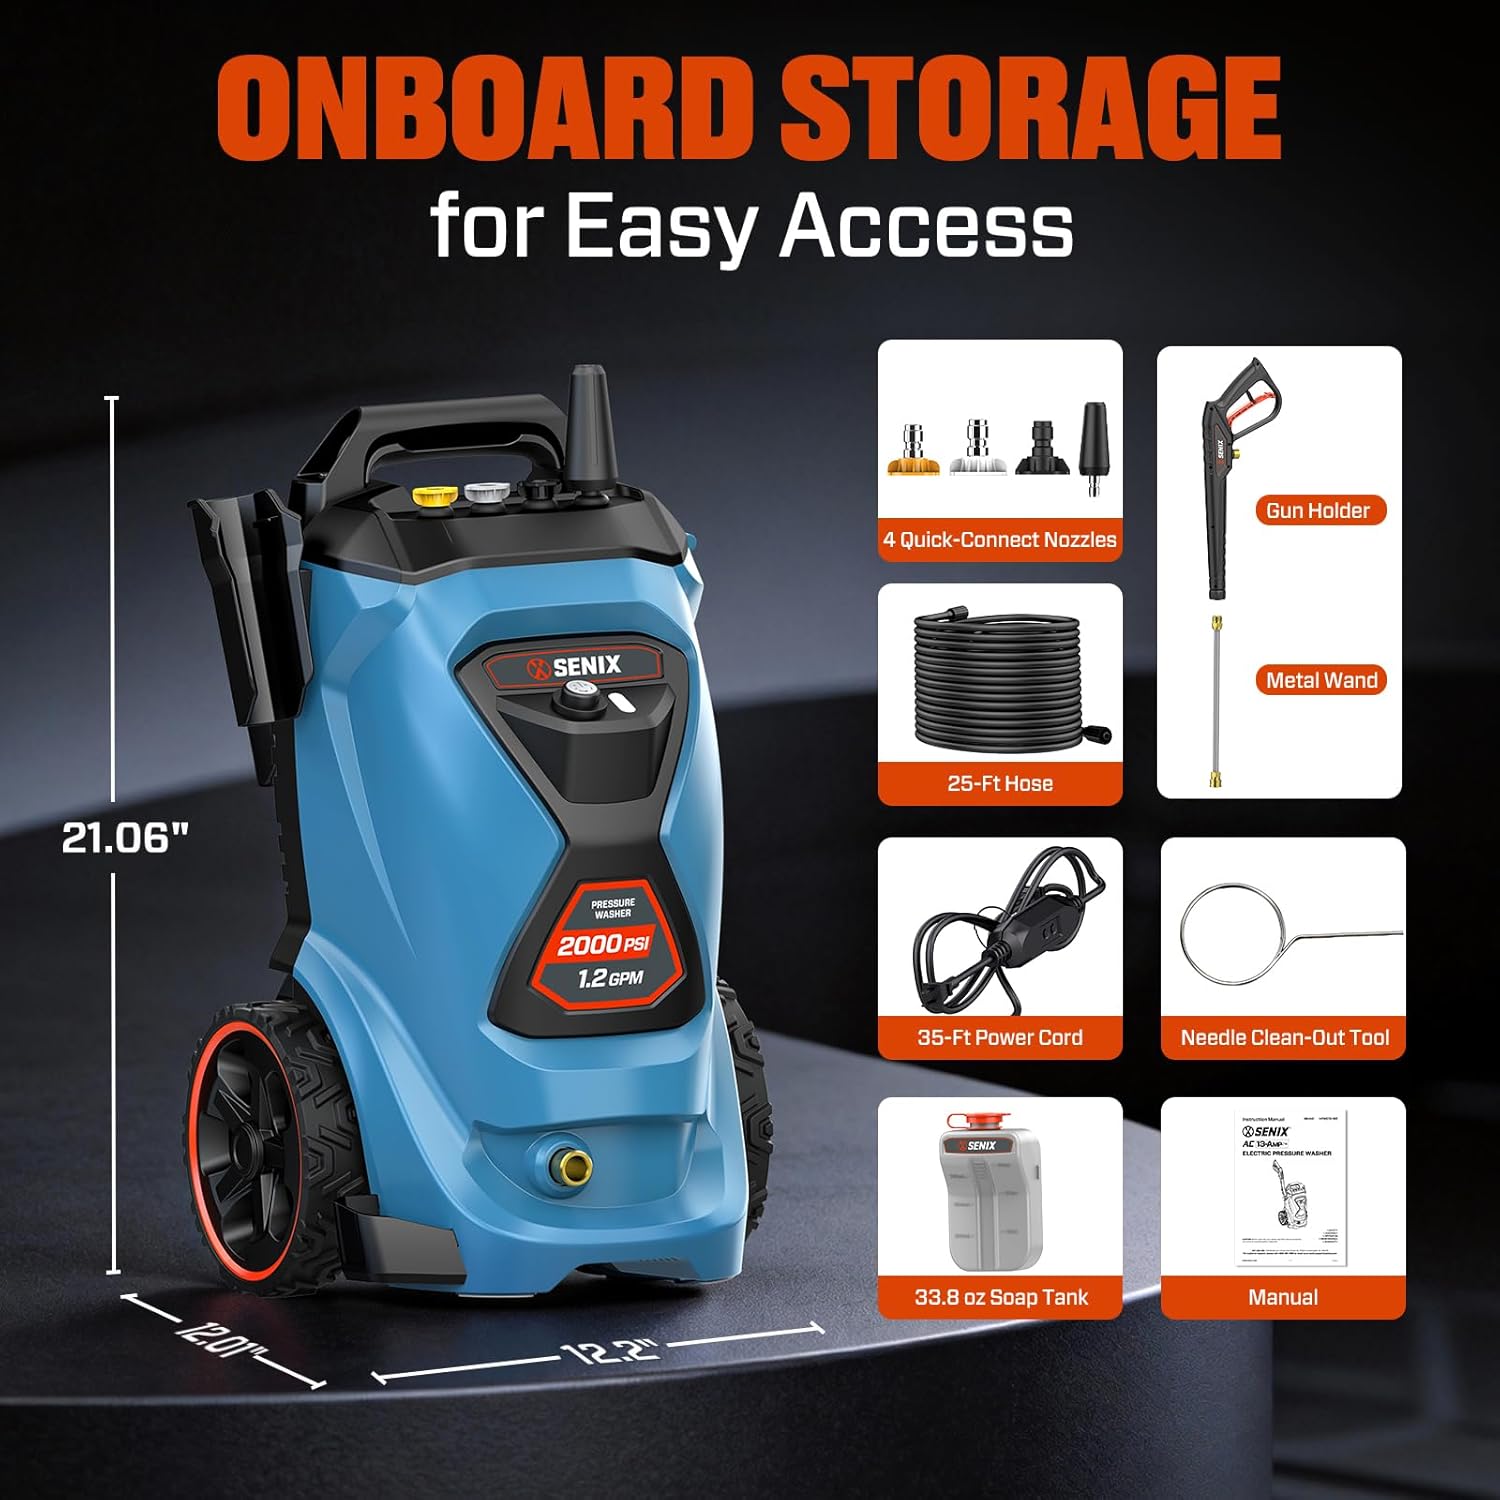
Figure 3: View of the pressure washer showing its dimensions and a display of included accessories like quick-connect nozzles, gun holder, metal wand, hose, power cord, soap tank, and manual.

Figure 4: All components included with the pressure washer, including the main unit, spray gun, wand, hose, nozzles, and soap tank.
Assembly and Setup
- Unpacking: Carefully remove all components from the packaging. Check for any damage during shipping.
- Handle Assembly: Extend the telescoping handle to the desired height and secure it.
- Connecting the High-Pressure Hose: Connect one end of the high-pressure hose to the pressure washer's outlet and the other end to the spray gun. Ensure connections are tight.
- Connecting the Water Supply: Attach a garden hose (not included) to the water inlet on the pressure washer. Ensure the garden hose is free of kinks and has a minimum diameter of 5/8 inch. Turn on the water supply fully.
- Connecting the Spray Gun and Wand: Insert the metal wand into the spray gun and twist to secure. Select the desired quick-connect nozzle and push it firmly into the end of the wand until it clicks into place.
- Adding Detergent (Optional): If using detergent, fill the integrated soap tank with pressure washer safe detergent.
- Power Connection: Plug the 35-ft GFCI power cord into a grounded 120V outlet. Ensure the GFCI is reset if necessary.

Figure 5: Detailed views of the push-button start, hose hook for organization, quick-connect nozzle system, and simple nozzle storage.
Operating Instructions
- Purging Air from the System: Before starting the motor, squeeze the trigger on the spray gun for approximately 30 seconds to allow water to flow through the system and expel any trapped air. This prevents damage to the pump.
- Starting the Pressure Washer: With the water supply on and air purged, press the power button to start the motor. The LED indicator will illuminate.
- Nozzle Selection: Choose the appropriate quick-connect nozzle for your cleaning task.
- 15° Nozzle (Yellow): For intense cleaning of stubborn dirt on hard, non-delicate surfaces.
- 40° Nozzle (White): For general cleaning of larger areas, suitable for vehicles, patios, and siding.
- Soap Nozzle (Black): For applying detergent at low pressure.
- Turbo Nozzle: Provides a rotating jet for maximum cleaning power on tough stains.
- Cleaning Technique: Hold the spray gun firmly with both hands. Start spraying a few feet away from the surface and gradually move closer until the desired cleaning effect is achieved. Maintain a consistent distance and angle for even cleaning.
- Using Detergent: When using the soap nozzle, the pressure washer will operate at a lower pressure, allowing for effective detergent application. After applying detergent, switch to a high-pressure nozzle (15° or 40°) to rinse the surface thoroughly.
- Stopping Operation: Release the trigger to engage the Total Stop System (TSS). For extended breaks, turn off the power switch and the water supply.

Figure 6: A person demonstrating the use of the pressure washer to clean an outdoor patio, highlighting its 2000 PSI and 1.2 GPM capabilities.

Figure 7: Visual guide to the four quick-connect nozzles (15°, 40°, Soap, Turbo) and their recommended applications, such as car washing with the soap nozzle.

Figure 8: Examples of multiple cleaning scenarios where the pressure washer can be used, including cars, driveways, windows, and fences.
Maintenance and Storage
After Each Use:
- Turn off the pressure washer and water supply.
- Squeeze the spray gun trigger to release any remaining pressure in the system.
- Disconnect the garden hose and high-pressure hose.
- Drain any remaining water from the pump and hoses.
- Clean the nozzles with the provided needle clean-out tool if they become clogged.
- Wipe down the unit with a damp cloth.
Winterization (for cold climates):
To prevent damage from freezing, it is crucial to properly winterize your pressure washer if it will be stored in an area where temperatures may drop below freezing.
- Disconnect all water connections.
- Pour pressure washer pump protector (available at hardware stores) into the water inlet.
- Briefly turn on the pressure washer (for 1-2 seconds) until the pump protector solution exits the high-pressure outlet.
- Store the unit in a dry, frost-free location.
Storage:
- Store the pressure washer in a clean, dry, and protected area.
- Utilize the onboard storage for nozzles, spray gun, and power cord to keep components organized.
- Coil the high-pressure hose neatly on the integrated hose hook.

Figure 9: The portable design of the pressure washer, featuring a telescopic handle and two 7-inch wheels for easy transport and storage.
Troubleshooting
| Problem | Possible Cause | Solution |
|---|---|---|
| Motor does not start | Power cord not plugged in; GFCI tripped; No power at outlet; Power switch off. | Plug in cord; Reset GFCI; Check circuit breaker; Turn power switch ON. |
| Low pressure | Insufficient water supply; Clogged nozzle; Air in pump; Inlet filter clogged. | Ensure full water flow; Clean or replace nozzle; Purge air from system; Clean inlet filter. |
| Motor stops during operation | Thermal overload activated; Low voltage; TSS engaged. | Allow motor to cool; Check power supply; Release trigger and restart. |
| Water leaks | Loose connections; Damaged O-rings; Cracked hose. | Tighten connections; Replace O-rings; Replace hose. |
| Detergent not siphoning | Soap nozzle not installed; Detergent tank empty; Clogged detergent line. | Install black soap nozzle; Refill tank; Clean detergent line. |
Specifications
| Specification | Value |
|---|---|
| Brand | SENIX |
| Model Number | HPWE13-M2 |
| Power Source | AC (Electric) |
| Maximum Pressure | 2000 PSI |
| Maximum Flow Rate | 1.2 GPM |
| Motor Amperage | 13 Amp |
| Hose Length | 25 ft (High-Pressure) |
| Power Cord Length | 35 ft (GFCI protected) |
| Item Weight | 15 Pounds |
| Product Dimensions (L x W x H) | 13.78" x 12" x 12.2" |
| Nozzles Included | 15°, 40°, Soap, Turbo |
Warranty and Customer Support
This SENIX pressure washer comes with a 3-year limited warranty, providing confidence in its quality and performance. Please retain your proof of purchase for warranty claims.
For technical assistance, troubleshooting, or warranty inquiries, please contact SENIX customer support:
- Website: Visit the official SENIX website for support resources and contact information.
- Phone: Refer to your product packaging or the SENIX website for the most current customer service phone number.
- Email: Contact support via email for non-urgent inquiries.
When contacting support, please have your model number (HPWE13-M2) and purchase date readily available.