1. Introduction
This manual provides detailed instructions for the safe installation, operation, and maintenance of your Cumbor Extra Wide Baby & Pet Gate Set. Please read all instructions carefully before assembly and use. Keep this manual for future reference.
2. Safety Information
- WARNING: Read all instructions before installation and use. Failure to follow these warnings and instructions could result in serious injury or death.
- This safety barrier is for domestic use only.
- This safety barrier is suitable for use with children from 6 to 24 months.
- This safety barrier is suitable for use with pets.
- Never leave children unattended.
- Always ensure the gate is securely closed and latched.
- Do not use the safety barrier if any components are damaged or missing.
- The safety barrier must not be fitted across windows.
- If the safety barrier is used at the top of stairs, it should not be positioned below the top level.
- If the safety barrier is used at the bottom of stairs, it should be positioned on the lowest step.
- Regularly check all fittings and components to ensure they are secure and in good working order.
- Do not use replacement parts or accessories other than those supplied or approved by Cumbor.
3. Package Contents
Please verify that all components are present before beginning installation:
- Main Gate Panel (x2)
- Extension Panels (various sizes, as per your specific set)
- Tension Bolts (x4 per gate)
- Wall Cups (x4 per gate)
- Adhesive Pads for Wall Cups (x4 per gate)
- Hardware Mount Kit (screws, wall anchors, mounting brackets - optional for hardware installation)
- Instruction Manual
4. Setup and Installation
Your Cumbor gate set offers both pressure-mounted and hardware-mounted installation options. Choose the method best suited for your specific location.
4.1 Measuring Your Opening
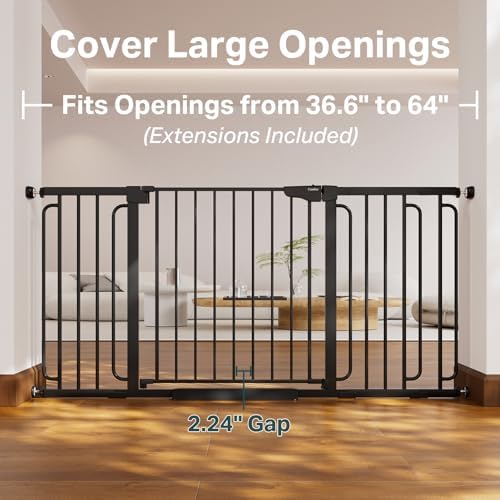
Before installation, accurately measure the width of your opening. Select the appropriate gate and extension combination to fit the measured width.
4.2 Pressure Mount Installation (Drill-Free)
This method is suitable for doorways and hallways where drilling is not desired. It provides secure installation by applying pressure against the walls.
- Assemble the gate: Insert extension panels into the main gate panel if needed.
- Insert the four tension bolts into the holes at each corner of the gate.
- Place the gate in the opening. The gap between the gate frame and the door latch is normal before tensioning.
- Attach wall cups to the wall using adhesive pads at the desired height for the tension bolts. For added security, you may screw the wall cups into the wall (screws not included for pressure mount).
- Tighten the tension bolts by rotating them until the gate is firmly secured and the gap at the latch mechanism is minimal (approximately 1-2mm). Ensure the gate is level and stable.
4.3 Hardware Mount Installation (More Stable)
Hardware mounting is recommended for stairs or high-traffic areas where maximum stability is required. This method involves drilling into the wall or banister.
- Assemble the gate: Insert extension panels into the main gate panel if needed.
- Determine the desired height and position for the gate.
- Mark the drilling points for the mounting brackets on both sides of the opening. Ensure the gate will be level.
- Drill pilot holes and securely attach the mounting brackets to the wall or banister using the provided screws and wall anchors (if necessary).
- Attach the gate to the installed mounting brackets according to the hardware kit instructions.
- Ensure all connections are tight and the gate swings freely and latches securely.

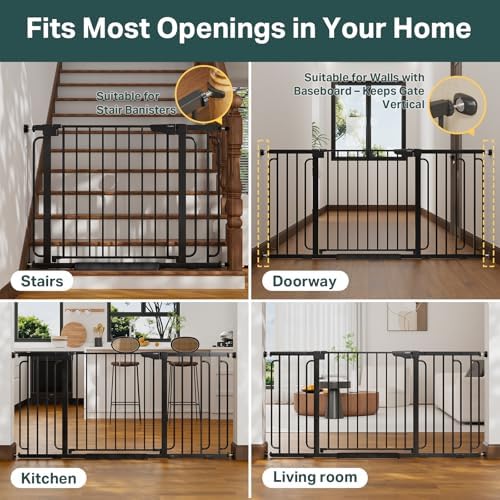
4.4 General Placement Considerations
5. Operating Instructions
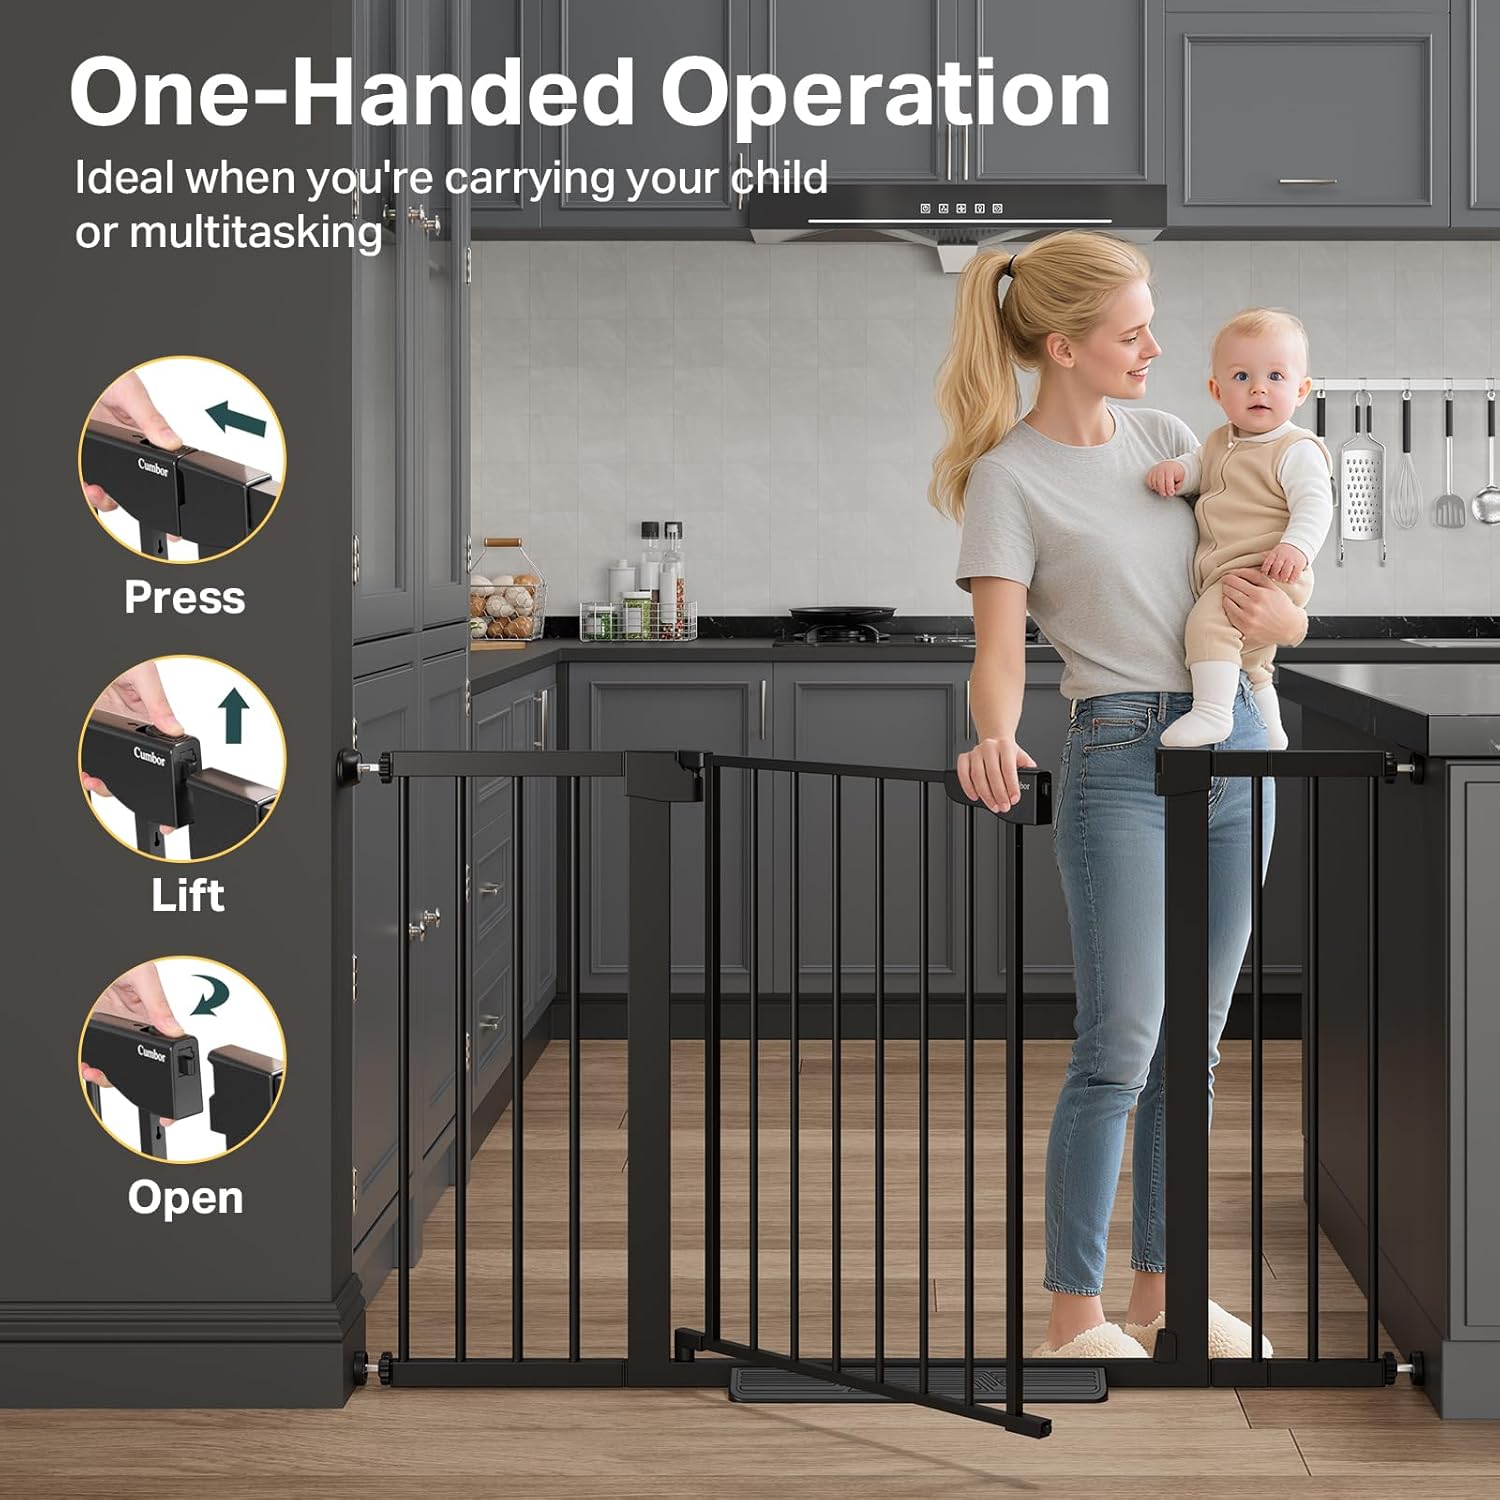
5.1 Opening the Gate (One-Handed Operation)
The gate is designed for convenient one-handed operation, ideal when carrying a child or other items.
- Press: Locate the button on the top of the gate handle. Press this button with your thumb.
- Lift: While holding the button, lift the gate door slightly upwards.
- Open: Swing the gate door open in either direction.

5.2 Auto-Close and Dual Direction Opening
The gate features an auto-close mechanism for convenience and safety, and can swing open in both directions.
- Auto-Close: If the gate is opened to an angle less than 90 degrees, it will automatically swing shut and latch.
- Hold-Open Feature: If the gate is opened to a full 90-degree angle, it will remain open, allowing for continuous passage. Gently push it to close.
- Dual Direction: The gate door can be opened to swing inwards or outwards, providing flexibility depending on your space.
5.3 Dual-Lock System
The gate incorporates a dual-lock design to enhance security and prevent toddlers or pets from easily opening it.
- The primary lock is integrated into the one-handed operation mechanism (press and lift).
- An additional lower locking mechanism provides extra security. Ensure both locks engage when the gate closes.

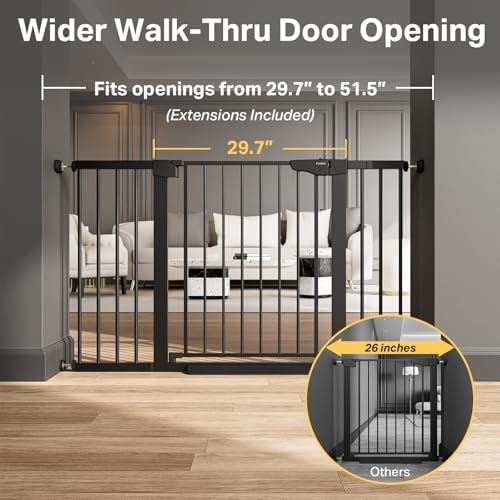
5.4 Wide Entrance with Accessible Pedal
The gate features a wide walk-through entrance and an accessible pedal for ease of passage, especially when pushing a stroller.

6. Maintenance
- Cleaning: Clean the gate regularly with a damp cloth and mild soap. Do not use abrasive cleaners or harsh chemicals.
- Inspection: Periodically inspect all parts for wear, damage, or loose connections. Pay close attention to the locking mechanism, hinges, and tension bolts.
- Tightening: For pressure-mounted gates, re-tighten the tension bolts as needed to maintain a secure fit.
- Lubrication: If the gate hinges become stiff, apply a small amount of silicone-based lubricant.
7. Troubleshooting
- Gate does not close or latch properly:
- Ensure the gate is installed level.
- For pressure-mounted gates, tighten the tension bolts evenly until the gap at the latch is minimal (1-2mm). Do not overtighten.
- Check for any obstructions preventing the gate from swinging freely.
- Gate feels unstable or wobbly:
- For pressure-mounted gates, ensure all four tension bolts are tightened securely and evenly against the wall cups.
- For hardware-mounted gates, verify that all screws and mounting brackets are firmly attached to the wall/banister.
- Ensure the correct extension panels are used for your opening width.
- Gate is difficult to open:
- Ensure you are pressing the button and lifting the gate door simultaneously as instructed.
- Check for any debris or foreign objects in the latch mechanism.
8. Specifications
| Product Name | Cumbor Extra Wide Baby & Pet Gate Set |
| Model Number | B0GGNQPW2Y |
| Gate 1 Width Range | 29.7 - 51.5 inches (with extensions) |
| Gate 2 Width Range | 36.6 - 64 inches (with extensions) |
| Material | Heavy-duty Steel Frame |
| Recommended Age | 6 - 24 months (children) |
| Mounting Options | Pressure Mount, Hardware Mount |
9. Support
For further assistance, troubleshooting, or to inquire about replacement parts, please contact Cumbor customer support. Refer to the product packaging or the Cumbor official website for the most current contact information.


