YARDCARE WR5035-1500U12
YARDCARE 13-Inch 2-in-1 Electric Dethatcher & Scarifier Instruction Manual
Model: WR5035-1500U12
1. Introduction
This manual provides essential information for the safe and effective operation, assembly, maintenance, and troubleshooting of your YARDCARE 13-Inch 2-in-1 Electric Dethatcher & Scarifier. Please read all instructions carefully before use and retain this manual for future reference.
The YARDCARE 2-in-1 Electric Dethatcher & Scarifier is designed to revitalize your lawn by efficiently removing built-up thatch and loosening compacted soil. This dual-function tool improves airflow, water absorption, and nutrient penetration, promoting healthier, greener grass.
2. Important Safety Information
WARNING: Read and understand all instructions before operating this product. Failure to follow all instructions listed below may result in electric shock, fire, and/or serious personal injury.
- Always wear appropriate personal protective equipment, including safety glasses, gloves, and sturdy footwear.
- Keep children, pets, and bystanders away from the operating area.
- Ensure the power cord is in good condition and avoid cutting or damaging it during operation.
- Do not operate the machine in wet conditions or rain.
- Disconnect the power supply before performing any adjustments, cleaning, or maintenance.
- Inspect the work area for rocks, debris, or other objects that could be thrown by the machine.
3. Product Overview
The YARDCARE 13-Inch 2-in-1 Electric Dethatcher & Scarifier combines two essential lawn care functions into one powerful tool. It features a robust motor, adjustable depth settings, and a convenient collection bag.
Key Features:
- 2-in-1 Dethatcher & Scarifier: Easily switch between dethatching and scarifying with interchangeable rollers to remove thatch and loosen compacted soil.
- Adjustable Depth Control: Multiple depth settings (typically 4 positions) allow for tailored lawn care based on your lawn's specific needs.
- Powerful 12 Amp Motor: Delivers consistent power for effective thatch removal and soil scarification.
- Spacious 8-Gallon Catcher: Collects a significant amount of thatch and debris, reducing the frequency of emptying.
- Designed for Comfort and Ease: Lightweight design with a soft-grip handle and collapsible feature for convenient storage.
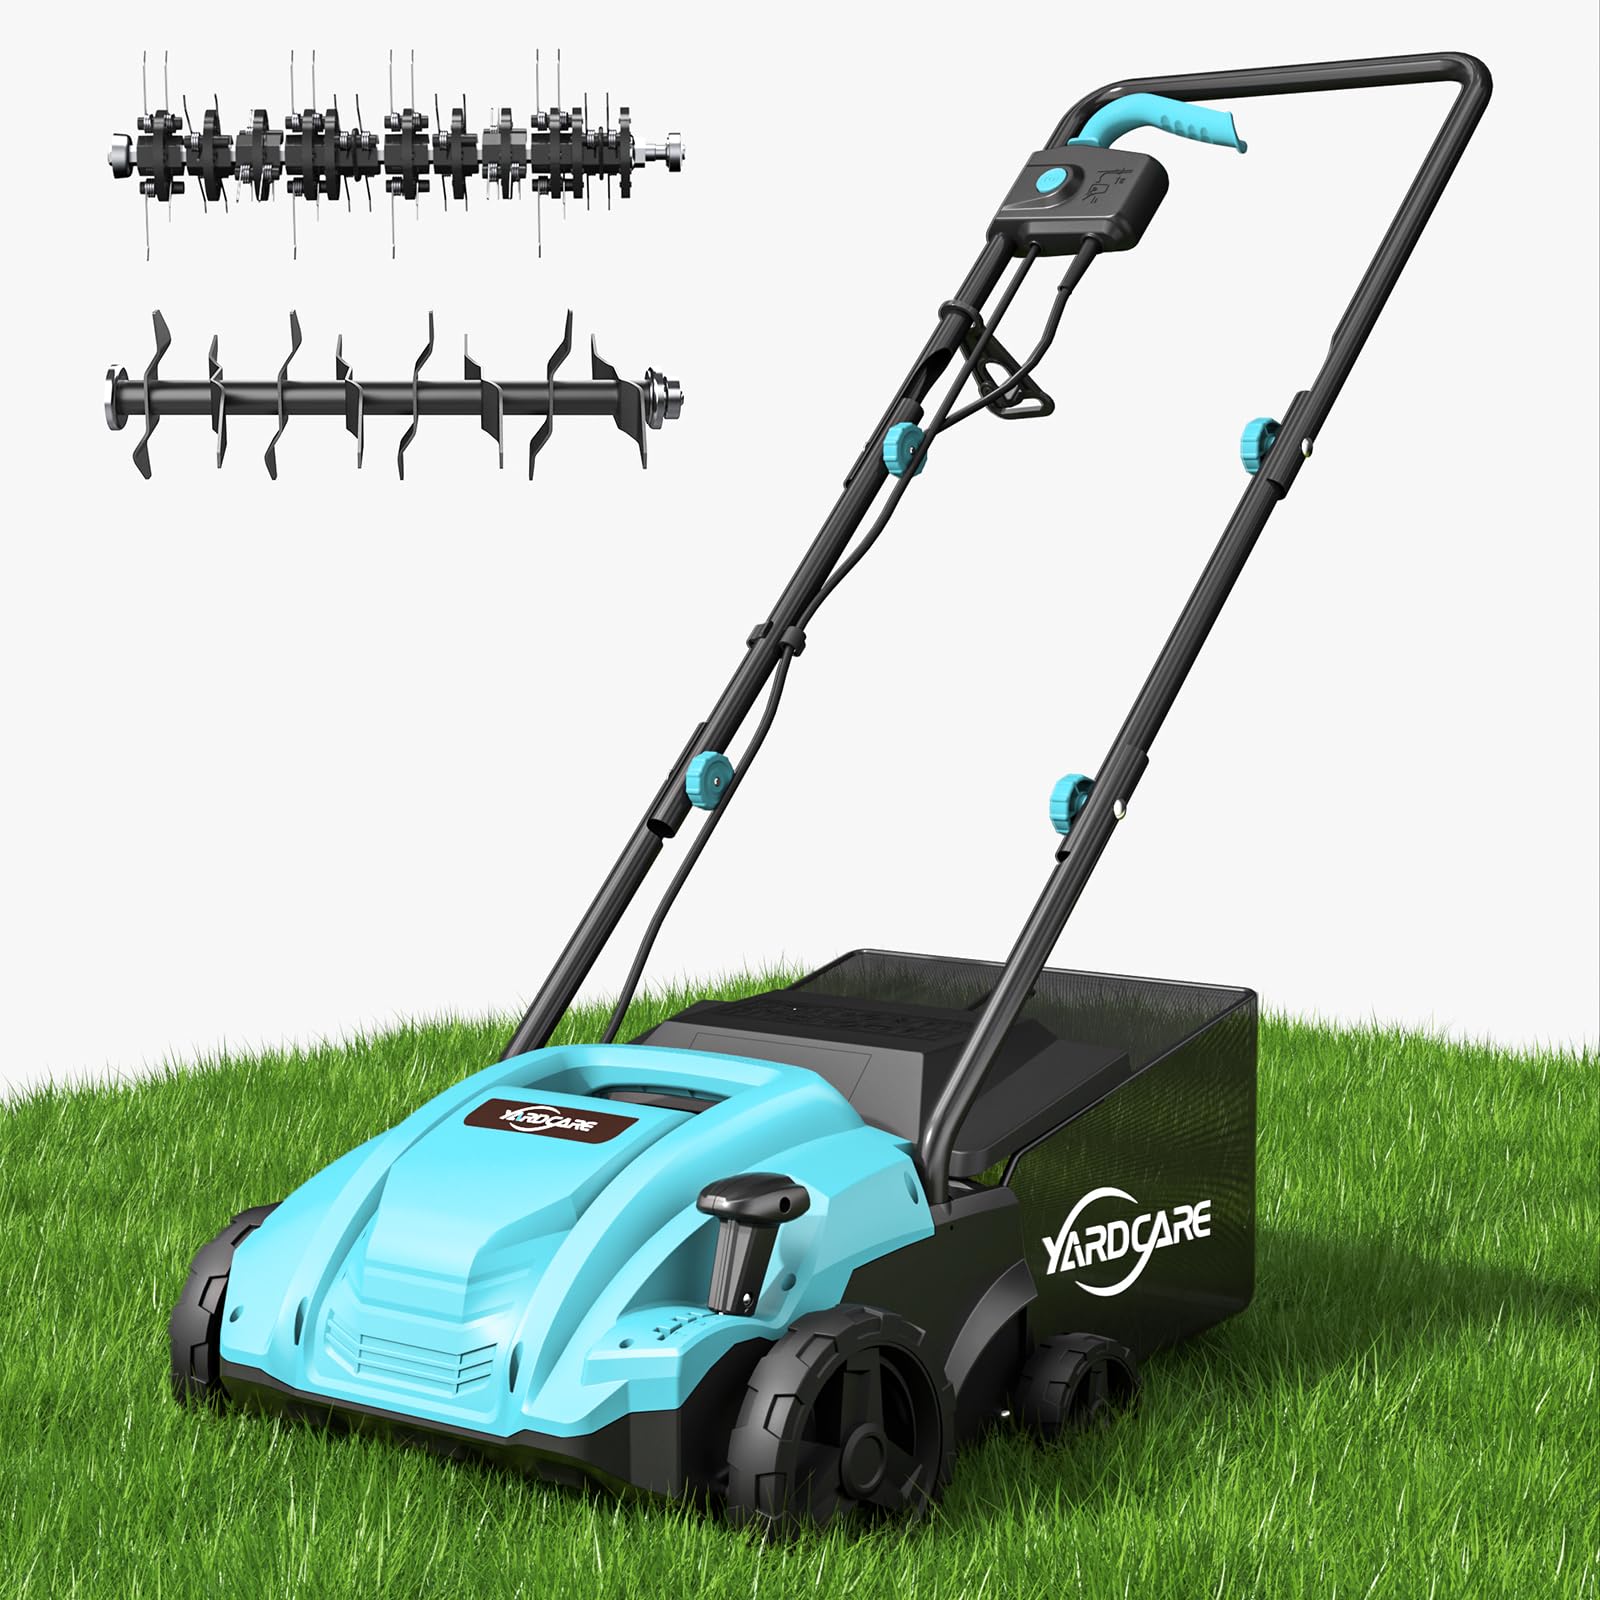
Figure 1: YARDCARE 13-Inch 2-in-1 Electric Dethatcher and Scarifier.
4. Setup and Assembly
The YARDCARE Dethatcher & Scarifier requires minimal assembly. Follow these steps to prepare your unit for use:
- Unpack Components: Carefully remove all parts from the packaging. Ensure all components listed in the packing list are present.
- Handle Assembly: Attach the lower handle bars to the main unit using the provided clamp screws. Then, attach the upper handle bar to the lower bars, securing them with the remaining clamp screws. Ensure all connections are tight.
- Collection Bag Assembly: Assemble the collection bag frame and attach the fabric bag. Secure the assembled bag to the rear of the main unit.
- Roller Installation: The unit comes with two interchangeable rollers: one for dethatching (tines) and one for scarifying (blades). To install or change a roller, ensure the machine is unplugged. Locate the roller release mechanism on the underside of the unit. Remove the currently installed roller by disengaging the lock and sliding it out. Insert the desired roller, ensuring it clicks securely into place.

Figure 2: Interchangeable rollers for dethatching and scarifying.
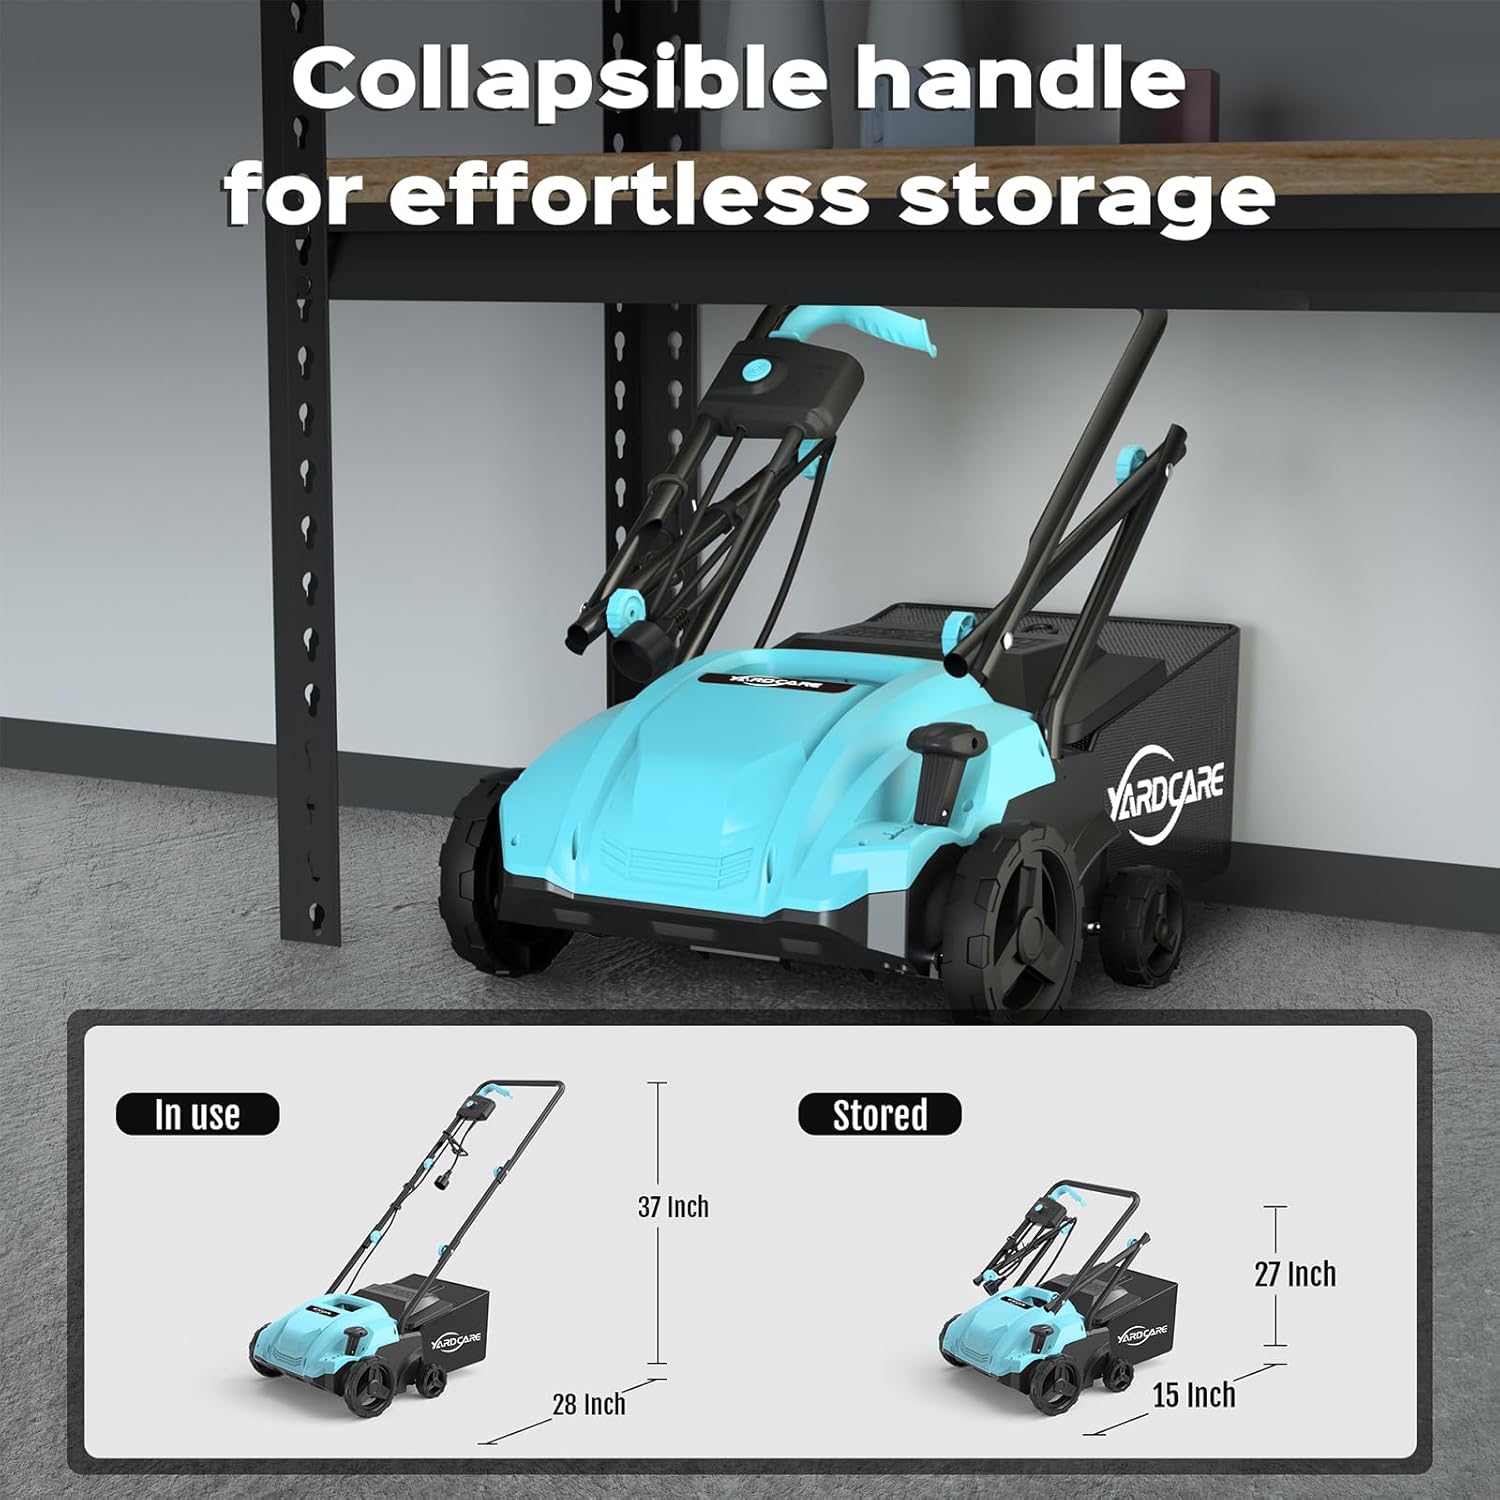
Figure 3: Collapsible handle for convenient storage.
Video Guide:
Video 1: Official product video demonstrating the assembly, operation, and key features of the YARDCARE Electric Dethatcher & Scarifier.
5. Operating Instructions
Starting the Unit:
- Ensure the unit is plugged into a suitable power outlet.
- Press and hold the safety button on the handle.
- While holding the safety button, pull the operating lever towards you. The motor will start.
- Release the safety button once the motor is running.
Adjusting Depth:
The unit features a depth adjustment lever, typically located near the wheels, allowing you to select from 4 different positions. Choose a shallow setting for light dethatching or a deeper setting for scarifying to stimulate root growth.

Figure 4: 4-Position depth adjustment for varied lawn conditions.
Dethatching/Scarifying Process:
- Begin by selecting the appropriate roller (dethatcher or scarifier) and depth setting for your lawn's condition.
- Start the unit as described above.
- Walk at a steady pace, pushing the unit across your lawn in overlapping rows.
- The 13-inch working path ensures efficient coverage.
- Periodically check and empty the 8-gallon collection bag to maintain optimal performance.

Figure 5: YARDCARE dethatcher with 30L collection bag in operation.
6. Maintenance
Regular maintenance ensures the longevity and optimal performance of your YARDCARE unit.
After Each Use:
- Disconnect Power: Always unplug the unit from the power source.
- Empty Collection Bag: Remove and empty the 8-gallon collection bag. Clean any remaining debris from the bag.
- Clean Unit: Use a brush or cloth to remove grass clippings and debris from the housing, rollers, and wheels. Do not use water directly on the motor or electrical components.
Roller Maintenance:
- Inspect the dethatching tines or scarifying blades for wear or damage. Replace rollers if they are excessively worn or bent.
- Refer to the 'Setup and Assembly' section for instructions on changing rollers.
Storage:
- Clean the unit thoroughly before storing.
- Fold the handle for compact storage.
- Store the unit in a dry, secure location, away from children and moisture.
7. Troubleshooting
| Problem | Possible Cause | Solution |
|---|---|---|
| Unit does not start | Not plugged in; Safety button/lever not engaged; Power outage; Damaged cord. | Check power connection; Ensure safety button is pressed before pulling lever; Check circuit breaker; Inspect cord for damage. |
| Poor dethatching/scarifying performance | Incorrect depth setting; Worn or damaged roller; Overly wet grass. | Adjust depth setting; Replace roller; Operate on dry grass. |
| Excessive vibration or noise | Debris caught in roller; Damaged roller; Loose components. | Disconnect power and clear debris; Replace damaged roller; Tighten all fasteners. |
| Collection bag not filling | Bag full; Incorrect depth; Obstruction in chute. | Empty bag; Adjust depth; Clear any blockages. |
8. Specifications
| Feature | Detail |
|---|---|
| Brand | YARDCARE |
| Model Number | WR5035-1500U12 |
| Power Source | Electric |
| Motor | 12 Amp |
| Cutting Width | 13 Inches |
| Depth Positions | 4 |
| Collection Bag Capacity | 8 Gallons (approx. 30 Liters) |
| Material | Plastic |
| Item Weight | 25.4 Pounds |
| Product Dimensions (D x W x H) | 12.13"D x 20.47"W x 16.78"H |
9. Warranty and Support
For warranty information, technical support, or to order replacement parts, please refer to the contact information provided with your product packaging or visit the official YARDCARE website. Keep your purchase receipt as proof of purchase for warranty claims.
Ask a question about this manual
Ask about setup, troubleshooting, compatibility, parts, safety, or missing instructions. Manuals+ will review the question and use this page’s manual context to help answer it.