
1. Introduction
Thank you for choosing the MiniCity Aerospace Foundry Book Nook Kit. This kit allows you to construct a detailed miniature space foundry diorama, designed to fit seamlessly into your bookshelf or stand as a decorative piece. It features intricate wooden components, LED lighting, and a dust cover to protect your creation. This manual provides comprehensive instructions for assembly, operation, and maintenance.
Estimated Assembly Time: 6-10 hours
Number of Pieces: 341 wood pieces
Recommended Age: 14 years and up
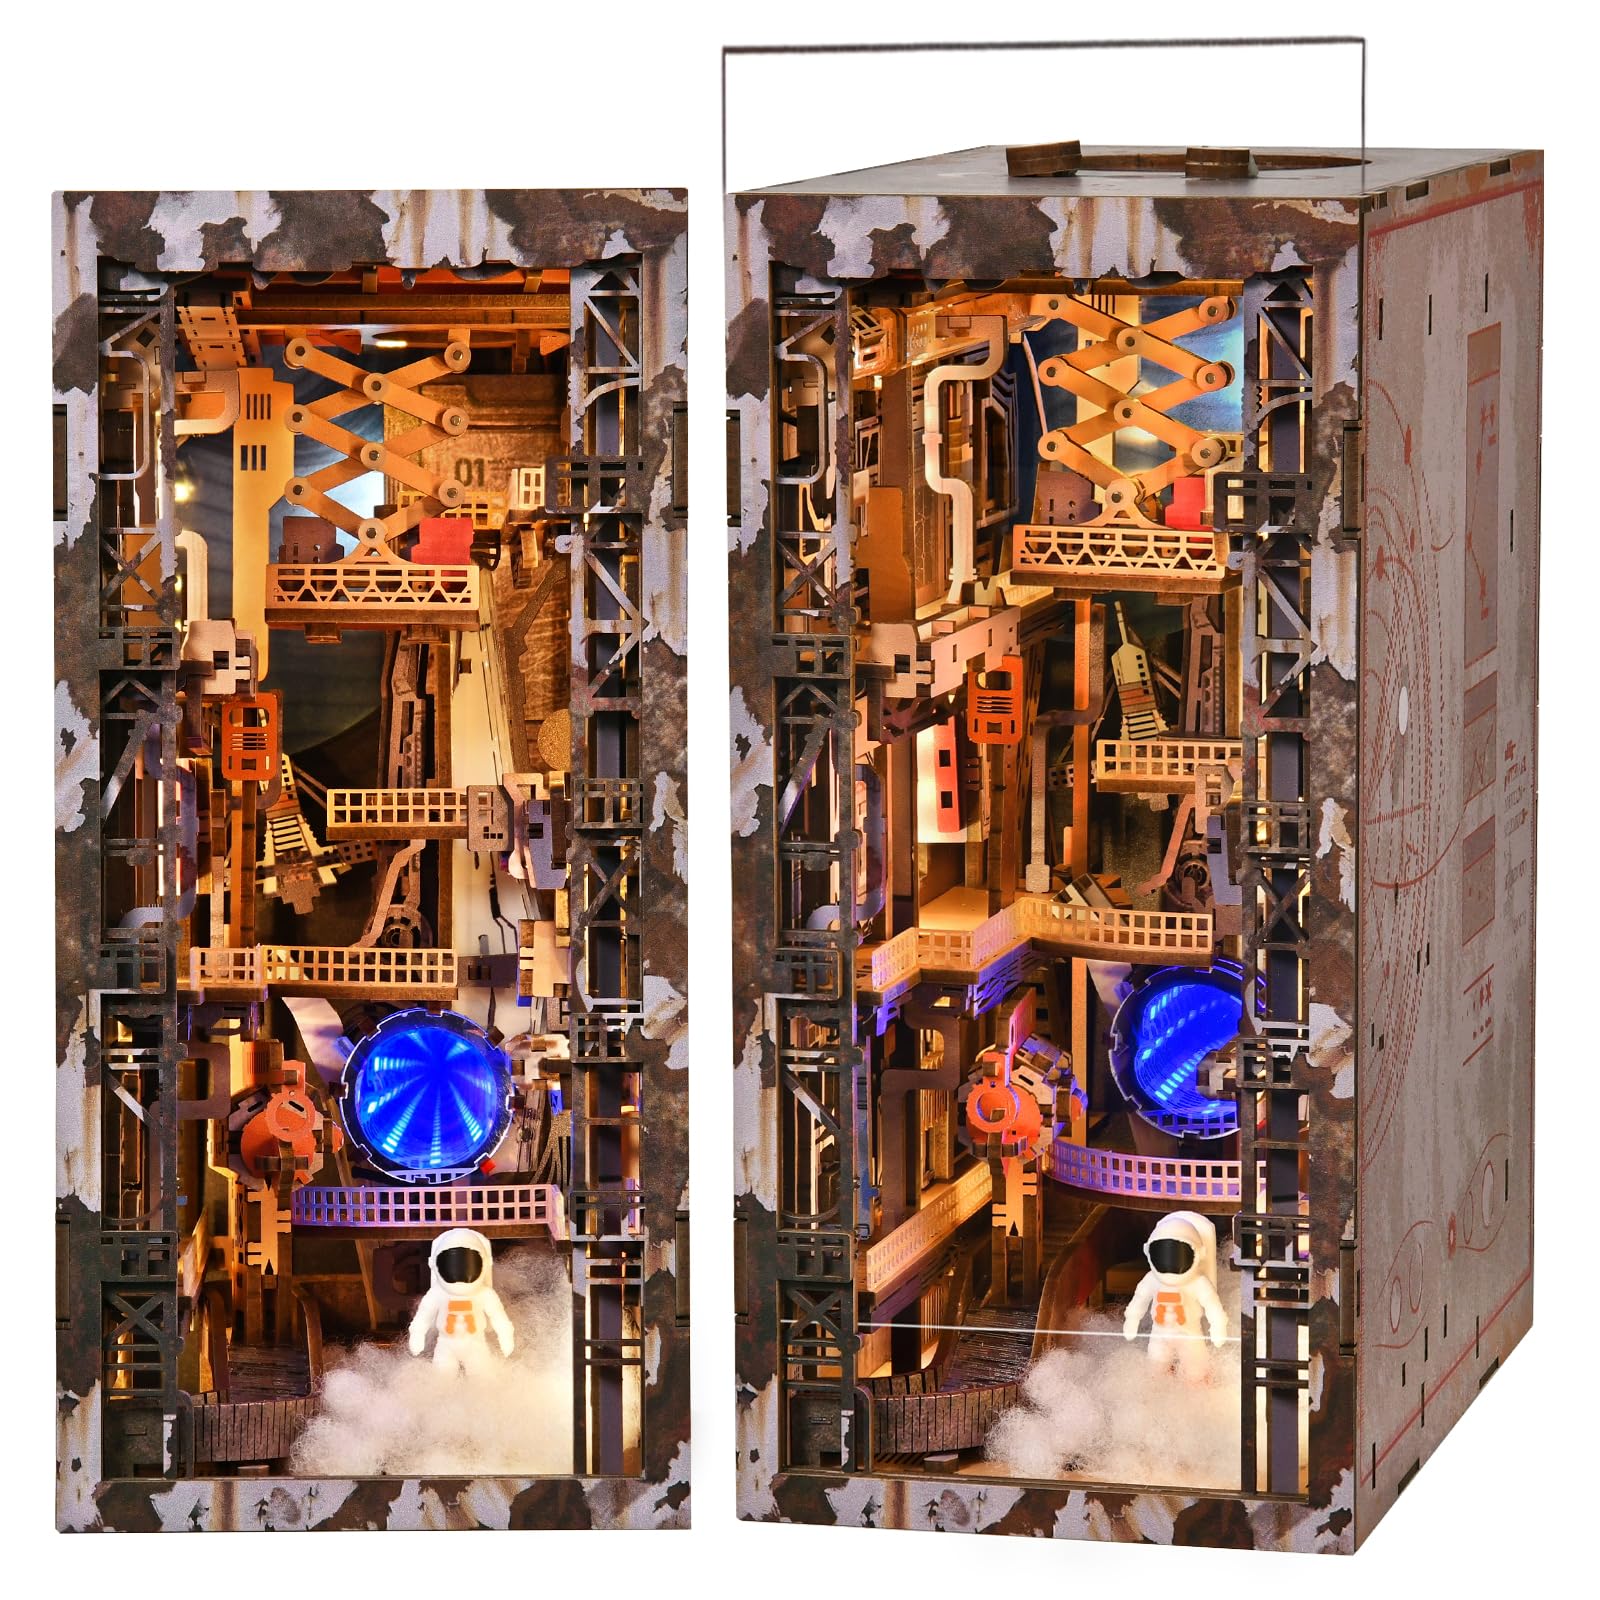
Image 1.1: Fully assembled MiniCity Aerospace Foundry Book Nook Kit.
2. Safety Information
Please read and understand all safety warnings before beginning assembly. Failure to follow these instructions may result in injury or damage to the product.
- Small Parts Warning: This kit contains small parts that may pose a choking hazard. Keep out of reach of children under 3 years of age.
- Sharp Tools: Assembly may require the use of small, sharp tools (e.g., tweezers, cutters). Handle with care to prevent injury. Adult supervision is recommended for younger users.
- Adhesive Use: The kit includes adhesive. Use in a well-ventilated area. Avoid contact with skin and eyes. In case of contact, rinse thoroughly with water and seek medical attention if irritation persists.
- Electrical Components: The LED lighting system contains small electrical components. Ensure proper battery installation and avoid short-circuiting. Do not expose to water.
- Material Handling: Wooden pieces may have sharp edges or splinters. Handle carefully.
3. Package Contents
Before starting assembly, verify that all components are present and undamaged. Refer to the parts list provided in your kit's detailed guide.
- Pre-cut wooden sheets for 3D miniature book nook components
- LED lighting kit with wiring
- Dust cover (acrylic panels)
- Adhesive (glue)
- Assembly tools (e.g., tweezers, sandpaper)
- Detailed instruction manual (physical guide)
- ABS astronaut accessories
- Metal-textured stickers

Image 3.1: Overview of kit components, including wooden sheets, tools, glue, and accessories.
4. Setup & Assembly
The Aerospace Foundry kit features a modular assembly design with parts packaged in separate bags. Follow the clear, step-by-step instructions provided in the physical guide for optimal results. Take your time during each step to ensure proper fit and alignment.
4.1 Preparation
- Clear a well-lit, spacious workspace.
- Organize all wooden sheets and identify parts according to the manual.
- Have the provided tools (tweezers, glue) readily available. You may also find a craft knife or small file useful for cleaning edges.
4.2 Assembly Steps
- Part Identification: Carefully detach wooden pieces from their sheets. Use the provided diagrams to identify each part.
- Edge Preparation: Some pieces may have small burrs or rough edges. Use sandpaper or a file to smooth these for a better fit.
- Dry Fit: Before applying glue, perform a dry fit of components to ensure they connect correctly.
- Adhesive Application: Apply a small, even amount of glue to the connecting tabs or surfaces. Hold pieces firmly together until the glue sets.
- Layered Construction: The kit is built in layers. Follow the numerical sequence in the instruction manual.
- LED Light Embedding: Integrate the LED wiring and components as indicated in the manual. Ensure wires are neatly tucked away and connections are secure.
- Detailing: Apply metal-textured stickers and place ABS astronaut accessories as shown in the guide to enhance realism.

Image 4.1: Example of assembling a small detail, demonstrating the 'Tight & Easy Connection' principle.
Video 4.1: An official video demonstrating key assembly steps and the overall construction process for the Aerospace Foundry Book Nook Kit.
5. Operation
5.1 LED Lighting
The Aerospace Foundry Book Nook Kit features integrated LED lighting to illuminate your miniature scene.
- Battery Installation: Locate the hidden battery case, typically on the back or bottom of the unit. Install the required batteries (not included, refer to the physical manual for battery type).
- Power On/Off: The kit includes a touch switch for easy operation. Gently touch the designated area (often marked with a power symbol) to turn the lights on or off.
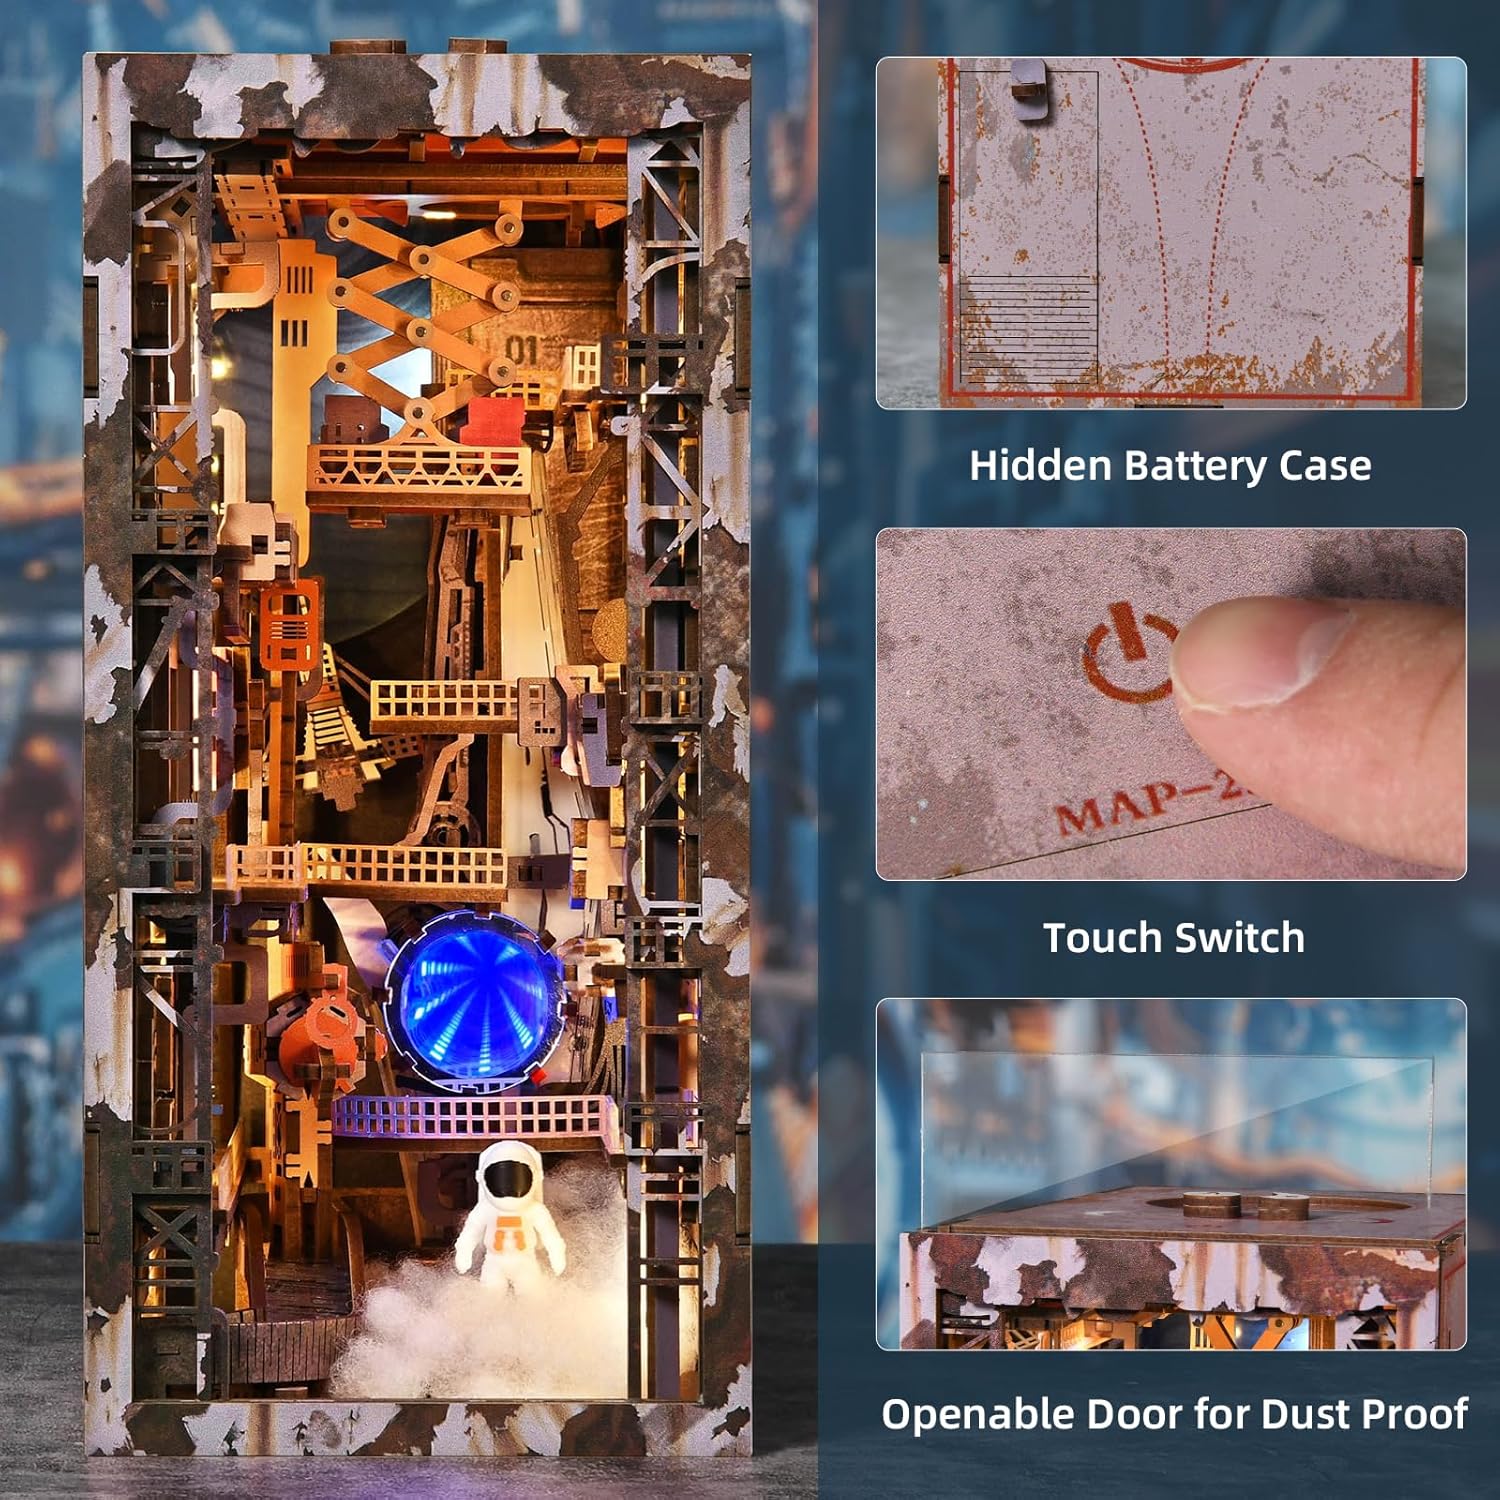
Image 5.1: Location of the hidden battery case and the touch switch for the LED lights.
5.2 Dust Cover
The included dust cover helps protect your assembled book nook from dust and environmental elements.
- Installation: Assemble the acrylic dust cover panels according to the instructions in your physical manual.
- Usage: The dust cover often features an openable door or removable panels for easy access to the interior of the book nook.
6. Maintenance
Proper care will ensure the longevity and appearance of your MiniCity Aerospace Foundry Book Nook.
- Cleaning: Gently wipe the wooden surfaces with a dry, soft cloth to remove dust. For the acrylic dust cover, use a soft, damp cloth and mild soap if necessary, then dry thoroughly. Avoid abrasive cleaners.
- Storage: Store the book nook in a stable environment, away from direct sunlight, extreme temperatures, and high humidity, which can cause warping or fading of the wooden components.
- Battery Replacement: If the LED lights dim or stop working, replace the batteries in the hidden battery case. Ensure correct polarity.
7. Troubleshooting
If you encounter issues during or after assembly, refer to the following common solutions:
| Problem | Possible Cause | Solution |
|---|---|---|
| Pieces do not fit snugly | Excess material on edges; incorrect orientation; insufficient sanding | Gently sand edges of the pieces. Double-check the instruction manual for correct orientation. Apply glue to secure loose connections. |
| LED lights do not turn on | Incorrect battery installation; dead batteries; loose wiring connection | Verify batteries are installed with correct polarity. Replace with fresh batteries. Check all wiring connections for tightness. Ensure the touch switch is functioning. |
| Missing or damaged parts | Manufacturing defect; shipping damage | Contact MiniCity customer support with your purchase details and a description of the missing/damaged parts. |
| Difficulty understanding instructions | Complex step; unclear diagram | Review the diagrams carefully. Look for online assembly videos or contact customer support for clarification. Take breaks if frustrated. |
8. Specifications
- Brand: MiniCity
- Model Number: MD03
- Product Name: Aerospace Foundry Book Nook Kit
- Assembled Dimensions: Approximately 4.3 x 7 x 9 inches (11 x 18 x 23 cm)
- Material: Wood
- Number of Pieces: 341
- Item Weight: 2 pounds
- Recommended Age: 14 years and up (Manufacturer Minimum Age: 168 months)
- Included Components: 3D wooden miniature book nook, LED lighting, dust cover, glue, tools

Image 8.1: Visual representation of product dimensions and key parameters.
9. Warranty and Support
MiniCity is committed to providing high-quality products. While specific warranty details are not provided in this manual, please retain your proof of purchase.
For any questions, missing parts, or technical assistance, please contact MiniCity customer support through the retailer where you purchased the product or visit the official MiniCity website for contact information.
Online Resources:
- Visit the MiniCity Store on Amazon for product information and updates.