Introduction
This manual provides essential information for the installation, operation, and maintenance of your new Generic Carburetor. It is designed to assist users in ensuring proper function and longevity of the product. Please read these instructions carefully before attempting any installation or maintenance procedures.
Product Overview & Package Contents
This carburetor is a replacement component designed for various Briggs & Stratton 20HP-25HP engine models. It is crucial to verify compatibility with your specific engine model before installation.
Package Contents:
- 1x Carburetor with backfire solenoid
- 7x Gaskets
- 2x Spark Plugs
- 1x Fuel Filter
Compatibility:
This carburetor is compatible with many Briggs & Stratton engine models, including but not limited to:
- 405777, 406777, 407677, 407777
- 441777, 442577, 445677, 445777, 445877, 445977
- 446677, 446777, 446877, 446977, 44677A
- 40F777, 40G777, 40H777
Please cross-reference your engine's model number to ensure proper fitment.
Product Images
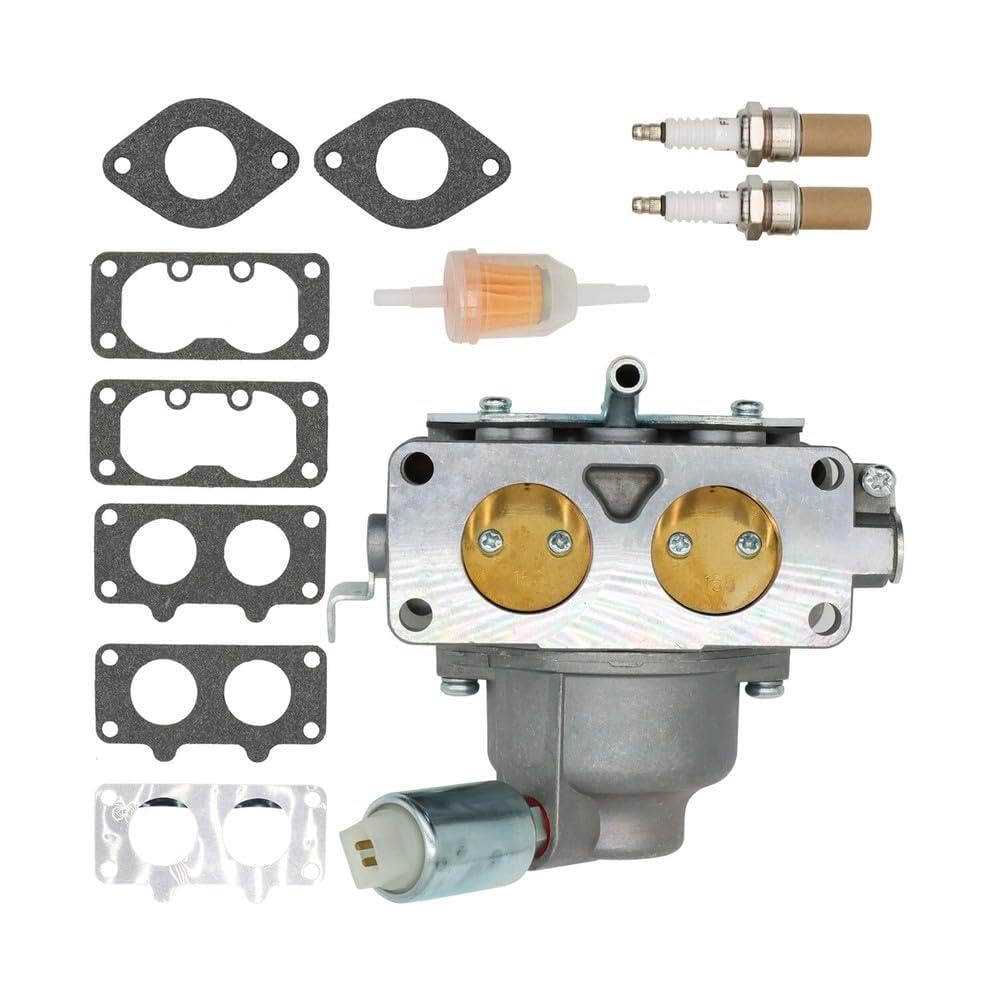
Image 1: Overview of the Generic Carburetor kit, showing the main carburetor unit, various gaskets, two spark plugs, and a fuel filter.

Image 2: A side view of the carburetor assembly, highlighting the main body, fuel inlet, and throttle linkage, alongside the included gaskets, spark plugs, and fuel filter.

Image 3: A bottom-up view of the carburetor, clearly showing the backfire solenoid and fuel bowl area, presented with the full kit components.

Image 4: A top view of the carburetor, illustrating the air intake and throttle plates, accompanied by the complete set of gaskets, spark plugs, and fuel filter.
Setup & Installation
Warning: Carburetor installation can be complex and may require specialized tools and knowledge. If you are not confident in your mechanical abilities, it is highly recommended to seek assistance from a qualified service technician.
Before beginning, ensure the engine is cool and disconnected from its power source (e.g., battery terminal removed for electric start, spark plug wire disconnected for manual start) to prevent accidental starting.
- Preparation: Gather all necessary tools. Ensure you have a clean workspace.
- Fuel System Drainage: Drain the fuel tank and carburetor bowl to prevent fuel spills.
- Air Filter Removal: Remove the air filter assembly to access the carburetor.
- Disconnect Linkages: Carefully disconnect the throttle and choke linkages from the old carburetor. Note their positions for reassembly.
- Fuel Line Disconnection: Disconnect the fuel line from the carburetor. Be prepared for residual fuel.
- Carburetor Removal: Unbolt the old carburetor from the engine manifold. Remove any old gaskets.
- Gasket Installation: Install new gaskets (provided) in the correct order and orientation between the engine, carburetor, and air filter base.
- New Carburetor Installation: Mount the new carburetor, ensuring it is seated correctly with the new gaskets. Secure bolts to manufacturer's specifications (do not overtighten).
- Reconnect Components: Reconnect the fuel line, throttle, and choke linkages. Ensure all connections are secure and move freely.
- New Spark Plugs & Fuel Filter: Replace the old spark plugs with the new ones provided. Install the new fuel filter in the fuel line, noting the direction of flow.
- Refuel & Test: Refill the fuel tank. Reconnect the power source. Start the engine and check for leaks or abnormal operation. Adjust idle speed and mixture if necessary, following your engine's service manual.
Operation
Once installed, the carburetor is designed to automatically mix air and fuel for optimal engine performance. Proper operation relies on a clean fuel system and correctly adjusted engine settings.
- Ensure the fuel tank contains fresh, clean fuel appropriate for your engine.
- Verify that the choke and throttle linkages operate smoothly and return to their correct positions.
- For initial startup or after extended storage, it may be necessary to prime the fuel system if your engine has a primer bulb.
- Monitor engine performance for smooth idling, acceleration, and consistent power output.
Maintenance
Regular maintenance helps ensure the longevity and efficient operation of your carburetor and engine.
- Fuel Filter Replacement: Replace the fuel filter annually or more frequently if operating in dusty conditions or with questionable fuel quality. A clogged fuel filter can restrict fuel flow to the carburetor.
- Spark Plug Inspection/Replacement: Inspect spark plugs regularly for wear, fouling, or incorrect gap. Replace them as needed, typically annually or every 100 hours of operation, using the provided new spark plugs.
- Fuel System Cleanliness: Use a fuel stabilizer if the engine will be stored for more than 30 days. Stale fuel can cause deposits that clog carburetor passages.
- Air Filter Maintenance: Regularly clean or replace the air filter to ensure the carburetor receives clean air. A dirty air filter can lead to a rich fuel mixture and poor performance.
- Carburetor Cleaning: If performance issues arise due to fuel contamination, the carburetor may need to be disassembled and cleaned. This is a more advanced procedure and may require professional service.
Troubleshooting
This section addresses common issues that may arise with carburetor operation.
| Problem | Possible Cause | Solution |
|---|---|---|
| Engine will not start | No fuel, clogged fuel filter, fouled spark plug, incorrect choke setting. | Check fuel level, replace fuel filter, replace spark plugs, ensure choke is set correctly for starting. |
| Engine runs rough/stalls | Dirty carburetor, old fuel, air leak, incorrect idle adjustment. | Clean carburetor, use fresh fuel, check for loose connections/gaskets, adjust idle speed. |
| Loss of power | Clogged fuel filter, dirty air filter, carburetor issues. | Replace fuel filter, clean/replace air filter, inspect carburetor for blockages. |
| Fuel leaks | Loose connections, damaged gaskets, stuck float. | Tighten connections, replace gaskets, inspect carburetor float and needle valve. |
Specifications
| Feature | Detail |
|---|---|
| Brand Name | Generic |
| Model Number | DUYENST4440 |
| Manufacturer | DUYENST |
| Unit Count | 1.0 Count |
| ASIN | B0GG8TQNGK |
Warranty Information
This product is subject to a 30-day return policy from the date of purchase. Please refer to the retailer's return policy for specific terms and conditions.
No specific manufacturer warranty information is provided for this product.
Customer Support
For further assistance, technical support, or inquiries regarding this product, please contact the seller or retailer from whom you purchased the item. They can provide guidance on troubleshooting or direct you to appropriate resources.