
1. Introduction
This manual provides essential instructions for the installation, operation, and maintenance of your new replacement carburetor. This carburetor is designed for compatibility with Homelite UT33650A 26CC and HHCPS.0264AT string trimmer models. Please read this manual thoroughly before attempting installation or use to ensure proper function and safety.
2. Product Overview
The carburetor is a crucial component responsible for mixing air and fuel in the correct ratio for combustion in your string trimmer's engine. This replacement unit is engineered to meet original equipment specifications for a direct fit and reliable performance.
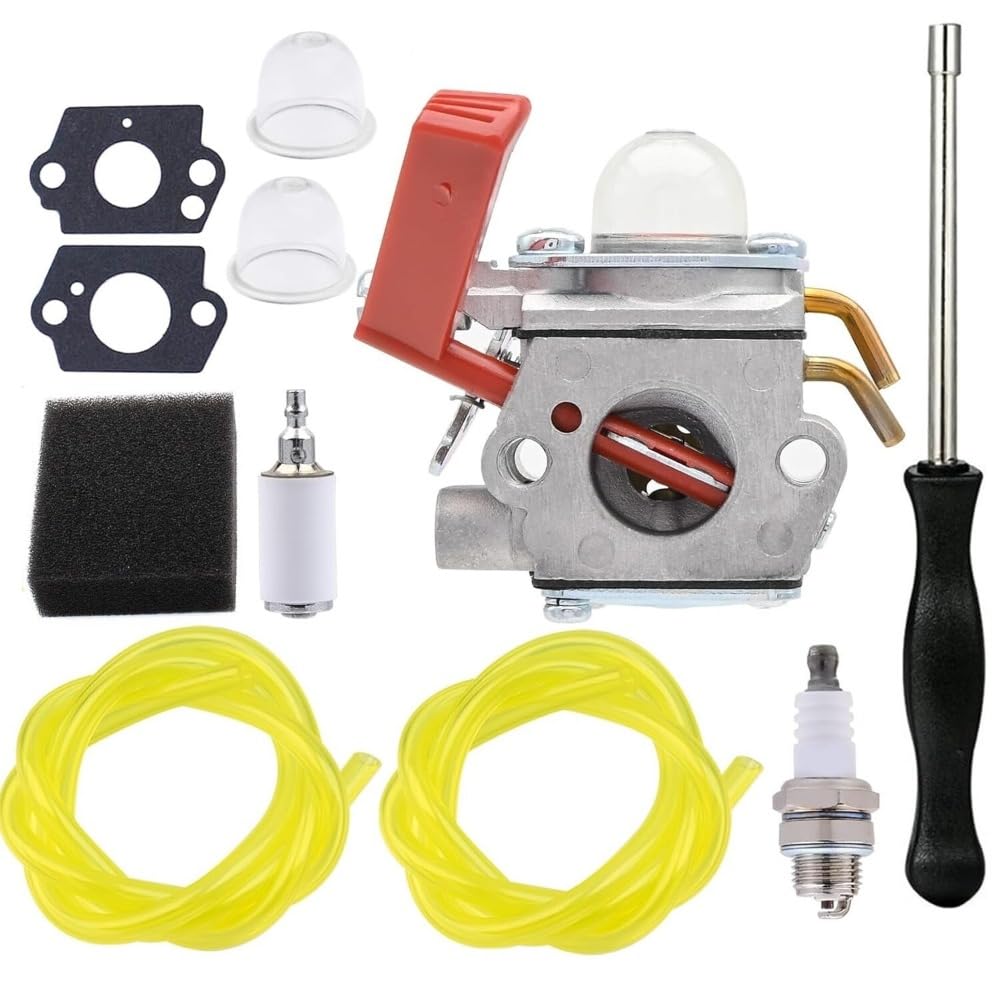
Figure 2.1: Front view of the carburetor, showing the primer bulb and red choke lever. This image highlights the main external features of the unit.
Key features of this carburetor include:
- Direct Replacement: Designed to match factory specifications for Homelite UT33650A 26CC and HHCPS.0264AT string trimmers.
- Precision Engineering: Manufactured to strict equipment specifications for optimal performance.
- Durable Construction: Made with quality materials for lasting reliability.
- Easy Installation: Simple design facilitates straightforward replacement for average users.
3. Installation (Setup)
Before beginning installation, ensure the string trimmer is turned off, cooled down, and the spark plug wire is disconnected to prevent accidental starting. Always wear appropriate safety gear, including gloves and eye protection.
3.1. Tools Required (General)
- Screwdrivers (Phillips and Flathead)
- Socket wrench set
- Pliers
- Fuel line clamps (optional)
- Clean rags
3.2. Removing the Old Carburetor
- Locate the carburetor on your string trimmer. It is typically situated between the air filter and the engine.
- Carefully disconnect the fuel lines from the old carburetor. Be prepared for some fuel spillage and have rags ready. Note the routing of the fuel lines for reinstallation.
- Disconnect the throttle linkage and choke linkage from the carburetor. Take a photo or make a diagram if necessary to remember their positions.
- Unbolt the carburetor from the engine manifold. There are usually two nuts or bolts holding it in place.
- Remove the old carburetor and any gaskets. Inspect the manifold for debris or damage.
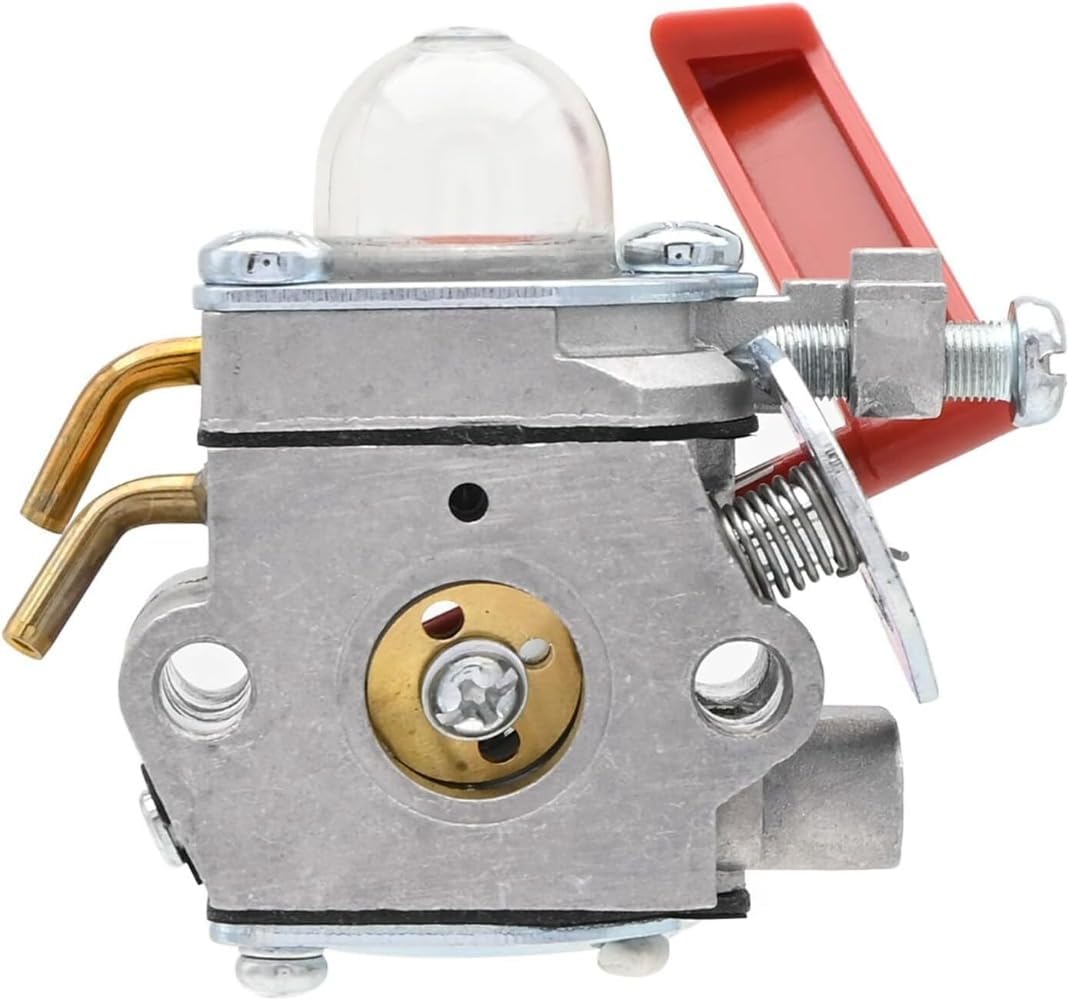
Figure 3.1: Side view of the carburetor, illustrating the fuel line connection points (brass tubes) and mounting holes. This view is helpful for identifying where fuel lines attach.
3.3. Installing the New Carburetor
- Ensure the mating surfaces on the engine manifold and the new carburetor are clean.
- Place new gaskets (if supplied or required) between the carburetor and the engine manifold.
- Mount the new carburetor onto the engine manifold and secure it with the bolts/nuts. Do not overtighten.
- Reconnect the throttle linkage and choke linkage to the new carburetor. Ensure they move freely and operate correctly.
- Reconnect the fuel lines to the appropriate ports on the carburetor. Refer to your notes or photos from removal. The primer bulb typically draws fuel from the tank and returns excess.

Figure 3.2: Another perspective of the carburetor, highlighting the choke plate mechanism and additional mounting points. This angle provides a clearer view of the air intake side.
4. Operation (Post-Installation Checks)
After installation, perform the following checks before attempting to start the string trimmer:
- Fuel Lines: Verify all fuel lines are securely connected and free from kinks or leaks.
- Linkages: Confirm that the throttle and choke linkages operate smoothly and return to their default positions.
- Primer Bulb: Press the primer bulb several times until fuel is visible and flowing through the lines, indicating the carburetor is primed.
- Spark Plug: Reconnect the spark plug wire.
Start the string trimmer according to its manufacturer's instructions. The carburetor is typically pre-tuned for standard operation. If the engine runs rough or does not start, refer to the Troubleshooting section.

Figure 4.1: View into the carburetor's main bore, revealing internal components like the throttle plate. This image helps visualize the air and fuel mixing area.
5. Maintenance
Proper maintenance ensures the longevity and optimal performance of your carburetor and string trimmer.
- Fuel Quality: Always use fresh, clean fuel mixed with the correct oil ratio as specified by your string trimmer's manufacturer. Stale fuel or fuel with ethanol can cause carburetor issues.
- Fuel Filter: Regularly check and replace the fuel filter in the fuel tank to prevent debris from reaching the carburetor.
- Air Filter: Keep the air filter clean. A clogged air filter can cause the engine to run rich and affect carburetor performance.
- Storage: Before long-term storage, drain the fuel tank and run the engine until it stops to clear all fuel from the carburetor. Alternatively, use a fuel stabilizer.

Figure 5.1: Top-front view of the carburetor, showing the primer bulb and the general layout of the top plate. This perspective is useful for understanding the overall assembly.
6. Troubleshooting
If your string trimmer experiences issues after carburetor replacement, consider the following common problems and solutions:
| Problem | Possible Cause | Solution |
|---|---|---|
| Engine will not start |
|
|
| Engine runs rough or stalls |
|
|
| Fuel leaks |
|
|

Figure 6.1: Side view of the carburetor, showing the fuel inlet and outlet ports more clearly, along with the throttle linkage attachment point. This view is useful for identifying connections during troubleshooting.
7. Specifications
- Product Type: Replacement Carburetor
- Compatibility: Homelite UT33650A 26CC String Trimmer, HHCPS.0264AT String Trimmer
- Brand: Generic
- Model Number (Manufacturer Part Number): 1 (Generic)
- ASIN: B0GG8P15BJ