1. Introduction
This manual provides instructions for the ROCKBROS Portable Bike Tool Kit, designed for emergency repairs and maintenance on road bikes, mountain bikes, and other bicycles. The kit includes a ratchet wrench with magnetic bits, a CO2 inflator nozzle, tire levers, and vulcanized rubber strips for tire repair.

Figure 1: Compact and portable design of the ROCKBROS Bike Tool Kit.
2. Setup
2.1 Unpacking the Kit
Carefully open the flip-top case. All components are securely fitted to prevent rattling and loss during transport. Remove the desired tools as needed.
2.2 Attaching Ratchet Bits
- Select the appropriate magnetic bit (M2.5, M3, M4, M5, M6, Phillips, or Slotted) for your task.
- Insert the bit firmly into the magnetic holder of the ratchet wrench. The magnetic connection ensures a secure attachment.

Figure 2: Inserting a magnetic bit into the ratchet wrench.
3. Operating Instructions
3.1 Using the Ratchet Wrench
The alloy steel ratchet wrench features a reversible mechanism for tightening and loosening fasteners.
- Attach the required bit as described in Section 2.2.
- To tighten, ensure the paddle switch is set for clockwise rotation.
- To loosen, switch the paddle for counter-clockwise rotation.
- Apply steady pressure and rotate the wrench to perform adjustments or repairs.

Figure 3: Reversible ratchet wrench mechanism.
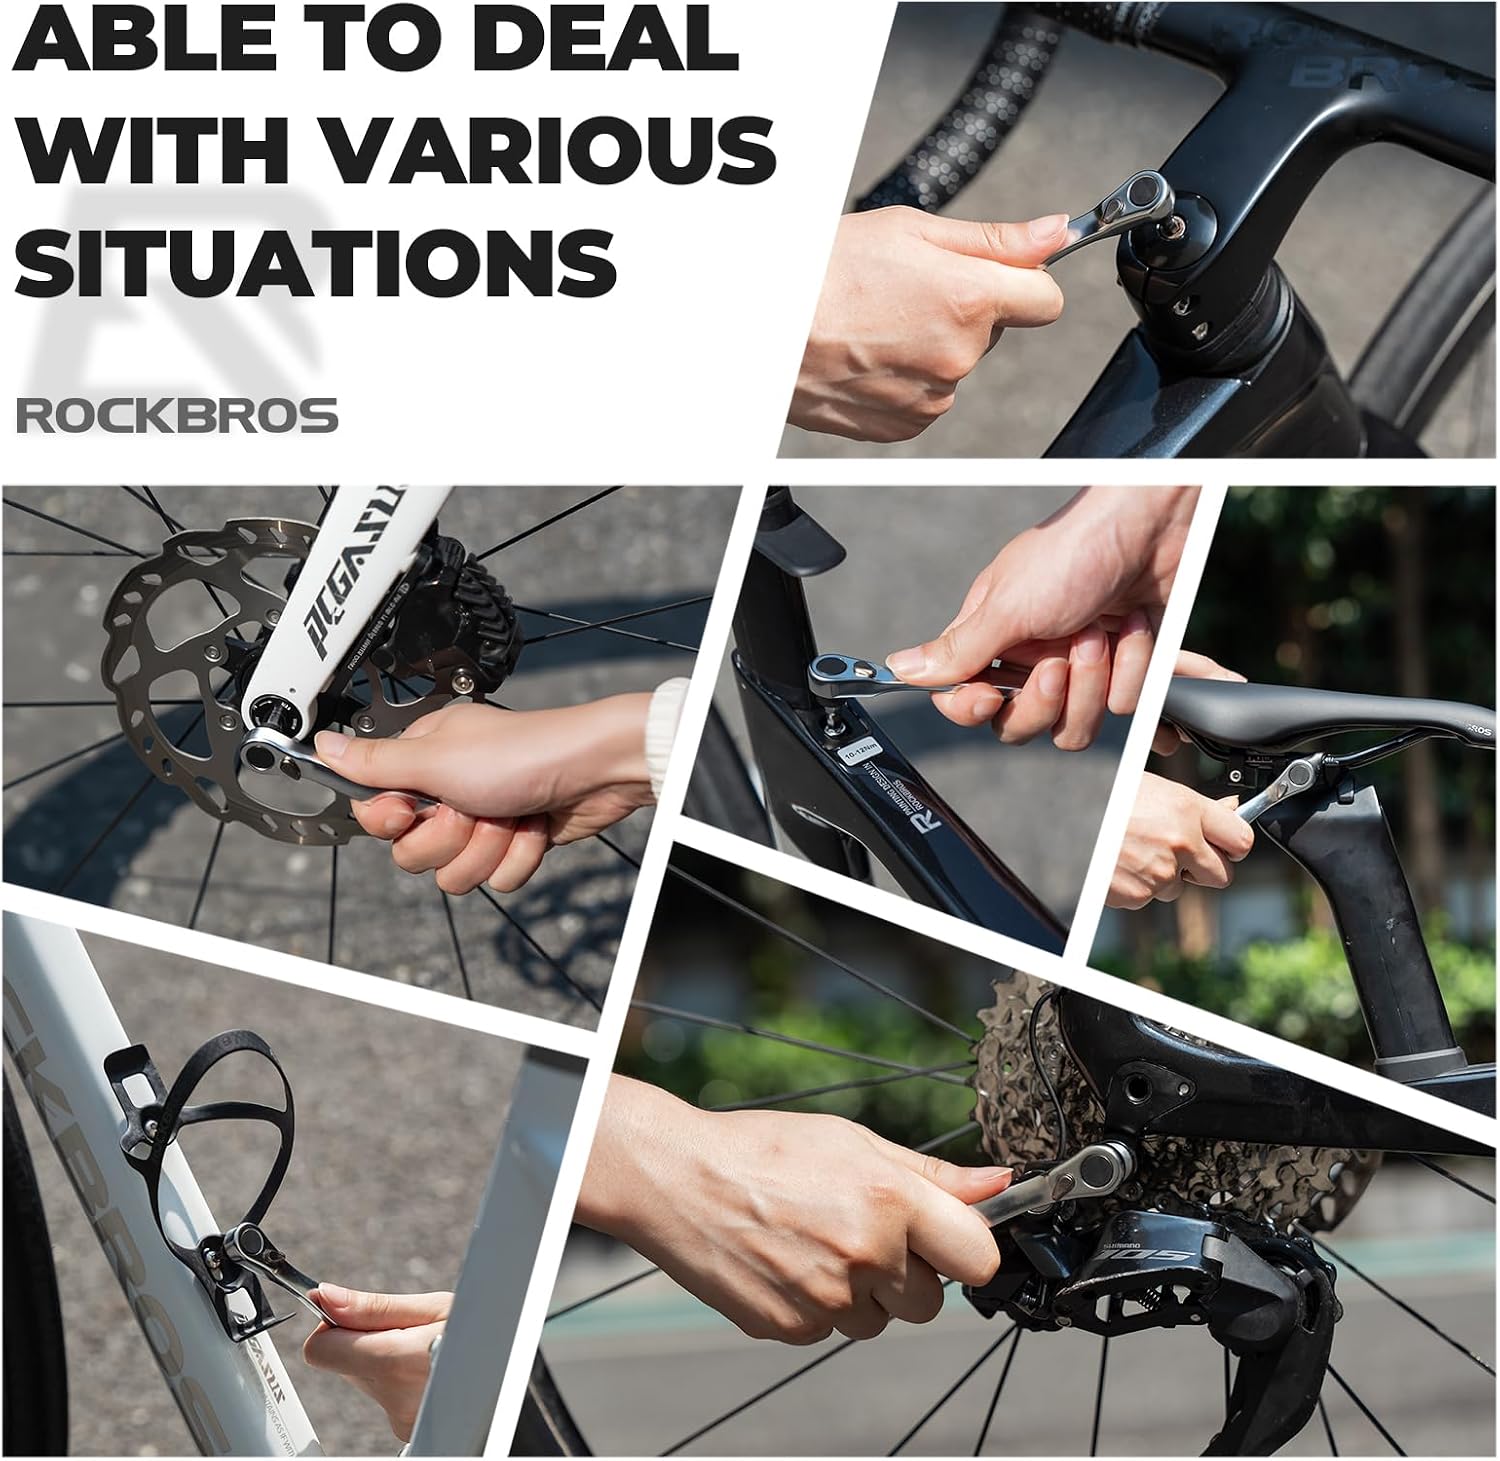
Figure 4: Examples of ratchet wrench applications on a bicycle.
3.2 Using the CO2 Inflator Nozzle
The aluminum alloy CO2 inflator nozzle provides rapid tire inflation for both Presta and Schrader valves. (Note: CO2 cartridges are not included and must be purchased separately.)
- Rotate the valve 90 degrees and screw in the CO2 cartridge until it is finger-tight.
- Tighten the valve further to puncture the cartridge with the internal pin.
- Securely attach the CO2 inflator nozzle to your tire's valve stem (Presta or Schrader).
- Rotate the cartridge approximately half a turn to release air and inflate the tire. Adjust rotation for desired inflation.

Figure 5: Instructions for using the CO2 inflator nozzle.
3.3 Tire Repair with Vulcanized Rubber Strips
This kit includes tools and vulcanized rubber strips for repairing punctures in tubeless tires.
- Locate the puncture. Use the probe tool to slide up/down and remove any debris around the hole.
- Thread a vulcanized rubber strip through the eye of the fork tool.
- Use the fork tool to push the rubber strip into the puncture, ensuring about one-third of the strip remains sticking out of the tire.
- Carefully pull out the fork tool, leaving approximately 5mm of the strip on the tire. Cut off any excess strip flush with the tire surface.

Figure 6: Guide to tire repair with vulcanized rubber strips.
3.4 Using Tire Levers
The two nylon tire levers are designed to assist in removing and installing bicycle tires without scratching rims.
- Insert the curved end of one tire lever under the tire bead.
- Lever the bead over the rim. Use the hook on the other end of the lever to secure it to a spoke.
- Repeat with the second lever a few inches away, or slide the first lever around the rim to fully dislodge the tire bead.

Figure 7: Using the highly flexible nylon bicycle tire lever.
4. Maintenance
To ensure the longevity and optimal performance of your ROCKBROS Bike Tool Kit, follow these maintenance guidelines:
- Cleaning: After each use, wipe down all tools with a clean, dry cloth to remove dirt, grease, or moisture. For stubborn grime, use a mild degreaser and dry thoroughly.
- Storage: Always store the tools back in their designated slots within the rugged flip-top case. Keep the kit in a dry environment to prevent rust and corrosion.
- Inspection: Periodically inspect the ratchet wrench and bits for any signs of wear or damage. Ensure the magnetic bit holder maintains a strong grip. Check tire levers for cracks or deformities.
- Lubrication: The ratchet mechanism may benefit from a small amount of light machine oil if it feels stiff, but avoid over-lubrication.
5. Troubleshooting
- Ratchet bits not holding securely: Ensure the bit is fully inserted into the magnetic holder. If the magnetic hold weakens over time, inspect for debris or damage to the magnet.
- CO2 inflator not sealing: Verify that the CO2 cartridge is fully punctured and screwed in tightly. Ensure the inflator nozzle is pressed firmly and squarely onto the tire valve stem. Check the rubber seals within the nozzle for damage or wear.
- Tire repair strip not sealing: Ensure the puncture area is clean and free of debris before inserting the strip. Push the strip firmly into the hole, ensuring it fills the void. For larger punctures, a second strip may be necessary.
- Tire levers slipping: Ensure the tire bead is not stuck to the rim. Apply steady, even pressure. If the tire is particularly tight, try working around the rim to loosen the bead before using the levers.
6. Specifications
| Component | Description |
|---|---|
| Ratchet Wrench | Alloy Steel, Reversible mechanism, Magnetic bit holder |
| Magnetic Bits | 7 pieces: M2.5, M3, M4, M5, M6, Phillips, Slotted |
| CO2 Inflator Nozzle | Aluminum Alloy, Dual valve adapter (Presta & Schrader compatible) |
| Tire Levers | 2 pieces, Enduring Nylon material |
| Tire Repair Strips | Vulcanized rubber strips |
| Case Material | Rugged, flip-top design |
| Weight | Approximately 0.27 lb (122 grams) |
| Dimensions (Kit) | Approximately 4.92 in x 1.57 in (12.5 cm x 4 cm) |

Figure 8: Kit components and dimensions.
7. Warranty and Support
For warranty information or technical support regarding your ROCKBROS Bike Tool Kit, please refer to the product packaging or contact ROCKBROS customer service through their official website or the retailer where the product was purchased. Please have your model number (B0GFZ5JQP2) available when contacting support.