Introduction
This manual provides instructions for the assembly, operation, and maintenance of your HAPPYGRILL Portable Crop Cage. Please read these instructions carefully before use to ensure proper setup and safe operation.
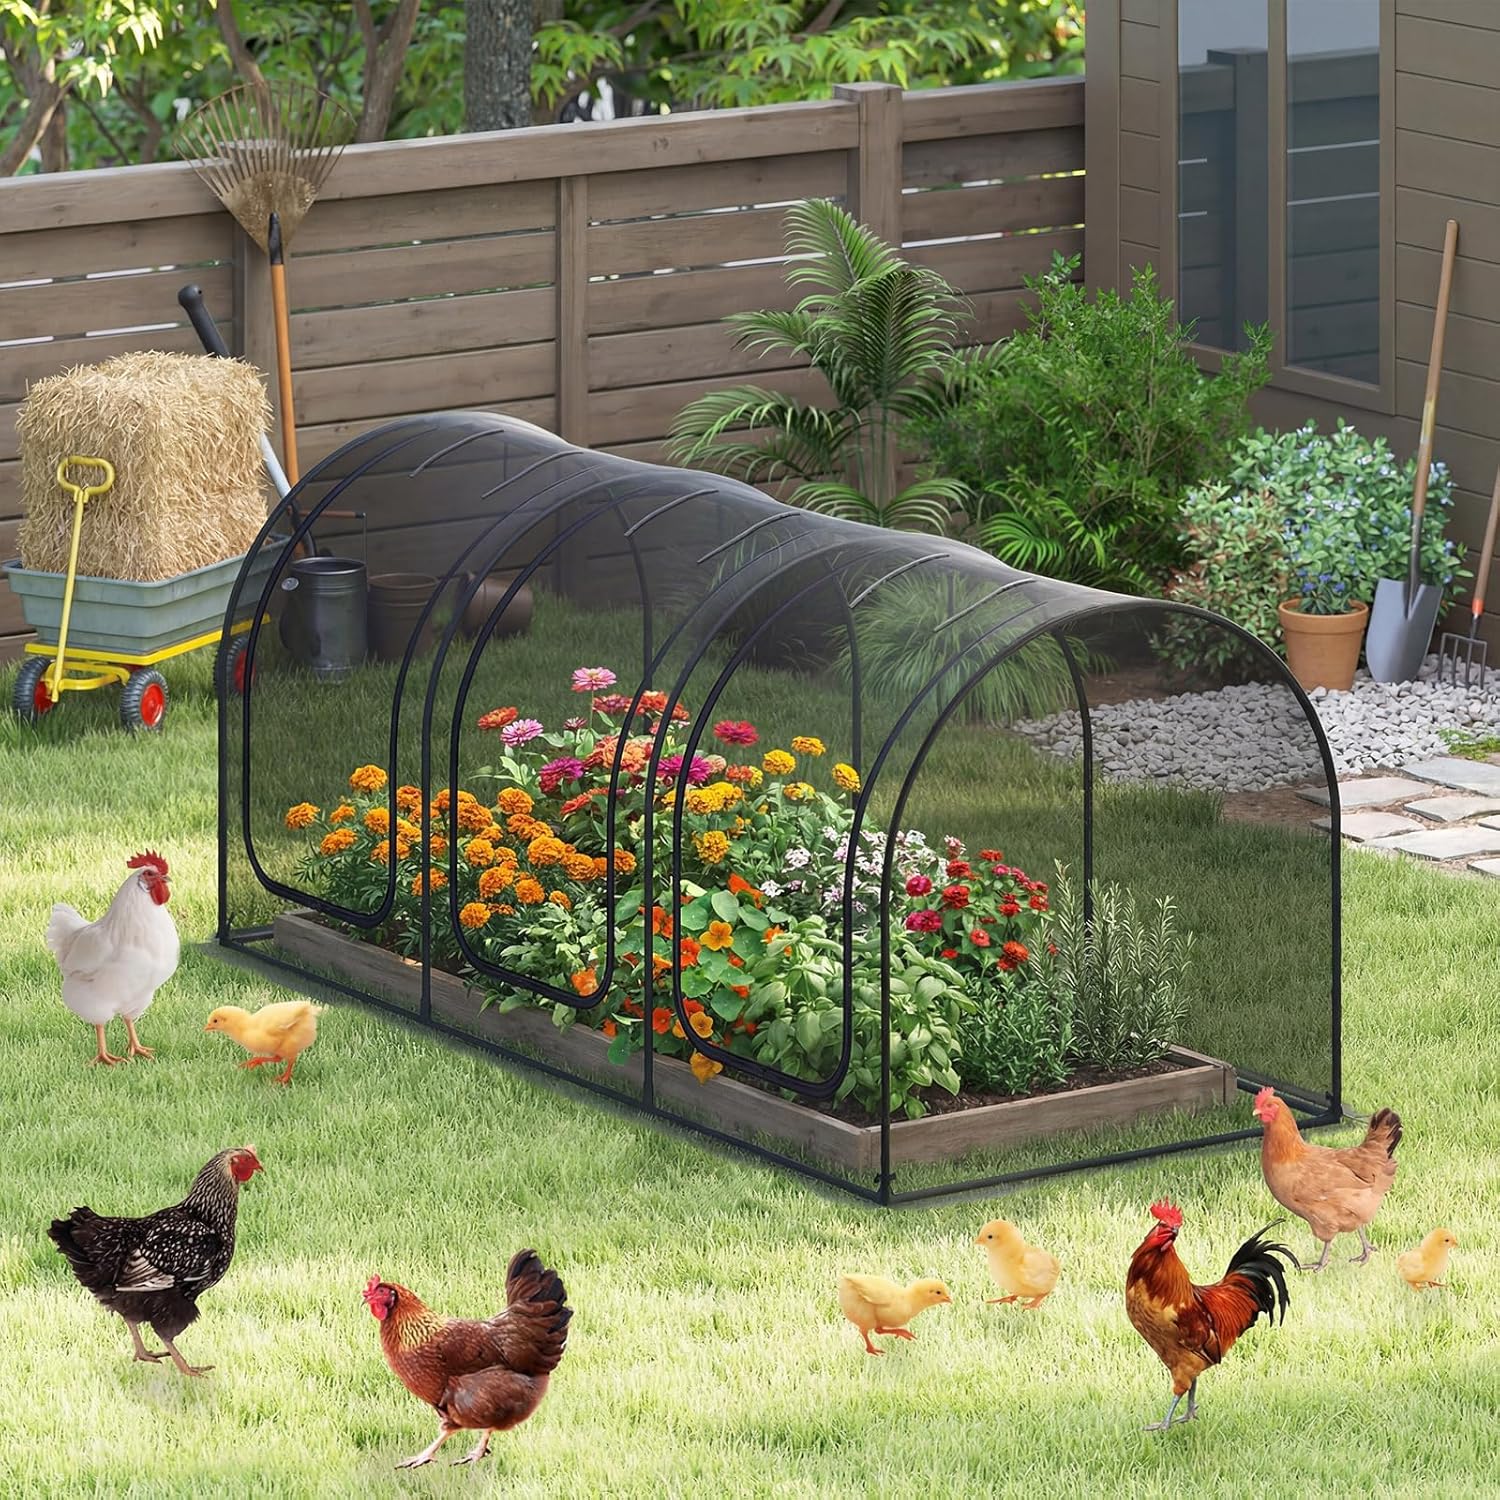
Image: The Happygrill Portable Crop Cage set up in a garden, protecting plants and flowers, with chickens nearby.

Image: Details highlighting the wear-resistant nylon netting for air ventilation and the sturdy powder-coated metal pipes for durability.
Safety Information
For your safety and to prevent damage to the product, please observe the following guidelines:
- Always assemble and disassemble with care to avoid injury from sharp edges.
- Secure the structure properly to prevent wind damage or tip-overs.
- Keep the product clean and dry to prevent mold or mildew growth.
- Avoid prolonged exposure to direct sunlight to minimize UV damage.
- Always use both hands when carrying the product to prevent accidental drops.
- Store the product in a cool, dry place when not in use.
Package Contents
Verify that all components are present before beginning assembly:
- 1 x Plant Protection Tent (Netting Cover)
- 1 x Carrying Bag
- 4 x Ground Stakes
- 1 x User’s Manual (this document)
- Metal Frame Pipes (various lengths, quantity not specified but implied by structure)
- Joint Connectors (quantity not specified)
- Fastener Straps (quantity not specified)
Setup and Assembly
The crop cage is designed for quick and tool-free assembly. Follow these steps:
- Unpack Components: Carefully remove all parts from the carrying bag and lay them out on a clean, flat surface.
- Assemble Metal Frame: Connect the metal pipes using the provided joint connectors. Ensure each connection is secure. The frame forms a tunnel-like structure.
- Attach Netting Cover: Drape the plant protection tent (netting cover) over the assembled metal frame. Align the edges of the netting with the frame.
- Secure Netting: Use the fastener straps to tightly secure the netting to the metal frame. Ensure the netting is taut to prevent sagging and provide optimal protection.
- Position and Anchor: Place the assembled crop cage in your desired garden location. Use the 4 U-shaped ground stakes to anchor the frame firmly into the soil, enhancing stability against wind.
- Utilize Extension Edges: For additional stability, especially in windy conditions, place stones or other weights along the extended edges of the netting at the base.

Image: Detailed view of the stable frame and wind-proof design, highlighting premium ground nails, extension edges for placing stones, sturdy joint connections, and tight fastener straps.
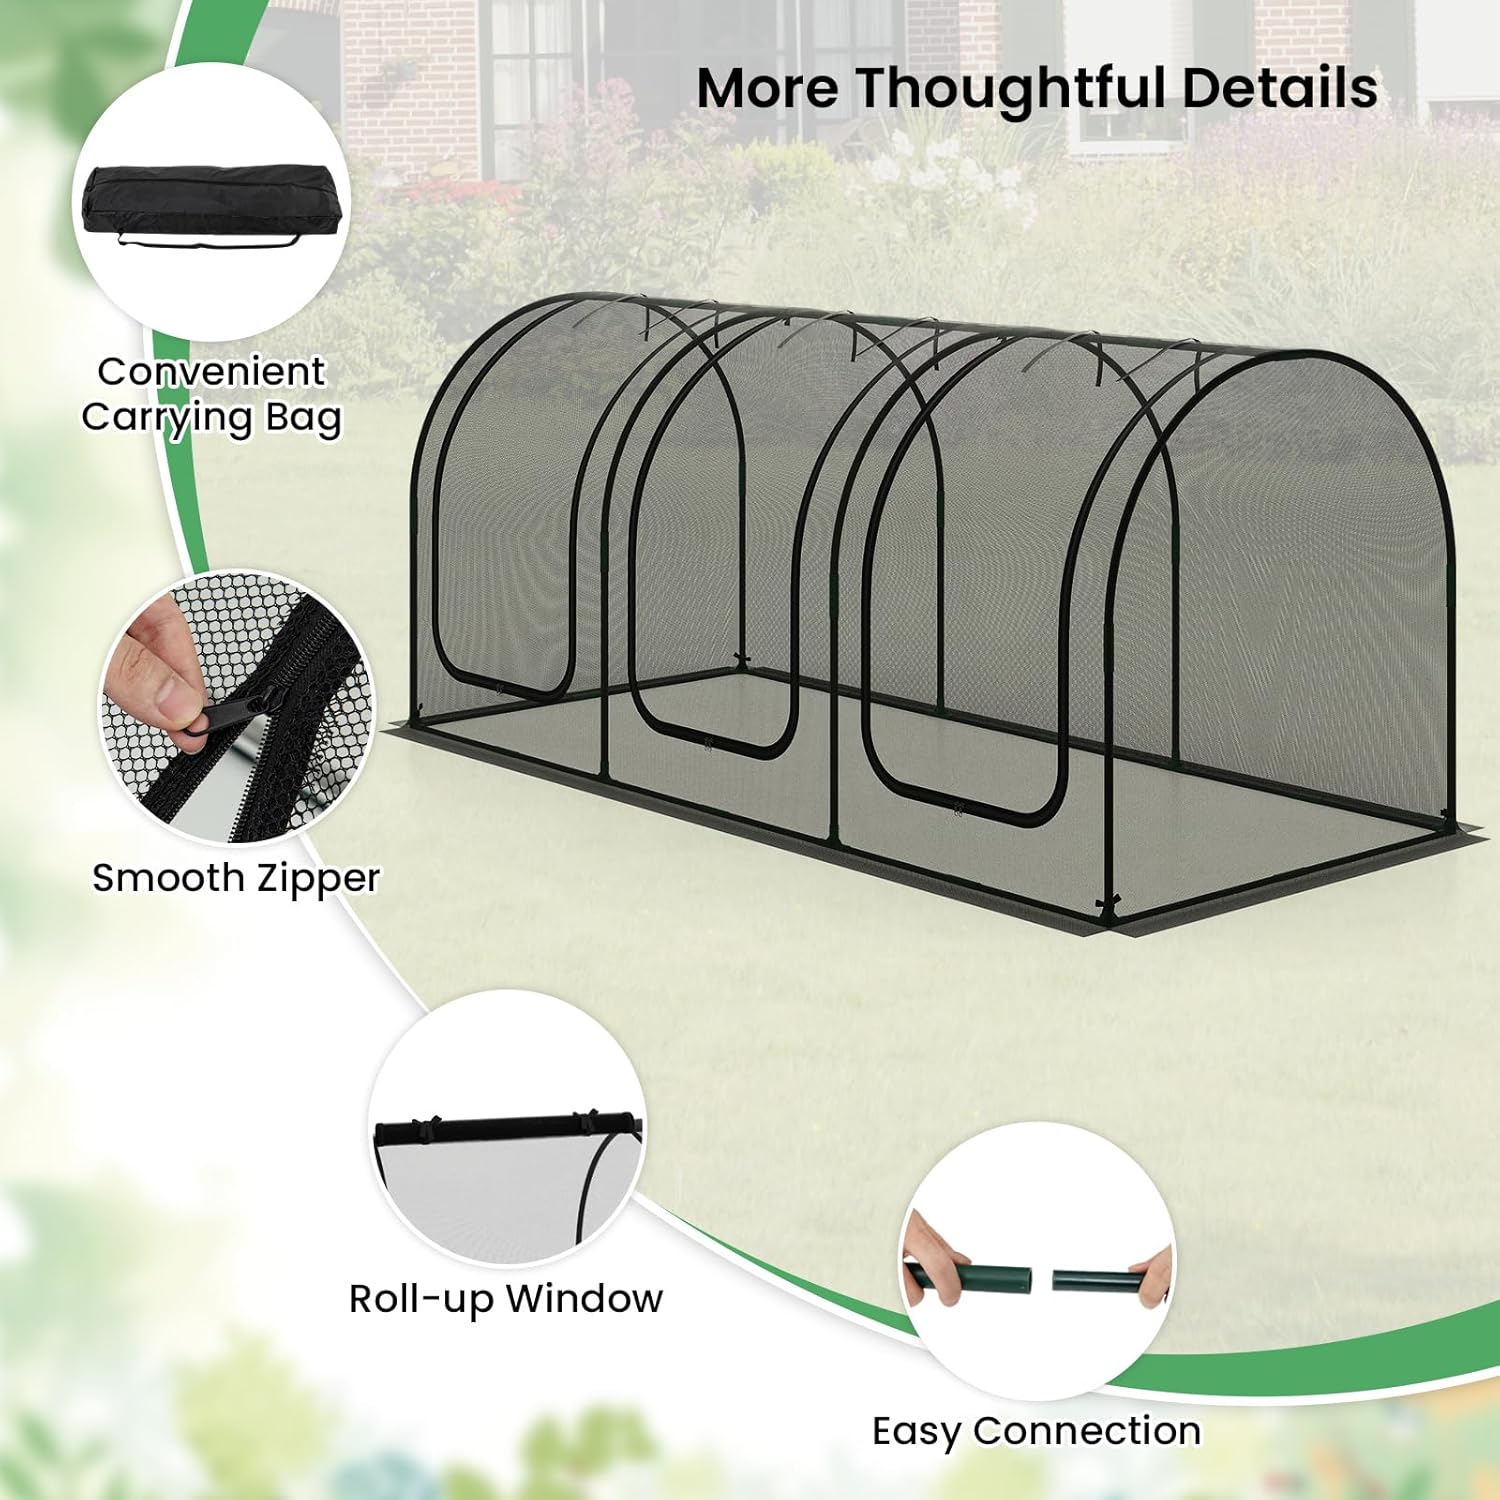
Image: Features such as the convenient carrying bag, smooth zipper operation, roll-up window, and easy connection points for the frame.
Operating Instructions
The crop cage is designed to protect your plants while allowing easy access and ventilation.
- Accessing Plants: The crop cage features 3 roll-up zippered doors. Unzip and roll up the doors as needed to access your plants for watering, harvesting, or inspection. Use the fixing ties to secure the rolled-up doors.
- Ventilation: The high-density nylon mesh provides excellent air circulation, preventing overheating and promoting healthy plant growth. The roll-up doors also contribute to ventilation when open.
- Protection: The wear-resistant netting effectively blocks pests, birds, and other small animals from reaching your plants, while allowing sunlight and water to pass through.
- Versatile Use: This crop cage can be used as farm netting, garden netting, or a garden bed netting cover, suitable for various outdoor spaces and plant types including vegetables, fruits, and flowers.
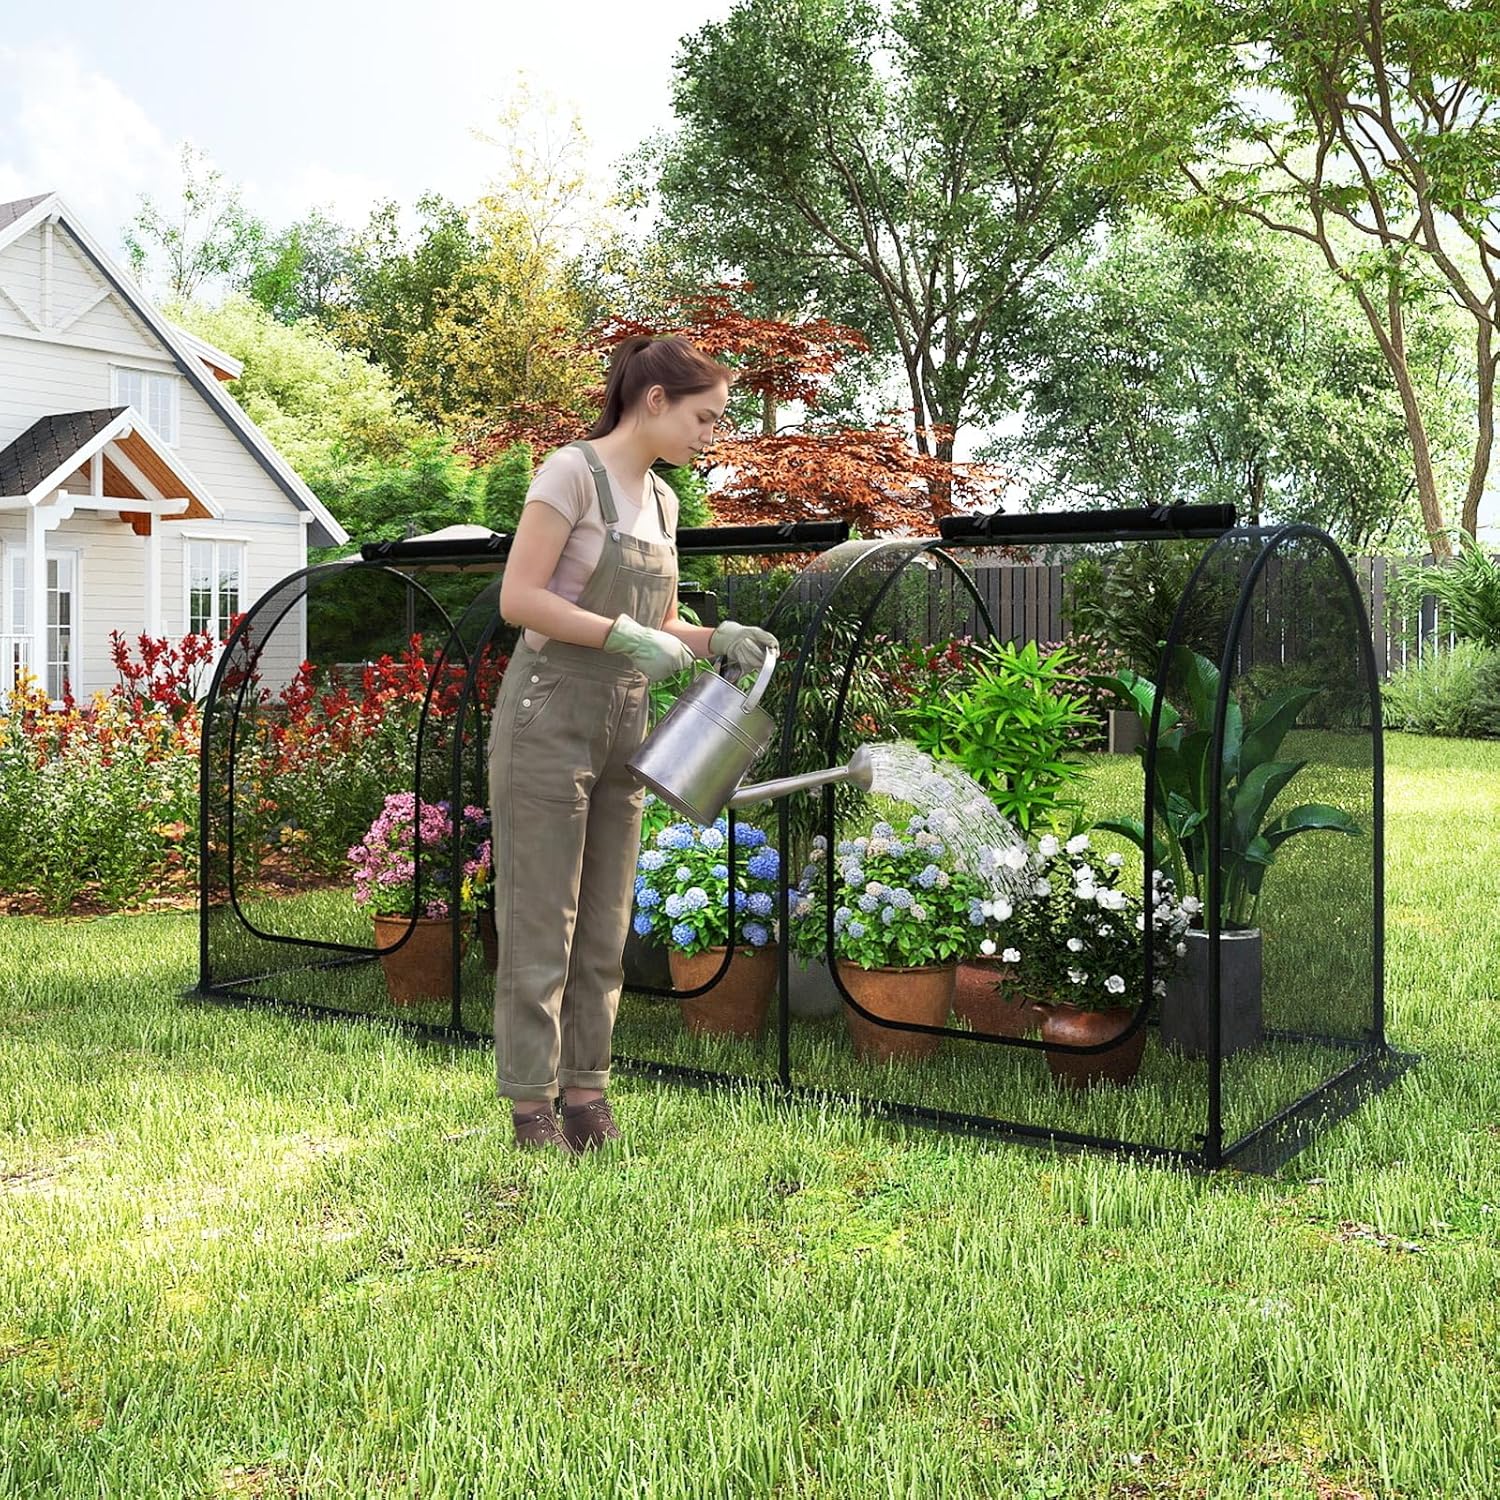
Image: A person watering plants inside the crop cage, demonstrating easy access through the roll-up doors.

Image: Visual demonstration of the crop cage's effectiveness in protecting plants from pests, showing a rabbit near unprotected plants versus healthy plants within the net.

Image: Various applications of the crop cage, including use as farm netting, garden netting, garden bed netting, and a general plant protection tent.
Maintenance
Proper maintenance will extend the lifespan of your crop cage:
- Cleaning: Regularly inspect the netting for debris. Clean the netting and frame with a soft cloth and mild soap solution if necessary. Rinse thoroughly and allow to air dry completely before storage.
- Drying: Ensure the netting is dry before folding and storing to prevent mold or mildew growth.
- UV Protection: While the materials are durable, prolonged exposure to intense direct sunlight can cause degradation over time. Consider storing the cage when not in active use during extreme weather or off-season.
- Storage: When not in use, disassemble the crop cage and store all components in the provided carrying bag in a cool, dry place, away from direct sunlight and extreme temperatures.
Troubleshooting
This section addresses common issues you might encounter:
- Cage is unstable: Ensure all metal pipe connections are fully engaged. Verify that the 4 ground stakes are firmly inserted into the soil. Add additional weight (e.g., stones) along the extended base edges for increased wind resistance.
- Netting is sagging: Check that the fastener straps are tightly secured around the frame. Adjust the netting to ensure even tension across the frame.
- Zippers are stiff: Apply a small amount of zipper lubricant or wax to the zipper teeth to improve smooth operation. Ensure the fabric is not caught in the zipper.
- Pests are entering: Inspect the netting for any tears or gaps. Ensure the zippered doors are fully closed when not in use. Check that the base of the cage is flush with the ground or adequately weighted to prevent entry from underneath.
Specifications
| Feature | Detail |
|---|---|
| Model Number | CA-HG4137 |
| Product Dimensions (L x W x H) | 108” x 48” x 47” (274 x 122 x 119 cm) |
| Material | Oxford Fabric, Metal (powder-coated), Nylon Mesh |
| Color | Black + Green |
| Net Weight | 9 lbs (4 kg) |
| Number of Doors | 3 (Roll-up zippered) |
| Ground Stakes Included | 4 |
| Carrying Bag Included | Yes (38.5” x 6” x 4.5” / 98 x 15 x 12 cm) |

Image: Product dimensions diagram, illustrating the overall size of the crop cage and its carrying bag.
Warranty Information
No specific warranty information is provided in the product details. Please refer to the retailer or manufacturer's website for any applicable warranty terms and conditions.
Customer Support
For further assistance, questions, or to report missing/damaged parts, please contact HAPPYGRILL customer service through the retailer where the product was purchased. You may also visit the official HAPPYGRILL store on Amazon for more information: HAPPYGRILL Store.