1. Introduction
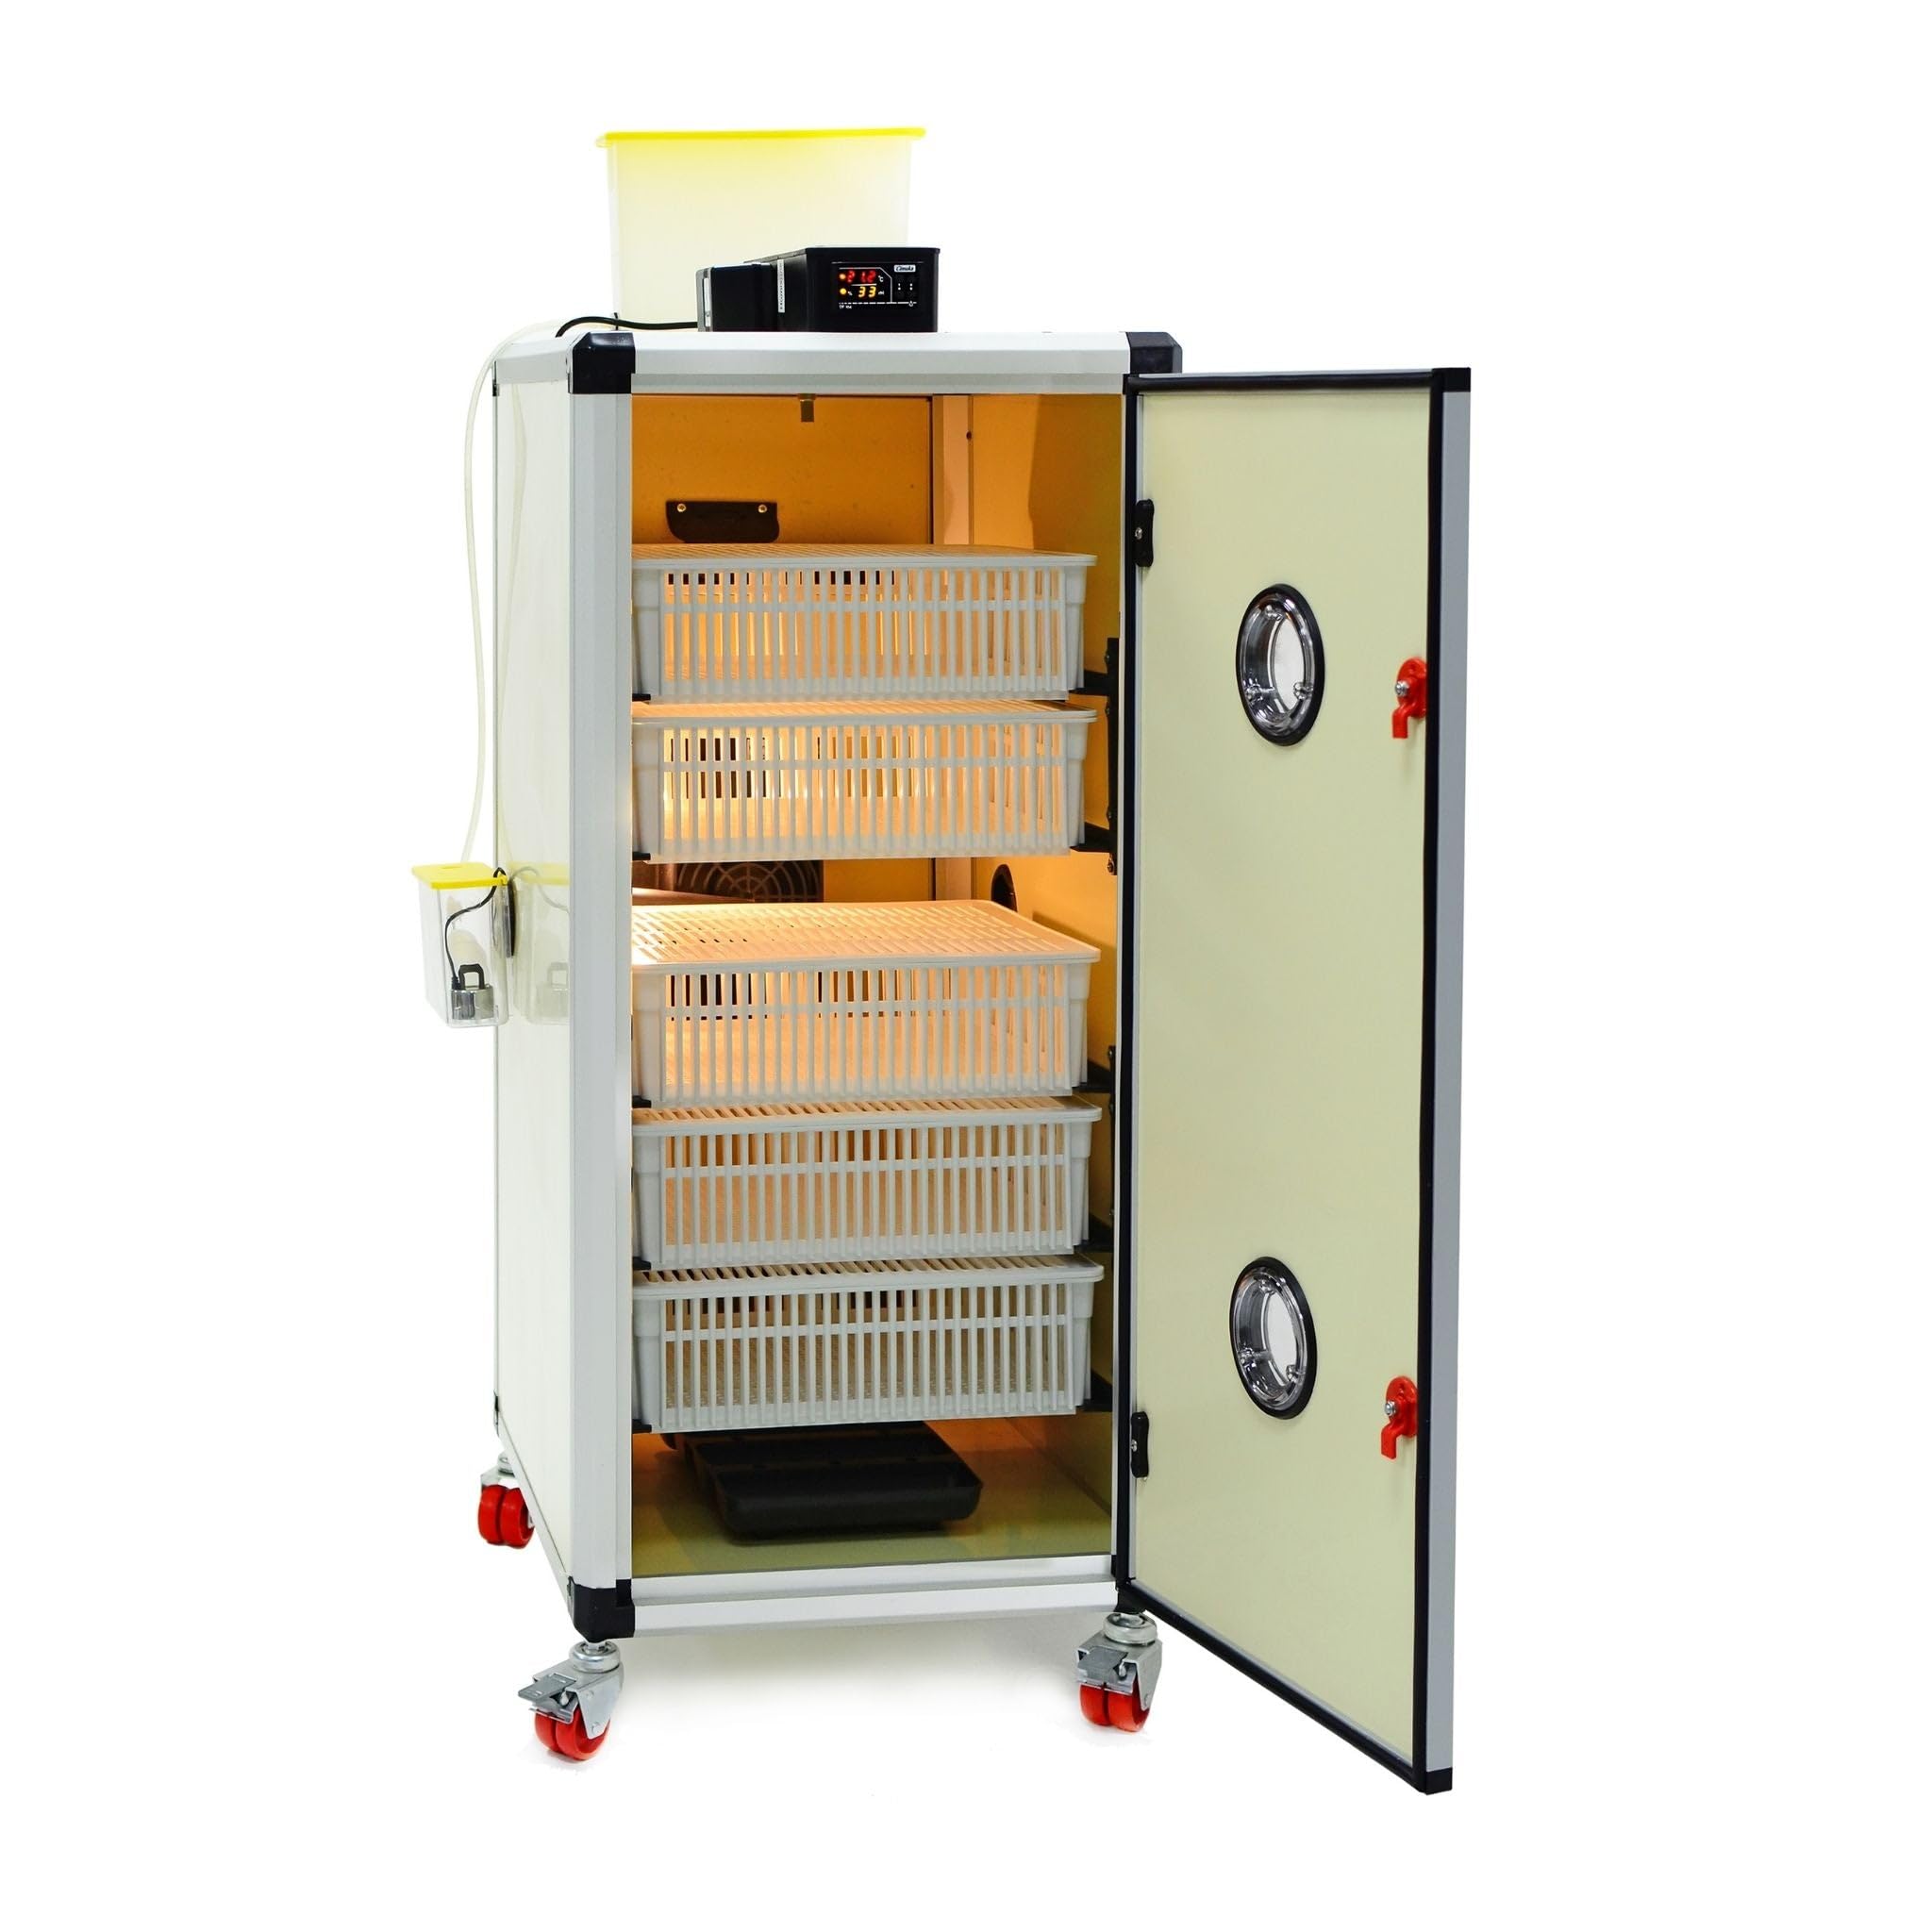
The Hatching Time HB175H Automatic Cabinet Egg Hatcher is a professional-grade unit designed for optimal hatching results. This advanced system provides stable temperature, humidity, and airflow, along with continuous monitoring, to support the critical hatch phase for various poultry species. This manual will guide you through the proper setup, operation, and maintenance of your HB175H hatcher to ensure successful hatches.
2. Safety Information
Please read all safety instructions carefully before operating the HB175H egg hatcher. Failure to follow these instructions may result in injury or damage to the unit.
- Ensure the unit is placed on a stable, level surface in a draft-free, temperature-controlled indoor environment.
- Connect the unit to a properly grounded 110V / 60Hz power outlet.
- Do not operate the unit with a damaged power cord or plug.
- Keep the unit away from water sources to prevent electrical shock.
- Do not attempt to open or repair the unit yourself. Contact qualified service personnel for assistance.
- Keep children and pets away from the operating unit.
- Always unplug the unit before cleaning or performing maintenance.
3. Setup
Follow these steps to set up your HB175H egg hatcher:
- Unpacking: Carefully remove all components from the packaging. Verify that all parts listed in the packing list are present.
- Placement: Position the hatcher in a suitable indoor location, ensuring adequate space around the unit for ventilation and access.
- Power Connection: Plug the power cord into a grounded 110V / 60Hz electrical outlet.
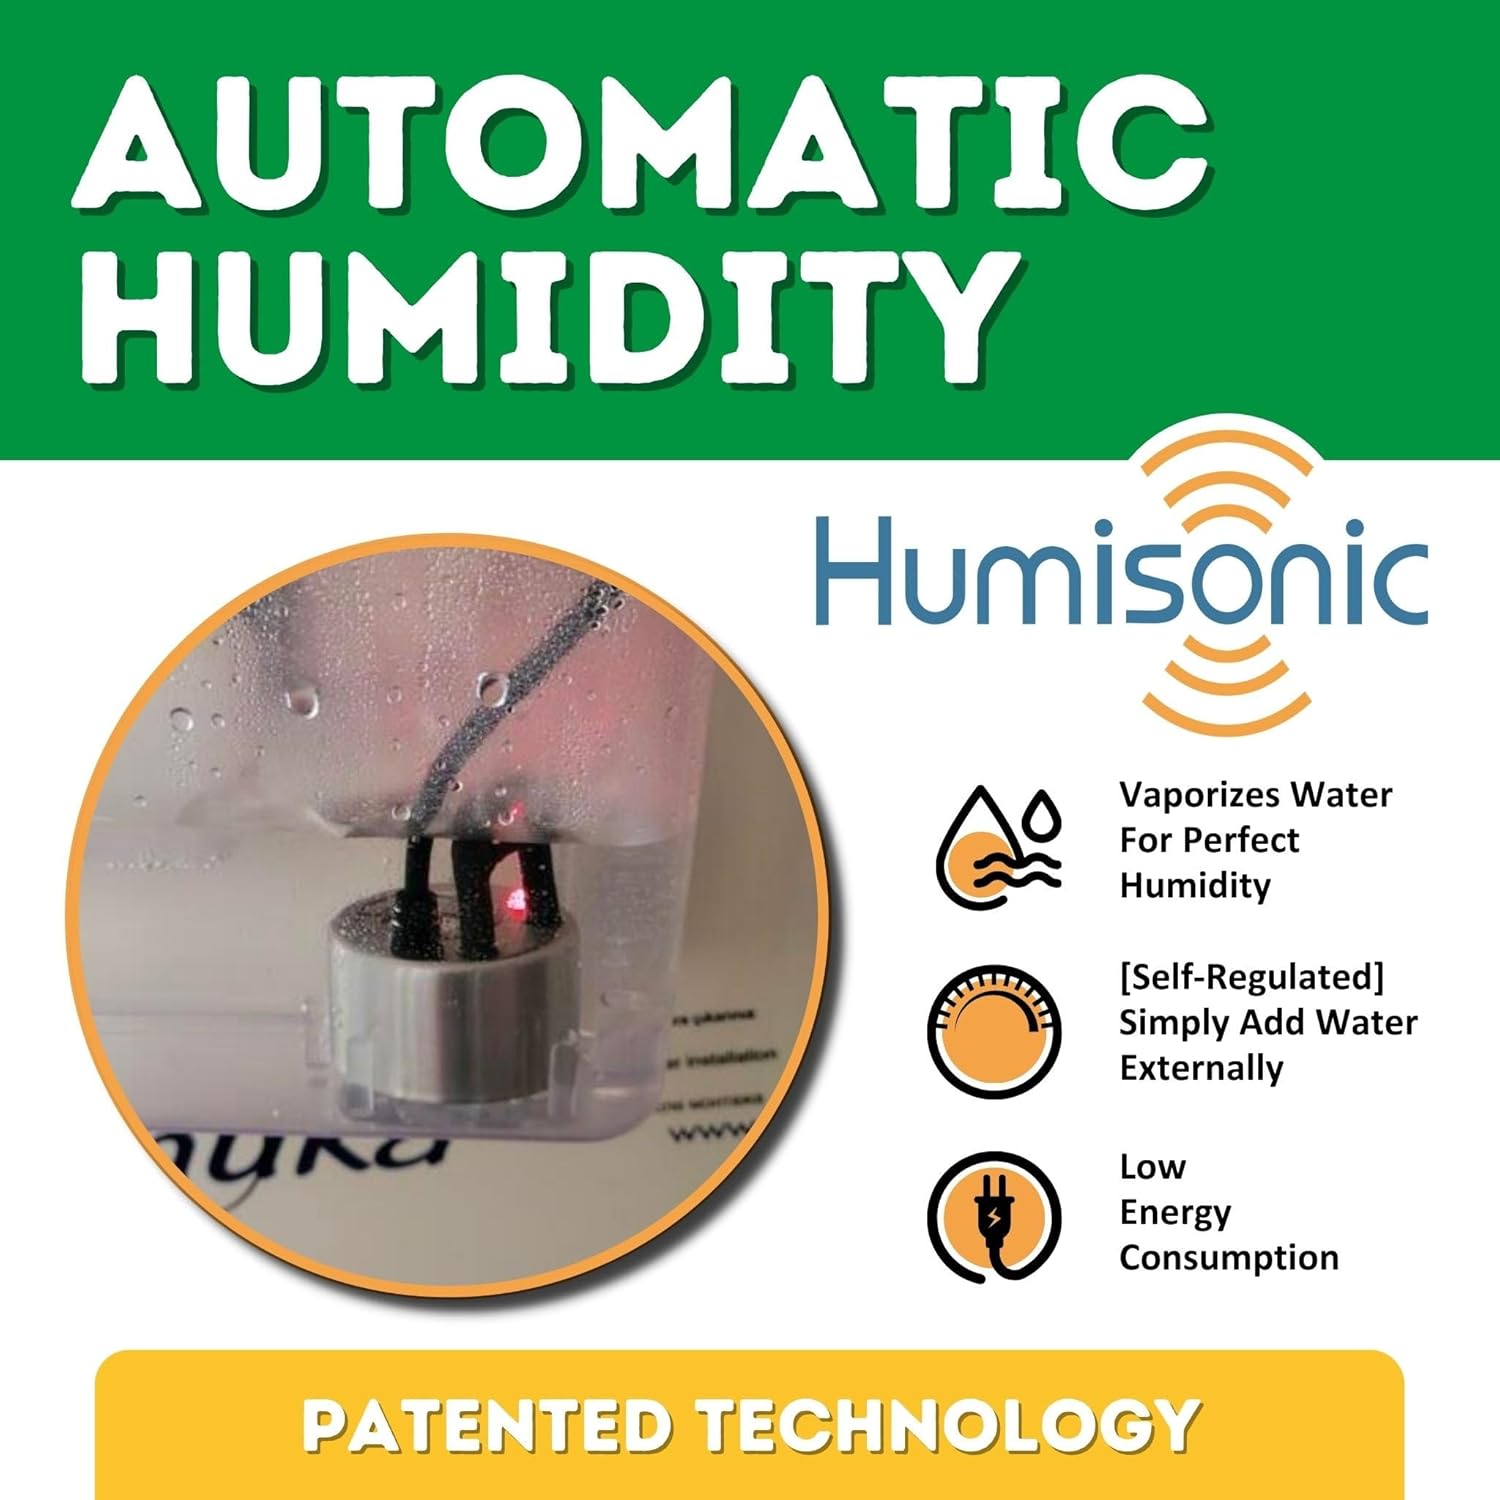
- Water Reservoir: Fill the external water reservoir with distilled water. The system will automatically regulate humidity levels.
- Initial Power-On: Turn on the unit. The digital display will show the current temperature and humidity.
- Calibration (if necessary): Refer to the separate controller manual for instructions on calibrating temperature and humidity sensors if required.
4. Operating Instructions
The HB175H is designed for ease of use with automatic controls.
4.1. Temperature and Humidity Control
The unit features self-regulated temperature and humidity control. Once the water reservoir is filled, the system automatically maintains optimal moisture levels. The digital controller allows for precise temperature settings.
4.2. Egg Placement
Place eggs gently into the provided hatching baskets. Ensure eggs are not overcrowded to allow for proper airflow. The HB175H is a dedicated hatcher; eggs should be transferred from a setter to this unit for the final hatching stage.

4.3. Monitoring and Alarms
The HB175H is equipped with an advanced alarm system for continuous monitoring. It features two alarms for high/low temperature and high/low humidity, each paired with a room sensor. These alarms provide real-time alerts for both internal and external conditions, ensuring optimal hatching conditions.

4.4. Active Periodic Cooling (APC)
This feature adjusts temperature and humidity to simulate natural egg cooling and dehumidifying processes. This is particularly beneficial for goose eggs. During APC, temperature and humidity alarms are temporarily deactivated, returning to preset parameters once the cycle is complete.

4.5. Automatic Ventilation
The Airroute automatic ventilation system ensures optimal temperature and humidity distribution throughout the hatcher. It provides IP55 protection against damp and dusty water and eliminates voltage drops for consistent performance.

4.6. Hatching Capacity
The HB175H offers versatile hatching capacity for various poultry species.
| Species | Max Eggs |
|---|---|
| Quail | 495 |
| Partridge | 280 |
| Pheasant | 240 |
| Chicken | 175 |
| Turkey / Duck | 120 |
| Goose / Peacock | 75 |
Note: This unit is a dedicated hatcher. A separate setter unit is required for the initial incubation phase.

4.7. Product in Use Video
5. Maintenance
Regular cleaning and maintenance are crucial for the longevity and optimal performance of your HB175H hatcher.
- Cleaning: The user-friendly design with front and back access simplifies cleaning. After each hatch, remove all hatching debris, including eggshells and unhatched eggs. Wipe down all interior surfaces with a mild disinfectant solution. Ensure the unit is completely dry before next use.
- Water Reservoir: Clean the water reservoir regularly to prevent algae or bacterial growth. Use fresh distilled water for each hatch.
- Fan and Vents: Periodically check the ventilation fan and air vents for any obstructions (e.g., dust, down feathers) and clean as necessary to maintain proper airflow.
6. Troubleshooting
If you encounter issues with your HB175H hatcher, refer to the following common problems and solutions:
| Problem | Possible Cause | Solution |
|---|---|---|
| Temperature Fluctuation | Drafty room, faulty sensor, unit door not sealed properly. | Ensure stable room temperature. Check door seal. Contact support if sensor is suspected. |
| Humidity Too Low/High | Insufficient/excessive water in reservoir, blocked humidity port, faulty sensor. | Adjust water level. Clean humidity port. Contact support if sensor is suspected. |
| Alarms Triggering Frequently | Environmental instability, incorrect alarm settings. | Stabilize room conditions. Verify alarm thresholds are set correctly. |
| Poor Hatch Rate | Incorrect temperature/humidity, poor egg quality, improper egg handling. | Review operating parameters. Ensure eggs are fertile and stored correctly before hatching. |
For issues not covered here or if problems persist, please contact Hatching Time customer support.
7. Specifications
- Model: HB175H
- Product Dimensions: 21.5 x 23 x 48 inches
- Item Weight: 55 pounds
- Power: 110V / 60Hz
- Average Power Consumption: 65W
- Peak Power Consumption: 220W
- Manufacturer: Cimuka
- Features: Automatic & Self-Regulated Temperature & Humidity, Advanced Alarm System, Automatic Ventilation (Airroute), Active Periodic Cooling (APC).

8. Warranty & Support
For warranty information, technical support, or replacement parts, please contact Hatching Time Official customer service.
- Customer Support: Refer to your purchase documentation or the Hatching Time website for contact details.
- Returns: The product typically includes a 30-day easy return policy. Please check your specific purchase terms.
- Protection Plans: Extended protection plans may be available for purchase.