1. Introduction
Thank you for choosing the CUORY 24-inch Full HD 100Hz LED Monitor. This manual provides essential information for setting up, operating, maintaining, and troubleshooting your new monitor. Designed for both work and entertainment, this monitor offers a Full HD (1920x1080p) resolution and a 100Hz refresh rate for smooth visuals. Its ultra-slim design and versatile connectivity options (HDMI, VGA) make it a suitable choice for various setups.
2. Safety Information
- Read all instructions carefully before using the monitor.
- Do not expose the monitor to rain or moisture to prevent fire or electric shock.
- Do not open the monitor casing. There are no user-serviceable parts inside. Refer all servicing to qualified personnel.
- Place the monitor on a stable, flat surface to prevent it from falling.
- Ensure proper ventilation around the monitor. Do not block ventilation openings.
- Use only the power adapter supplied with the monitor.
- Unplug the monitor from the power outlet during lightning storms or when unused for long periods.
3. Package Contents
Please check the box for the following items:
- CUORY 24-inch Full HD 100Hz LED Monitor
- Monitor Stand (Base and Neck)
- Power Adapter
- HDMI Cable
- User Manual (this document)
4. Assembly and Setup
4.1 Attaching the Stand
- Carefully remove the monitor from its packaging, placing it face down on a soft, clean surface to prevent scratches.
- Attach the stand neck to the back of the monitor. Ensure it clicks securely into place or is fastened with screws if provided.
- Attach the stand base to the neck, securing it with the thumb screw or screws provided.

Image: Rear view of the monitor, illustrating the stand attachment area.
4.2 Connecting Cables
Connect the necessary cables to the corresponding ports on the back of the monitor and your computer.
- Power Cable: Connect the power adapter to the monitor's power input, then plug the adapter into a power outlet.
- HDMI Cable: Connect one end of the HDMI cable to the monitor's HDMI port and the other end to the HDMI port on your computer.
- VGA Cable: Alternatively, connect one end of the VGA cable to the monitor's VGA port and the other end to the VGA port on your computer.

Image: Detailed view of the monitor's connectivity ports (HDMI, VGA, Power).
4.3 Initial Power-On
After connecting all cables, press the power button on the monitor to turn it on. The monitor should automatically detect the input signal. If not, you may need to manually select the input source using the OSD menu.
Image: The CUORY 24-inch monitor fully assembled and powered on.
5. Operating the Monitor
5.1 Power On/Off
The power button is typically located on the back or bottom edge of the monitor. Press it to turn the monitor on or off.
5.2 OSD (On-Screen Display) Menu Navigation
The monitor features control buttons, usually on the back, to access and navigate the OSD menu. These buttons allow you to adjust various display settings.
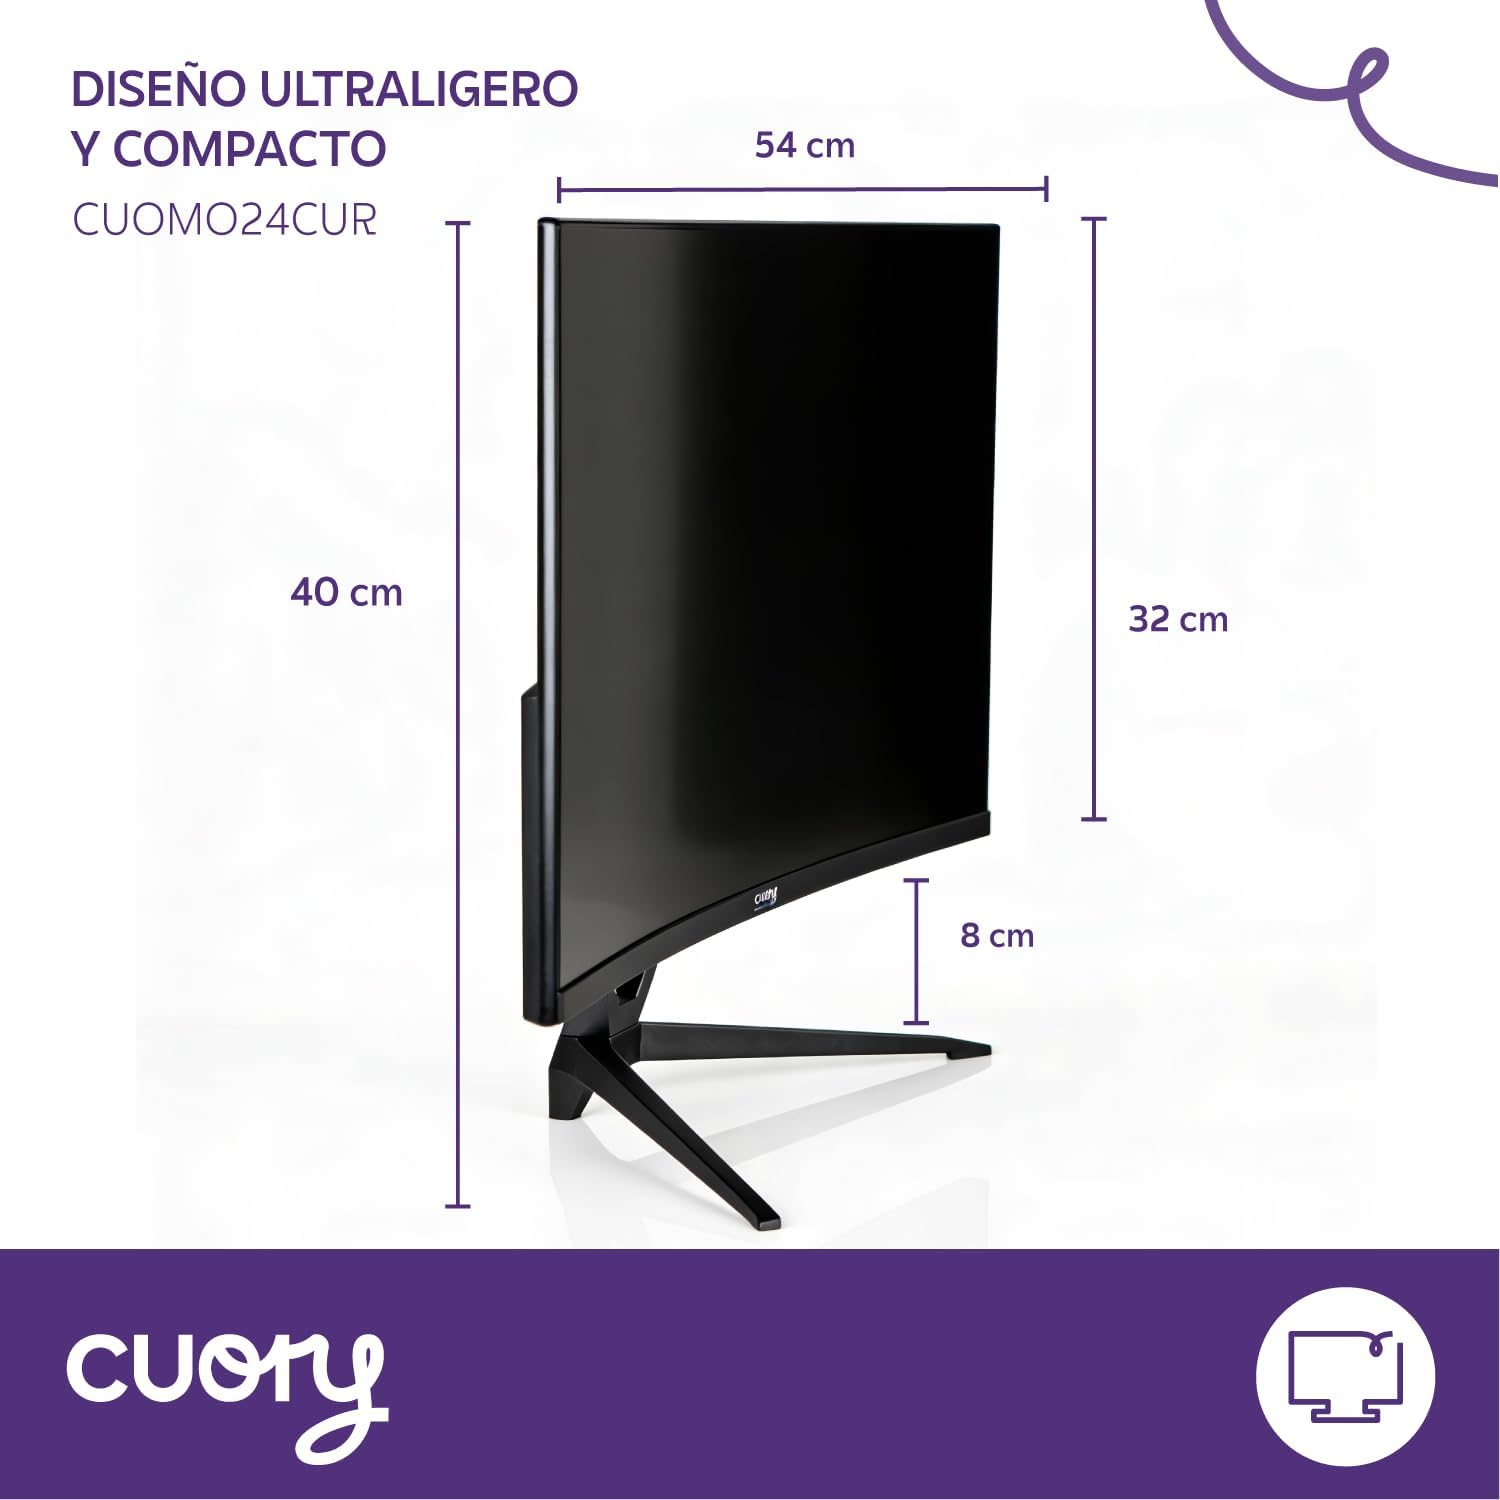
Image: Location of the OSD control buttons on the back of the monitor.
5.3 Input Source Selection
Use the OSD menu to select the desired input source (HDMI or VGA) if the monitor does not automatically detect it.
5.4 Adjusting Display Settings
Within the OSD menu, you can adjust settings such as:
- Brightness/Contrast: Adjust the overall luminance and difference between light and dark areas.
- Color Settings: Modify color temperature, hue, and saturation.
- Picture Mode: Select preset modes for different content types (e.g., Standard, Game, Movie).
- Aspect Ratio: Choose between 16:9 or other available aspect ratios.
6. Maintenance
6.1 Cleaning the Screen
To clean the screen, gently wipe it with a soft, lint-free cloth. For stubborn marks, lightly dampen the cloth with water or a specialized screen cleaner. Never spray liquid directly onto the screen.
6.2 Cleaning the Body
Wipe the monitor's casing with a soft, dry cloth. Avoid using abrasive cleaners or solvents that could damage the finish.
6.3 General Care
- Avoid placing heavy objects on the monitor or its cables.
- Keep the monitor away from direct sunlight, heat sources, and excessive dust.
- Ensure adequate airflow around the monitor to prevent overheating.
7. Troubleshooting
If you encounter issues with your monitor, please refer to the following common problems and solutions:
| Problem | Possible Solution |
|---|---|
| No image on screen / Power LED off |
|
| No signal / 'No Input' message |
|
| Image is blurry or distorted |
|
| Refresh rate is not 100Hz (e.g., 75Hz) |
|
| Monitor stand feels unstable |
|
8. Specifications
| Feature | Specification |
|---|---|
| Brand | CUORY |
| Model Name | CUOMOLED |
| Screen Size | 24 Inches |
| Resolution | Full HD (1920 x 1080p) |
| Refresh Rate | 100 Hz |
| Panel Type | LED |
| Aspect Ratio | 16:9 |
| Response Time | 5 Milliseconds |
| Connectivity | 1x HDMI, 1x VGA |
| Color | Black |
| Dimensions (D x W x H) | 1 x 60.5 x 37 centimeters (approximate, without stand) |
Note: While the product is listed as 24 inches, some specifications in the source data indicate 27 inches. This manual refers to the 24-inch model (B0GFP31C93).
9. Warranty and Support
9.1 Product Warranty
This CUORY monitor comes with a 30-day product warranty from the date of purchase. This warranty covers manufacturing defects. Please retain your proof of purchase for warranty claims.
9.2 Returns Policy
You may be eligible for a return or replacement within 30 days of purchase, subject to the retailer's return policy.
9.3 Customer Support
For further assistance, technical support, or warranty inquiries, please contact CUORY customer service through the retailer's platform or the official CUORY website. Specific contact details may vary by region.