
Introduction
Thank you for choosing the Grills House GE6001S 6-Burner Gas Grill. This manual provides essential information for the safe assembly, operation, maintenance, and troubleshooting of your new grill. Please read all instructions carefully before use and retain this manual for future reference.

Image: The Grills House GE6001S 6-Burner Gas Grill, showing overall dimensions of 23.03"D x 57.68"W x 46.06"H.
Important Safety Information
WARNING:
- Use outdoors only.
- Read instructions before using the appliance.
- Accessible parts may be very hot. Keep young children away.
- Do not move the appliance during use.
- Turn off the gas supply at the LP cylinder after use.
- Any modification of the appliance may be dangerous.
- Do not store or use gasoline or other flammable vapors and liquids in the vicinity of this or any other appliance.
Product Features
The Grills House GE6001S is designed for versatile outdoor cooking, offering a range of features for an enhanced grilling experience.
High Output & Versatility
- Five main burners, each delivering 10,000 BTU, for extensive cooking.
- A 12,000 BTU high-heat sear burner for precise searing.
- A dedicated 10,000 BTU side burner for preparing side dishes, sauces, or hot beverages.

Image: Visual representation of the grill's 72,000 BTU total output, detailing the five 10,000 BTU main burners, one 12,000 BTU sear burner, and one 10,000 BTU side burner.
Spacious Cooking Area
- Total cooking area of 691 sq. in.
- Primary cooking space: 544 sq. in.
- Warming rack area: 147 sq. in.
- Accommodates 10-12 guests or up to 24 burgers.

Image: The grill's expansive cooking surface, illustrating the 544 sq. in. cooking grate and 147 sq. in. warming rack, totaling 691 sq. in. for cooking up to 24 burgers.
Consistent & Reliable Start
- Electronic ignition for quick and hassle-free startup.

Image: A close-up of the reliable electronic ignition button, ensuring quick and easy grill startup.
Cooking Visualization
- Built-in lid thermometer for real-time temperature monitoring.
- Glass viewing window on the lid for effortless food checks without lifting the lid.

Image: The stainless steel lid features a convenient glass viewing window and an integrated thermometer for monitoring cooking progress without heat loss.
Stylish & Durable Construction
- Premium stainless steel lid and cabinet doors for modern aesthetics and durability.
- Rust and scratch resistant design.
- Cast iron cooking grates for superior stick-resistant performance.

Image: A close-up view of the durable cast iron cooking grates, designed for excellent heat retention and stick resistance.
Convenient Storage & Mobility
- Cabinet-style storage frame for LP cylinder, grilling tools, and seasonings.
- Left side shelf with knife rack and recessed spice storage box.
- Adjustable basket with paper towel holder on the right panel.
- Integrated bottle opener.
- Exclusive wheel configuration with lockable casters for easy movement and secure placement.

Image: The grill's spacious storage cabinet, designed to neatly store an LP cylinder, various grilling accessories, and seasonings.
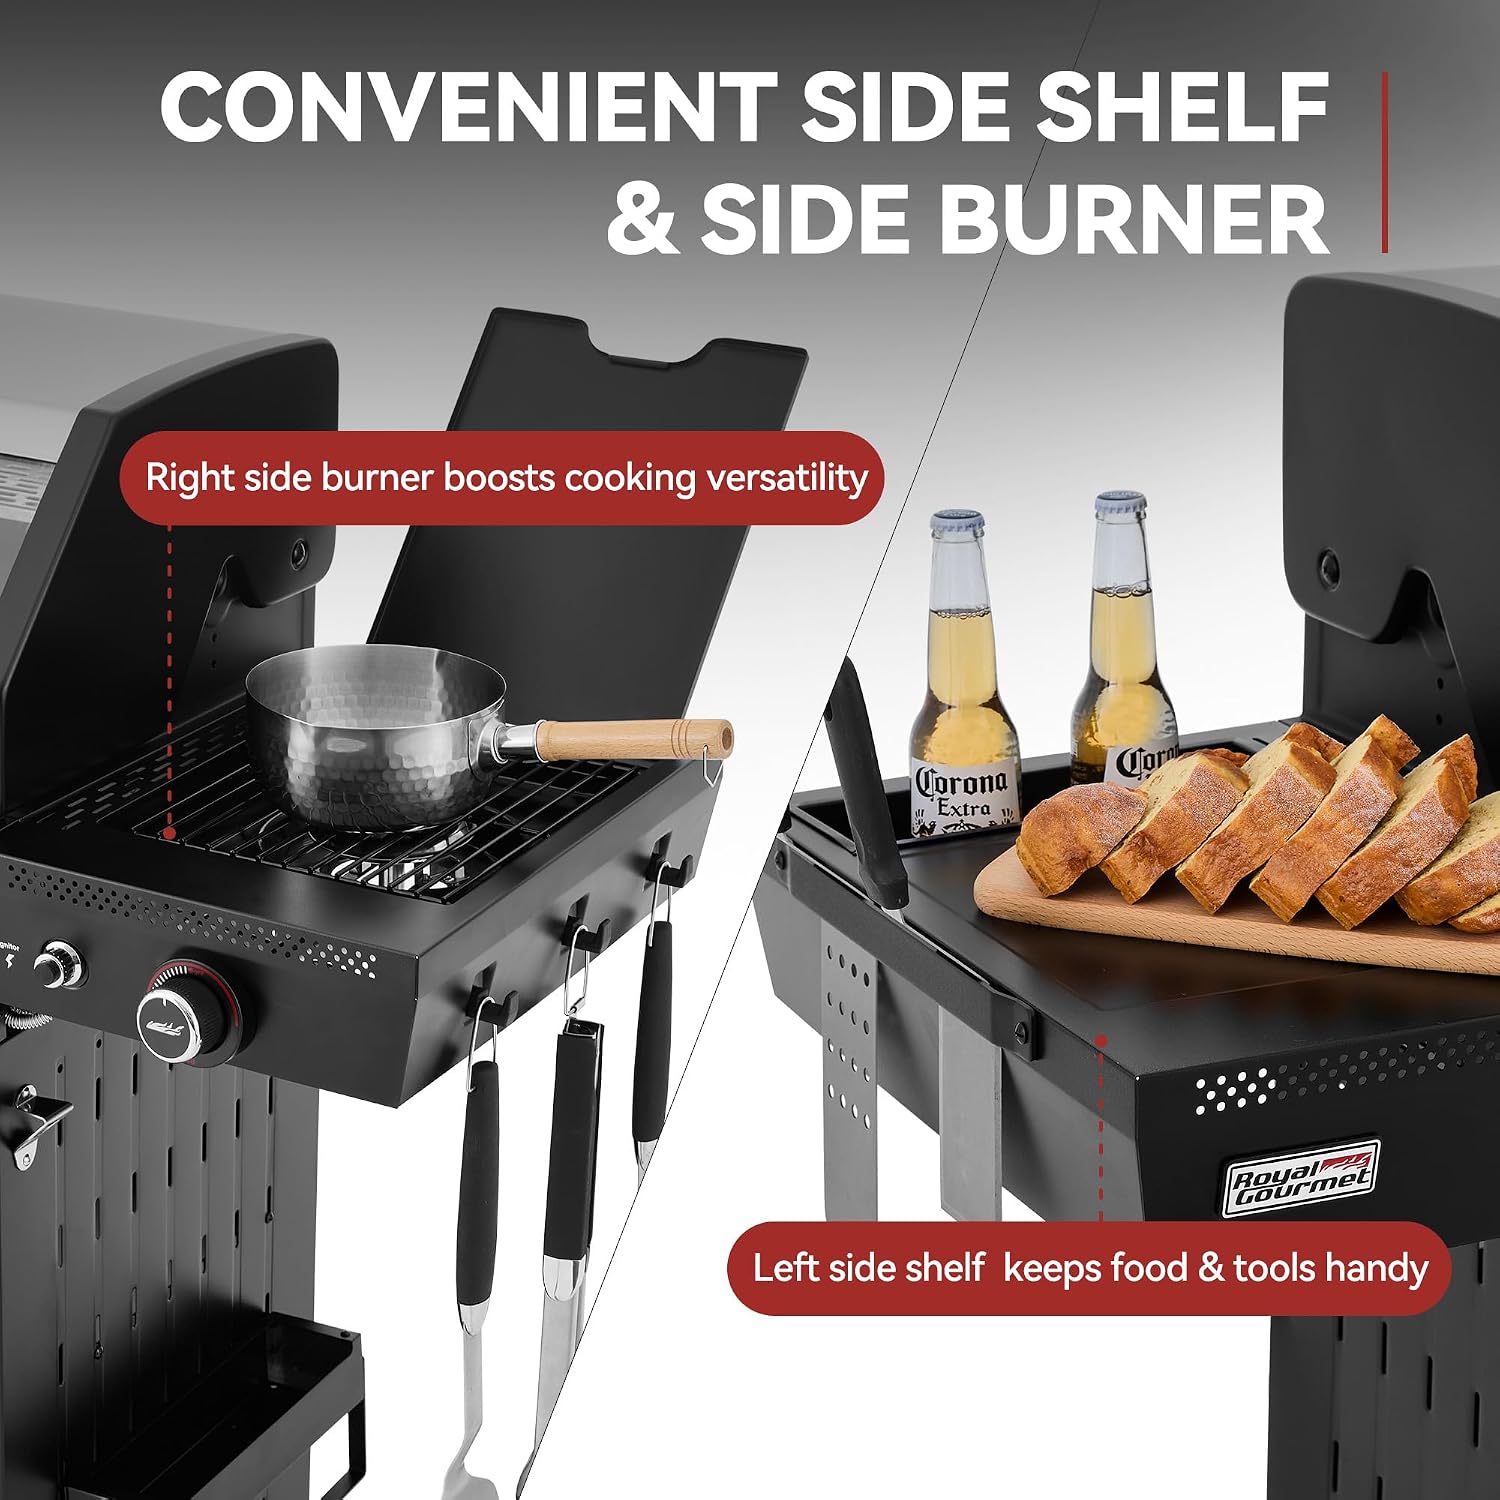
Image: The convenient side shelf features a functional side burner and integrated hooks for hanging grilling tools, enhancing cooking versatility and organization.

Image: A close-up of the grill's robust wheels, including lockable casters for easy maneuverability and secure positioning.
Setup and Assembly
For detailed assembly instructions, please refer to the official assembly video provided below. It covers all 34 steps, estimated to take 50 minutes with two people.
Video: Official assembly guide for the Grills House GE6001S 6-Burner Gas Grill. This video provides step-by-step visual instructions for putting together your grill.
Key Assembly Steps (Summary)
- Attach the bottom shelf joint to the bottom shelf.
- Assemble the left and right panels to the bottom shelf.
- Prepare the LP cylinder screw.
- Attach the screw bushing to the bottom shelf.
- Insert the LP cylinder screw into the bushing and secure it.
- Install the wheels to the bottom shelf.
- Assemble the casters to the bottom shelf.
- Assemble the rear panels to the bottom shelf.
- Assemble the cart front beam to the cart frame.
- Assemble the middle shelf and its supports to the cart frame.
- Install the main body support beams to the left and right panels.
- Assemble the main body to the cart frame.
- Assemble the basket, handle sleeves, and door handle to the cabinet doors.
- Insert the cabinet doors into the bottom shelf holes.
- Assemble the side shelf to the main body.
- Disassemble the ignition box and install it to the side burner shelf.
- Attach the knob and knob base to the side burner shelf.
- Install the side burner to the side burner shelf.
- Place the pot rack on the side burner.
- Install the tool holder and basket to the side shelf.
- Assemble the grease tray and grease cup to the cart frame.
- Assemble the lid handle to the lid.
- Install the thermometer to the lid.
- Position the flame tamers and flame tamer (big) over the main burners and sear burner.
- Place the cooking grates and cooking grate (big) over the flame tamers.
- Assemble the warming rack.
- Install the bottle opener to the right panel.
- Assemble the basket and paper towel holder.
- Attach the hose connector to the left panel and assemble the regulator to the LP cylinder.
Operating Instructions
Before operating your grill, ensure all connections are secure and there are no gas leaks. Always operate the grill in a well-ventilated outdoor area.
Electronic Ignition
- Open ALL control knobs to "OFF" position.
- Turn on gas supply on LP cylinder.
- Push in control knob and turn it anti-clockwise to "HIGH" position.
- Push and hold ignitor button to light the burner.
- If the burner does not ignite, turn control knob to "OFF" position, wait for 5 minutes before attempting to relight the burner.
- If the burner ignites, repeat for other burners.
- Should the burners still fail to ignite, check the gas supply.
Temperature Control
Use the control knobs to adjust the flame intensity for each burner. The built-in lid thermometer allows you to monitor the internal temperature of the grill, helping you maintain optimal cooking conditions.

Image: The Grills House GE6001S grill in operation, showcasing various foods cooking on the main grates and a pot on the side burner, demonstrating its multi-functional capabilities.
Video: A promotional video highlighting the features and usage of the 6-Burner Gas Grill, demonstrating its versatility for different cooking styles.
Maintenance and Care
Regular maintenance ensures the longevity and safe operation of your grill.
Cleaning the Grease Management System
- The grill features a removable grease tray and a detachable grease cup for easy cleaning.
- After each use, allow the grill to cool completely.
- Carefully slide out the grease tray and remove the grease cup.
- Dispose of accumulated grease properly.
- Wash the grease tray and cup with warm, soapy water. Rinse thoroughly and dry before reinserting.

Image: A detailed view of the grill's removable grease tray and cup, designed for easy cleaning and maintenance.
General Cleaning
- Cooking Grates: Clean cast iron grates with a grill brush after each use while still warm. For deeper cleaning, wash with warm, soapy water.
- Exterior Surfaces: Wipe stainless steel and powder-coated surfaces with a soft cloth and mild detergent. Avoid abrasive cleaners.
- Burners: Periodically check burner ports for blockages. Clean with a wire brush if necessary.
Troubleshooting
| Problem | Possible Cause | Solution |
|---|---|---|
| Burner fails to ignite | No gas flow; blocked burner port; faulty ignitor. | Check LP cylinder gas supply; clean burner ports; check ignitor electrode and wire connection. |
| Low flame | Low gas pressure; partially blocked burner. | Check LP cylinder level; clean burner ports. |
| Uneven heating | Blocked burner ports; uneven flame tamers. | Clean burner ports; ensure flame tamers are correctly positioned. |
| Grease fires | Excess grease accumulation. | Clean grease tray and cup regularly; trim excess fat from food. |
Specifications
| Feature | Detail |
|---|---|
| Brand | Grills House |
| Model Name | GE6001S-SC |
| Product Dimensions | 23.03"D x 57.68"W x 46.06"H |
| Item Weight | 111.3 Pounds |
| Fuel Type | Gas |
| Main Burner Count | 6 |
| Side Burner Count | 1 |
| Total BTU Output | 72,000 BTU (5x10,000 BTU main, 1x12,000 BTU sear, 1x10,000 BTU side) |
| Total Cooking Area | 691 sq. in. |
| Material Type | Stainless Steel (Lid, Main burners, Warming rack, Cabinet Doors); Cast Iron (Cooking Grates); Steel (Main Body, Lid Handle, Side Burner, Side Shelves); Aluminum-plated Steel Sheet (Lid Liner Panel) |
| Special Feature | Removable Grease Tray, Glass Viewing Window, Electronic Ignition |
| Color | Black & Silver |
| Required Assembly | Yes |
| UPC | 810001895570 |
Warranty and Support
The Grills House GE6001S 6-Burner Gas Grill comes with a one-year limited warranty for all parts. For warranty claims, technical support, or replacement parts, please contact Grills House customer service. Keep your purchase receipt as proof of purchase.
Manufacturer: Grills House
For further assistance, visit the Grills House Store on Amazon.
