1. Important Safety Instructions
To ensure safe operation and prevent damage, please read and follow these instructions carefully.
- Always unplug the unit before cleaning.
- Do not use harsh chemicals or abrasive materials to clean the inner bucket.
- Keep the unit away from water sources to prevent electrical hazards.
- Do not overfill the unit beyond its maximum capacity.
- Use caution when handling the contents, as they may contain sharp objects or hot material after a cycle.
- Ensure the lid is properly secured before starting any cycle.
- This appliance is for household use only. Do not use outdoors.
- Do not operate the appliance with a damaged cord or plug.
2. Product Overview
The NutriChef 4 Quart Electric Kitchen Composter is designed to efficiently transform food scraps into nutrient-rich fertilizer. It utilizes high-temperature drying, grinding, and cooling processes to reduce food waste volume by up to 90%.
Key Features:
- Efficient Waste Reduction: Transforms food scraps into fertilizer in 2-6 hours, reducing waste volume by up to 90%.
- Odorless Operation: Equipped with dual activated carbon filters to ensure an odor-free environment. Includes a smart filter alert for timely replacement.
- Quiet Performance: Operates at less than 48 dB, suitable for use at any time without disruption.
- User-Friendly Controls: Features one-touch operation and three volume-based modes (Small, Medium, Large).
- Easy to Clean: Ceramic-coated inner bucket is heat-resistant, dishwasher-safe, and self-cleaning.
- Durable and Safe: Constructed from ABS and aluminum with built-in overheat, overload, and auto-shutoff protection.
- Versatile Capacity: 4-quart capacity suitable for handling waste from 5-10 people per cycle.
Components:
Familiarize yourself with the main parts of your NutriChef Electric Kitchen Composter:
- Main Unit Housing
- Removable Inner Bucket (Ceramic-coated)
- Lid with Viewing Window
- Control Panel (Power, Volume, Mode, Start/Stop buttons, Timer Display, Indicator Lights)
- Dual Activated Carbon Filters (located in the filter compartment)
- Power Cord
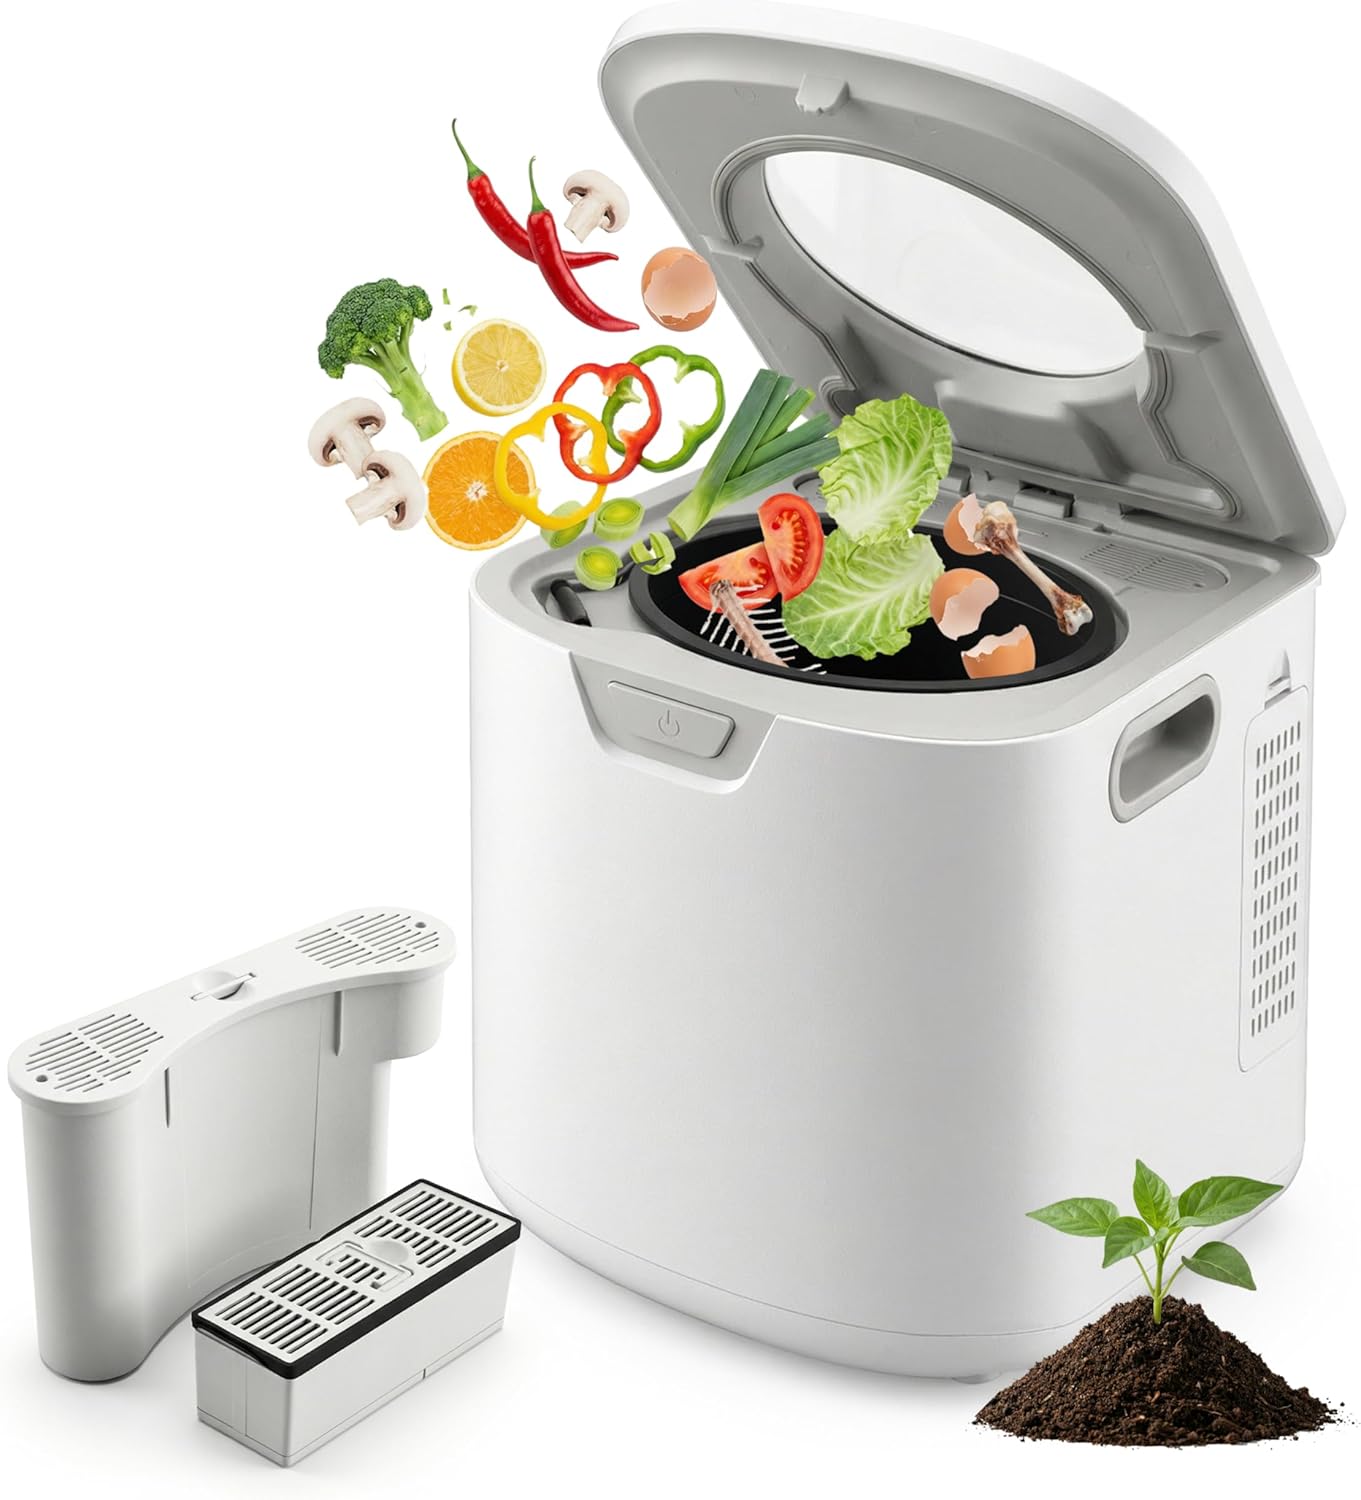
Figure 2.1: NutriChef 4 Quart Electric Kitchen Composter (White model).
3. Setup and First Use
- Unpack the Composter: Carefully remove all packaging materials and ensure all components are present.
- Placement: Place the composter on a stable, flat, heat-resistant surface, such as a kitchen countertop or under cabinets. Ensure adequate ventilation around the unit.
- Install Carbon Filters:
- Locate the filter compartment, typically at the back or side of the unit.
- Open the compartment cover.
- Insert the two activated carbon filters into their designated slots. Ensure they are seated correctly.
- Close the filter compartment cover securely.

Figure 3.1: Location of the carbon filter and odor filter.
- Clean the Inner Bucket: Before first use, wash the ceramic-coated inner bucket with warm, soapy water. Rinse thoroughly and dry completely. Place it back into the main unit.
- Connect Power: Plug the power cord into a grounded electrical outlet. The unit will typically emit a beep and indicator lights may illuminate.
4. Operating Instructions
4.1 Adding Food Waste
- Open the lid of the composter.
- Add food scraps directly into the inner bucket. Do not overfill; ensure the lid can close securely without forcing.
- Close the lid firmly.

Figure 4.1: Food waste before and after composting.
4.2 Acceptable and Unacceptable Waste
The NutriChef composter is designed to process a wide range of organic kitchen waste. For optimal results, avoid items that can damage the unit or are not suitable for composting.
| Acceptable Waste | Unacceptable Waste |
|---|---|
| Fruit and vegetable scraps (peels, cores, wilted produce) | Large bones (beef, pork) |
| Coffee grounds and tea bags (without staples) | Hard pits (avocado, peach) |
| Eggshells | Dairy products (large quantities) |
| Cooked meat and fish (small quantities) | Oils and grease (large quantities) |
| Bread and pasta | Plastic, glass, metal, rubber |
| Small amounts of paper products (napkins, paper towels) | Styrofoam, packaging materials |
| Grains and cereals | Candy, gum, and highly processed foods |
Note: For best results, cut larger food items into smaller pieces before adding them to the composter.
4.3 Starting a Composting Cycle
- Ensure the inner bucket is correctly placed and the lid is securely closed.
- Press the Power button to turn on the unit.
- Select the desired volume mode (Small, Medium, or Large) by pressing the Volume button. The indicator light for the selected mode will illuminate. This adjusts the cycle duration for optimal processing.
- (Optional) If your model has a Mode button for custom control or specific functions (e.g., Easy-Clean), select it now.
- Press the Start/Stop button to begin the composting cycle. The unit will start drying, grinding, and cooling the food waste. The display will show the remaining cycle time.

Figure 4.2: Smart one-touch control panel.
A typical cycle takes between 2 to 6 hours, depending on the volume and type of waste. The unit operates quietly, under 48 dB.
4.4 After the Cycle
- Once the cycle is complete, the unit will beep and/or indicator lights will change.
- Allow the unit to cool down before opening the lid.
- Carefully remove the inner bucket. The processed material will be dry and significantly reduced in volume.
- The resulting material can be mixed with soil for plants and gardens.

Figure 4.3: Internal view of the composting process.
5. Maintenance
5.1 Cleaning the Inner Bucket
- Always unplug the composter before cleaning.
- Remove the inner bucket from the unit.
- The ceramic-coated inner bucket is dishwasher-safe. Alternatively, wash it by hand with warm, soapy water and a non-abrasive sponge.
- Rinse thoroughly and ensure it is completely dry before placing it back into the unit.
- The unit also features a self-cleaning mode (if available via the Mode button) for convenient internal cleaning.

Figure 5.1: Self-cleaning feature of the inner bucket.
5.2 Replacing Carbon Filters
- The composter is equipped with a smart filter alert that will indicate when the carbon filters need replacement, typically after approximately 600 hours of use.
- Unplug the unit.
- Open the filter compartment.
- Remove the old filters and dispose of them responsibly.
- Insert new activated carbon filters, ensuring they are correctly oriented and seated.
- Close the filter compartment cover.
- Note: Replacement filters can be purchased from authorized NutriChef retailers or the official website.

Figure 5.2: Air filtration system for odorless operation.
5.3 Exterior Cleaning
- Wipe the exterior of the unit with a soft, damp cloth.
- Do not use abrasive cleaners or immerse the unit in water.
- Ensure the unit is completely dry before plugging it back in.
6. Troubleshooting
If you encounter issues with your NutriChef Electric Kitchen Composter, refer to the following table for common problems and solutions.
| Problem | Possible Cause | Solution |
|---|---|---|
| Unit does not power on. | Not plugged in; power outlet issue; unit malfunction. | Ensure the power cord is securely plugged into a working outlet. Check the circuit breaker. |
| Cycle does not start or stops unexpectedly. | Lid not properly closed; inner bucket not seated correctly; overheat/overload protection activated. | Ensure the lid is firmly closed and the inner bucket is correctly positioned. Unplug the unit, let it cool for 30 minutes, then try again. Reduce load size if consistently overloading. |
| "Filter" indicator light remains on (even if new). | Filters need replacement; filter compartment not closed properly; sensor issue. | Replace carbon filters if they have reached their lifespan (approx. 600 hours). Ensure the filter compartment cover is securely closed. If the issue persists with new filters, contact customer support. |
| Unpleasant odor during operation. | Filters are old or saturated; inappropriate food waste added; lid not sealed. | Replace carbon filters. Review acceptable waste guidelines. Ensure the lid is properly sealed. Clean the inner bucket and unit thoroughly. |
| Processed material is still wet or chunky. | Overfilled bucket; high moisture content in waste; incorrect volume mode selected. | Do not overfill the bucket. For very wet waste, consider adding some drier material (e.g., bread, paper towels) or running a longer cycle. Select the appropriate volume mode for the load size. |
| Unit is unusually noisy. | Hard items in the bucket; grinding mechanism obstruction. | Stop the unit, unplug it, and carefully check the inner bucket for any hard, unacceptable items that may be obstructing the grinding blades. Remove them before restarting. |
If the problem persists after trying these solutions, please contact NutriChef Customer Support.
7. Specifications
| Specification | Detail |
|---|---|
| Brand | NutriChef |
| Model Number | B0GF4PXV68 |
| Capacity | 4 Quarts (approx. 3.78 Liters) |
| Material | Ceramic (inner bucket), ABS, Aluminum (housing) |
| Color | White |
| Product Dimensions (L x W x H) | 10.91" x 12.95" x 12.6" (27.7 cm x 32.9 cm x 32 cm) |
| Item Weight | 18.7 Pounds (approx. 8.48 kg) |
| Noise Level | Under 48 dB |
| Cycle Time | 2-6 hours (depending on volume and mode) |
| Filter Type | Dual Activated Carbon Filters |
| UPC | 842893184579 |
8. Warranty and Support
Specific warranty information and detailed customer support contacts are not provided in this document. For warranty details, product registration, or technical assistance, please refer to the warranty card included with your product or visit the official NutriChef website. You may also contact the retailer where the product was purchased.
NutriChef Official Website: www.nutrichefkitchen.com


