Product Overview
The Naomi Home Tamara Adjustable Overbed Bedside Table is designed to provide a versatile and convenient surface for various activities while in bed or seated. It features adjustable height, integrated charging ports, and mobile casters for ease of use and portability.
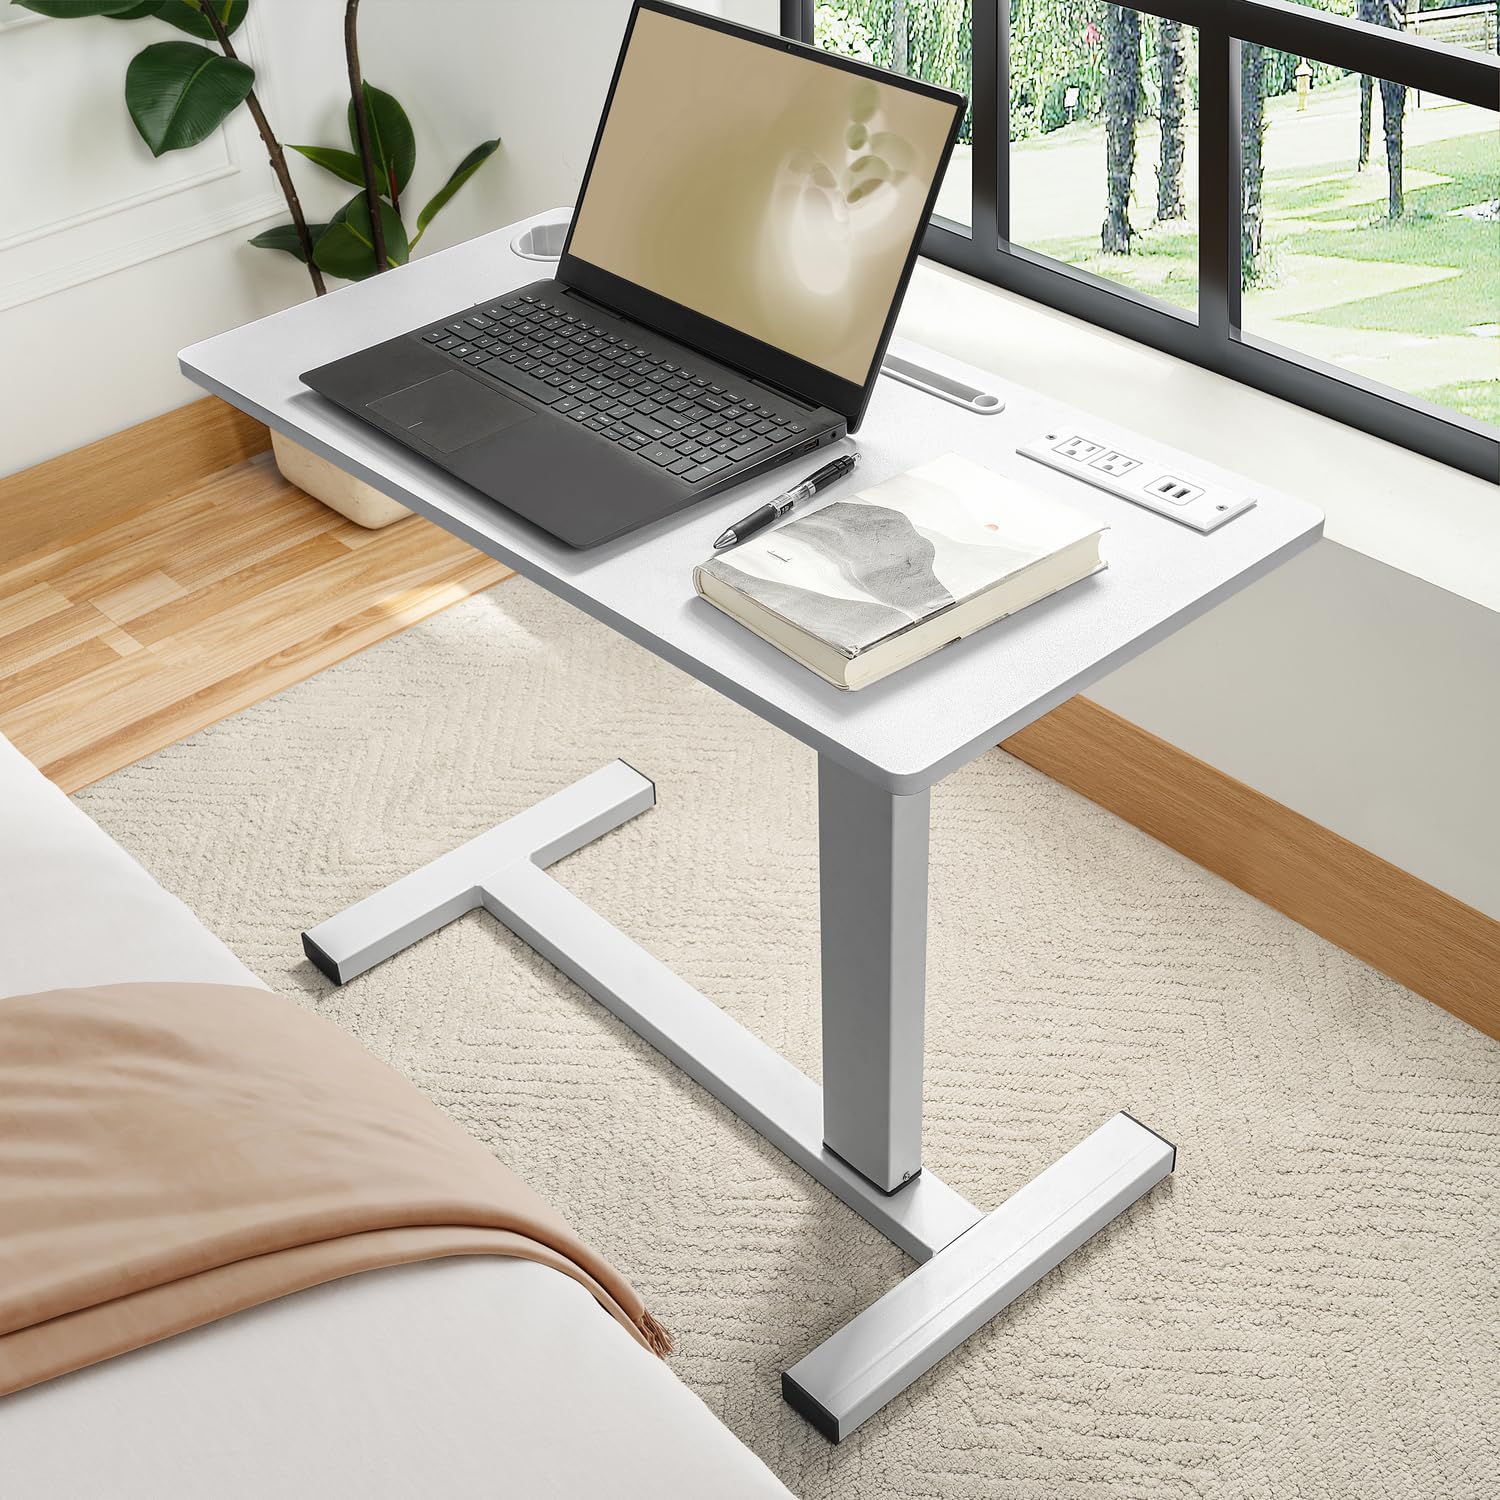
Image: The Naomi Home Tamara Adjustable Overbed Bedside Table in white, showcasing its design and features.
Key Features:
- Adjustable Height: Smooth height range from 27.9" to 36.42" to accommodate various furniture heights and seating positions.
- Integrated Charging: Built-in USB ports, a C-type port, and a standard outlet for convenient device charging.
- Organized Surface: Includes integrated holders for a phone, pen, and drink.
- Mobile Design: Equipped with smooth, hidden casters for easy movement and storage.
- Durable Construction: Features a sturdy MDF frame and an H-shaped metal base.
Setup and Assembly
Follow these step-by-step instructions to assemble your Naomi Home Tamara Adjustable Overbed Bedside Table. Ensure all parts are present before beginning assembly.
Assembly Video Guide:
Video: A detailed assembly guide for the Naomi Home Tamara Overbed Table, demonstrating each step of the construction process.
Step-by-Step Assembly:
- Unpack Components: Carefully remove all parts from the packaging. Verify that all hardware and table components are present according to the included parts list.
- Assemble the Base: Attach the horizontal support bars to the vertical base components using the provided screws and Allen wrench. Ensure all connections are secure.
- Attach the Main Column: Secure the main adjustable column to the assembled base. Use the appropriate screws and tighten them firmly.
- Install the Tabletop Bracket: Mount the tabletop bracket to the top of the main column. This bracket will support the tabletop and the height adjustment mechanism.
- Secure the Tabletop: Carefully align the tabletop with the bracket and secure it using the remaining screws. Ensure the tabletop is centered and stable.
- Connect Power Unit: Insert the power strip with USB and C-type ports into the designated slot on the tabletop. Route the power cord neatly along the column and secure it if necessary.
- Final Check: Once assembled, gently test the stability of the table and the functionality of the height adjustment lever.
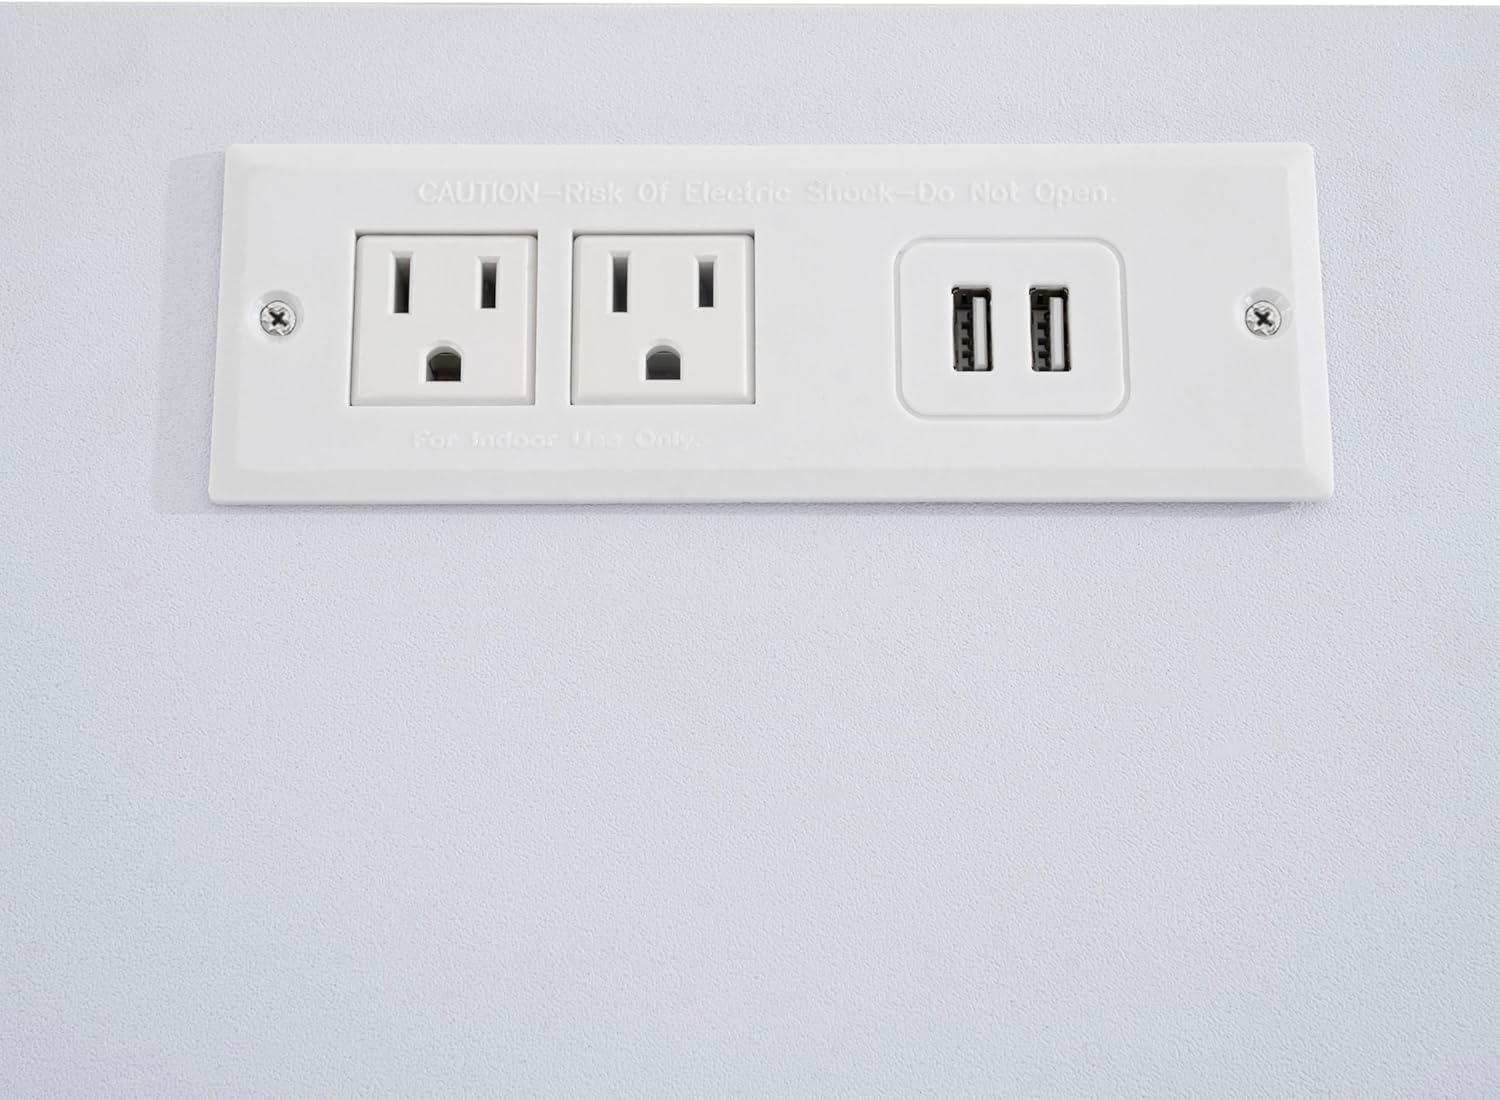
Image: Close-up of the H-shaped metal base, showing the integrated hidden casters for mobility.

Image: The tabletop featuring a built-in cup holder and power outlets, ready for use.

Image: A close-up view of the integrated power outlets, including two standard AC outlets and two USB ports.
Operating Instructions
Adjusting Table Height:
To adjust the height of the table, locate the adjustment lever on the side of the main column. Press the lever to release the locking mechanism, then gently raise or lower the tabletop to your desired height. Release the lever to lock the table in position. Ensure the table is stable before placing items on it.

Image: The table shown at its minimum height of 27.9 inches and maximum height of 36.42 inches, illustrating the adjustable range.
Using Charging Ports:
The table is equipped with two standard AC outlets, two USB-A ports, and one USB-C port. Plug the table's main power cord into a wall outlet. You can then connect your devices to the integrated ports for convenient charging. The USB ports provide 5V/2A max output.

Image: A close-up of the integrated power strip, highlighting the USB and C-Type charging ports alongside standard outlets.
Utilizing Integrated Holders:
The tabletop includes a built-in cup holder to keep your beverages secure and a pen holder to keep writing instruments organized. These features help maintain a clean and functional workspace.

Image: A detailed view of the integrated cup holder on the tabletop.

Image: A close-up of the built-in pen holder, designed to keep writing tools accessible.
Maintenance
To ensure the longevity and appearance of your overbed table, follow these simple care instructions:
- Cleaning: Wipe the table surfaces with a damp cloth. Avoid using harsh chemicals or abrasive cleaners, which may damage the finish.
- Spills: Promptly clean any spills to prevent staining, especially on the tabletop surface.
- Inspection: Periodically check all screws and connections to ensure they remain tight. Retighten if necessary.
Troubleshooting
If you encounter any issues with your Naomi Home Tamara Adjustable Overbed Bedside Table, refer to the following common solutions:
- Table Wobbles: Ensure all assembly screws are securely tightened. Check that the table is on a flat, even surface.
- Height Adjustment Issues: Verify that the adjustment lever is fully engaged or disengaged. If the mechanism feels stiff, ensure no debris is obstructing its movement.
- Charging Ports Not Working: Confirm the table's main power cord is securely plugged into a functional wall outlet. Check if the devices being charged are properly connected to the USB or AC ports.
- Casters Not Rolling Smoothly: Inspect casters for any trapped debris (e.g., hair, lint) and clean if necessary.
Specifications
| Brand | Naomi Home |
| Model | Tamara |
| Product Dimensions (D x W x H) | 15.83" x 29.71" x 36.38" |
| Adjustable Height Range | 27.9" to 36.42" |
| Item Weight | 24 Pounds |
| Maximum Weight Recommendation | 110.23 Pounds |
| Frame Material | Melamine/ MDF |
| Color | White |
| Required Assembly | Yes |
| USB Output | 5V/2A Max |
Warranty Information
This Naomi Home Tamara Adjustable Overbed Bedside Table comes with a 90-day manufacturer warranty. Please retain your proof of purchase for any warranty claims. The warranty covers defects in materials and workmanship under normal use.
Customer Support
For further assistance, missing parts, or warranty inquiries, please contact Naomi Home customer support. Refer to the contact information provided with your product packaging or visit the official Naomi Home website.
Online Support: Visit the Naomi Home Store on Amazon