Introduction
This manual provides detailed instructions for the assembly, operation, maintenance, and troubleshooting of your Huuger 78.7 Inch Height Adjustable Behind Couch Table. Please read these instructions carefully before assembly and use to ensure proper function and longevity of your product. Keep this manual for future reference.
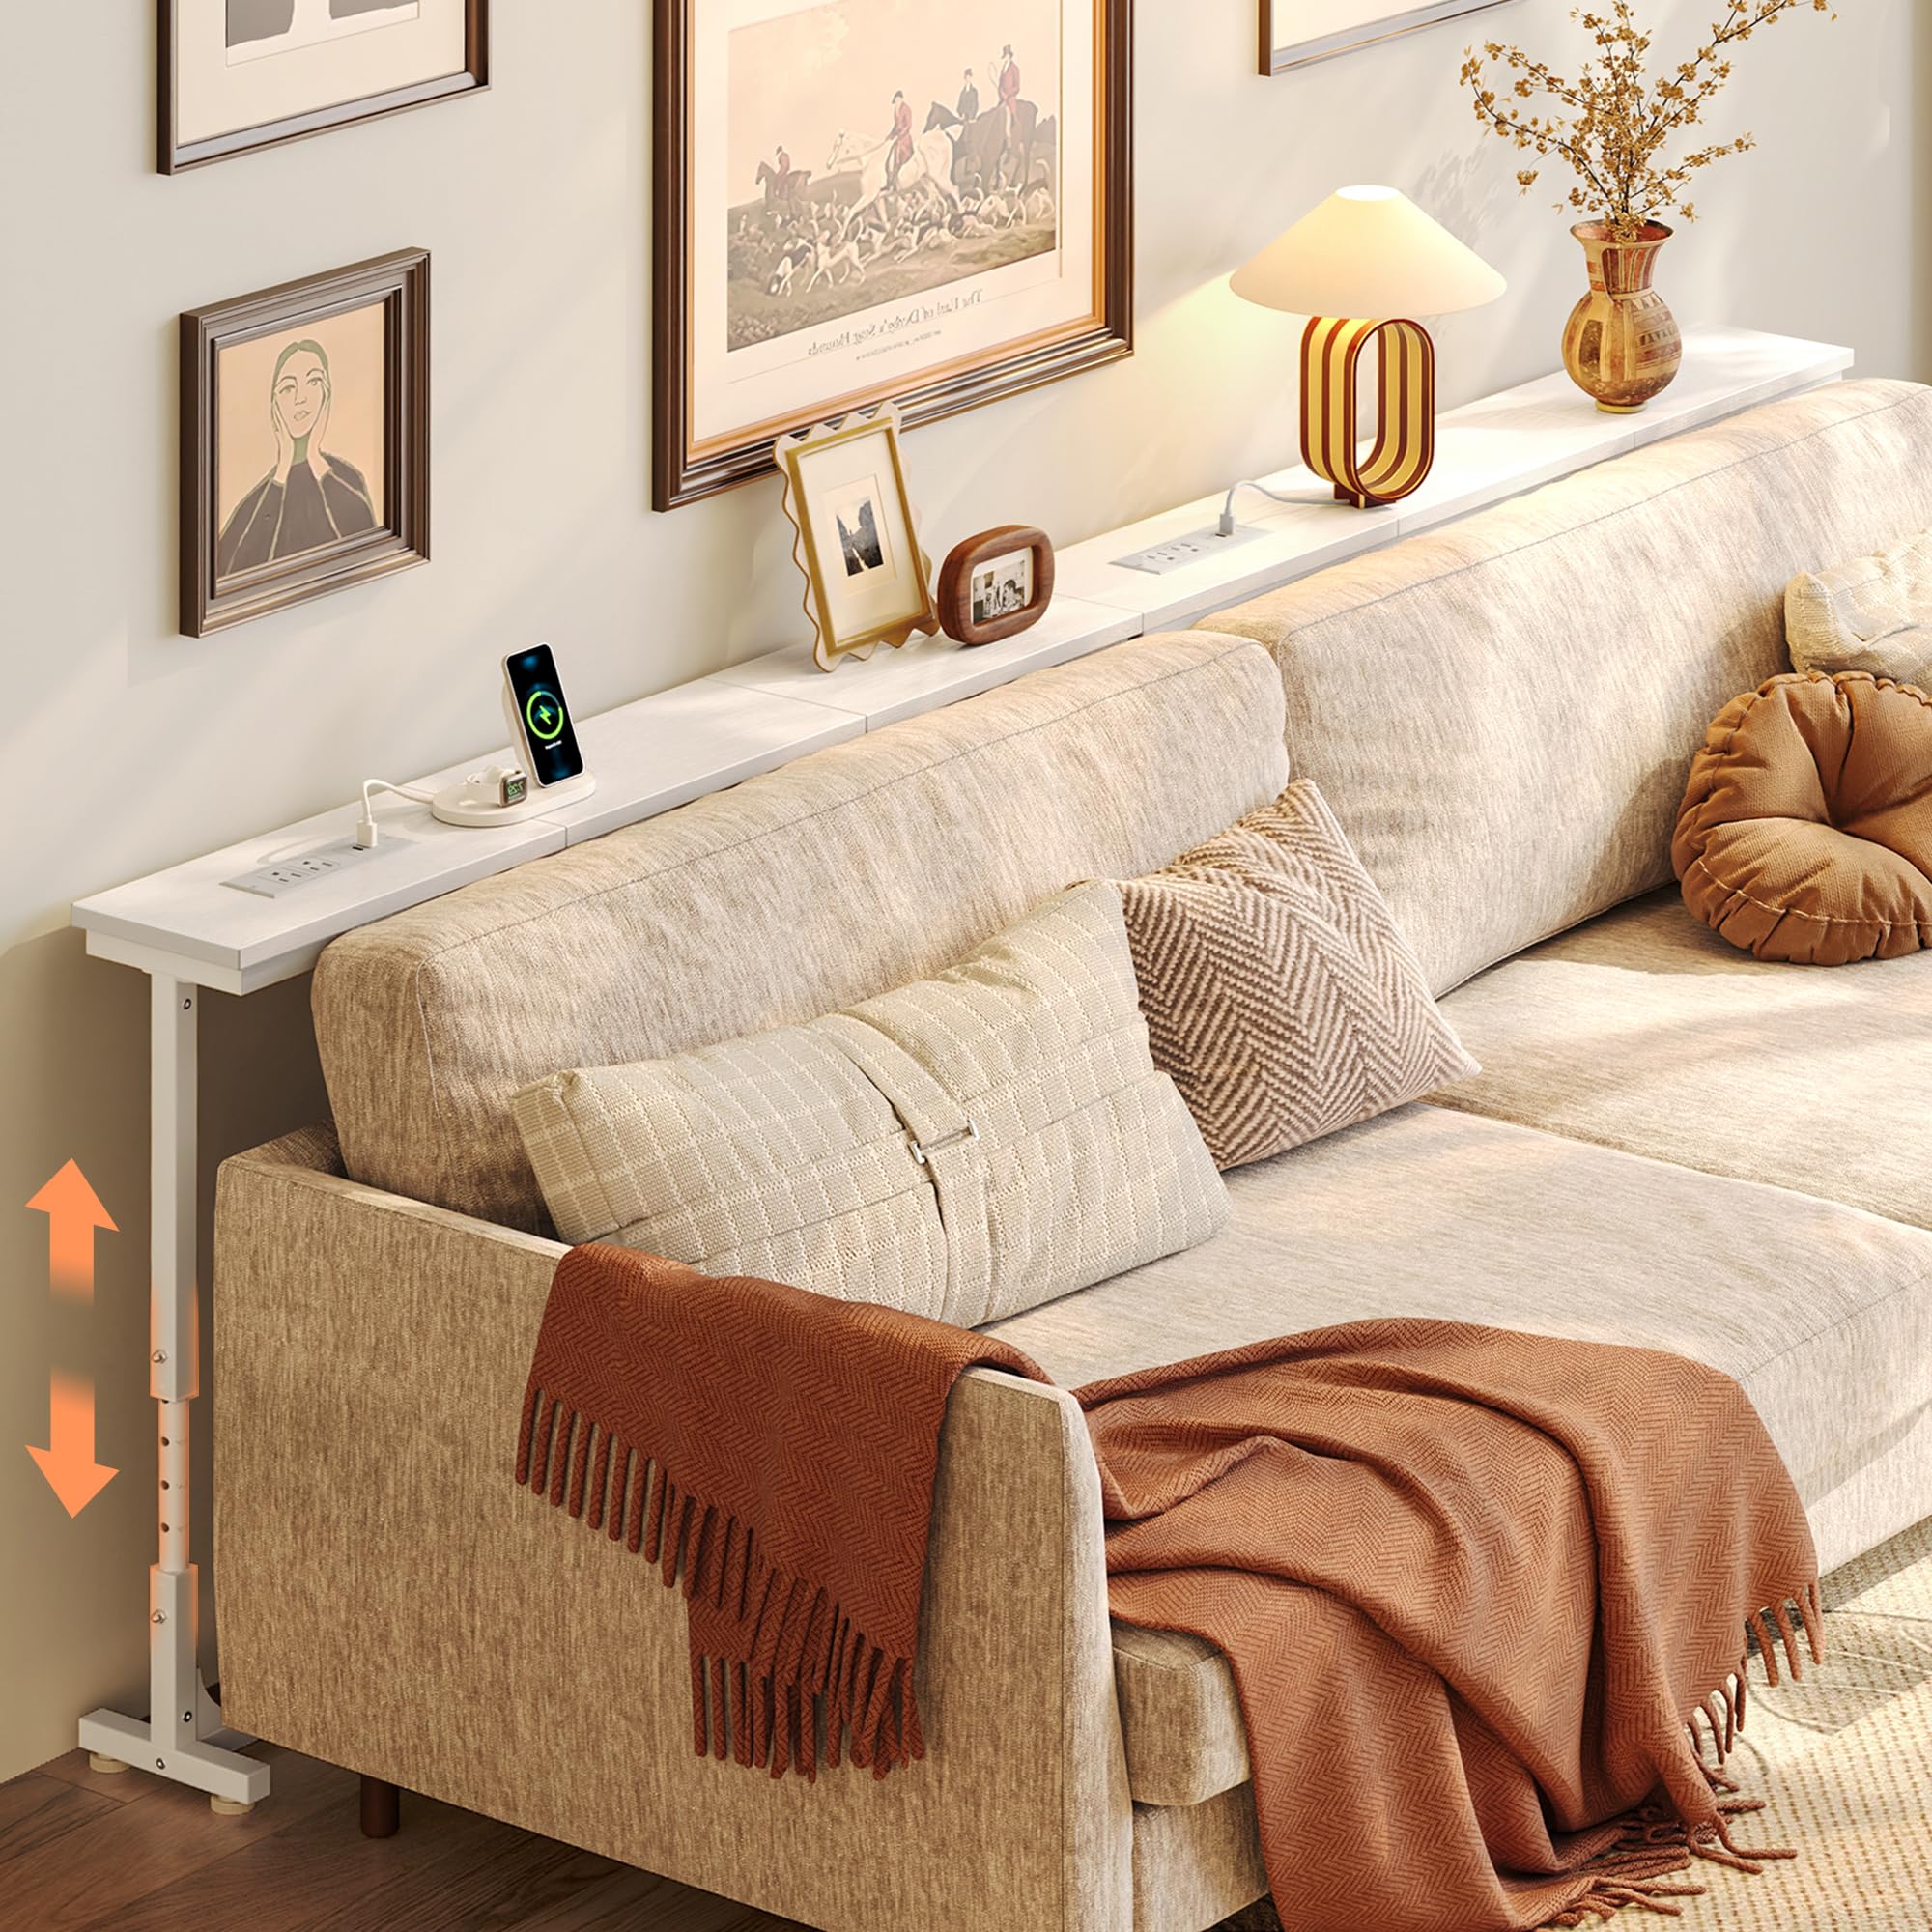
Image: The Huuger 78.7 Inch Behind Couch Table, showcasing its slim design and integrated power outlets.
Product Features
- Integrated Power Outlets: Equipped with 2 AC outlets, 1 USB-C port, and 1 USB port for convenient charging of electronic devices.
- Adjustable Height: Features an 8-level height adjustment mechanism, ranging from 23.9 inches to 34.4 inches, to match various sofa heights.
- Slim Design: Narrow profile designed to fit behind sofas, maximizing space utilization.
- Connectable Design: Includes metal connectors to securely join multiple tables for extended length.
- Sturdy Construction: Built with durable P2 particleboard and a strong metal frame for stability.
- Adjustable Anti-Collision Pads: Prevents tilting against baseboards and protects walls from scratches.
- Adjustable Feet: Ensures stability on uneven floor surfaces.

Image: Close-up view of the integrated power module, featuring two AC outlets, one USB-C port, and one standard USB port.

Image: Illustration demonstrating the 8-level height adjustment feature, allowing the table to be set between 23.9 and 34.4 inches.
Assembly Instructions
Assembly of this product is designed to be straightforward. Please follow the included step-by-step instructions and use the provided tools. It is recommended to assemble the table on a soft, clean surface to prevent scratches.
- Unpack Components: Carefully unpack all parts and hardware. Verify that all components listed in the parts list are present.
- Assemble Frame: Attach the metal frame components according to the diagrams in the instruction manual. Ensure all screws are tightened securely.
- Attach Tabletop: Secure the tabletop sections to the assembled frame. If connecting multiple tables, use the provided sheet metal connectors to align and secure the sections.
- Install Power Module: Place the power outlet module into its designated slot on the tabletop. Ensure the power cord is routed safely.
- Adjust Feet and Anti-Tip: Install the adjustable feet at the base of the table legs. Attach the anti-tip kit to the table and secure it to a wall for enhanced stability, especially if the table is not flush against a sofa or wall.
- Adjust Height: Set the desired height using the marked levels on the adjustable legs.

Image: Detailed view of the table's construction, highlighting the sheet metal connectors for joining multiple tables, the sturdy metal frame, the anti-tip design for wall attachment, and the adjustable feet for stability on uneven surfaces.

Image: An overhead view with dimensions, showing the 78.7 inch width, 5.9 inch depth, and the adjustable height range from 23.9 to 34.4 inches.
Operation
Height Adjustment
The table features 8 distinct height levels, allowing you to adjust its height from 23.9 inches to 34.4 inches. To adjust, loosen the locking mechanisms on the legs, slide the inner leg to the desired marked height, and then securely tighten the locking mechanisms. Ensure both sides are adjusted to the same level for stability.
Using Power Outlets
The integrated power module provides convenient access to electrical power. It includes two standard AC outlets (125V/12A), one USB-C port (5V/2A), and one USB-A port (5V/2A). Simply plug your devices into the appropriate ports for charging or power. The power module can be positioned flexibly along the tabletop to suit your needs.
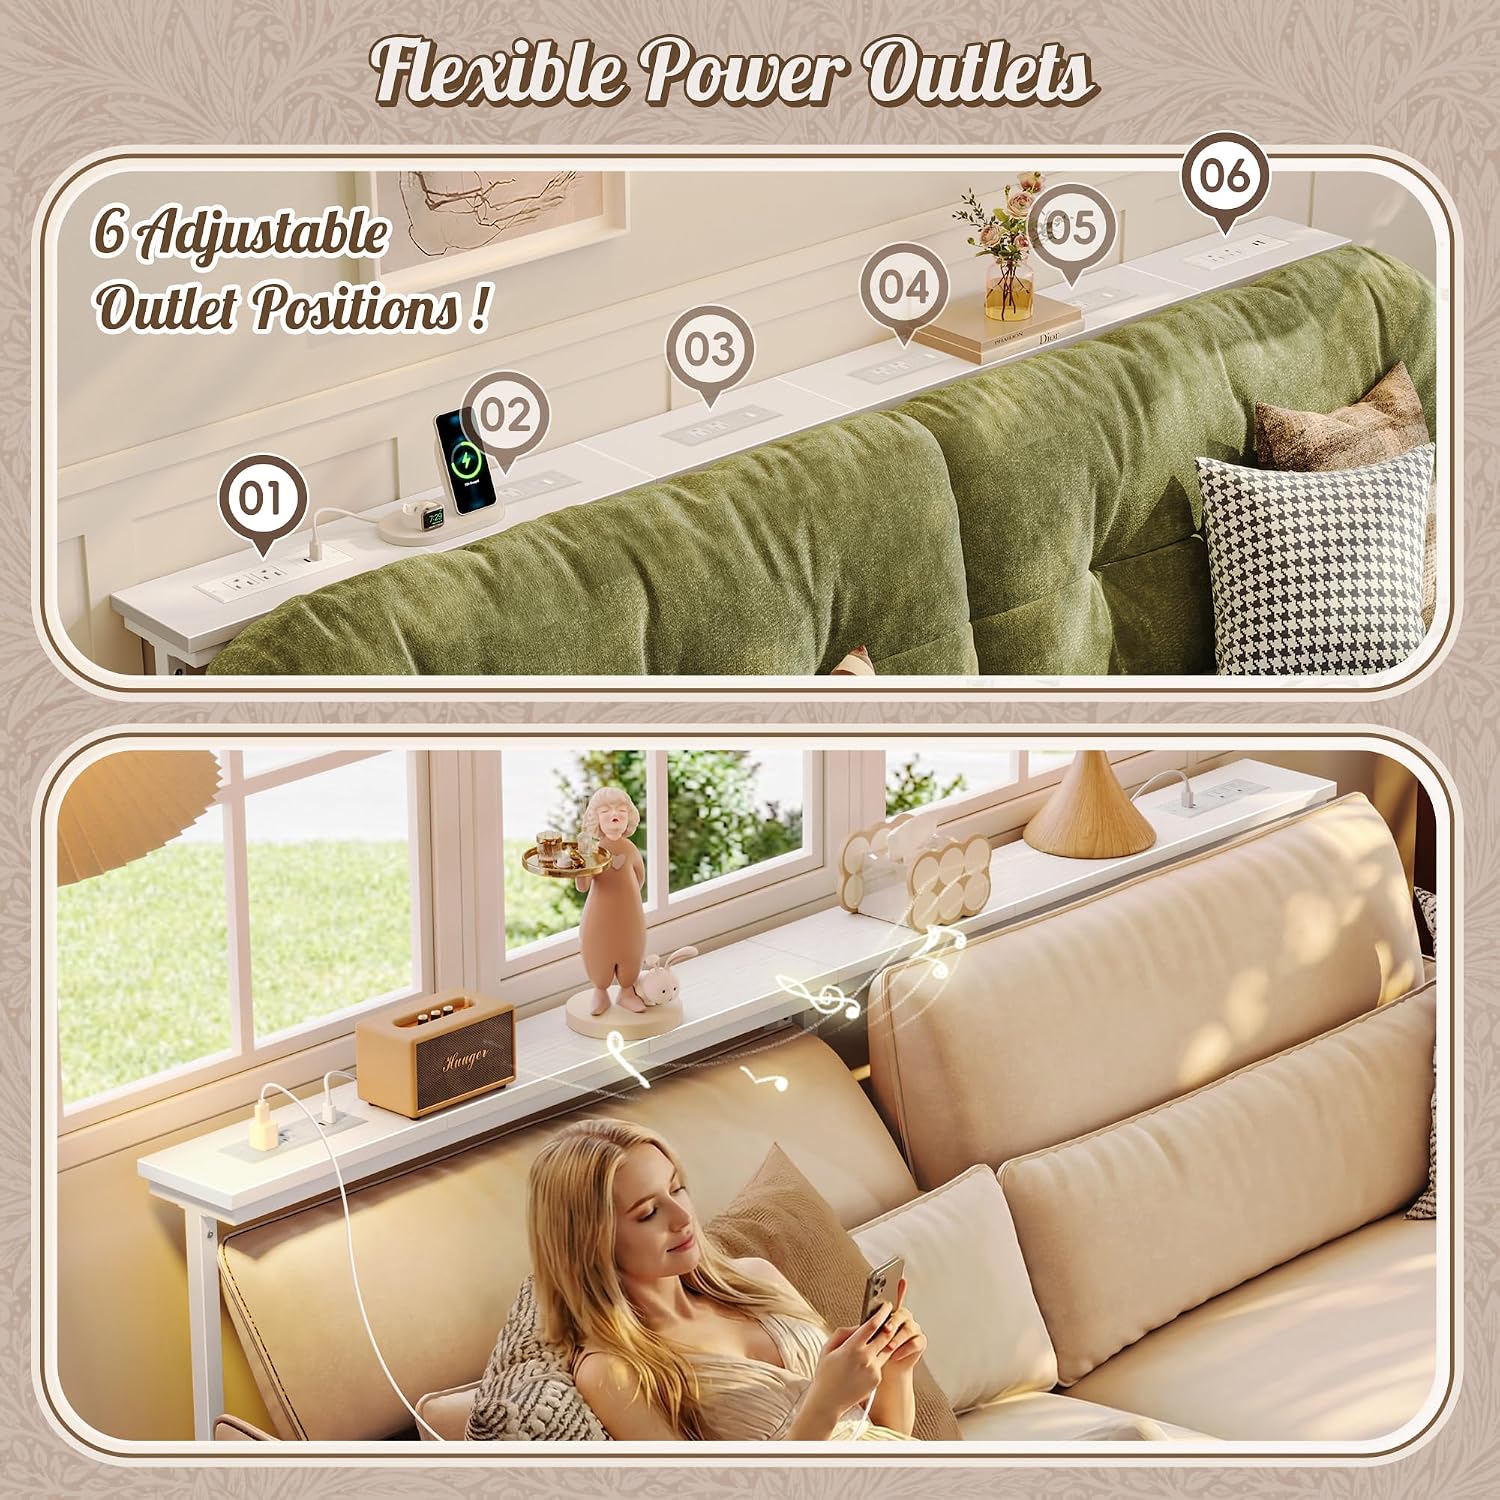
Image: The table demonstrating the flexible placement options for the power outlet module along the tabletop.
Connecting Multiple Tables
If you have purchased multiple Huuger behind couch tables, you can connect them to create a longer surface. Use the provided sheet metal connectors to join the tabletops securely. Ensure the frames are also aligned and stable after connection.

Image: The narrow sofa table positioned behind a couch, illustrating its practical use for holding items and charging devices, even accommodating a pet.
Maintenance
- Cleaning: Wipe the tabletop and metal frame with a soft, damp cloth. Avoid using harsh chemicals or abrasive cleaners, which can damage the finish.
- Spills: Immediately wipe up any spills to prevent moisture damage to the engineered wood.
- Inspection: Periodically check all screws and connections to ensure they remain tight. Retighten if necessary.
- Power Module Care: Keep the power outlets clean and free of dust. Do not expose the power module to liquids.
Troubleshooting
- Issue: Table feels unstable or wobbly.
- Solution:
- Ensure all assembly screws are fully tightened.
- Adjust the leveling feet at the bottom of the legs to compensate for uneven floors.
- Verify that the height adjustment mechanisms on both legs are securely locked at the same level.
- Utilize the anti-tip kit to secure the table to the wall, especially if it is not supported by a sofa or is at a higher adjustment.
- Issue: Power outlets are not working.
- Solution:
- Check if the main power cord from the table is securely plugged into a functional wall outlet.
- Ensure the power module is correctly seated in its slot on the tabletop and its internal connections are secure.
- Test the wall outlet with another device to confirm it is supplying power.
- Issue: Power cords from the table are too short for my wall outlet.
- Solution: If the integrated power cord does not reach your wall outlet, use a certified extension cord of appropriate length and gauge. Ensure the extension cord is safely routed to avoid tripping hazards.
- Issue: Tabletop sections do not align perfectly when connected.
- Solution: Ensure the sheet metal connectors are properly installed and tightened. Recheck the assembly of the frame components to ensure they are level and square before attaching the tabletop sections.

Image: Detail of the adjustable anti-collision pads, designed to protect walls from scratches and prevent the table from tilting against baseboards.
Specifications
| Brand | Huuger |
| Model Number | B0GDZNTMZX |
| Material | P2 Particleboard (Engineered Wood), Metal Frame |
| Color | White |
| Dimensions (W x D x H) | 78.7 x 5.9 x 23.9-34.4 inches (Adjustable Height) |
| Tabletop Thickness | 2 Inches |
| Power Outlets | 2 x AC Outlets (125V/12A), 1 x USB-C Port (5V/2A), 1 x USB-A Port (5V/2A) |
| Room Type | Living Room |
| Assembly Required | Yes |
Warranty and Support
Huuger products are designed for quality and durability. This product comes with a 3-year service commitment. For any questions, concerns, or assistance with your product, please contact Huuger customer support through the retailer's platform where the purchase was made.