1. Introduction
This manual provides detailed instructions for the proper use and maintenance of your YINMIK YK-T4 Hydroponic Meter. This device is designed to accurately measure pH, Parts Per Million (PPM), Electrical Conductivity (EC), and temperature in hydroponic nutrient solutions and other water samples. Please read this manual thoroughly before operation to ensure optimal performance and longevity of your meter.
2. Safety Information
- Always handle the meter and calibration solutions with care.
- Keep calibration and cleaning solutions out of reach of children and pets. Do not ingest.
- Avoid dropping or subjecting the meter to severe impacts.
- Do not disassemble the meter; this will void the warranty.
- Ensure the battery compartment is sealed properly to prevent water ingress.
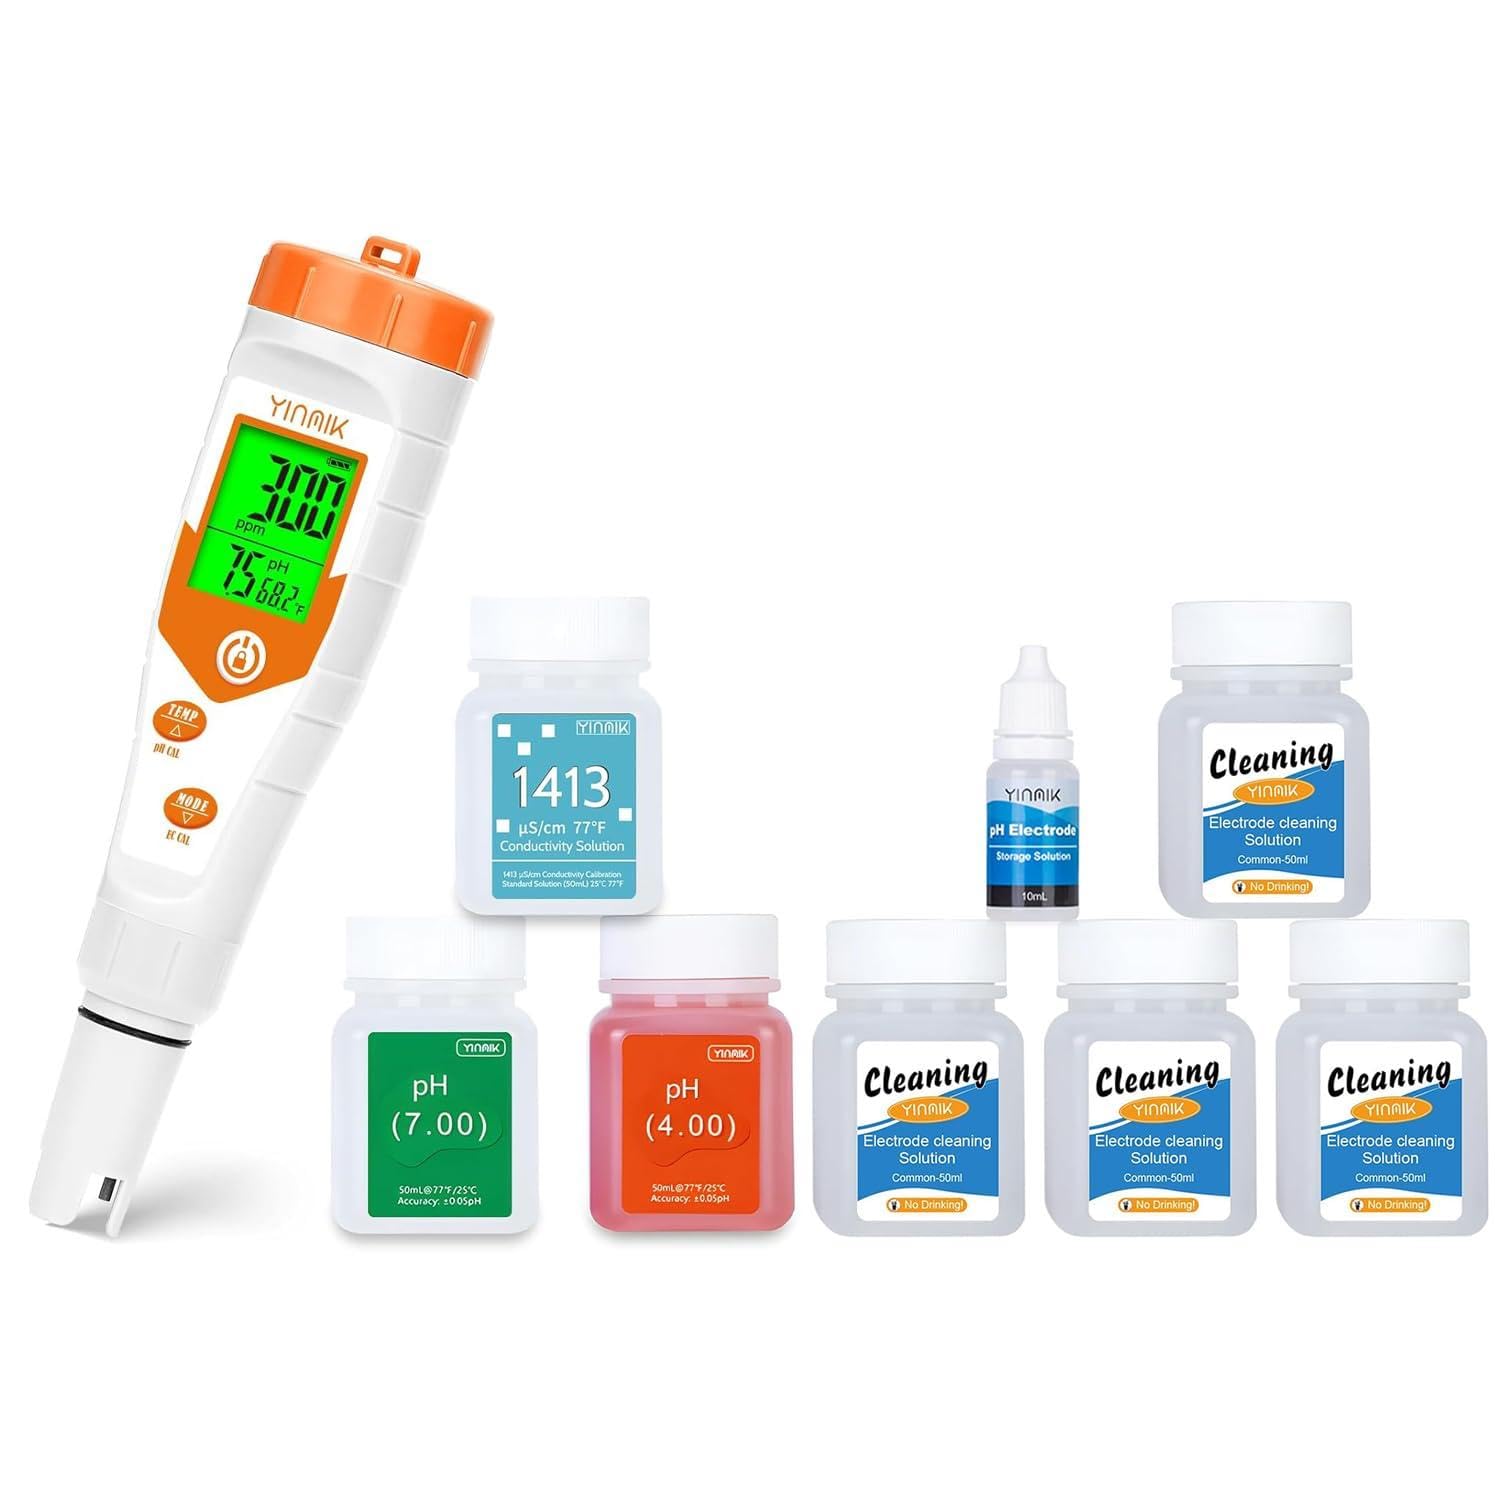
3. Package Contents
Verify that all items are present in your package:
- YINMIK YK-T4 Hydroponic Meter
- pH 4.00 Calibration Solution (50ml)
- pH 7.00 Calibration Solution (50ml)
- 1413 µS/cm Conductivity Calibration Solution (50ml)
- Electrode Cleaning Solution (multiple 50ml bottles)
- pH Electrode Storage Solution (10ml)
4. Product Overview
The YINMIK YK-T4 is a versatile 4-in-1 meter designed for hydroponic applications. It features a large, clear display that can show multiple parameters simultaneously, such as pH, EC/PPM, and temperature, without the need for manual switching. The meter is equipped with dedicated calibration buttons for ease of use and has a replaceable electrode for extended service life.


5. Setup
- Battery Installation: Open the battery compartment (usually located at the top or back of the meter) and insert the required batteries, observing polarity. Close the compartment securely.
- Initial Rinse: Before first use, rinse the electrode with distilled or deionized water.
- Prepare Electrode Cap: Ensure the sponge inside the electrode cap is moist with the provided pH Electrode Storage Solution. This prevents the electrode from drying out, which can affect accuracy and lifespan.

6. Operating Instructions
- Turn On: Press the power button to turn on the meter.
- Select Mode: Use the 'MODE' button to cycle through different measurement displays (e.g., pH/EC/Temp, pH/PPM/Temp).
- Take Measurement: Immerse the electrode into the sample solution, ensuring the sensor is fully submerged. Gently stir the solution and wait for the reading to stabilize (typically a few seconds).
- Record Reading: Read the values displayed on the screen.
- Temperature Unit: Use the 'TEMP' button to switch between Celsius (°C) and Fahrenheit (°F) if applicable.
- Turn Off: Press the power button again to turn off the meter. Rinse the electrode with distilled water after each use and replace the cap with moist storage solution.

7. Calibration
Regular calibration is essential for accurate readings. Calibrate your meter at least once a month, or more frequently if used often, if readings are inconsistent, or after replacing the electrode.
7.1 pH Calibration
- Prepare two clean beakers with pH 4.00 and pH 7.00 calibration solutions.
- Rinse the electrode with distilled water and blot dry.
- Immerse the electrode into the pH 7.00 solution. Press and hold the 'pH CAL' button until the display shows 'CAL' or a similar indication. The meter will automatically recognize the solution and calibrate. Wait for the reading to stabilize and confirm calibration (e.g., 'END' or 'PASS').
- Rinse the electrode again with distilled water.
- Immerse the electrode into the pH 4.00 solution. Repeat the calibration process as with pH 7.00.
- For advanced users, a third point (pH 10.00) may be used if available and required for your specific range.
7.2 EC Calibration
- Prepare a clean beaker with 1413 µS/cm conductivity calibration solution.
- Rinse the electrode with distilled water and blot dry.
- Immerse the electrode into the 1413 µS/cm solution. Press and hold the 'EC CAL' button until the display shows 'CAL' or a similar indication. The meter will automatically recognize the solution and calibrate. Wait for the reading to stabilize and confirm calibration.
- Rinse the electrode with distilled water after calibration.
8. Maintenance
8.1 Electrode Cleaning
Over time, deposits can accumulate on the electrode, leading to inaccurate readings even after calibration. Regular cleaning is crucial.
- Rinse the electrode with distilled water.
- Immerse the electrode in the provided Electrode Cleaning Solution for approximately 15-30 minutes. For stubborn deposits, a longer soak may be necessary.
- Gently brush the electrode tip with a soft brush (e.g., a soft toothbrush) if visible deposits remain.
- Rinse the electrode thoroughly with distilled water.
- Perform a full calibration after cleaning to ensure accuracy.


8.2 Electrode Storage
Proper storage is vital for extending the life of your electrode.
- Always rinse the electrode with distilled water after use.
- Ensure the sponge inside the electrode cap is kept moist with pH Electrode Storage Solution. Never store the electrode dry.
- Replace the electrode cap securely after each use.
8.3 Solution Storage
The calibration and cleaning solutions are provided with double-layer strong sealing tape to prevent leakage and contamination during transportation and storage. Ensure bottles are tightly sealed after use to maintain their integrity.

9. Troubleshooting
- Inaccurate Readings:
- Ensure the electrode is clean. Refer to Section 8.1.
- Perform a full calibration. Refer to Section 7.
- Check if the electrode is damaged or worn out. Replace if necessary.
- Verify that the sample temperature is within the meter's operating range.
- Meter Not Turning On:
- Check battery installation and ensure batteries are not depleted. Replace if needed.
- Ensure the battery compartment is dry and free of corrosion.
- Slow Response Time:
- The electrode may be dirty or dry. Clean and re-moisten the electrode.
- The electrode may be nearing the end of its lifespan.
10. Specifications
| Parameter | Range | Accuracy |
|---|---|---|
| pH | 0.00 - 14.00 pH | ±0.05 pH |
| EC | 0 - 19990 µS/cm | ±2% F.S. |
| PPM (TDS) | 0 - 9990 ppm | ±2% F.S. |
| Temperature | 0.1 - 60.0 °C (32.0 - 140.0 °F) | ±0.5 °C |
| Automatic Temperature Compensation (ATC) | 0 - 60 °C | |
| Power Supply | 2 x 1.5V AAA Batteries (not always included) | |
11. Warranty and Support
YINMIK products are manufactured to high-quality standards. For warranty information, technical support, or service inquiries, please refer to the contact information provided on the product packaging or visit the official YINMIK website. Please have your product model number (YK-T4) and purchase date available when contacting support.


