Important Safety Information
Read all safety warnings and instructions before operating this machine. Failure to follow the warnings and instructions may result in electric shock, fire, and/or serious injury.
- This machine is designed for professional use only.
- Electrical Connection: The power cord does not include a plug. It must be connected to a suitable air switch (rated approximately 63A) by a qualified professional electrician. Ensure all electrical connections comply with local codes and standards.
- Starting Procedure: Always lift the grinding head off the ground before starting the motor. Once the motor reaches full speed, gently lower the grinding head onto the surface.
- Surface Compatibility: Do not use this machine on floors with existing adhesive or glue. This can damage the machine and the floor.
- Generator Use: If operating with a generator, ensure its output power is at least 12KW to prevent damage to the grinder and ensure stable operation.
- Wear appropriate personal protective equipment (PPE) including safety glasses, hearing protection, dust mask, and sturdy work boots during operation.
- Ensure the work area is well-ventilated and clear of obstructions.
- Keep bystanders and children away from the operating machine.
Product Overview
The HayWHNKN JHSFY-238061 is a robust concrete floor grinder designed for professional floor preparation and polishing tasks. It features a powerful motor, an efficient dust collection system, and an adjustable design for versatile application across various floor types.

Figure 1: HayWHNKN JHSFY-238061 Concrete Floor Grinder with its various components and accessories.
Key Features:
- Powerful Performance: Equipped with a 4KW copper motor and a 5-grinding-head design, rotating at 1440r/min for efficient material removal.
- Dust-Free Operation: Features a 1.8KW built-in suction fan and a sealed dust cover, directing dust into a 20L capacity dust box with a high-efficiency filter element (90% dust filtration).
- Adjustable Design: Handle height is adjustable. Working depth can be set from 0-3mm. The distance between the chassis and the floor is adjustable via wheel height. Grinding plates and heads are replaceable.
- Wide Application: Suitable for restoring flatness, roughening surfaces, refurbishing old epoxy, and polishing various floors including cement, epoxy, marble, and for steel plate rust removal.
Included Components
Verify that all items listed below are present in the packaging before beginning assembly or operation.
Figure 2: Overview of the main unit and all accessories included with the grinder.
- Concrete Floor Grinder Main Unit
- Electric Wire (without plug) x 1
- Filter Element x 1
- Grinding Head #30 (5 pieces)
- Diamond Disc (5 pieces)
- Resin Grinding Sheet (5 pieces)
- Sandpaper (5 pieces)
- Resin Grinding Disc Adhesive Plate (5 pieces)
- Replacement Capacitor x 2
- Wrench x 1
Setup
1. Unpacking and Initial Inspection
Carefully remove all components from the packaging. Inspect the machine and accessories for any signs of damage during transit. Report any damage to your supplier immediately.
2. Handle Assembly
Attach the handle to the main unit. Ensure all bolts are securely tightened. The handle height can be adjusted to a comfortable operating position using the provided adjustment mechanisms.

Figure 3: Side view illustrating the handle and control panel area.
3. Electrical Connection
This step must be performed by a qualified professional electrician.
- Connect the provided electric wire to the machine's electrical input.
- The other end of the electric wire, which does not have a plug, must be wired into a suitable air switch rated for approximately 63A.
- Ensure the power supply is 220V and can deliver the required 4KW (or 12KW if using a generator).
- Verify all connections are secure and properly insulated before proceeding.
4. Installing Grinding Heads
The grinder uses a 5-grinding-head system. Select the appropriate grinding heads (e.g., #30 grinding discs, diamond discs, resin grinding sheets, or sandpaper with adhesive plates) for your specific application.
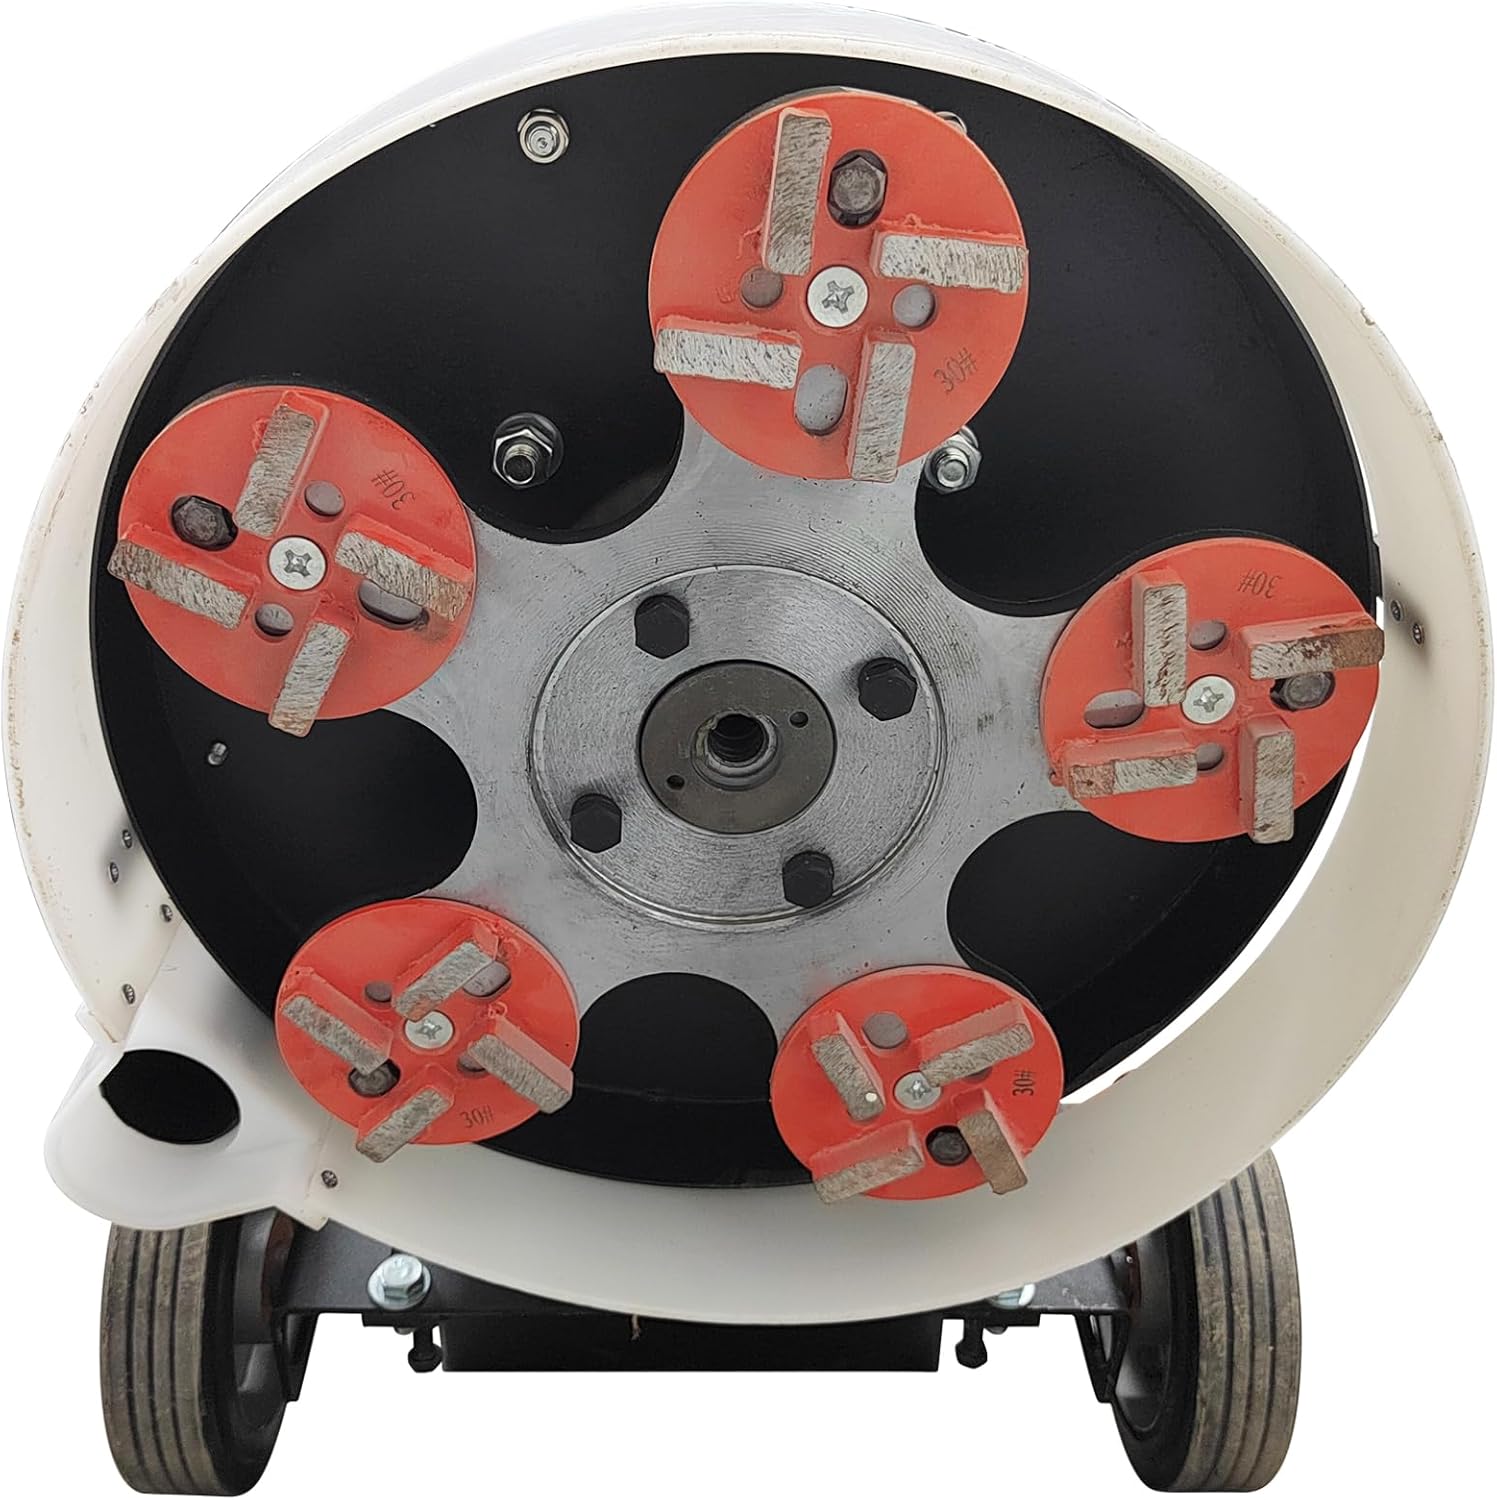
Figure 4: View of the grinding plate with five grinding heads attached.
- Tilt the machine back to access the grinding plate.
- Securely attach the chosen grinding heads to the five mounting points on the grinding plate. Ensure they are firmly seated and tightened.
- For resin grinding sheets or sandpaper, use the resin grinding disc adhesive plates as a base.
5. Dust Bin and Filter Installation
Ensure the 20L dust bin is correctly attached and the filter element is properly installed within the dust collection system.

Figure 5: Rear view of the grinder with the dust bin in place.

Figure 6: Detail of the filter element within the dust collection system.
Operation
1. Pre-Operation Checks
- Confirm all safety warnings have been read and understood.
- Ensure all electrical connections are secure and correct.
- Verify grinding heads are properly installed and secured.
- Check that the dust bin is empty and the filter element is clean.
- Clear the work area of any debris or obstructions.
- Wear all required PPE.
2. Starting the Machine
- Lift the grinding head off the ground by tilting the machine slightly back using the handle.
- Engage the power switch (refer to Figure 7 for control panel layout).
- Allow the motor to reach full operating speed (1440 r/min).
- Gently lower the grinding head onto the floor surface.

Figure 7: Detail of the control panel, showing the power switch (red) and start/stop buttons.
3. Adjusting Grinding Depth
The working depth can be adjusted from 0-3mm. This is typically done by adjusting the height of the wheels relative to the grinding plate. Experiment with small adjustments to achieve the desired material removal rate.
4. Grinding and Polishing Techniques
- Maintain a steady, even pace across the floor surface.
- Overlap passes slightly to ensure uniform coverage.
- Monitor the dust collection system to ensure it is operating effectively.
- For polishing, use the appropriate resin grinding sheets or sandpaper.
5. Applications
This grinder is suitable for a variety of floor types and tasks:

Figure 8: Examples of floor types and applications for the grinder.
- Restoration of new ground flatness.
- Roughening surfaces for better adhesion of coatings.
- Refurbishing old epoxy floors.
- Small-scale polishing of cement, marble, and terrazzo floors.
- Rust removal from steel plates.
6. Shutting Down
- Lift the grinding head off the ground.
- Turn off the power switch.
- Allow the machine to come to a complete stop before leaving it unattended.
Maintenance
Regular maintenance ensures optimal performance and extends the lifespan of your concrete floor grinder.
1. Dust Bin Emptying and Cleaning
- Empty the 20L dust bin frequently, especially after each use or when it appears full.
- Clean the interior of the dust bin to prevent buildup.
2. Filter Element Maintenance
- The high-efficiency filter element should be regularly inspected and cleaned.
- Tap or brush off accumulated dust. If heavily soiled or damaged, replace the filter element (a spare is included).
3. Grinding Head Replacement
- Grinding heads will wear down over time. Inspect them before each use.
- Replace worn grinding heads promptly to maintain grinding efficiency and prevent damage to the machine or floor.
- Refer to the "Setup" section for instructions on attaching grinding heads.
4. General Cleaning
- Wipe down the exterior of the machine with a damp cloth after each use.
- Ensure no dust or debris accumulates in ventilation openings.
Troubleshooting
This section addresses common issues you might encounter during the operation of your concrete floor grinder. For problems not listed here, contact customer support.
| Problem | Possible Cause | Solution |
|---|---|---|
| Machine does not start. | No power supply; faulty electrical connection; emergency stop engaged; motor overload. | Check power source and air switch. Ensure electrical connections are secure (consult electrician). Disengage emergency stop. Allow motor to cool if overloaded. |
| Poor grinding performance. | Worn grinding heads; incorrect grinding head type for surface; insufficient grinding depth. | Replace worn grinding heads. Ensure correct grinding heads are used for the material. Adjust grinding depth. |
| Excessive dust during operation. | Dust bin full; filter element clogged or damaged; dust cover not sealed properly. | Empty dust bin. Clean or replace filter element. Check dust cover for proper sealing. |
| Machine vibrates excessively. | Unevenly worn grinding heads; loose grinding heads; damaged grinding plate. | Inspect and replace unevenly worn grinding heads. Tighten all grinding head fasteners. Inspect grinding plate for damage. |
Specifications
Technical details for the HayWHNKN JHSFY-238061 Concrete Floor Grinder.

Figure 9: Key dimensions of the concrete floor grinder.
| Feature | Detail |
|---|---|
| Model Number | JHSFY-238061 |
| Brand | HayWHNKN |
| Motor Power | 4 KW (Copper Motor) |
| Voltage | 220 Volts |
| Grinding Head Quantity | 5 |
| Rotation Speed | 1440 r/min |
| Working Depth Range | 0-3 mm |
| Dust Bin Capacity | 20 Liters |
| Built-in Fan Power | 1.8 KW |
| Item Weight | 277 Pounds (approx. 125.6 kg) |
| Package Dimensions | 42.52 x 35.04 x 22.44 inches (approx. 108 x 89 x 57 cm) |
| UPC | 198462688987 |
Warranty and Support
For warranty information, technical support, or to order replacement parts, please contact your retailer or the manufacturer directly. Keep your purchase receipt and model number (JHSFY-238061) handy for all inquiries.
Manufacturer: HayWHNKN