1. Introduction
The ZUZZEE SZ308 is a smart digital multimeter designed for precise measurement of various electrical parameters. It features a clear LCD display, durable construction, and multiple functions suitable for automotive maintenance, industrial applications, and home electrical troubleshooting. This manual provides essential information for the safe and effective use of your multimeter.

Figure 1: ZUZZEE SZ308 Digital Multimeter with included test leads.
2. Package Contents
Verify that all items listed below are present in your package:
- 1 x ZUZZEE SZ308 Handheld Digital Multimeter
- 2 x Test Leads (one red, one black)
- 1 x User Manual
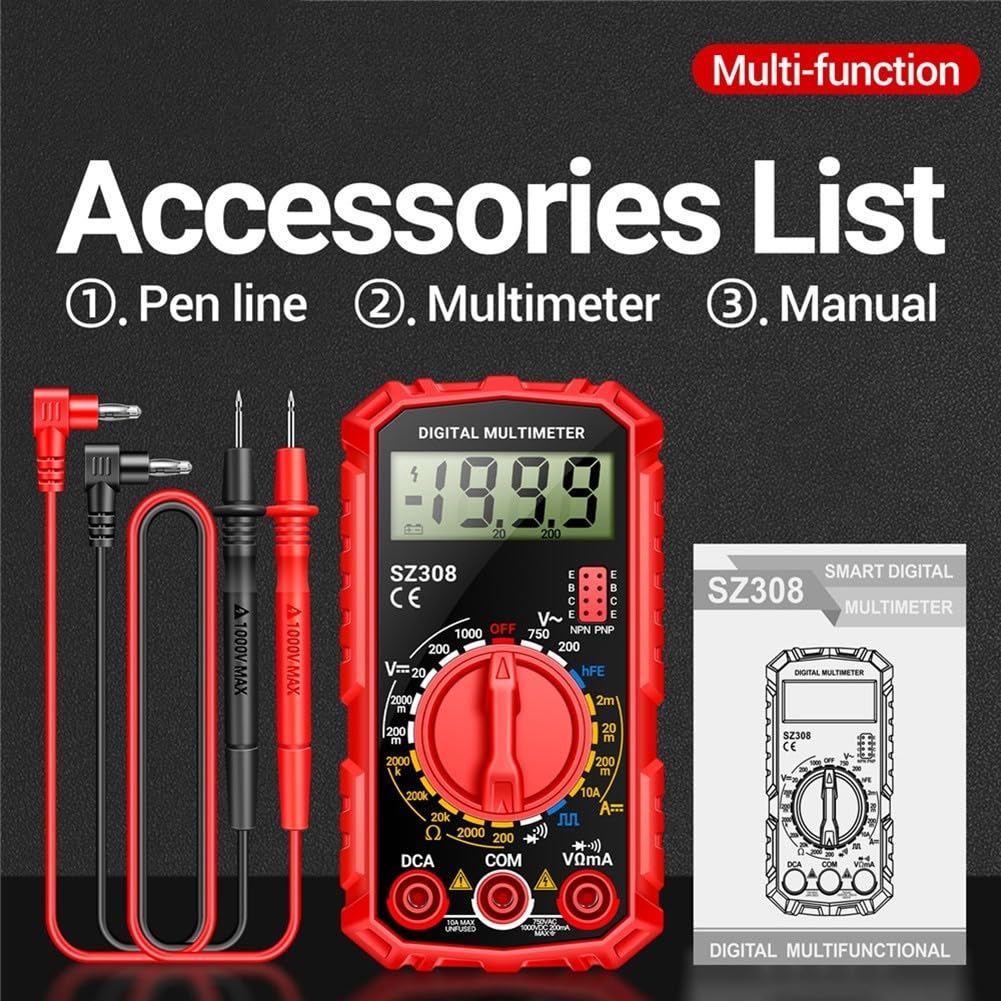
Figure 2: Contents of the ZUZZEE SZ308 package.
3. Safety Information
To ensure safe operation and avoid damage to the meter, observe the following safety precautions:
- Always ensure the meter is in the correct function and range before making measurements.
- Do not apply voltage or current that exceeds the maximum specified limits for the meter.
- Exercise extreme caution when working with live circuits.
- Never connect the test leads across a voltage source when the rotary switch is set to current, resistance, or diode mode.
- Replace the battery immediately when the low battery indicator appears to ensure accurate readings.
- Do not use the meter if it appears damaged or if the test leads are damaged.
- Keep fingers behind the finger guards on the test leads during measurements.
4. Product Overview
The ZUZZEE SZ308 Digital Multimeter features a robust design with an easy-to-read LCD and intuitive controls.
4.1 Components
- LCD Display: Shows measurement readings, units, and function indicators.
- Rotary Switch: Used to select measurement functions and ranges.
- Input Jacks:
- COM Jack: Common input for all measurements (black test lead).
- VΩmA Jack: Input for voltage, resistance, diode, and low current measurements (red test lead).
- 10A Jack: Input for high current measurements (red test lead).
- Data Hold Button: Freezes the current reading on the display.
- Backlight Button: Activates or deactivates the display backlight.

Figure 3: Front panel of the ZUZZEE SZ308 Multimeter.
5. Setup
5.1 Battery Installation
The ZUZZEE SZ308 requires a 9V battery (not included) for operation.
- Ensure the multimeter is turned OFF.
- Locate the battery compartment cover on the back of the unit.
- Unscrew the retaining screw(s) and remove the cover.
- Connect a 9V battery to the battery clips, observing correct polarity.
- Place the battery into the compartment and replace the cover, securing it with the screw(s).
5.2 Connecting Test Leads
Always connect the black test lead to the COM jack. Connect the red test lead to the appropriate input jack based on the desired measurement:
- For voltage, resistance, diode, and low current (mA) measurements, connect the red test lead to the VΩmA jack.
- For high current (10A) measurements, connect the red test lead to the 10A jack.
6. Operating Instructions
6.1 Power On/Off
Turn the rotary switch from the "OFF" position to any desired measurement function to power on the multimeter. To power off, turn the rotary switch back to the "OFF" position.
6.2 Measuring AC/DC Voltage
- Connect the red test lead to the VΩmA jack and the black test lead to the COM jack.
- Set the rotary switch to the desired AC Voltage (V~) or DC Voltage (V=) range. Start with the highest range if the voltage is unknown.
- Connect the test probes in parallel across the circuit or component to be measured.
- Read the voltage value on the LCD display.

Figure 4: Measuring AC voltage with the multimeter.
6.3 Measuring AC/DC Current
Caution: Never connect the multimeter in parallel with a voltage source when measuring current. Always connect in series with the load.
- For current up to 200mA, connect the red test lead to the VΩmA jack. For current up to 10A, connect the red test lead to the 10A jack. Connect the black test lead to the COM jack.
- Set the rotary switch to the desired AC Current (A~) or DC Current (A=) range. Start with the highest range if the current is unknown.
- Open the circuit where the current is to be measured and connect the test probes in series with the load.
- Read the current value on the LCD display.
6.4 Measuring Resistance
Caution: Ensure the circuit is de-energized and all capacitors are discharged before measuring resistance.
- Connect the red test lead to the VΩmA jack and the black test lead to the COM jack.
- Set the rotary switch to the desired Resistance (Ω) range.
- Connect the test probes across the component to be measured.
- Read the resistance value on the LCD display.
6.5 Diode Test
- Connect the red test lead to the VΩmA jack and the black test lead to the COM jack.
- Set the rotary switch to the Diode (►|) function.
- Connect the red probe to the anode and the black probe to the cathode of the diode. The display will show the forward voltage drop.
- Reverse the probes. The display should show "OL" (Open Loop) for a good diode.
6.6 Continuity Test
- Connect the red test lead to the VΩmA jack and the black test lead to the COM jack.
- Set the rotary switch to the Continuity (🔊) function.
- Connect the test probes across the circuit or component. If the resistance is below approximately 50Ω, the buzzer will sound, indicating continuity.
6.7 Data Hold Function
Press the "HOLD" button to freeze the current reading on the display. Press it again to release the hold function and resume live measurements.
7. Maintenance
7.1 Cleaning
Wipe the meter casing with a damp cloth and mild detergent. Do not use abrasives or solvents. Ensure the meter is completely dry before use.
7.2 Battery Replacement
When the low battery indicator appears on the display, replace the 9V battery as described in the "Battery Installation" section (5.1). Always use a fresh 9V battery.
7.3 Fuse Replacement
If the current measurement function stops working, the fuse may need replacement. Refer to the specifications for the correct fuse type and rating. Fuse replacement typically involves opening the back casing, similar to battery replacement. If unsure, consult a qualified technician.
8. Troubleshooting
| Problem | Possible Cause | Solution |
|---|---|---|
| No display or dim display | Low or dead battery | Replace the 9V battery. |
| "OL" (Overload) displayed | Measurement exceeds selected range or meter's maximum capacity. | Select a higher range or ensure the measurement is within the meter's limits. |
| Incorrect readings | Incorrect function/range selected; poor test lead connection; low battery. | Verify function/range, check test lead connections, replace battery. |
| Current measurement not working | Blown fuse. | Replace the fuse (refer to 7.3 Fuse Replacement). |
9. Specifications
| Parameter | Specification |
|---|---|
| AC Voltage Range | 0-750V |
| DC Voltage Range | 200mV-1000V |
| DC Current Range (mA) | 2mA-10A |
| Resistance Range (Ω) | 0Ω-2000kΩ |
| Maximum Display | 1999 counts |
| AC Voltage Accuracy | ±(1.0% + 15) |
| Resistance Accuracy | ±(1.2% + 5) |
| DC Current Accuracy | ±(1.5% + 5) |
| DC Voltage Accuracy | ±(1.5% + 5) |
| Battery Type | 9V (not included) |
| Material | PP (Polypropylene) |
| Dimensions (L x W x H) | 121.8 x 66.5 x 33.5 mm (4.80 x 2.62 x 1.32 inches) |
| Weight | 185 Grams |
10. Warranty and Support
Warranty information for the ZUZZEE SZ308 Digital Multimeter is typically provided with your purchase documentation. Please refer to the specific warranty terms and conditions included with your product.
For technical support, troubleshooting assistance beyond this manual, or warranty claims, please contact ZUZZEE customer service through the retailer where the product was purchased or visit the official ZUZZEE website for contact information.