Introduction
This manual provides detailed instructions for the assembly, operation, and maintenance of your YOPTO 12x14FT Outdoor Storage Shed. Please read all instructions carefully before beginning assembly and retain this manual for future reference. Proper assembly and care will ensure the longevity and optimal performance of your storage shed.

Image: Exterior view of the YOPTO 12x14FT Outdoor Storage Shed, showcasing its design and size in a backyard setting.
Safety Information
- Always wear appropriate safety gear, including gloves and eye protection, during assembly.
- Ensure the assembly area is clear of obstructions and level.
- Do not attempt to assemble the shed in strong winds or adverse weather conditions.
- Two or more people are recommended for safe and efficient assembly.
- Keep children and pets away from the assembly area.
- Securely anchor the shed to the ground after assembly to prevent wind damage.
- Do not store flammable liquids or hazardous materials inside the shed.
- Regularly inspect the shed for any loose parts or damage and address them promptly.
Package Contents
Before beginning assembly, verify that all parts listed in the packing list are present and undamaged. All panels are pre-cut and pre-drilled, and components are clearly labeled for ease of identification.
Tools Provided: Gloves, screwdriver bit, and wrenches.

Image: Detailed view of key components including 4 ground nails, 8 expansion bolts, 2 pairs of gloves, security door lock latch, smooth plastic protective shell, and reinforced beams.
Setup and Assembly
Follow these steps carefully for proper assembly. It is recommended to have at least two people for this process.
Step 1: Prepare the Foundation
Ensure the chosen site for your shed is level and firm. A concrete slab or a treated timber base is recommended for optimal stability and longevity. The shed includes a floor frame, which elevates the structure to protect items from moisture. Note: Flooring materials are not included.

Image: Illustration of the included floor frame, designed to elevate the shed and protect contents from ground moisture. It explicitly states that flooring itself is not provided.
Step 2: Assemble the Frame
Begin by assembling the base frame according to the numbered parts. Then, erect the vertical supports and connect them with the horizontal beams to form the shed's main structure. The reinforced frame provides superior strength and stability.

Image: Diagram illustrating the sturdy internal frame support system, showing how the metal components interlock to create a stable structure.
Step 3: Install Wall Panels
Attach the pre-drilled steel wall panels to the assembled frame. Ensure panels are aligned correctly and secured with the provided fasteners. Work systematically around the shed, ensuring each panel is firmly attached before moving to the next.
Step 4: Assemble and Attach Doors
Assemble the double hinged doors according to the instructions. Attach the doors to the designated frame opening, ensuring they swing freely and close securely. Install the security door lock latch for enhanced security.
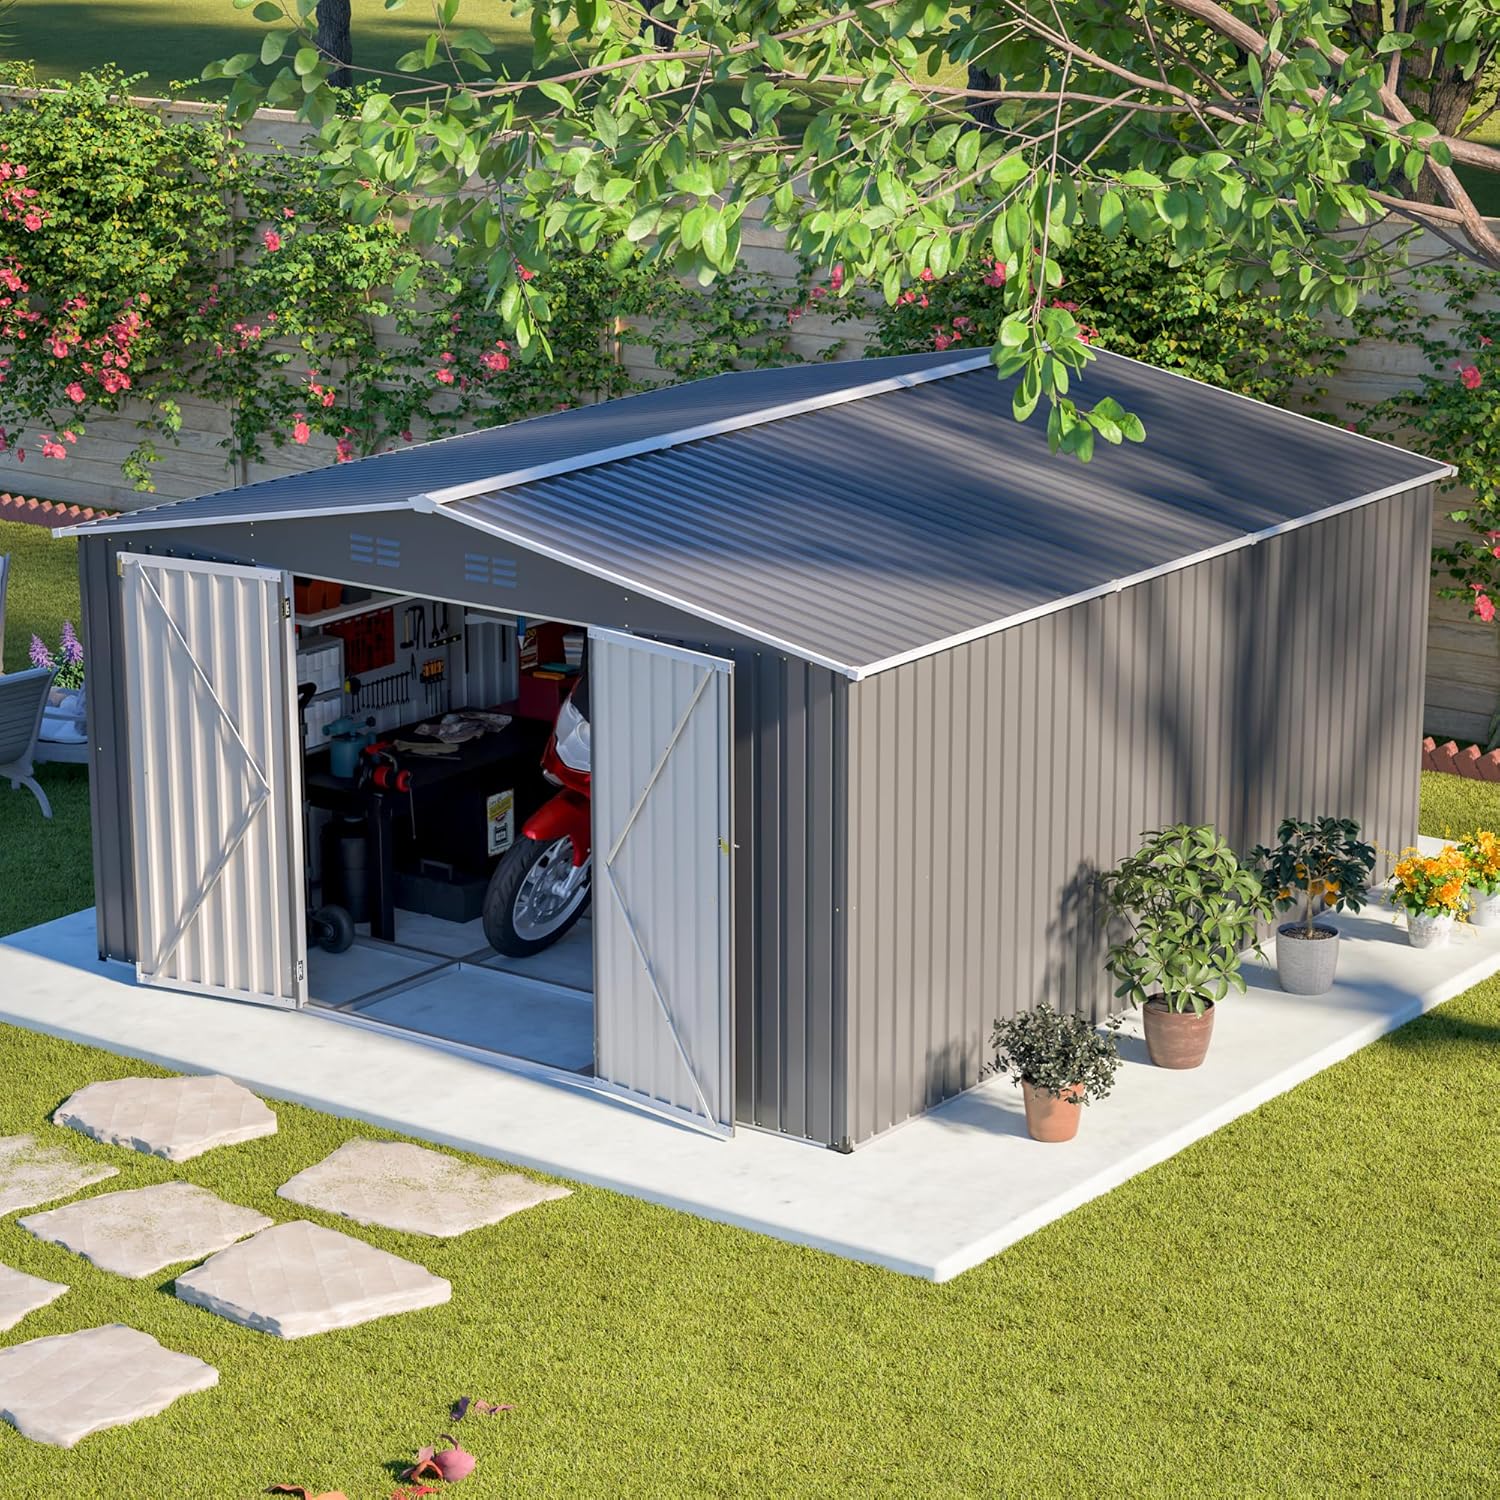
Image: The shed with its double doors open, demonstrating wide access to the interior for storing various items.
Step 5: Install the Roof
Carefully position and secure the sloped roof panels. The sloped design is engineered to prevent water pooling and snow accumulation. Ensure all roof sections are tightly fastened to maintain weather resistance.
Step 6: Install Air Vents
Install the four integrated air vents near the roof. These vents are crucial for promoting consistent ventilation and reducing interior moisture, helping to keep your stored belongings dry.

Image: A visual representation of the shed during rainfall, highlighting the four air vents for heat dissipation and the sloped roof's waterproof design that facilitates water runoff.
Step 7: Secure the Shed
Use the provided ground nails and expansion bolts to securely anchor the shed to your foundation. This step is vital for stability, especially in windy conditions.
Operating Instructions
Accessing the Shed
The shed features lockable double hinged doors for wide and easy access. To open, unlock the latch and pull the doors outwards. To close, push the doors shut and secure the latch. For added security, a padlock (not included) can be used with the lock latch.
Ventilation
The four integrated air vents near the roof provide continuous airflow. These vents are designed to reduce moisture buildup and maintain air circulation within the shed, protecting your stored items.
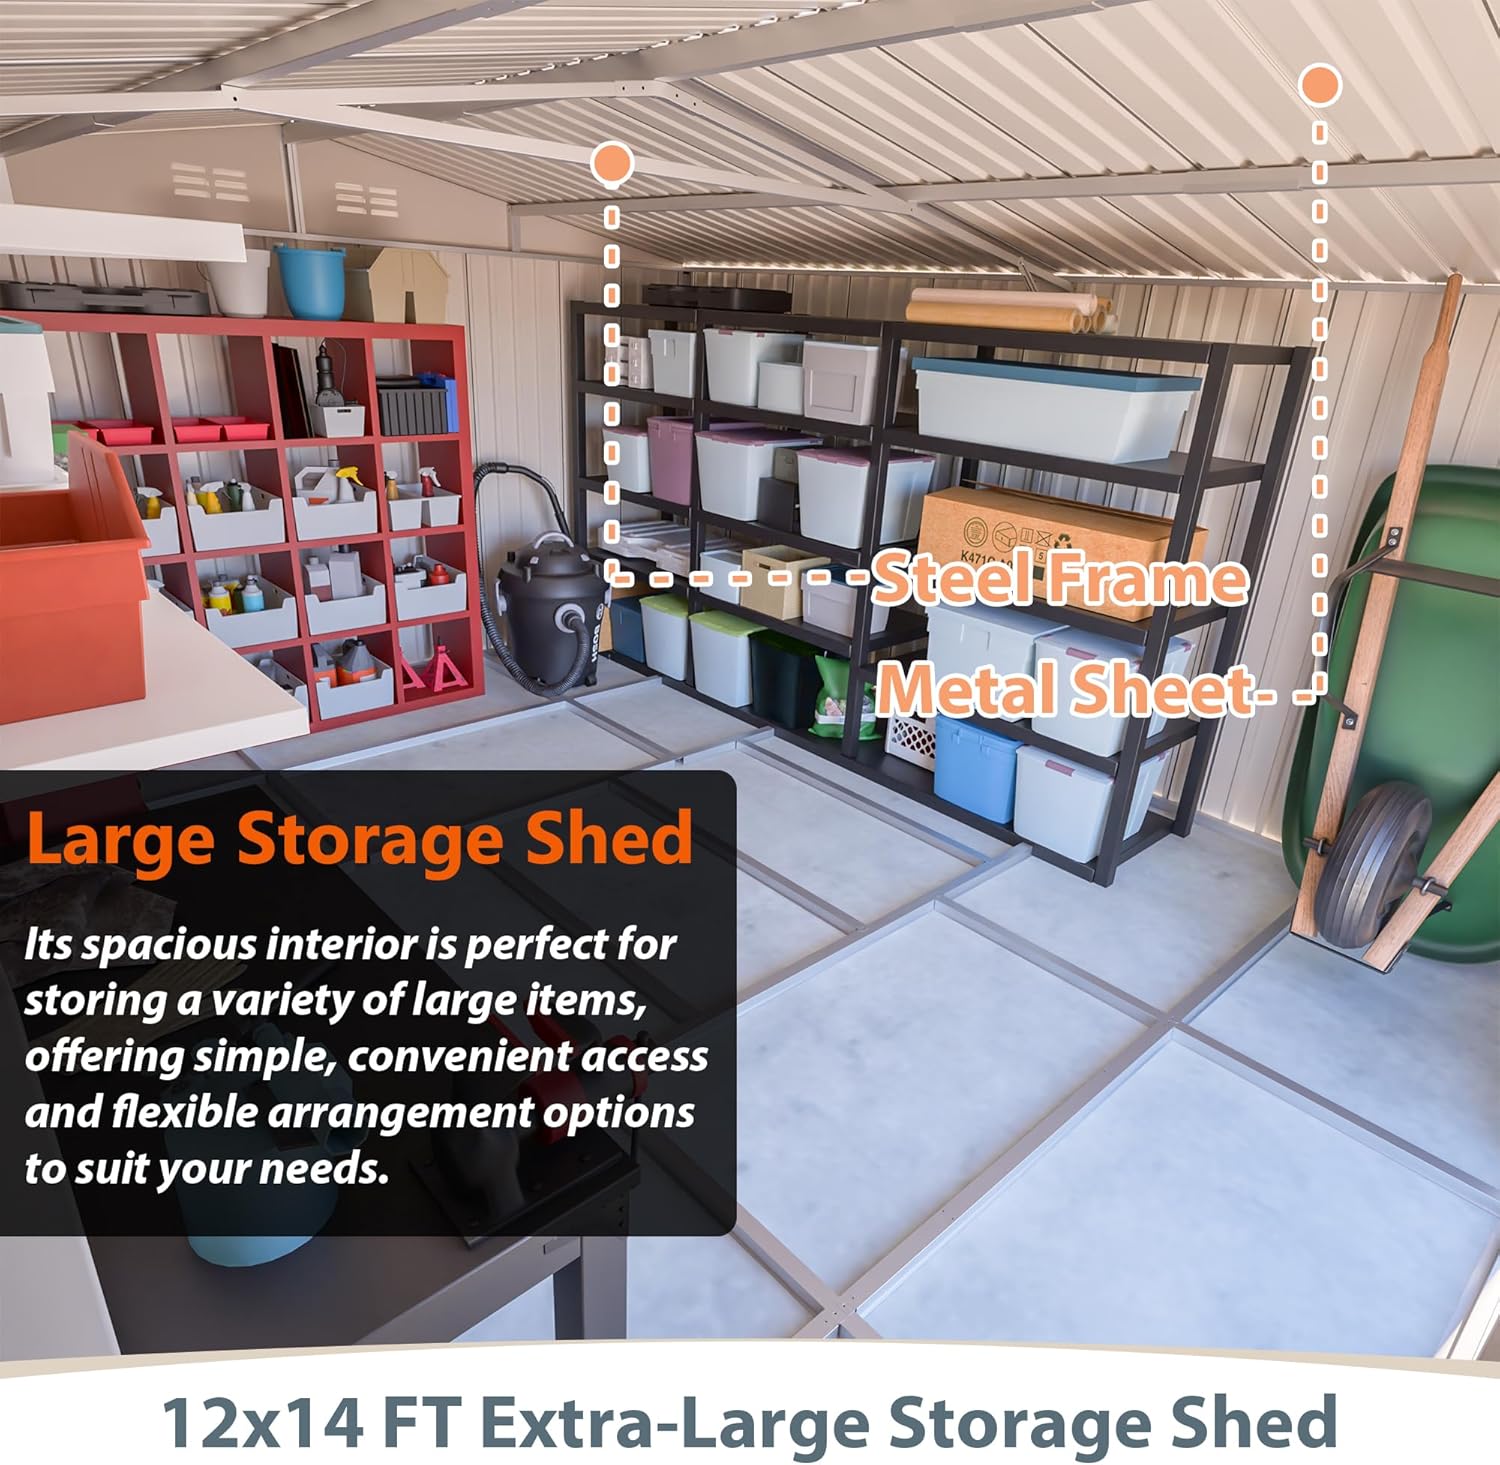
Image: Interior view of the 12x14 FT extra-large storage shed, demonstrating its spacious capacity and potential for organizing various large items with shelving.
Maintenance
Cleaning
Clean the shed exterior periodically with mild soap and water. Avoid abrasive cleaners or harsh chemicals that could damage the coated steel panels. Rinse thoroughly with clean water.
Inspection
Regularly inspect all fasteners, bolts, and anchors to ensure they remain tight. Check for any signs of rust, especially in areas where the coating might be scratched. Apply rust-inhibiting paint to any exposed metal if necessary.
Weather Considerations
- Snow Load: The reinforced roof is designed to support up to 10 lbs/sq ft (approximately 14.5 psf as per image). In areas with heavy snowfall, it is advisable to clear excessive snow from the roof to prevent structural stress.
- Wind: Ensure the shed is securely anchored to the ground to withstand strong winds.
- Moisture: The sloped roof and floor frame help manage moisture. Ensure the area around the shed is well-drained to prevent water accumulation at the base.
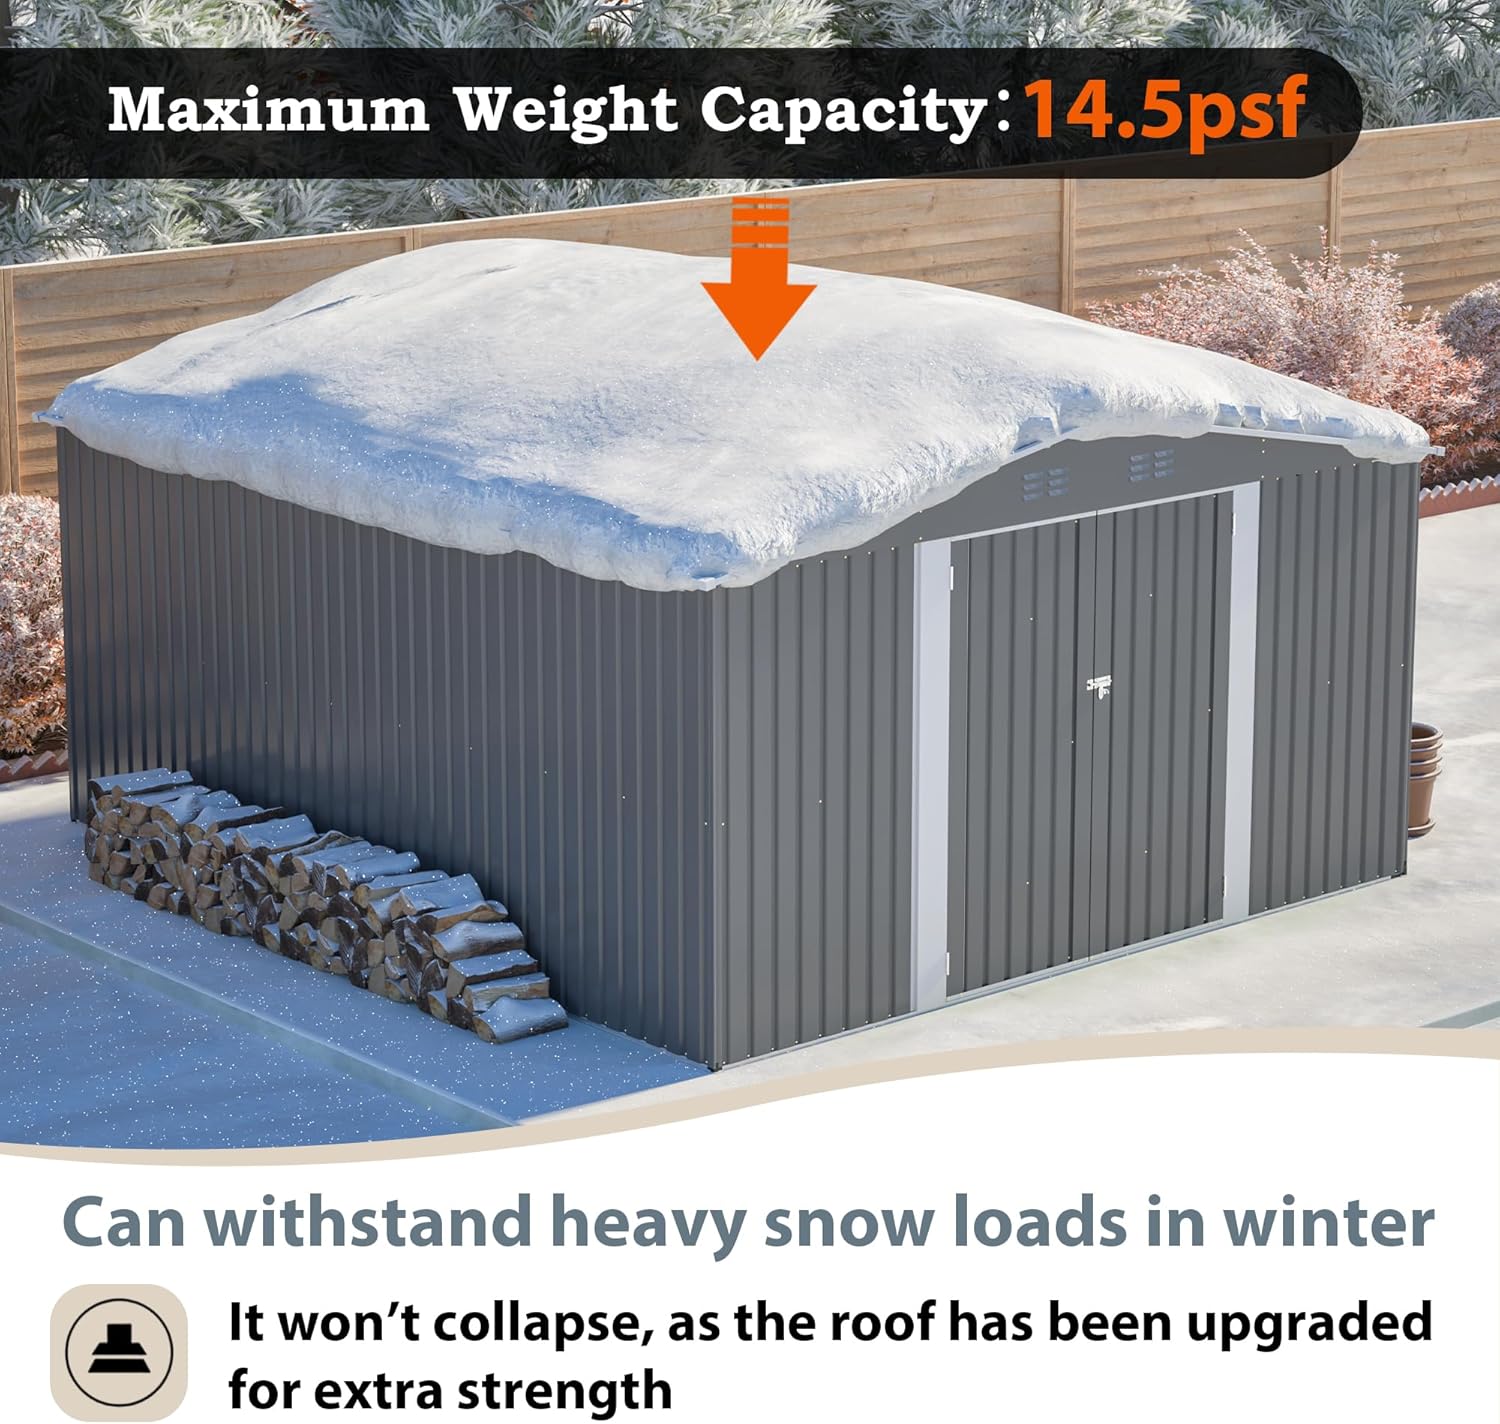
Image: The shed shown under a layer of snow, illustrating its ability to withstand heavy snow loads due to its reinforced roof, with a stated maximum weight capacity of 14.5 psf.
Troubleshooting
| Problem | Possible Cause | Solution |
|---|---|---|
| Shed feels unstable or wobbly. | Loose fasteners; uneven foundation; inadequate anchoring. | Tighten all bolts and screws. Ensure the foundation is level. Verify ground anchors are securely installed. |
| Doors do not close properly. | Misaligned frame; hinges are bent or loose; obstruction. | Check frame squareness. Adjust hinges or tighten screws. Remove any debris blocking the door path. |
| Water leakage inside the shed. | Improperly sealed roof panels; damaged panels; water pooling at base. | Inspect roof seams and panel overlaps for gaps. Ensure all screws are tight. Improve drainage around the shed. |
| Excessive condensation inside. | Insufficient ventilation; high humidity. | Ensure air vents are clear and unobstructed. Consider adding a dehumidifier in very humid climates if necessary. |
Specifications
| Feature | Detail |
|---|---|
| Product Dimensions (Overall) | 164.31"D x 144.95"W x 80.4"H (approx. 12x14 FT) |
| Product Door Size | W55.76" x H65.04" |
| Material | Alloy Steel (0.25mm thick coated steel panels) |
| Color | Light Gray |
| Roof Type | Sloped Gable Roof |
| Air Vents | 4 integrated vents |
| Water Resistance Level | Waterproof |
| Roof Bearing Capacity | Up to 10 lbs/sq ft (approx. 14.5 psf) |
| Assembly Required | Yes |
| Item Weight | 120 pounds |
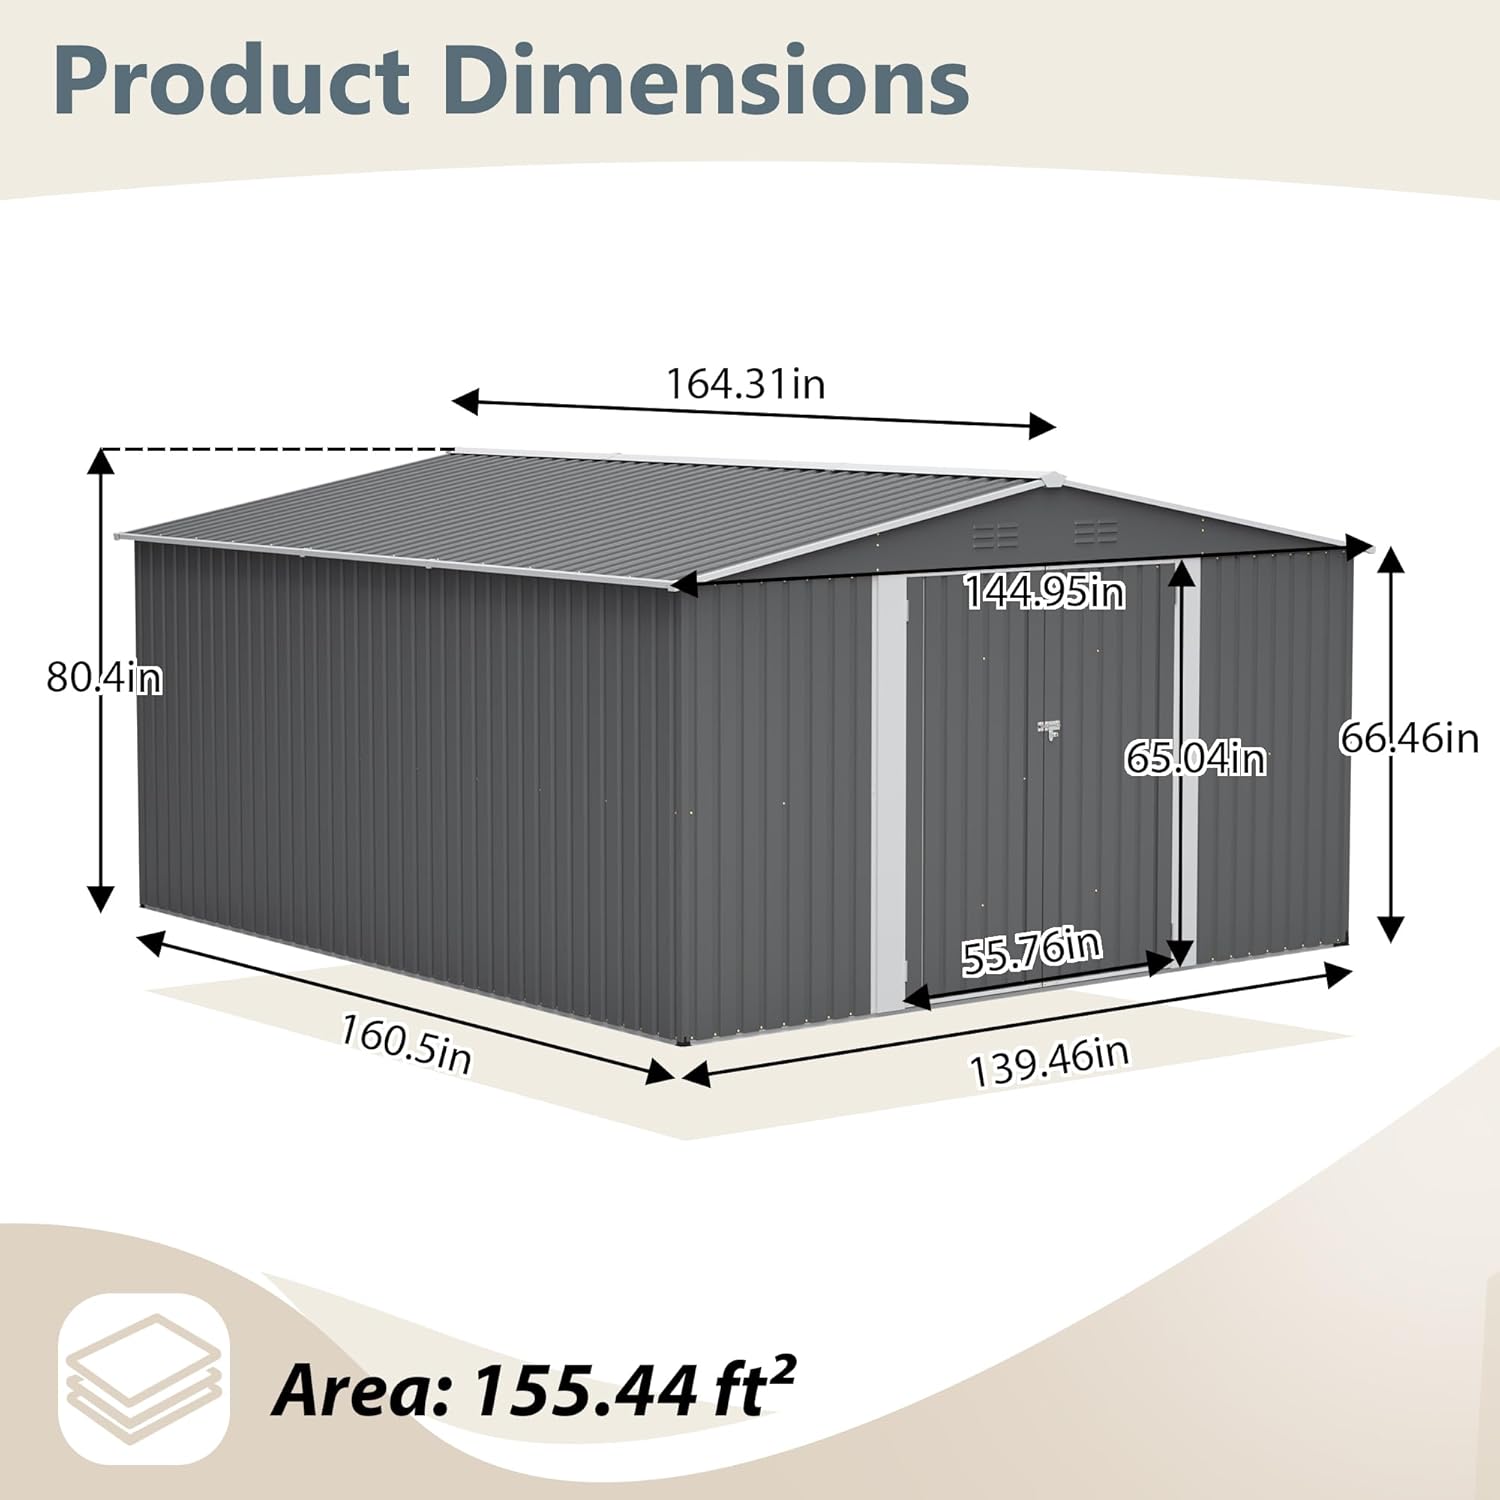
Image: Technical diagram showing the precise product dimensions of the shed, including overall length, width, height, and door measurements.
Warranty and Support
For any questions regarding assembly, missing parts, or product performance, please contact YOPTO customer support. Refer to your purchase documentation for specific warranty details and contact information.