
1. Introduction
Thank you for choosing the Dong Cheng 20V 90Nm Cordless Brushless Impact Drill. This manual provides essential information for the safe and effective operation, maintenance, and troubleshooting of your tool. Please read it thoroughly before first use and keep it for future reference.

Image 1.1: Dong Cheng 20V 90Nm Cordless Brushless Impact Drill with battery and charger.
2. Safety Instructions
Always follow basic safety precautions to reduce the risk of fire, electric shock, and personal injury.
- Work Area Safety: Keep your work area clean and well-lit. Cluttered or dark areas invite accidents. Do not operate power tools in explosive atmospheres, such as in the presence of flammable liquids, gases, or dust.
- Electrical Safety: Avoid body contact with earthed or grounded surfaces. Do not expose power tools to rain or wet conditions.
- Personal Safety: Always wear eye protection. Use hearing protection when operating the tool for extended periods. Dress properly; avoid loose clothing or jewelry. Secure long hair.
- Tool Use and Care: Do not force the power tool. Use the correct power tool for your application. Disconnect the battery pack from the power tool before making any adjustments, changing accessories, or storing power tools.
- Battery Safety: Use only the charger specified by the manufacturer. Do not short-circuit the battery pack. Do not expose battery packs to heat or fire.

Image 2.1: Illustration of the DSC (Dynamic Safety Control) feature, which protects against sudden kickback, compared to a drill without this safety function.
3. Product Overview
The Dong Cheng 20V 90Nm Cordless Impact Drill is a versatile tool designed for screwdriving, drilling, and impact drilling tasks. It features a powerful brushless motor, a 13mm chuck, and a 2-speed gearbox for optimal performance across various materials.
Key Features:
- Brushless Motor: Delivers up to 90 Nm of torque, offering increased efficiency and durability compared to brushed motors.
- 3-in-1 Functionality: Easily switch between screwdriving, drilling, and impact drilling modes.
- DSC Safety Control: Automatically adjusts power to prevent kickback when the bit jams, protecting the user and the tool.
- High-Capacity Battery: Equipped with a 4.0Ah battery for extended runtime and stable power output.
- 2-Speed Gearbox: Provides precise speed control (0-500 rpm for low speed, 0-2200 rpm for high speed) for different applications.
- 19 Torque Settings: Allows for precise torque adjustment to prevent over-tightening and material damage.
- 13mm Keyless Chuck: Ensures secure bit retention and quick bit changes.
- LED Work Light: Illuminates the work area for improved visibility.

Image 3.1: Detailed view of the brushless motor, highlighting its 90 Nm maximum torque, increased power, extended lifespan, and reduced noise levels.

Image 3.2: The 3-in-1 function selector, allowing users to choose between screwdriving, drilling, and impact drilling modes.
4. Setup
4.1 Charging the Battery
- Connect the charger to a standard power outlet.
- Slide the 4.0Ah battery pack onto the charger until it clicks into place.
- The charger's indicator light will show the charging status. A red light typically indicates charging, while a green light indicates a full charge.
- Once fully charged, disconnect the battery from the charger.

Image 4.1: Diagram illustrating the battery charge indicator lights and their meanings (charging, full, anomaly, high temperature).
4.2 Installing/Removing the Battery
- To install: Align the battery pack with the base of the drill handle and slide it in until it locks securely.
- To remove: Press the battery release button (usually located on the side of the battery) and slide the battery pack out.
4.3 Installing/Removing Drill Bits or Screwdriver Bits
- Ensure the drill is switched off and the battery is removed for safety.
- Rotate the chuck counter-clockwise to open the jaws.
- Insert the desired drill bit or screwdriver bit into the chuck, ensuring it is centered.
- Rotate the chuck clockwise to tighten the jaws firmly around the bit. Hand-tighten for best grip.
- To remove: Rotate the chuck counter-clockwise to loosen and pull the bit out.

Image 4.2: Close-up view of the 13mm metal chuck, highlighting its robust design for firm grip and precise drilling.
5. Operating Instructions
5.1 Selecting Operating Mode
The drill offers three modes: Screwdriving, Drilling, and Impact Drilling. Rotate the mode selector ring (located behind the chuck) to choose the appropriate mode for your task.
- Screwdriving Mode: For driving and removing screws. Adjust the torque setting for optimal results.
- Drilling Mode: For drilling holes in wood, metal, and plastics without impact.
- Impact Drilling Mode: For drilling holes in masonry and concrete.
5.2 Adjusting Torque Settings
In screwdriving mode, rotate the torque adjustment ring (located behind the mode selector) to select one of the 19 torque settings. Higher numbers indicate higher torque. Use lower settings for smaller screws and softer materials, and higher settings for larger screws and harder materials.
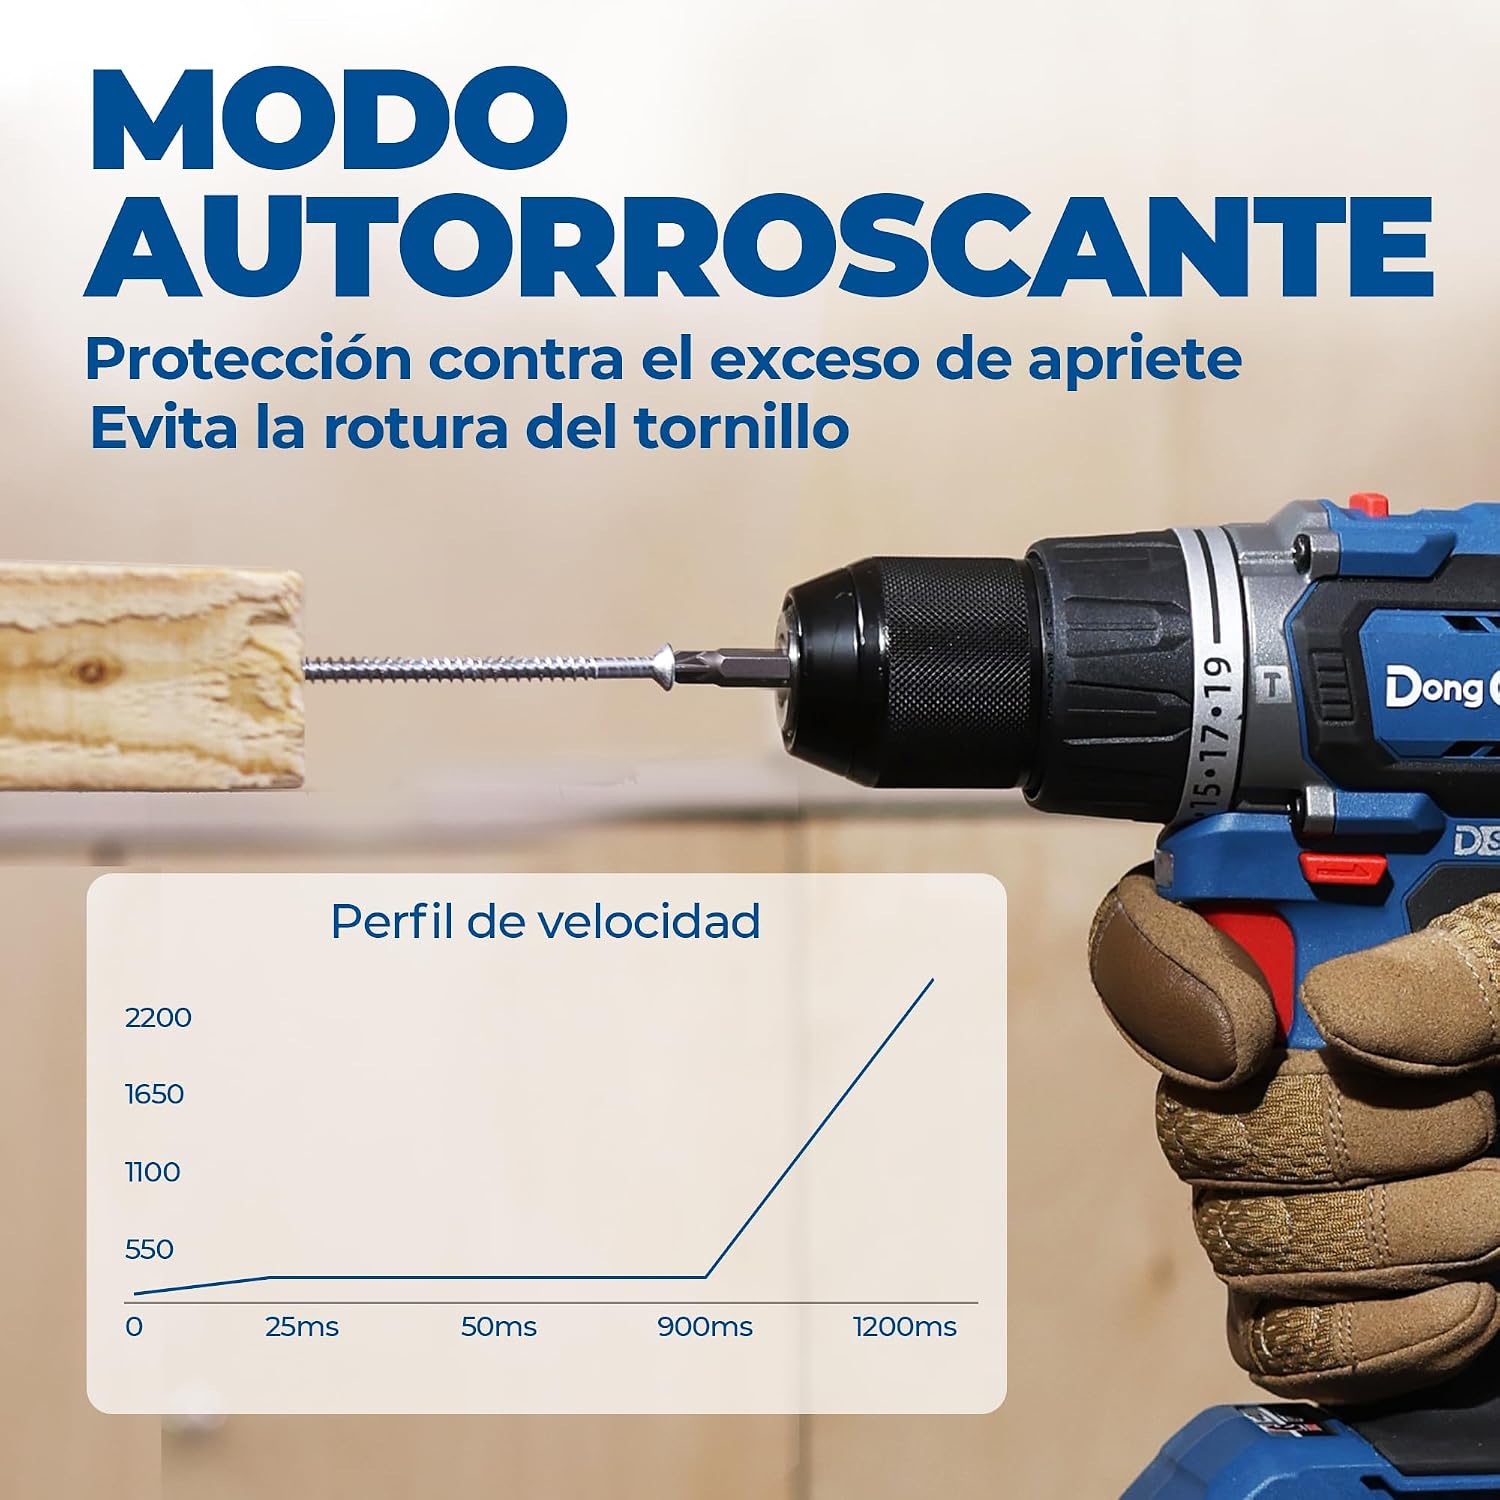
Image 5.1: The auto-threading mode, which protects against over-tightening and screw breakage, shown with a speed profile graph.
5.3 Selecting Speed
The drill has a 2-speed gearbox. Use the speed selector switch (usually on top of the drill) to choose between:
- Speed 1 (0-500 rpm): For high torque applications like driving large screws or drilling large holes.
- Speed 2 (0-2200 rpm): For high-speed drilling in smaller diameters or softer materials.

Image 5.2: The 2-speed gearbox selector, indicating low speed (0-500 rpm) and high speed (0-2200 rpm) options.
5.4 Forward/Reverse Rotation
The forward/reverse switch (located above the trigger) controls the direction of rotation. Push it left for forward (clockwise) rotation and right for reverse (counter-clockwise) rotation. Position it in the center to lock the trigger and prevent accidental startup.
5.5 Operating the Drill
- Ensure the correct bit, mode, speed, and torque settings are selected.
- Hold the drill firmly with both hands, if possible, especially for impact drilling or high torque tasks.
- Position the bit on the workpiece.
- Press the trigger to start the drill. The LED work light will activate.
- Apply steady, even pressure. Do not force the tool.
- Release the trigger to stop the drill.

Image 5.3: Examples of drilling capacities for various materials: screwdriving, wood, steel, and masonry.
6. Maintenance
Regular maintenance ensures the longevity and optimal performance of your drill.
- Cleaning: Keep the ventilation openings clear and free of dust. Use a soft, damp cloth to clean the tool casing. Do not use harsh chemicals or abrasive cleaners.
- Chuck Maintenance: Periodically clean the chuck jaws to ensure proper gripping of bits.
- Battery Care: Store batteries in a cool, dry place away from direct sunlight. Do not store fully discharged batteries for extended periods.
- Storage: When not in use, store the drill, batteries, and charger in their original case or a safe, dry place out of reach of children.
7. Troubleshooting
| Problem | Possible Cause | Solution |
|---|---|---|
| Drill does not start | Battery not charged or improperly installed; Forward/reverse switch in center (locked) position. | Charge battery and ensure it is securely installed; Move forward/reverse switch to desired direction. |
| Loss of power during operation | Battery low; Overload. | Recharge battery; Reduce pressure or use a sharper bit. |
| Bit slips in chuck | Chuck not tightened sufficiently; Bit shank is dirty or damaged. | Tighten chuck firmly; Clean or replace bit. |
| Excessive vibration or noise | Damaged bit; Loose components. | Replace bit; Check for loose parts and tighten if safe to do so, or contact service. |
8. Specifications
| Feature | Specification |
|---|---|
| Brand | Dong Cheng |
| Model Number | DCJZ2090i-EDM-EU01 |
| Power Source | Battery |
| Voltage | 20V |
| Max Torque | 90 Nm |
| No-Load Speed (Speed 1) | 0-500 RPM |
| No-Load Speed (Speed 2) | 0-2200 RPM |
| Chuck Size | 13 mm |
| Torque Settings | 19 |
| Battery Capacity | 4.0 Ah (Lithium-ion) |
| Drilling Capacity (Wood) | 45 mm |
| Drilling Capacity (Metal) | 13 mm |
| Product Dimensions (L x W x H) | 16.3 x 7.5 x 25.5 cm |
| Weight (with battery) | 1.9 kg |
| Country of Origin | China |

Image 8.1: Physical dimensions and weight of the drill, highlighting its compact and lightweight design for extended use.
9. Warranty and Support
9.1 Warranty Information
Your product includes a warranty card. Please refer to this card for detailed warranty terms and conditions. To extend your warranty to 5 years, register your product within 30 days of purchase. Keep your proof of purchase for warranty claims.
9.2 Customer Support
For any questions, technical assistance, or service needs, please consult your warranty card for contact information or reach out to Dong Cheng customer support directly. We are committed to providing prompt and helpful assistance.