Introduction
Thank you for choosing the ONBRILL HOD-123 Executive L Shaped Desk. This manual provides detailed instructions for assembly, operation, maintenance, and troubleshooting to ensure you get the most out of your new desk. Please read this manual thoroughly before assembly and use, and retain it for future reference.
Safety Instructions
- Always assemble the desk on a soft, clean surface to prevent scratches.
- Ensure all screws and fasteners are securely tightened before use. Periodically check and retighten as necessary.
- Do not overload the desk. The desktop supports up to 150 pounds.
- Keep small parts away from children during assembly.
- Use only the provided hardware for assembly.
- Avoid placing hot items directly on the desk surface without protection.
- Do not stand or sit on the desk.
Package Contents
Please verify that all components are present before beginning assembly. If any parts are missing or damaged, contact customer support.
- Desktop panels (L-shaped sections)
- Storage unit panels (sides, back, shelves)
- File drawers (fronts, sides, backs, bottoms)
- Power hub with 4 AC outlets and 2 USB ports
- Drawer slides and handles
- Assembly hardware (screws, dowels, cam locks, etc.)
- Instruction manual
Setup & Assembly
Assembly is straightforward with clear, step-by-step instructions and numbered parts. Two people are recommended for easier and safer assembly.
1. Unpack and Identify Parts
Carefully unpack all components and lay them out on a clean, soft surface. Refer to the parts list in your included assembly guide to identify each piece.
2. Assemble the Storage Unit
Begin by assembling the central storage unit, which includes the shelves and drawer compartments. Follow the numbered steps in your assembly guide to connect the side panels, back panel, and internal shelves using the provided hardware.
3. Install File Drawers
Assemble the file drawers according to the instructions, ensuring the drawer slides are correctly oriented and securely attached to both the drawers and the storage unit. Test the smooth operation of the drawers.

Image: Regular File Drawers
4. Attach Desktop Panels
Connect the L-shaped desktop panels to the assembled storage unit. Ensure proper alignment and secure all connections with the designated screws and cam locks. The desk is designed for stability once fully assembled.
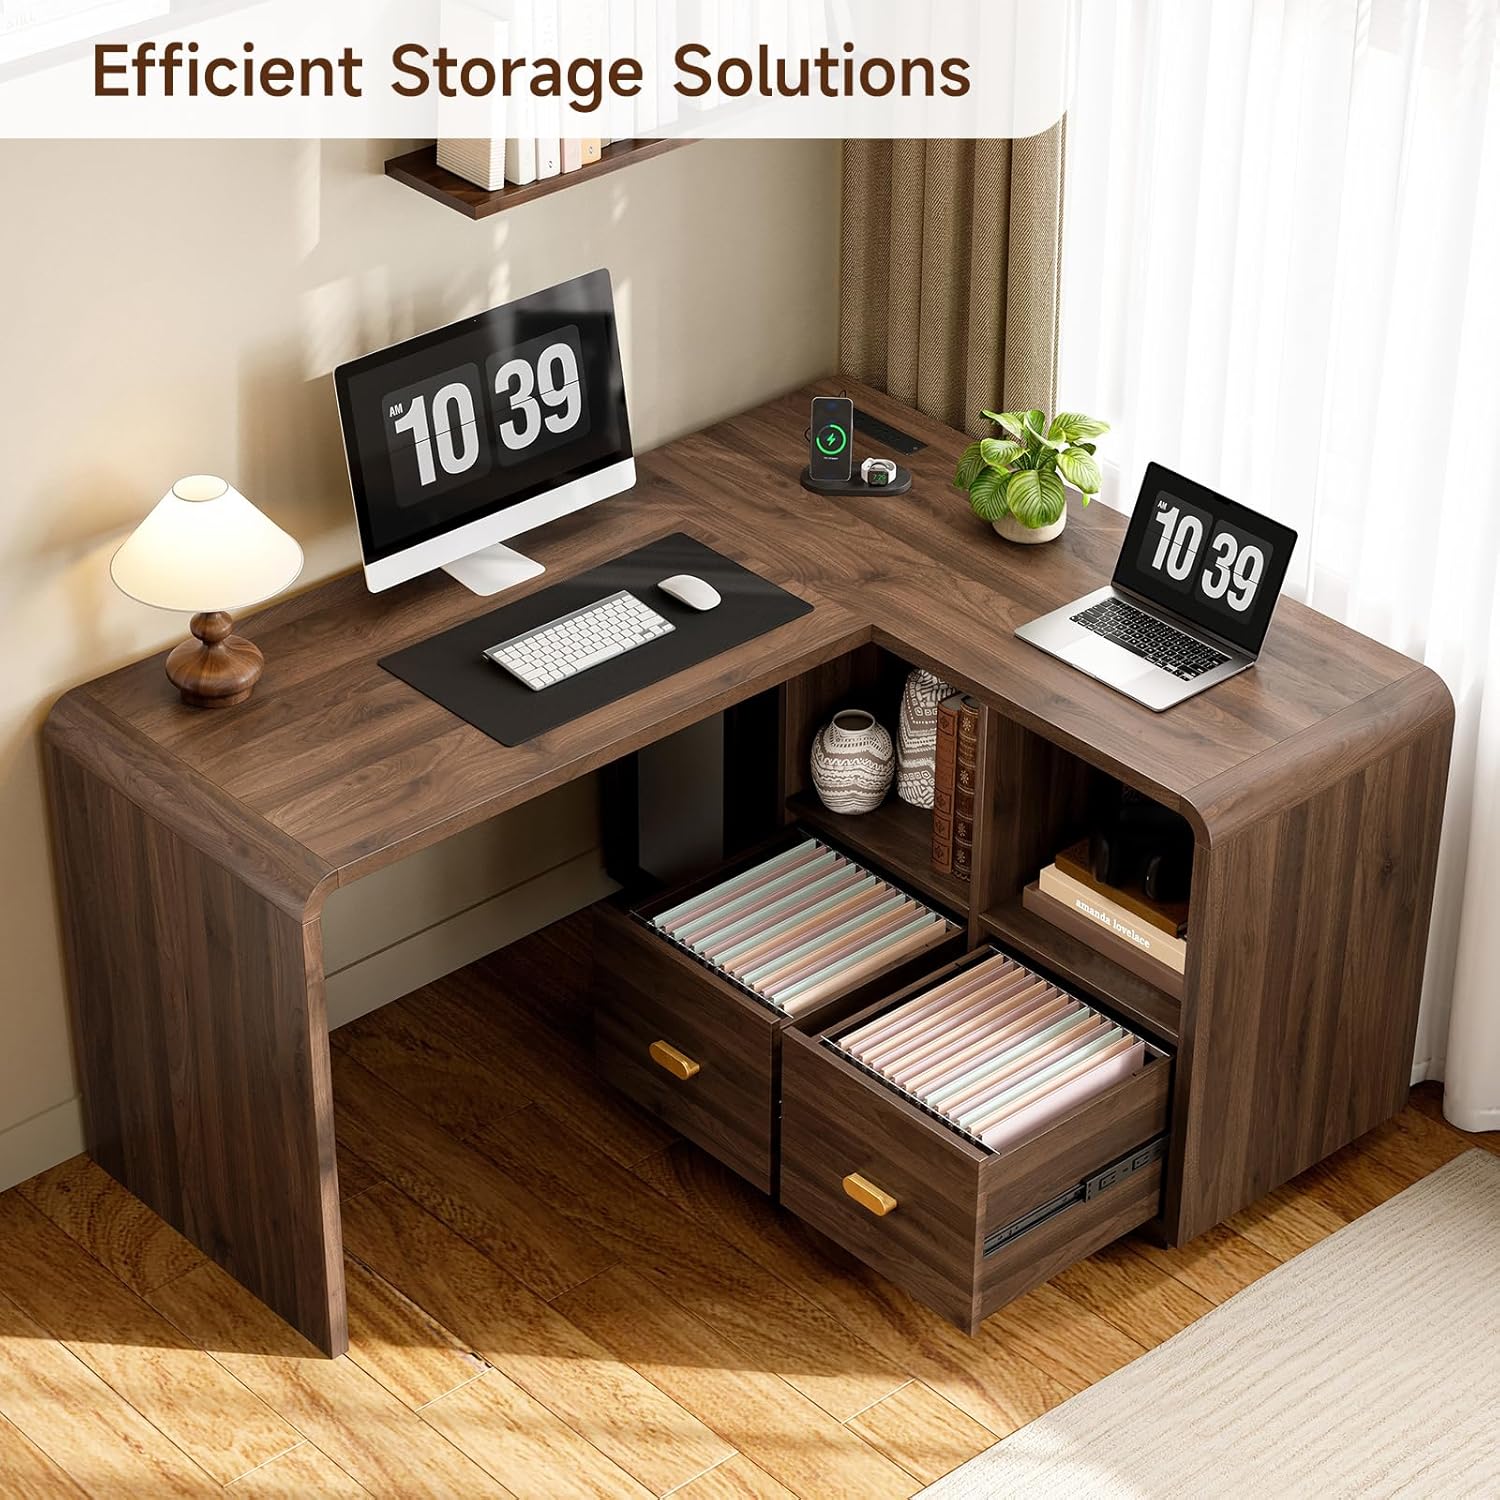
Image: Product Dimensions
5. Install Power Hub
Carefully insert the integrated power hub into its designated slot on the desktop. Ensure it is flush with the surface and securely fastened. Plug the power cord into a suitable wall outlet.

Image: Convenient Charging Station
Assembly Overview Video
Video: Arched L Shaped Office Desk Display. This video provides a visual overview of the desk's features and design, demonstrating its functionality and aesthetic appeal.
Operating Instructions
Using the Power Hub
The integrated power hub features 4 standard AC outlets and 2 USB ports (1 USB-A, 1 USB-C). Simply plug your devices into the appropriate ports for convenient charging and power access directly on your desktop. Ensure the desk's main power cord is connected to a live wall outlet.
Utilizing File Drawers
The two file drawers are designed to accommodate A4, legal, and letter-sized documents. Use hanging file folders for organized storage. Pull the gold-colored handles to open and close the drawers smoothly.
Storage Shelves
The open storage shelves provide easy access for books, office supplies, and decorative items. Arrange items to maximize space and maintain a clutter-free workspace.

Image: Efficient Storage Solutions
Maintenance
- Cleaning: Wipe the desk surface with a soft, damp cloth. Avoid harsh chemicals or abrasive cleaners that may damage the laminated finish.
- Spills: Clean up spills immediately to prevent staining or damage to the wood finish.
- Hardware: Periodically check all screws and fasteners to ensure they remain tight. Retighten if necessary to maintain stability.
- Sunlight: Avoid prolonged exposure to direct sunlight to prevent fading or discoloration of the wood finish.
Troubleshooting
| Problem | Possible Cause | Solution |
|---|---|---|
| Desk is wobbly | Loose fasteners; uneven floor | Ensure all screws are tightened. Use shims under legs if the floor is uneven. |
| Drawers do not slide smoothly | Drawer slides misaligned; debris in tracks | Check alignment of drawer slides. Clear any debris from the tracks. |
| Power outlets not working | Desk not plugged in; circuit breaker tripped | Ensure the desk's power cord is securely plugged into a working wall outlet. Check your home's circuit breaker. |
| Missing parts during assembly | Packaging error | Contact ONBRILL customer support with your purchase details and the specific missing parts. |
Specifications
| Feature | Detail |
|---|---|
| Model Number | HOD-123 |
| Dimensions (D x W x H) | 23.43" x 58.66" x 28.35" |
| Material | Engineered Wood |
| Finish Type | Laminated |
| Color | Walnut |
| Weight Capacity (Desktop) | 150 Pounds |
| Power Outlets | 4 AC Outlets |
| USB Ports | 1 USB-A, 1 USB-C |
| Number of Drawers | 2 (File Drawers) |
| Number of Shelves | 2 |
| Assembly Required | Yes |
Warranty and Support
ONBRILL is committed to quality and customer satisfaction. This product is backed by ONBRILL's commitment to long-term performance. For any questions, missing parts, or support needs, please contact ONBRILL customer service. Please have your purchase information and model number (HOD-123) ready when contacting support.
Contact information can typically be found on the ONBRILL official website or through your retailer's customer service portal.