1. Introduction
The 3DMakerpro Seal Premium 3D Scanner is a high-precision, small-format 3D scanning device designed for capturing intricate details of objects. Utilizing a blue LED light source and advanced scanning technology, it delivers accurate and full-color 3D models suitable for various applications including 3D printing, virtual reality, and reverse engineering.

Image: The 3DMakerpro Seal Premium 3D Scanner, showcasing its compact design.
This manual provides essential information for setting up, operating, and maintaining your 3DMakerpro Seal Premium 3D Scanner to ensure optimal performance and longevity.
2. Safety Information
- Do not expose the scanner to water or excessive moisture.
- Avoid direct eye exposure to the blue LED light source.
- Operate the device within the specified temperature and humidity ranges.
- Use only the provided power adapter and data cable.
- Keep the scanner away from strong magnetic fields.
- Do not attempt to disassemble or repair the scanner yourself. Contact customer service for assistance.
3. Package Contents
Verify that all items are present in your package:
- 3DMakerpro Seal Premium 3D Scanner (Aluminum alloy)
- Turntable
- Tripod
- 65W Charger
- Data Cable
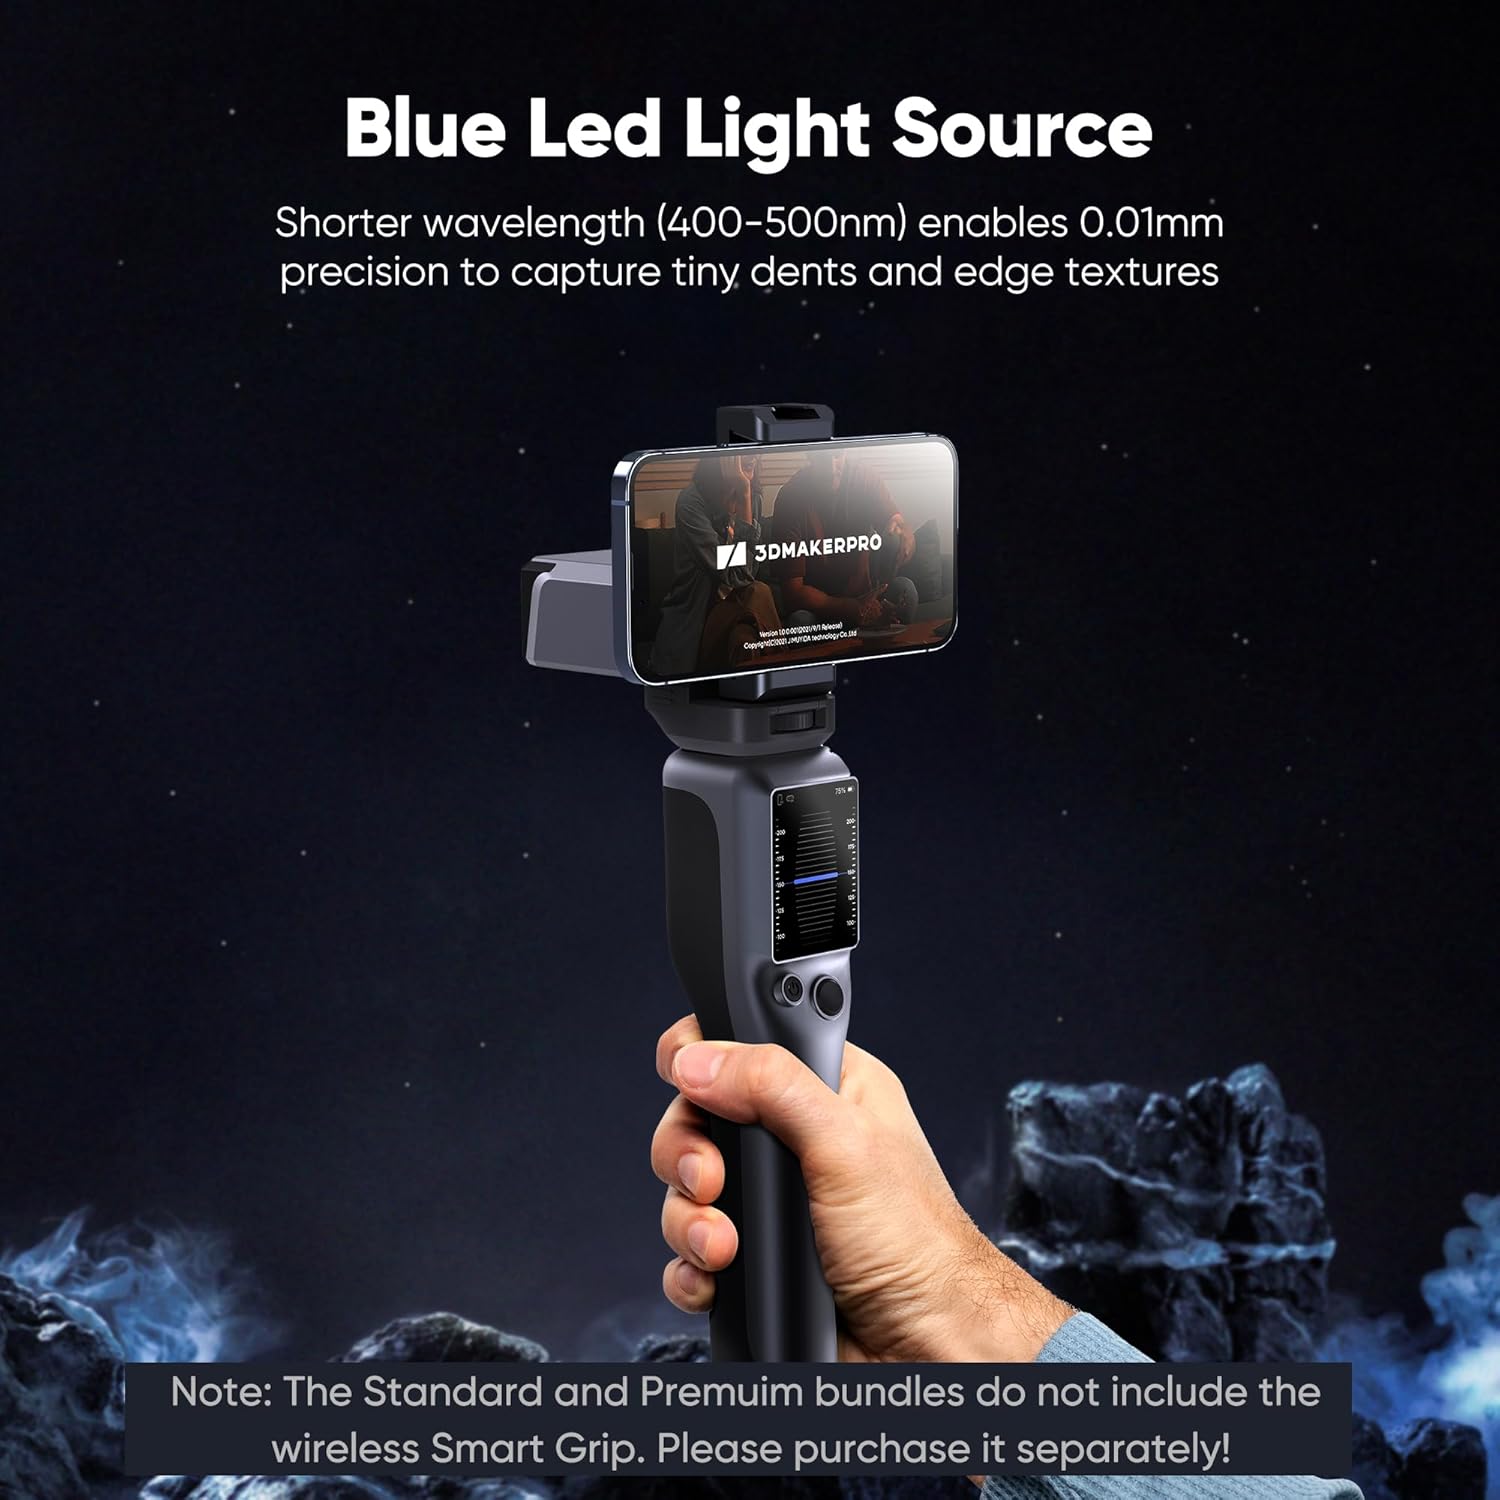
Image: 3DMakerpro Seal Premium 3D Scanner unit.

Image: Included Turntable and Tripod accessories.

Image: 65W Charger.

Image: Data Cable.
4. Setup
4.1 System Requirements
To ensure smooth operation of the 3DMakerpro Seal Premium 3D Scanner and its accompanying software, your computer must meet the following specifications:
| Operating System | Minimum Requirements | Recommended Configuration |
|---|---|---|
| Windows 10/11 (64-bit) | Intel Core i5 8th Gen, 16GB RAM, MX250 GPU with 2GB VRAM | Intel Core i7 8th Gen, 16GB RAM, NVIDIA 3060 GPU with 4GB VRAM |
| macOS 12/13/14 | Supports M1/M2/M3 chips | |
| Android | Android 11 or higher | |
| iOS | iOS 16 or higher (Extended support) | |
A powerful PC is required for optimal performance. Please ensure your system meets at least the minimum requirements.

Image: Visual representation of minimum and recommended computer specifications.
4.2 Hardware Connection
- Connect the 3DMakerpro Seal scanner to your computer using the provided data cable.
- Plug the 65W charger into the scanner and a power outlet.
- For enhanced stability and scanning quality, attach the scanner to the tripod and place it on the turntable as needed.

Image: The 3DMakerpro Seal scanner mounted on a tripod with a turntable.
4.3 Software Installation
Download and install the JMStudio software from the official 3DMakerpro website. Follow the on-screen instructions for installation. JMStudio is compatible with both Windows and macOS.
5. Operating Instructions
5.1 Initial Scan Preparation
Before scanning, ensure your object is placed on a stable surface. For optimal results with small objects (10-300mm), use the turntable. The recommended working distance for the scanner is 180-280mm.

Image: The 3DMakerpro Seal scanning a small object, demonstrating its small-format capability.
5.2 Scanning Process
- Launch the JMStudio software on your computer.
- Select the appropriate scanning mode within the software.
- Position the scanner at the recommended working distance from the object.
- Initiate the scan. The blue LED light source will project structured light onto the object.
- Move the scanner smoothly around the object or allow the turntable to rotate for a complete capture. The 10fps scan rate and anti-shake functions assist in achieving smoother, more accurate results.
- Monitor the real-time scan data in JMStudio to ensure full coverage and quality.

Image: The blue LED light source of the 3DMakerpro Seal capturing object details.
5.3 Full-Color Scanning
The Seal Premium version is equipped with a texture camera that supports 24-bit full-color scanning. This feature captures vibrant colors and lifelike textures, adding realism to your 3D models. Ensure proper lighting conditions for accurate color capture.

Image: An example of a 3D model captured with 24-bit full-color scanning.
6. Software (JMStudio)
JMStudio is the dedicated software for the 3DMakerpro Seal scanner, offering a comprehensive suite of tools for 3D model processing.
- Visual Tracking: Real-time feedback during scanning to ensure consistent data capture.
- Error Correction: Smart AI algorithms to eliminate flawed or misaligned point cloud data while retaining accurate points.
- Auto-Alignment: Automatically stitches scan data for seamless connections.
- Export Formats: Supports export in OBJ, STL, PLY, and ASC formats for compatibility with various 3D printing and modeling software.
- Lifetime Free Updates: JMStudio receives continuous updates to enhance features and performance.

Image: Screenshot of the JMStudio software interface demonstrating features like error correction and auto-alignment.
7. Maintenance
- Cleaning: Gently wipe the scanner's exterior with a soft, dry cloth. Do not use abrasive cleaners or solvents. Ensure the lens is free of dust and smudges for clear scanning.
- Storage: Store the scanner in a cool, dry place, away from direct sunlight and extreme temperatures. Use the original packaging or a protective case when transporting.
- Software Updates: Regularly check for and install JMStudio software updates to benefit from new features and performance improvements.
8. Troubleshooting
If you encounter issues with your 3DMakerpro Seal Premium 3D Scanner, refer to the following common solutions:
- Scanner Not Detected: Ensure the data cable is securely connected to both the scanner and your computer. Verify that the power adapter is plugged in and providing power. Try a different USB port.
- Poor Scan Quality: Check the working distance (180-280mm). Ensure the object is well-lit but avoid direct glare. Clean the scanner lens. Verify your computer meets the recommended system requirements. Practice scanning techniques for smoother motion.
- Software Crashes/Freezes: Ensure JMStudio is updated to the latest version. Close other demanding applications. Verify your computer meets the recommended system requirements, especially RAM and GPU.
- No Color Texture: Confirm you are using the Seal Premium version, as Seal Lite does not support color scanning. Ensure adequate and even lighting on the object.
For further assistance, consult the online user guide or contact 3DMakerpro customer service.
9. Specifications
| Feature | Detail |
|---|---|
| Product Dimensions | 4.33 x 2.36 x 1.38 inches |
| Item Weight | 3.66 pounds |
| Manufacturer | 3DMakerpro |
| Model Number | CZ Seal Premuim |
| ASIN | B0GBTDNRC3 |
| Light Source | Blue LED (400–500nm) |
| Accuracy | Up to 0.01mm |
| Scanning Format | Small-format (10-300mm objects) |
| Recommended Working Distance | 180–280mm |
| Color Scanning | 24-bit Full-Color (Premium Version only) |
| Scan Rate | 10fps |
| Software | JMStudio (Lifetime free updates) |
| Export Formats | OBJ/STL/PLY/ASC |

Image: Detailed view of the 3DMakerpro Seal with dimensions and key components labeled.
10. Warranty and Support
The 3DMakerpro Seal Premium 3D Scanner comes with a 1-year warranty from the date of purchase. This warranty covers manufacturing defects and ensures reliable operation under normal use conditions.
For technical support, warranty claims, or any inquiries regarding your product, please contact 3DMakerpro customer service. You can find contact information on the official 3DMakerpro website or through your purchase platform.
We recommend registering your product online to facilitate warranty service and receive important updates.


