
1. Product Overview
This manual provides instructions for the FAMAPY 63-inch Display Cabinet with Glass Doors and Lights. This cabinet is designed for storage and display, featuring tempered glass doors, adjustable shelves, and integrated LED lighting. It includes three bottom drawers for additional storage.
Dimensions: 15.7 inches (Depth) x 63 inches (Width) x 78.7 inches (Height).
Material: Constructed from durable MDF with tempered glass doors.
Features:
- Tempered glass doors to protect items from dust.
- Adjustable shelves for flexible organization.
- Integrated LED lighting with 7 color options and remote control.
- Three bottom drawers for private storage.
- Anti-tip device for enhanced stability and safety.
2. Safety Information
Please read and understand all safety instructions before assembly and use. Failure to follow these instructions may result in injury or damage to the product.
- Always secure the cabinet to the wall using the provided anti-tip device. This is crucial to prevent the cabinet from tipping over, especially in households with children or pets.
- Exercise caution when assembling the cabinet due to its weight and size. It is recommended to have at least two people for assembly.
- Keep the area around the cabinet clear of flammable materials.
- Maintain a safe distance from heat sources to prevent damage to the cabinet materials.
- Do not place excessively heavy items on the glass shelves. Distribute weight evenly to prevent shelves from breaking or collapsing.
- Ensure all screws and fasteners are tightened securely during assembly and periodically check for tightness during use.
3. Components List
Before beginning assembly, verify that all parts listed below are present and undamaged. The cabinet comes in 3 boxes; components may be distributed across these boxes. All hardware is numbered for easy identification.
- Shelves (10 tiers)
- Drawers (3 units)
- Hinges
- Handles
- Mounting Hardware (including anti-tip device)
- LED Light Kit with Remote Control
- Assembly Tools (e.g., Allen wrench)
- MDF/PB Panels
- Tempered Glass Doors
4. Assembly Instructions
Please follow the detailed instruction manual included in the packaging. The following provides a general overview of the assembly process. It is recommended to assemble the cabinet on a soft, clean surface to prevent scratches.
4.1 Unpacking and Preparation
Carefully unpack all three boxes. Identify and lay out all components and hardware. Refer to the numbered parts in the included instruction manual. If any parts are missing or damaged, contact customer service before proceeding.
4.2 Base Assembly
Attach the legs to the base panel using the provided screws. Tighten them securely with the appropriate tool.
4.3 Frame Construction
Connect the side panels to the back panel using dowels and cam locks. Ensure all connections are firm and aligned. This forms the main structure of the cabinet.

Figure 1: Cabinet dimensions and internal structure overview.
4.4 Shelf Installation
Insert the shelves into the pre-drilled holes at your desired height. The shelves are adjustable, allowing for customization of storage space.
4.5 Door and Drawer Installation
Attach the glass doors using the hinges and screws. Ensure the doors are properly aligned and open/close smoothly. Install the three bottom drawers into their respective compartments. Attach the handles and knobs to the doors and drawers.

Figure 2: Detail of door handles.

Figure 3: Detail of a drawer knob.
4.6 LED Light Installation
Install the LED light strips according to the specific instructions provided with the light kit. Connect the power supply and test the lights.
4.7 Anti-Tip Device Installation
Securely attach the anti-tip device to the top rear of the cabinet and to a wall stud. This step is critical for safety.

Figure 4: Assembled display cabinet.
5. Operating Instructions
5.1 LED Lighting System
The display cabinet features integrated LED lighting with multiple color options. Use the provided remote control to operate the lights.
- Power On/Off: Press the power button on the remote to turn the lights on or off.
- Color Selection: Use the color buttons on the remote to select from 7 available colors.
- Brightness Adjustment: Adjust the brightness using the designated buttons on the remote.
- Mode Selection: Some remotes may offer various lighting modes (e.g., fade, strobe). Refer to the remote's specific instructions.

Figure 5: LED lighting in various colors with remote control.
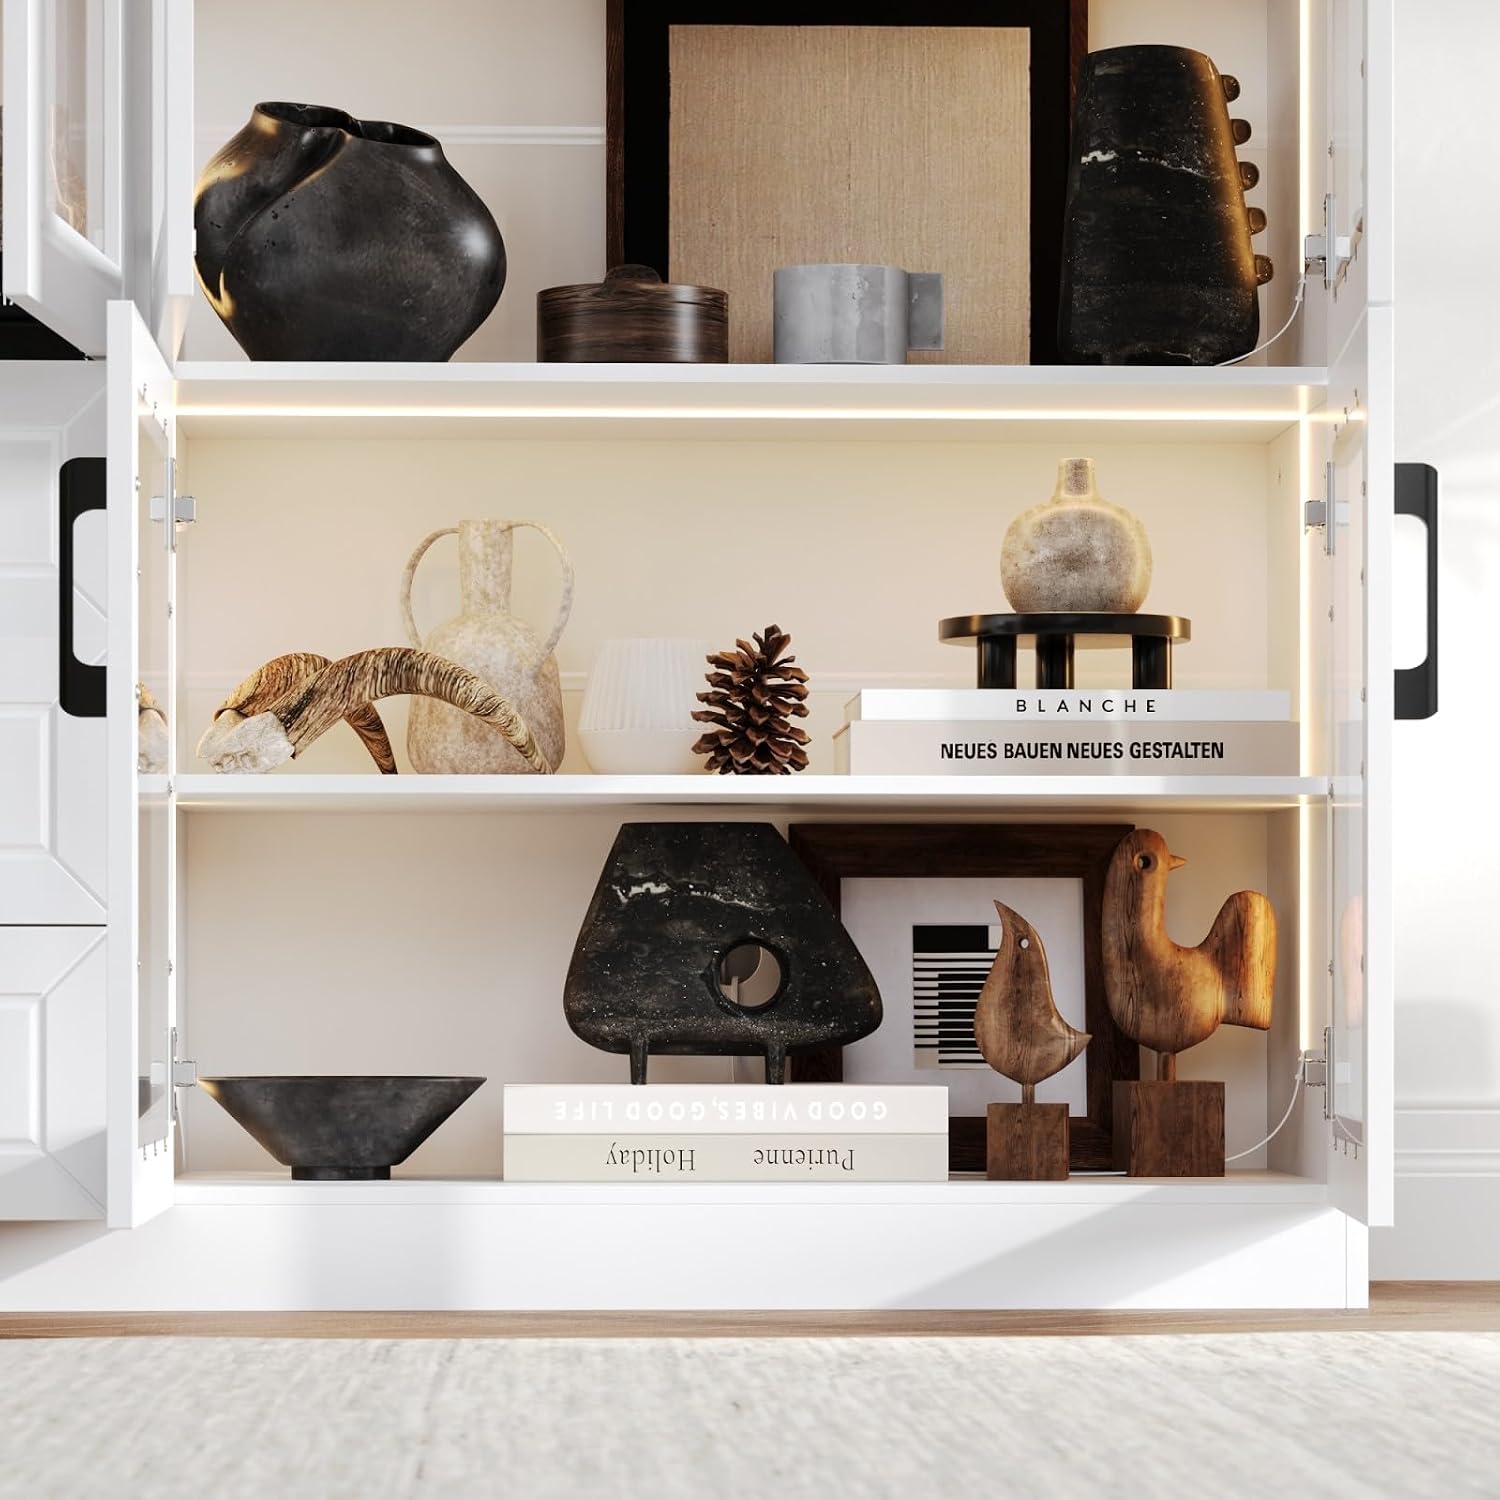
Figure 6: Cabinet interior with LED lights activated.
5.2 Adjustable Shelves
The shelves can be repositioned to accommodate items of different heights. To adjust a shelf:
- Remove all items from the shelf.
- Carefully lift the shelf and remove it from its supports.
- Relocate the shelf supports to the desired pre-drilled holes.
- Place the shelf back onto the supports, ensuring it is level and secure.
5.3 Drawers and Doors
The three bottom drawers operate on smooth glides. Pull the knob to open and push to close. The glass doors open outwards on hinges. Ensure doors are fully closed to protect contents from dust.

Figure 7: Open drawer interior.
5.4 Cable Management
A cable management hole is provided at the back of the cabinet to route power cords for the LED lights or other electronic devices stored within.

Figure 8: Cable management hole.
6. Maintenance
Regular maintenance will help preserve the appearance and functionality of your display cabinet.
- Cleaning Surfaces: Wipe MDF/PB surfaces with a soft, damp cloth. Avoid abrasive cleaners or harsh chemicals that can damage the finish.
- Cleaning Glass: Use a standard glass cleaner and a lint-free cloth for glass doors. Spray cleaner onto the cloth, not directly onto the glass, to prevent liquid from seeping into seams.
- Dusting: Regularly dust all surfaces, including shelves and the interior, to prevent buildup.
- Hardware Check: Periodically check all screws, hinges, and drawer glides to ensure they are secure. Tighten if necessary.
- LED Lights: If LED lights dim or stop working, check the power connection and the remote control battery. Do not attempt to repair the LED strips yourself; contact customer service if issues persist.
7. Troubleshooting
This section addresses common issues you might encounter with your display cabinet.
| Problem | Possible Cause | Solution |
|---|---|---|
| LED lights not turning on. | Power cable disconnected; remote control battery dead; light strip malfunction. | Ensure power cable is securely plugged in. Replace remote control battery. If issue persists, contact customer service. |
| Doors do not close properly or are misaligned. | Hinges are loose or improperly adjusted; cabinet not level. | Check and tighten hinge screws. Adjust hinges as needed (refer to assembly manual for hinge adjustment details). Ensure the cabinet is on a level surface. |
| Drawers stick or do not slide smoothly. | Drawer glides are dirty or misaligned; drawer overloaded. | Clean drawer glides. Check for obstructions. Ensure drawer contents are not exceeding weight limits. Realign glides if necessary. |
| Cabinet feels unstable or wobbly. | Anti-tip device not installed or loose; uneven floor; loose assembly screws. | Verify the anti-tip device is securely anchored to the wall. Adjust leveling feet if present, or place shims under the base on uneven floors. Tighten all assembly screws. |
8. Specifications
| Brand | FAMAPY |
| Model Number | B0G91QVF54 |
| Color | White |
| Material | MDF/PB/Glass (Engineered Wood Frame) |
| Product Dimensions (D x W x H) | 15.7" x 63" x 78.7" |
| Number of Shelves | 10 |
| Number of Drawers | 3 |
| Additional Features | Integrated LED Lights, Adjustable Shelves, Anti-tip Device |
| Installation Type | Freestanding with Wall Mount (Anti-tip) |
| Required Assembly | Yes |
9. Warranty and Support
For warranty information, missing parts, or technical support, please refer to the contact information provided in your product packaging or visit the official FAMAPY website. Please have your model number (B0G91QVF54) and purchase date ready when contacting support.
Online Support: Visit the FAMAPY Store on Amazon
