Introduction
The RayCue 10-in-1 80Gbps Dock is designed to expand the connectivity and storage capabilities of your Mac Studio or Mac Mini. This versatile docking station provides high-speed data transfer, extensive display options, and convenient access to various peripherals, enhancing your workflow and desktop organization.

The RayCue 10-in-1 80Gbps Dock seamlessly integrates with your Mac Studio, offering enhanced connectivity and speed.
Key Features
- 80Gbps Data Transfer: World's first 80Gbps dock compatible with Mac Studio (M4 Max/M3 Ultra, M2 Max/M2 Ultra, M1 Max/M1 Ultra) and Mac Mini (M1/M2).
- Massive Storage Expansion: Dual NVMe SSD bays supporting RAID 0/1 and up to 16TB storage (80Gbps).
- Multi-Display Connectivity: 2x HDMI 2.1 ports (8K@30Hz or 4K@144Hz) and 1x DisplayPort 2.1 for flexible multi-display setups.
- Professional Connectivity: Dual 10Gbps USB-A ports, CFexpress Type A/B card readers, and a 3.5mm Hi-Fi audio jack.
- Pro-Grade Media Access: CFexpress Type A/B card readers with 10Gbps speed for photographers and videographers.
- Hi-Fi Audio Output: 96kHz audio output through the 3.5mm audio jack.
- Sleek & Functional Design: Precision-milled aluminum alloy matching Mac Studio aesthetics, with stackable passive cooling for improved airflow.
Package Contents

All components included in the RayCue 10-in-1 80Gbps Dock package.
- Packing Box
- Accessory Box
- USB C 65W Power Adapter
- Mac Mini Dock/Hub
- User Manual
- TB5 Cable 17cm
- Screwdriver, screws * 3
- Thermal Pad for SSD
Setup
1. SSD Installation
The dock features dual NVMe SSD bays for expanded storage. Follow these steps to install your SSDs:
- Remove the enclosure cover from the bottom of the dock using the included screwdriver.
- Insert your NVMe M.2 SSD at a 30-degree angle into the bay.
- Gently press down the SSD and secure it with the included screw.
- Apply the thermal silicone pad onto the SSD for optimal heat dissipation.
- Re-install the enclosure cover and secure it with the screws.

Illustration of NVMe SSD installation into the dock's magnetic bays.
The dual SSD bays support various NVMe M.2 SSD sizes and RAID 0/1 configurations.
This video demonstrates the process of installing an SSD into a compatible dock, similar to the RayCue 10-in-1 80Gbps Dock.
2. Connecting to Mac Studio/Mini
Place your Mac Studio or Mac Mini directly on top of the RayCue dock. Connect the included TB5 cable (17cm) from the 'Host' USB-C port on the dock to a Thunderbolt port on your Mac Studio/Mini.

The dock is designed to seamlessly integrate with your Mac Studio, providing a clean and organized setup.
This video illustrates the physical integration and connection of a Mac Mini with a similar docking station, demonstrating how the dock expands connectivity.
3. Power Connection
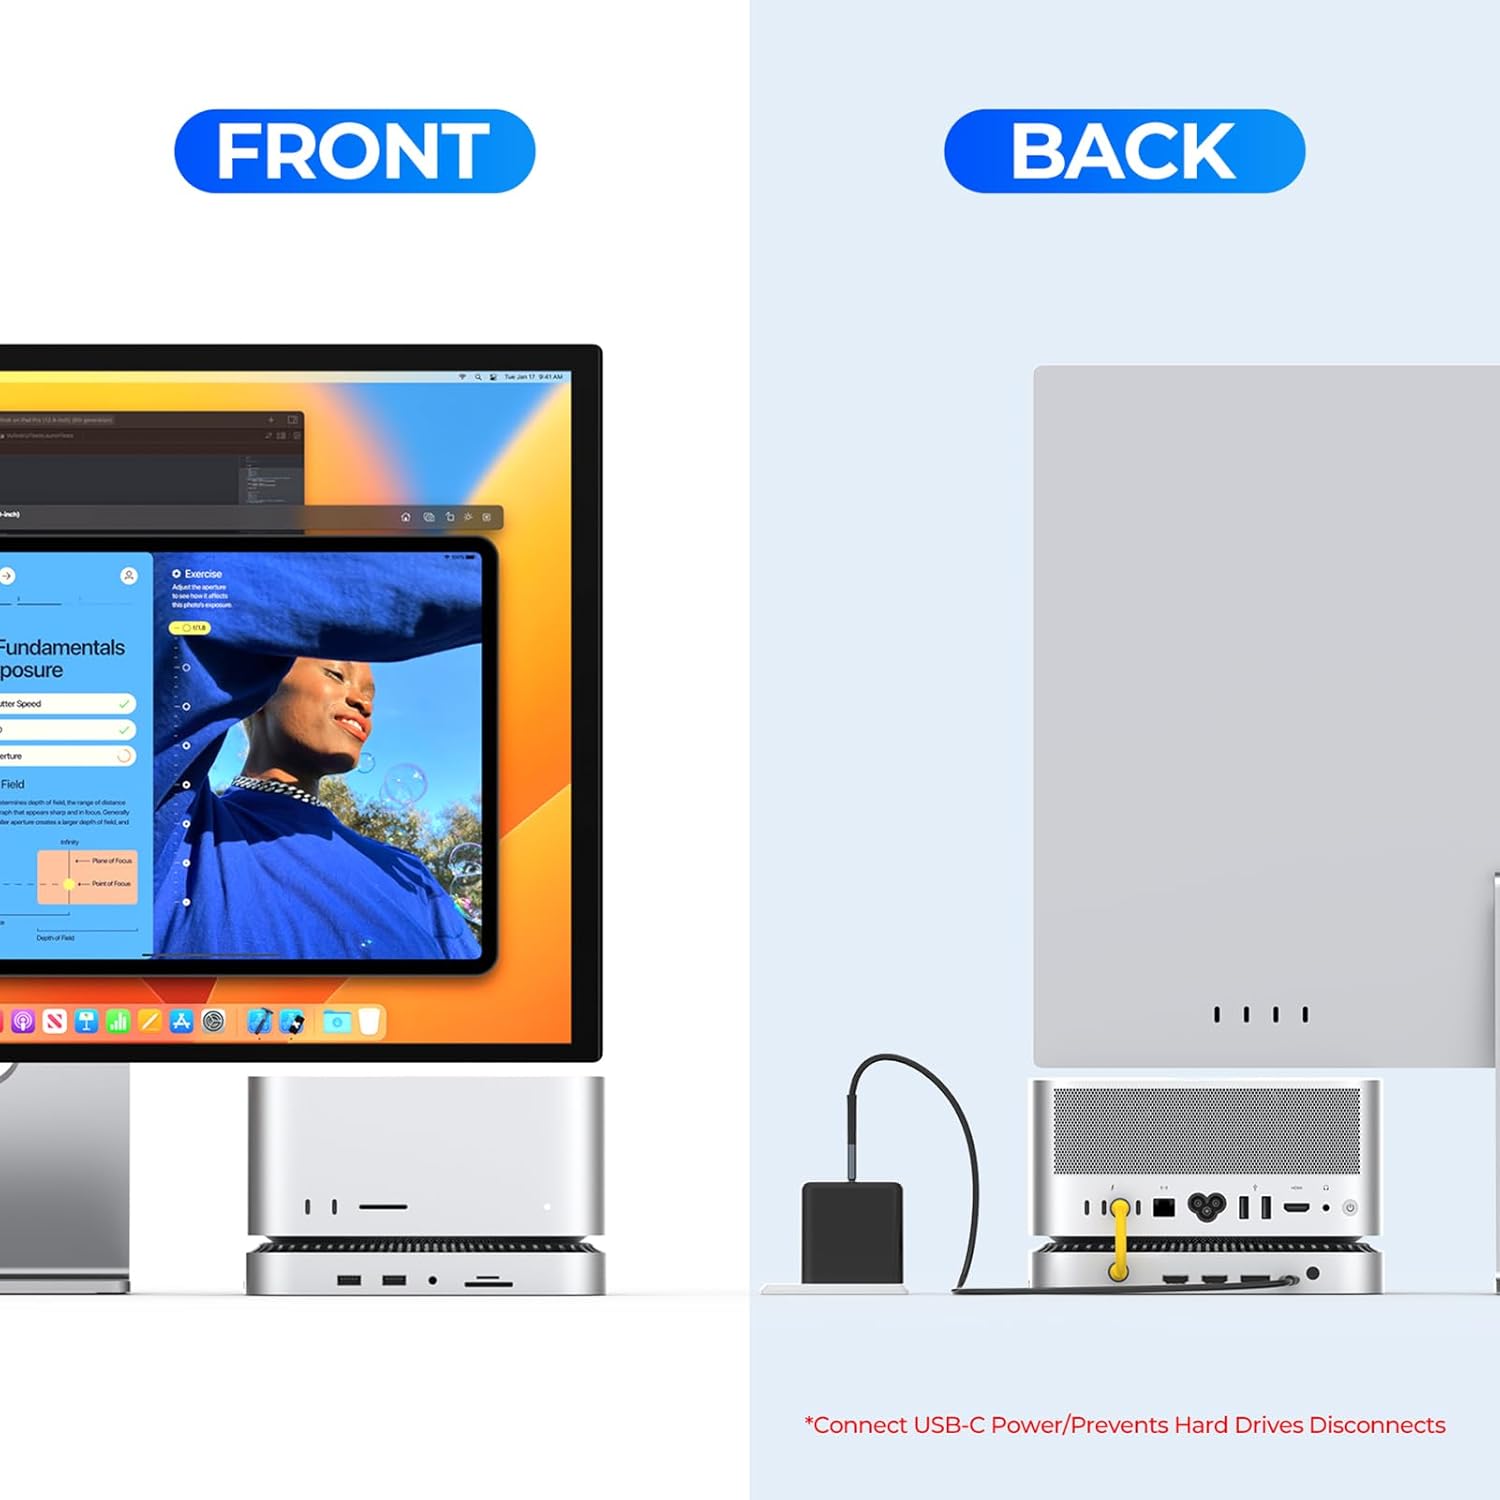
Connect the included USB C 65W power adapter to the 'PD Power Input' USB-C port on the back of the dock. This provides power to the dock and connected devices, ensuring stable operation, especially when using multiple peripherals or SSDs.

The back of the dock includes the PD Power Input to ensure stable power delivery to all connected devices.
Operating Instructions
1. Port Overview
The RayCue 10-in-1 80Gbps Dock offers a comprehensive array of ports:
- Front Ports: 2x USB-A 3.2 (10Gbps), 1x 3.5mm Hi-Fi Audio Jack, 1x CFexpress Type B, 1x CFexpress Type A.
- Rear Ports: 1x Host USB-C (80Gbps), 2x HDMI 2.1 (8K@30Hz or 4K@144Hz), 1x DisplayPort 2.1, 1x PD Power Input USB-C (45W), 1x Fan Switch.
- Internal: 2x M.2 NVMe SSD Slots (up to 16TB, RAID 0/1 support).
2. Multi-Display Setup
Connect your monitors to the HDMI 2.1 and DisplayPort 2.1 outputs on the rear of the dock. The dock supports various display configurations:
- Single Screen: Up to 8K via DisplayPort.
- Dual Screen: Up to 4K + 4K via HDMI1 and HDMI2.
- Three Screens: Up to 4K + 4K + 4K via HDMI1, HDMI2, and DisplayPort.

Achieve a triple 4K display setup for enhanced productivity and creative work.
3. Data Transfer and Card Reader Usage
Utilize the dual 10Gbps USB-A ports for high-speed peripheral connections. The integrated CFexpress Type A/B card readers provide fast import for 4K/8K RAW footage, ideal for professional media workflows. Insert CFexpress cards with contacts facing up.

The 10Gbps CFexpress card reader allows for rapid transfer of large media files.
4. Cooling Fan Operation
The dock features a built-in cooling fan to improve airflow and maintain optimal temperatures for your Mac Studio/Mini. The fan can be controlled via the push-button switch on the back of the dock. If left on, the fan will automatically start and stop with your Mac Studio/Mini.
Maintenance
- Keep the dock clean by wiping it with a soft, dry cloth.
- Ensure the ventilation grilles are free from dust and obstructions to maintain optimal cooling performance.
- Avoid exposing the device to extreme temperatures or humidity.
Troubleshooting
- No Power/Connectivity: Ensure all cables, especially the TB5 host cable and the 45W PD power input, are securely connected. Try using a different power outlet.
- SSD Not Recognized: Verify that the SSD is correctly installed in the bay and secured. Check Disk Utility on your Mac to ensure the SSD is formatted correctly (APFS for Mac only, exFAT for cross-platform use).
- Display Issues: Confirm that display cables are properly connected to both the dock and the monitors. Check your Mac's display settings to detect and configure external displays.
- Intermittent Disconnects: Ensure the 45W PD power adapter is connected to the dock. Some peripherals may draw significant power, and external power helps maintain stability.
- Slow Data Transfer: Ensure you are using the correct ports for high-speed devices (e.g., 10Gbps USB-A ports). Check the specifications of your connected devices and cables.
Specifications
| Feature | Detail |
|---|---|
| Brand | RayCue |
| Color | Sliver |
| Hardware Interface | 3.5mm Audio, HDMI, USB 3.2 Gen 2 |
| Compatible Devices | Mac Studio (M4 Max or M3 Ultra), Mac Studio (M2 Max or M2 Ultra), Mac Studio (M1 Max or M1 Ultra, 2022), Mac Mini M1, Mac Mini M2 |
| Total USB Ports | 3 |
| Number of Ports | 12 |
| Total HDMI Ports | 2 |
| Wattage | 15W (for device operation, 45W PD input for power delivery) |
| Manufacturer | RayCue |
Warranty and Support
This product comes with a 1-year limited warranty from the date of purchase. For technical support or warranty claims, please refer to the contact information provided in the included User Manual or visit the official RayCue website.


