Introduction
This manual provides essential information for the safe and effective installation, operation, and maintenance of your new Generic Gas Range Oven Igniter. This igniter is designed as a direct replacement for various Kenmore gas range models, addressing common issues such as the oven failing to ignite, slow preheating, or insufficient heat output.
The igniter functions as a critical heat sensor, necessary for safely activating the gas safety valve and initiating the flame within your oven. Proper installation ensures your appliance returns to optimal performance.
Safety Information
WARNING: Before attempting any installation or repair, always disconnect the appliance from its power supply and turn off the gas supply to the range. Failure to do so can result in electric shock, gas leaks, fire, or serious personal injury.
- Ensure the work area is well-ventilated.
- Wear appropriate personal protective equipment, such as gloves and eye protection.
- If you are unsure about any step, consult a qualified appliance technician.
- Do not modify the igniter or any part of the appliance.
- After installation, check for gas leaks using a soap and water solution (never an open flame).
Setup and Installation
This igniter is designed for a plug-and-play installation, featuring a pre-attached two-prong Molex plug for a secure electrical connection. Follow these steps carefully for a safe and effective replacement.
Tools Required:
- Screwdriver (Phillips and/or Flathead, depending on your oven model)
- Wrench or Nut Driver (if applicable for mounting bolts)
- Work Gloves
- Flashlight (optional, for better visibility)
Installation Steps:
- Disconnect Power and Gas: Ensure the gas supply valve to the range is closed and the appliance is unplugged from the electrical outlet or the circuit breaker is turned off.
- Access the Oven Cavity: Open the oven door and remove the oven racks. Depending on your model, you may need to remove the oven bottom panel. This usually involves lifting the front edge and sliding it out, or removing a few screws.
- Locate the Old Igniter: The igniter is typically located near the gas burner tube at the bottom of the oven cavity. It is a ceramic-like component with two prongs and wires leading to it.
- Disconnect the Old Igniter:
- Carefully disconnect the electrical connector by pulling it apart. Do not pull on the wires.
- Unscrew the mounting screws that secure the igniter to the burner assembly or oven frame.
- Gently remove the old igniter. Note its orientation for installing the new one.
- Install the New Igniter:
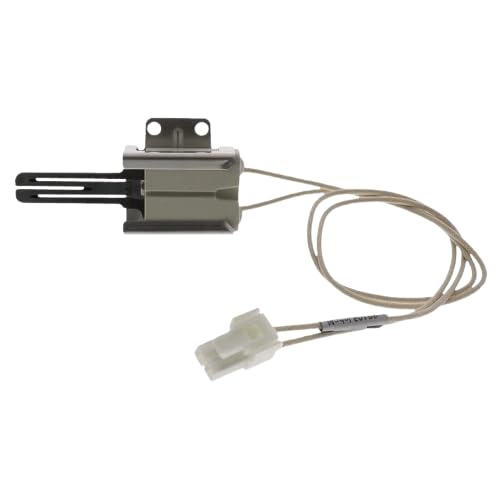
Image: The new Generic Gas Range Oven Igniter, showing its overall structure and the pre-attached two-prong Molex connector.
- Position the new igniter in the same orientation as the old one.
- Secure it with the mounting screws. Do not overtighten.
- Connect the two-prong Molex plug of the new igniter to the oven's wiring harness. Ensure a firm connection.
- Reassemble the Oven: Replace the oven bottom panel and oven racks.
- Restore Power and Gas: Turn on the gas supply and plug the appliance back into the electrical outlet or turn on the circuit breaker.
- Test the Oven: Proceed to the "Operating Instructions" section to test the igniter.

Image: Side view of the igniter, highlighting the ceramic body and the metal mounting bracket for secure attachment.
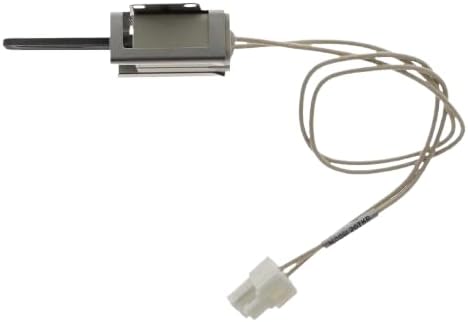
Image: Top view of the igniter, illustrating the electrical connector and the wiring that connects to the oven's harness.
Operating Instructions
After installing the new igniter and restoring power and gas, it is important to test the oven's functionality.
- Set Oven Temperature: Turn on your oven and set it to a moderate temperature, such as 350°F (175°C).
- Observe Ignition: Listen for the faint click of the gas valve opening and observe the igniter. It should glow bright orange within 30-60 seconds, followed by the ignition of the gas burner.
- Monitor Heating: Allow the oven to preheat and reach the set temperature. Confirm that the oven heats up efficiently and maintains the desired temperature.
- Check for Gas Odor: If you detect any gas odor, immediately turn off the gas supply and power to the range. Ventilate the area and do not use the oven until the source of the leak is identified and repaired by a qualified technician.
Maintenance
The gas oven igniter is a wear-and-tear component and typically does not require routine maintenance. However, following general appliance care can help prolong its life and ensure efficient operation:
- Keep the oven cavity clean to prevent grease and food debris from accumulating near the igniter or burner.
- Avoid spilling liquids directly onto the igniter.
- If you notice a significant decrease in oven performance (e.g., slow preheat, inconsistent heating), inspect the igniter for visible damage or a weak glow.
Troubleshooting
If your oven is not functioning correctly after igniter replacement, consider the following common issues and solutions:
| Problem | Possible Cause | Solution |
|---|---|---|
| Oven not heating / No ignition |
|
|
| Slow preheat time |
|
|
| Gas odor without flame |
|
|
If troubleshooting steps do not resolve the issue, it is recommended to contact a qualified appliance repair technician.
Specifications
| Feature | Detail |
|---|---|
| Brand | Generic |
| Compatible Kenmore Models | 790.72909015, 790.74003310, 790.74032310, 790.74032311, 790.74032312, 790.74032313, 790.74032314, 790.74033310, 790.74033311, 790.74033312, 790.74033313, 790.74033314, 790.74039310, 790.74039311, 790.74039312, 790.74039313, 790.74039314, 790.74043310, 790.74132310, 790.74132311, 790.74132312, 790.74132313, 790.74132314, 790.74133310, 790.74133311, 790.74133312, 790.74133313, 790.74133314, 790.74134310, 790.74134311, 790.74134312, 790.74134313, 790.74134314 |
| Voltage | 120 Volts |
| Product Dimensions | 1 x 1 x 1 inches (Approximate) |
| Connector Type | Two-Prong Molex Plug |
Warranty and Support
For information regarding product warranty, please refer to the packaging or contact the seller directly. For technical support or further assistance with installation and troubleshooting, please reach out to the product's manufacturer or a certified appliance technician.


