
1. Introduction
Thank you for choosing the HOVVIDA Portable Tire Inflator AM41J3. This wireless electric pump is designed for convenient and efficient inflation of various items, including car tires, motorcycle tires, bicycle tires, balls, and inflatable toys. Featuring a high-capacity 7800 mAh battery, a 150 PSI digital pressure gauge, and an integrated LED light, this device offers a reliable solution for your inflation needs. Please read this manual thoroughly before use to ensure proper operation and safety.
2. Safety Instructions
- Keep the device away from children.
- Do not operate the inflator in wet conditions or near flammable liquids or gases.
- Avoid prolonged continuous operation to prevent overheating. Allow the device to cool down between uses if necessary.
- Do not point the air hose at people or animals.
- Always ensure the correct pressure setting for the item being inflated to prevent over-inflation and potential damage or injury.
- The device is not designed for high-volume inflation items such as air mattresses, paddleboards, or large truck tires.
- When using the 12V DC car power cable, ensure your vehicle's engine is running to prevent draining the car battery.
3. Package Contents
Verify that all items listed below are included in your package:
- 1 x HOVVIDA Portable Tire Inflator
- 1 x 15.8-inch Air Hose
- 1 x Schrader Valve Adapter
- 1 x Presta Valve Adapter
- 2 x Toy Nozzles (long + short)
- 1 x Ball Needle
- 1 x 12V DC Car Power Cable (300 cm / 118 inches)
- 1 x Fuse
- 1 x Anti-scratch Silicone Base
- 1 x USB-C Charging Cable
- 1 x Storage Bag
- 1 x User Manual

Figure 3.1: All components included in the package.
4. Product Features
- Fast Inflation: Equipped with a 25mm copper cylinder motor, delivering 40 L/min airflow for rapid inflation. Can inflate a 215/45/R17 car tire from 30 to 36 PSI in approximately 48 seconds.
- High-Capacity Battery: Integrated 7800mAh rechargeable battery supports cordless operation and can inflate up to four standard car tires (0-36 PSI) on a single charge.
- Dual Power Options: Operates wirelessly on battery or via the included 12V DC car power cable.
- Automatic Shut-off: Automatically stops inflation once the preset target pressure is reached, ensuring precise and hands-free operation.
- Multiple Inflation Modes: Features 5 preset modes (Car, Motorcycle, Bicycle, Ball, Custom) and 4 pressure units (PSI, BAR, kPa, kg/cm²).
- Digital Display: Clear digital screen shows real-time pressure readings with ±0.1 PSI accuracy.
- Emergency LED Light: Built-in 120 lm LED light with constant and SOS flashing modes for visibility in low-light conditions.
- Portable Design: Compact (17 x 7.1 x 5.6 cm) and lightweight (0.7 kg) for easy storage and transport.
- Stable Operation: Features an anti-scratch silicone base and a 15.8-inch air hose for stable placement during use.
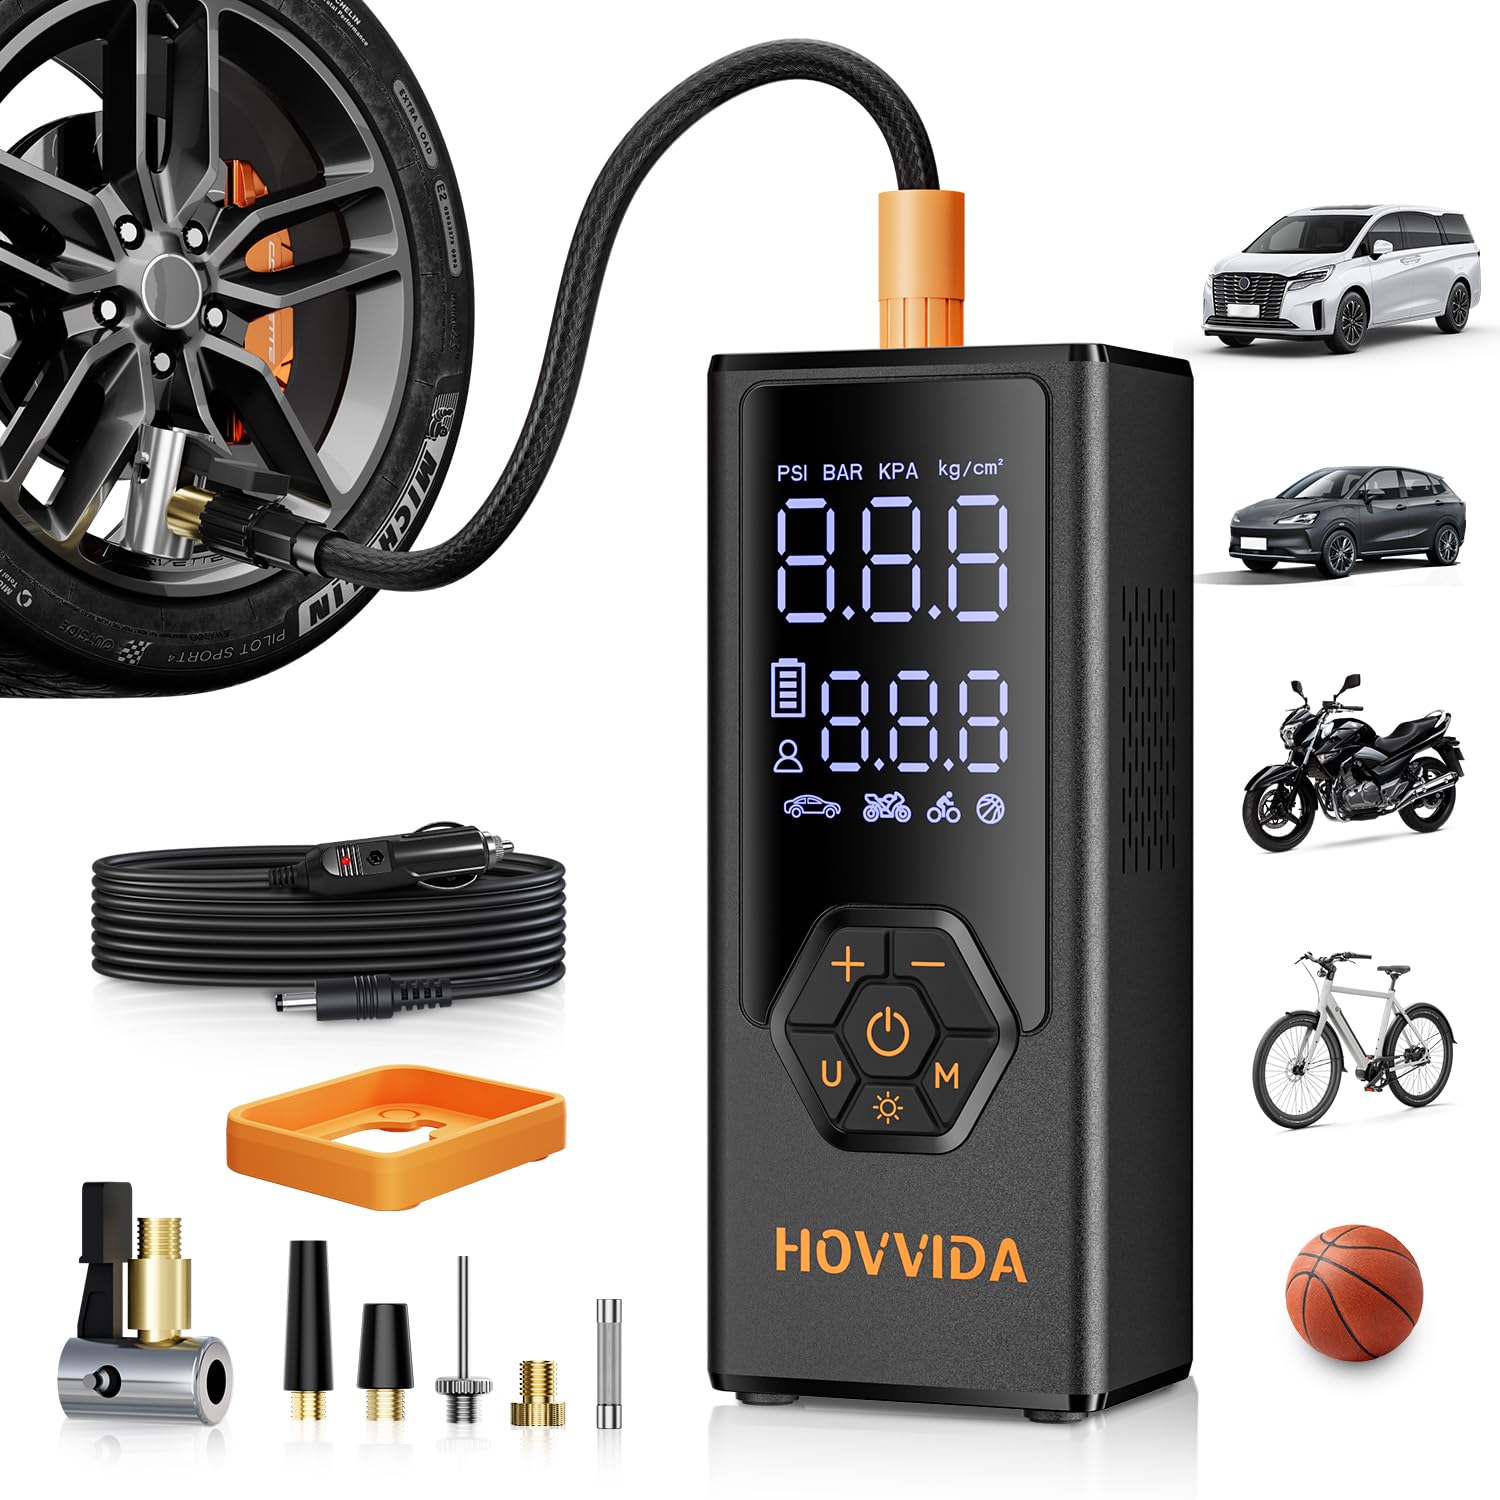
Figure 4.1: Illustration of the fast inflation mechanism.

Figure 4.2: Feature comparison with other inflators.
5. Setup and Charging
5.1 Initial Charging
Before first use, fully charge the tire inflator. Connect the provided USB-C charging cable to the device and a suitable USB power adapter (not included). The battery indicator on the display will show the charging status. Charging typically takes several hours. The inflator cannot be turned on while it is charging. Disconnect the charger before powering on the device.
5.2 Using the 12V DC Car Power Cord
In case the battery is depleted or for extended use, you can power the inflator directly from your vehicle's 12V DC outlet. Connect the 12V DC car power cable to the inflator and your car's cigarette lighter socket. Important: Always keep your vehicle's engine running while using the car power cable to prevent draining your car battery.
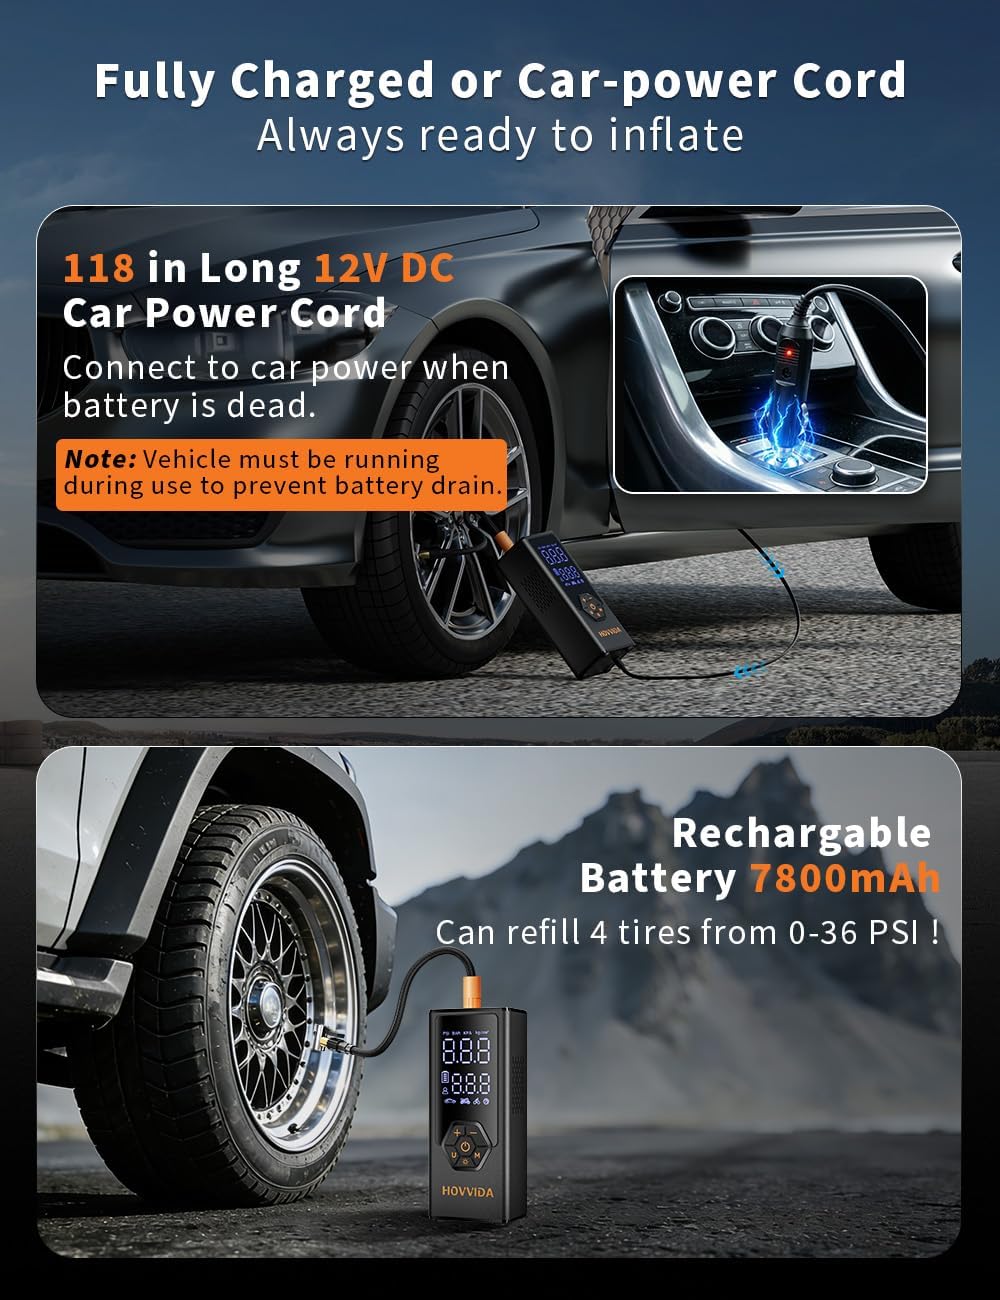
Figure 5.1: Charging options for the inflator.
5.3 Attaching the Air Hose and Adapters
Screw the 15.8-inch air hose securely onto the inflator's air outlet. Select the appropriate valve adapter (Schrader, Presta, toy nozzle, or ball needle) for the item you wish to inflate and attach it to the other end of the air hose.

Figure 5.2: Stable design with air hose connected to a tire.
6. Operating Instructions
6.1 Powering On/Off
Press and hold the power button (U) for 2-3 seconds to turn the inflator on or off.
6.2 Selecting Inflation Modes and Pressure Units
After powering on, the digital display will show the current pressure and selected mode. Press the 'M' button to cycle through the 5 preset inflation modes: Car, Motorcycle, Bicycle, Ball, and Custom. Each mode has a default pressure range. Press the 'U' button to switch between 4 pressure units: PSI, BAR, kPa, and kg/cm².

Figure 6.1: Selecting inflation modes and pressure units.
6.3 Setting Target Pressure
In any mode, use the '+' and '-' buttons to adjust the target pressure. The display will show the set pressure. Once set, the value will flash for a few seconds and then lock in.
6.4 Starting and Stopping Inflation
- Connect the air hose with the appropriate adapter securely to the item's valve.
- Ensure the target pressure is set correctly.
- Press the power button (U) briefly to start inflation. The inflator will begin pumping air, and the display will show the real-time pressure.
- The inflator will automatically shut off once the preset target pressure is reached.
- To manually stop inflation at any time, press the power button (U) again.
- Carefully disconnect the air hose from the valve.
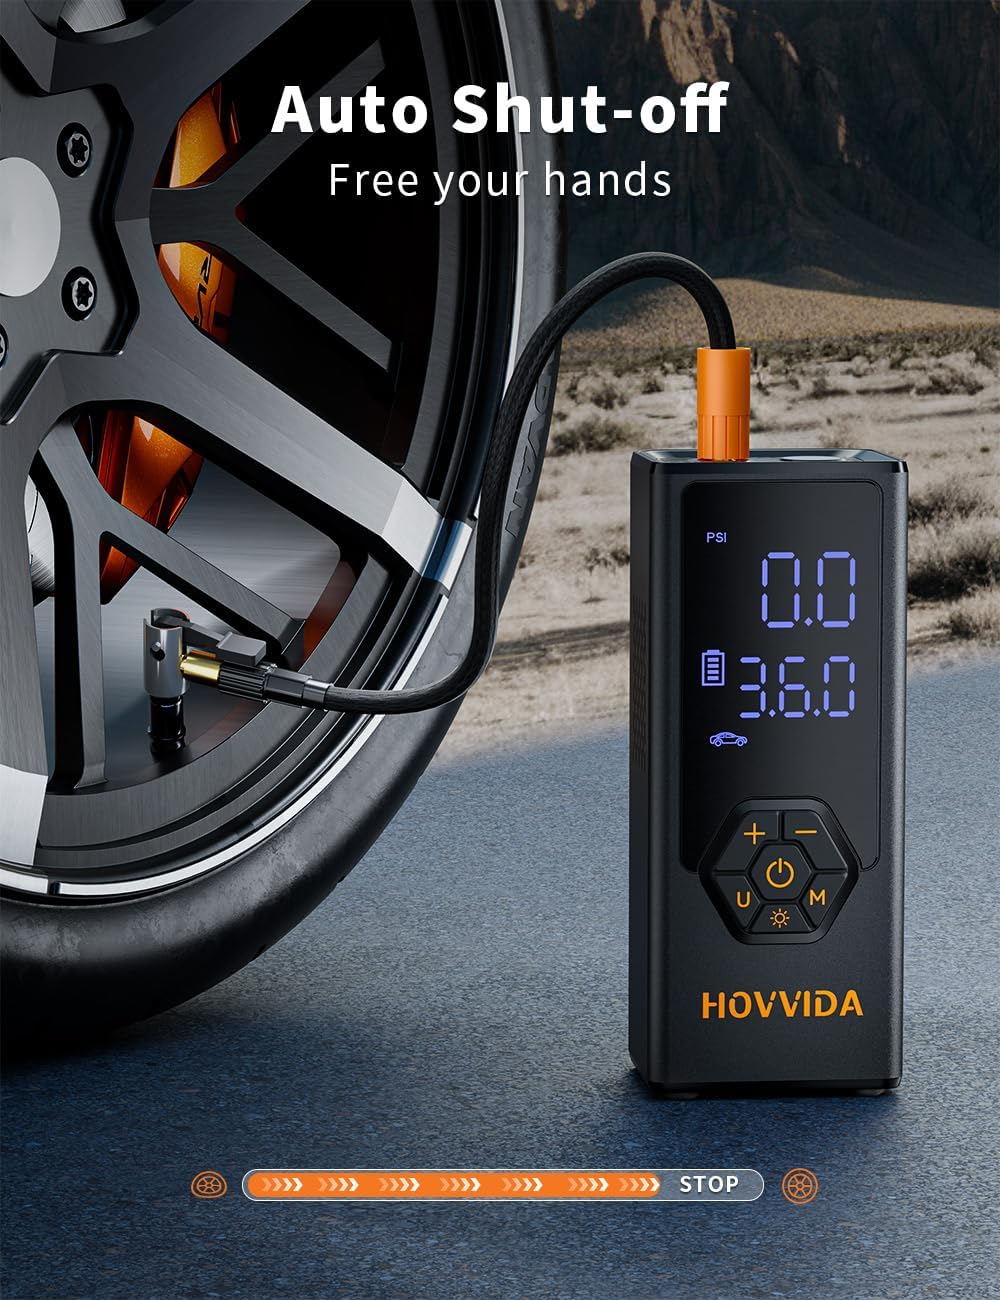
Figure 6.2: Automatic shut-off feature in action.
7. LED Light Function
The HOVVIDA Portable Tire Inflator is equipped with a 120 lm high-brightness LED light for use in dark environments or emergencies.
- Constant Light Mode: Press the light button (M with sun icon) once to turn on the constant LED light.
- SOS Flashing Mode: Press the light button (M with sun icon) a second time to activate the SOS flashing mode.
- Turn Off: Press the light button (M with sun icon) a third time to turn off the LED light.

Figure 7.1: LED light in operation.
8. Maintenance
- Cleaning: Wipe the device with a soft, dry cloth. Do not use abrasive cleaners or immerse the device in water.
- Storage: Store the inflator and its accessories in the provided storage bag in a cool, dry place, away from direct sunlight and extreme temperatures.
- Battery Care: For optimal battery life, charge the device at least once every three months if not in regular use.
- Hose and Adapters: Inspect the air hose and adapters regularly for any signs of wear or damage. Replace if necessary.
9. Troubleshooting
| Problem | Possible Cause | Solution |
|---|---|---|
| Inflator does not turn on. | Battery is depleted. Device is currently charging. | Charge the device fully. If charging, disconnect the USB-C cable before attempting to power on. |
| Inflation is slow or not working. | Air hose or adapter not securely connected. Incorrect mode or pressure setting. Battery low. | Ensure all connections are tight. Verify the selected mode and target pressure. Recharge the battery or use the 12V DC car power cord. |
| Device overheats during use. | Prolonged continuous operation. | Turn off the device and allow it to cool down for at least 10-15 minutes before resuming operation. Avoid continuous use for more than 10 minutes. |
| Inaccurate pressure reading. | Sensor error. | Ensure the air hose is properly connected. Power cycle the device. If the issue persists, contact customer support. |
| Using 12V DC car power drains car battery. | Vehicle engine was off during use. | Always ensure your vehicle's engine is running when powering the inflator via the 12V DC car power cord. |
10. Specifications
| Specification | Value |
|---|---|
| Brand | HOVVIDA |
| Model Number | AM41J3 |
| Item Weight | 1.11 Kilograms (2.45 lbs) |
| Product Dimensions (L x W x H) | 17.02 x 7.01 x 5.59 cm (6.7 x 2.76 x 2.2 inches) |
| Max Pressure | 150 PSI |
| Airflow Rate | 40 L/Min |
| Battery Capacity | 7800 mAh |
| Input Voltage | 12V DC (via car power cable) |
| LED Light Brightness | 120 lm |
| Hose Length | 15.8 inches |
| Date First Available | February 16, 2026 |
11. Warranty and Support
HOVVIDA products are manufactured to high-quality standards. For warranty information, technical support, or any questions regarding your product, please refer to the contact information provided on the product packaging or visit the official HOVVIDA website. Please retain your proof of purchase for warranty claims.