1. Introduction
Thank you for purchasing the Lafocuse Digital LED Alarm Clock. This device features a large 7-inch LED display, showing time, temperature, date, and day of the week simultaneously. It includes dual alarms, adjustable brightness, a snooze function, and a countdown timer. Please read this manual carefully to ensure proper use and optimal performance.
2. Key Features
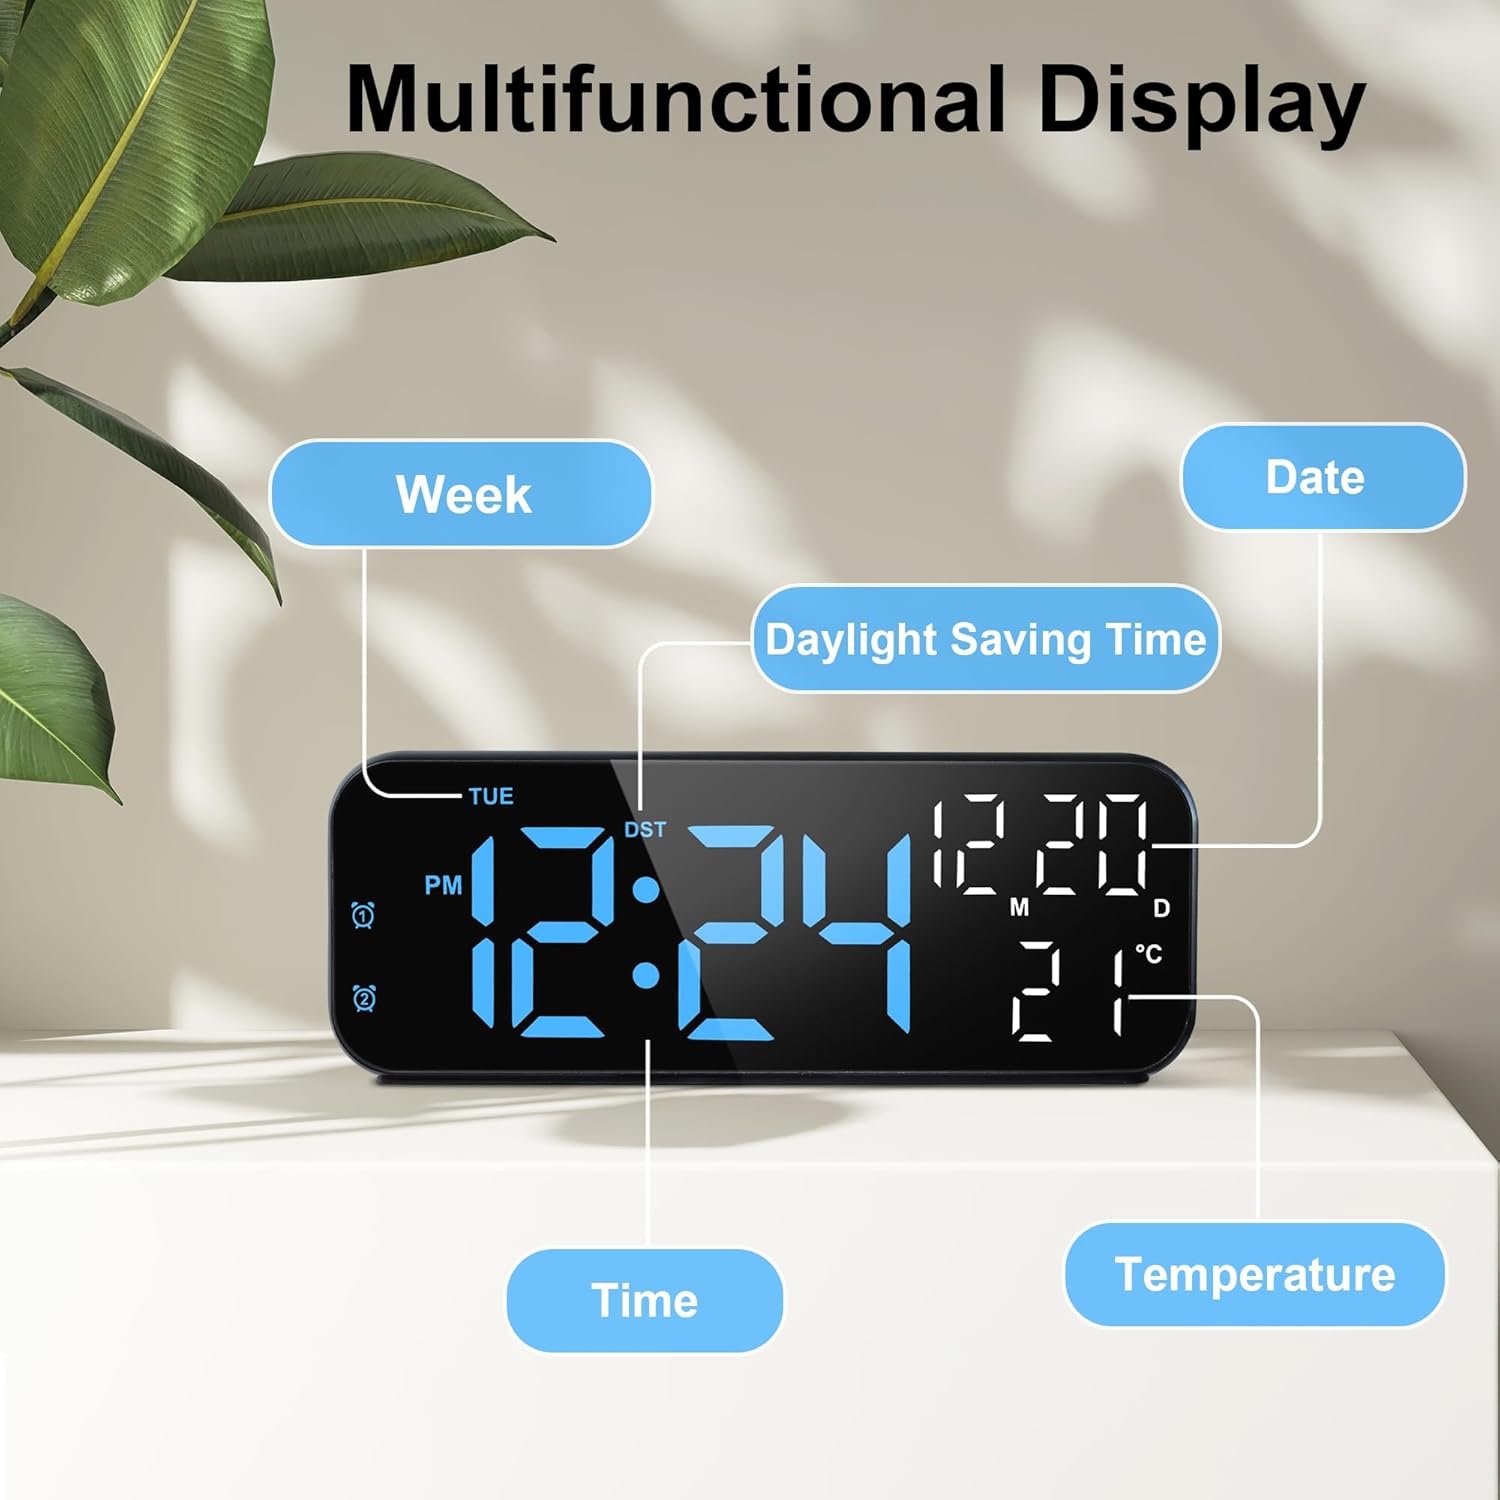
- 7-inch LED Display: Shows time (12/24H), ambient temperature (°F/°C), date, and day of the week simultaneously.
- Dual Power Options: Operates via USB cable (included) or 3 AAA batteries (not included).
- 3 Brightness Levels: Adjustable display brightness (low/medium/high) for various environments. Screen can be turned off.
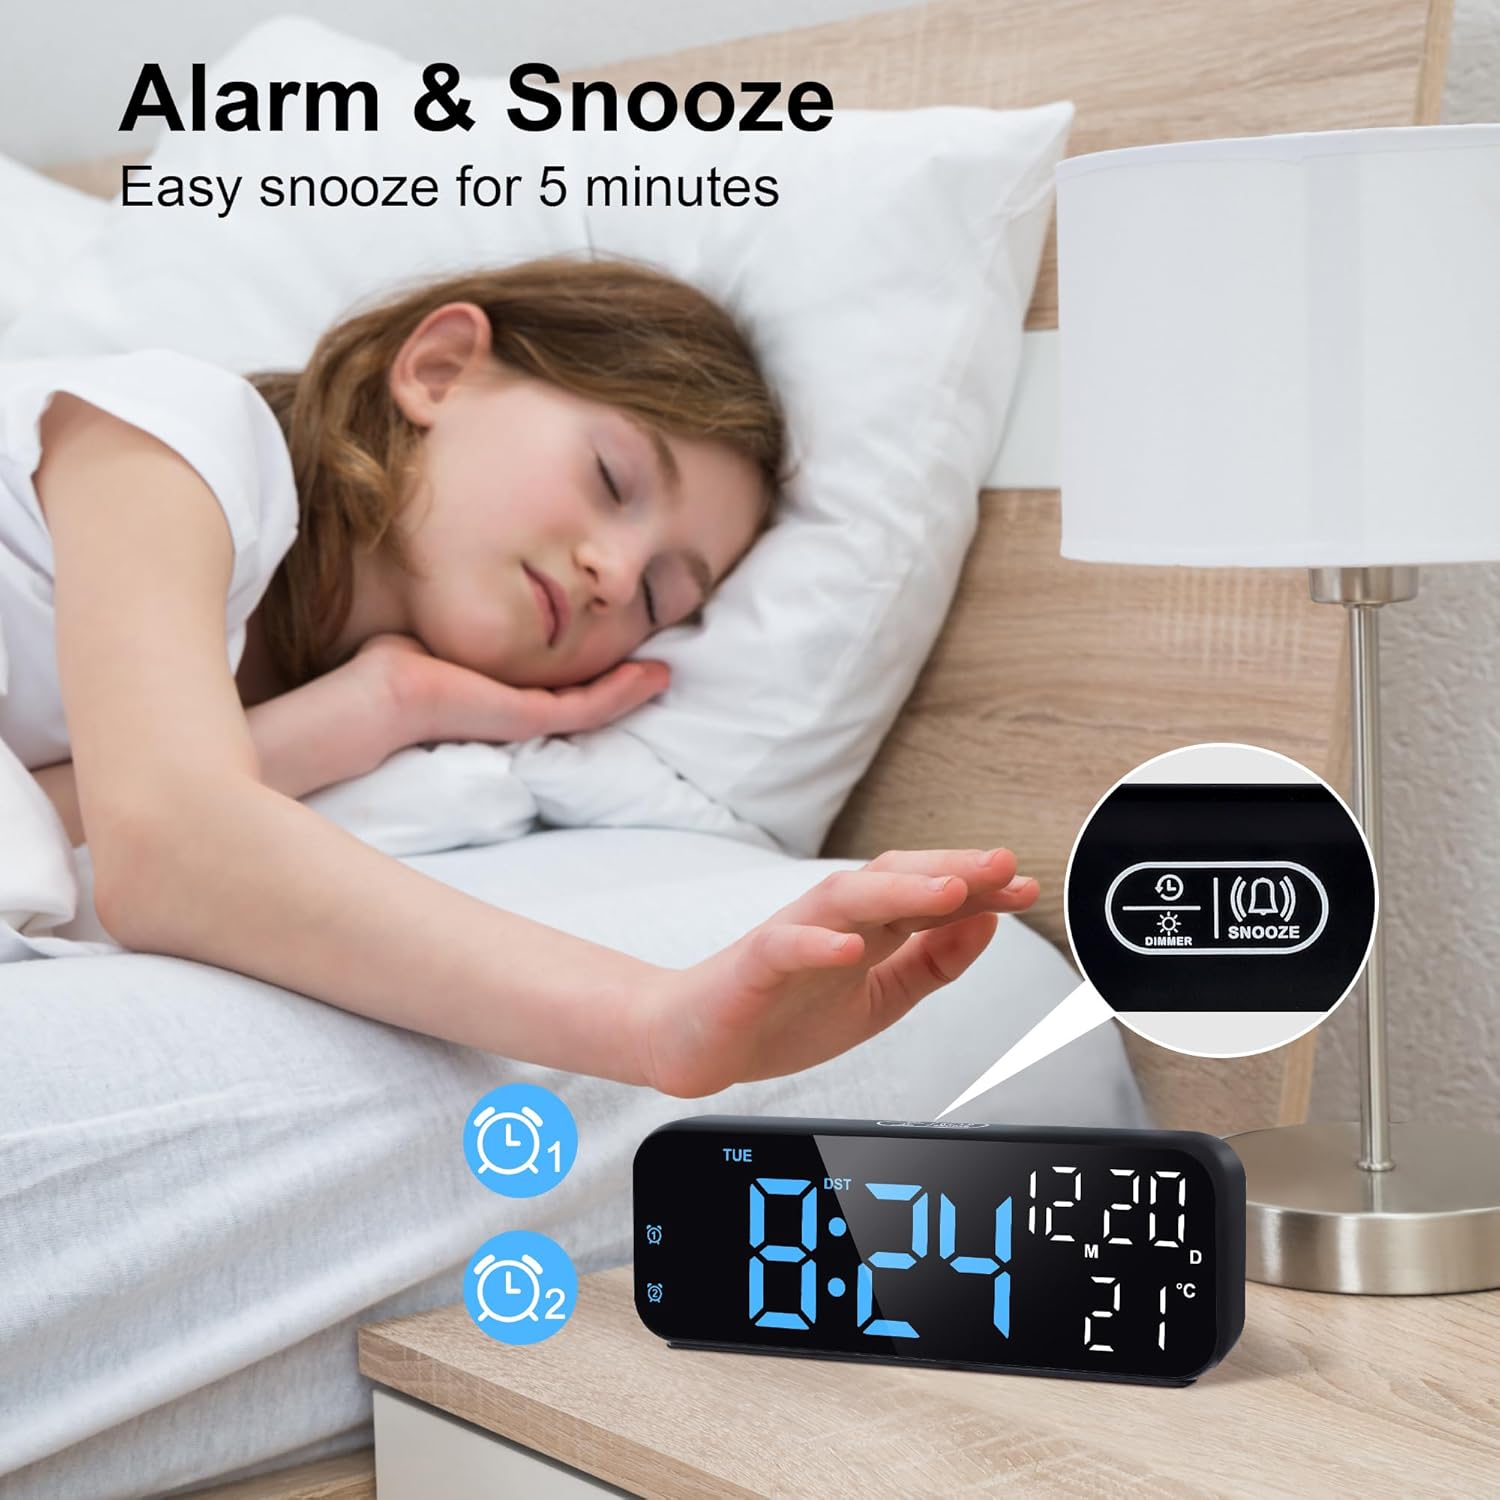
- Dual Alarms & Snooze: Set two independent alarms with an adjustable snooze duration (1-60 minutes).
- Countdown Timer: Timer function with a maximum duration of 24 hours.
3. Package Contents
- Lafocuse Digital LED Alarm Clock
- USB Power Cable
- User Manual
4. Product Overview
Familiarize yourself with the clock's buttons and ports:

Controls:
- Dimmer/Snooze Button: Located on top. Press to adjust brightness or activate snooze.
- SET Button: Used to enter and confirm settings.
- TIME Button: Used for time and date settings.
- UP Button: Increases values during settings.
- DOWN Button: Decreases values during settings.
- ALARM1/ALARM2 Buttons: Used to set and activate/deactivate alarms.
Ports & Compartments:
- Battery Case: Located on the rear, for 3 AAA batteries.
- Power Cable Jack: For connecting the USB power cable.
5. Setup
5.1 Power Options

- USB Power: Connect the included USB cable to the power cable jack on the back of the clock and plug the other end into a USB power adapter (not included). The display will remain continuously on.
- Battery Power: Insert 3 AAA batteries (not included) into the battery compartment on the back. Ensure correct polarity (+/-). When running on batteries, the display will not stay on continuously. It will light up for 16 seconds when you touch the snooze area on top or press any button, then automatically turn off to save power.
5.2 Initial Time and Date Setting
To set the correct time and date, follow these steps:
- Press and hold the 'TIME SET' button for 3 seconds to enter time setting mode. The year will start flashing.
- Use the 'UP' or 'DOWN' buttons to adjust the year.
- Press 'TIME SET' again to move to month setting. Adjust with 'UP'/'DOWN'.
- Press 'TIME SET' again to move to day setting. Adjust with 'UP'/'DOWN'.
- Press 'TIME SET' again to move to hour setting. Adjust with 'UP'/'DOWN'.
- Press 'TIME SET' again to move to minute setting. Adjust with 'UP'/'DOWN'.
- Press 'TIME SET' one last time to exit time setting mode.
For a visual guide on setting the time, refer to the video below:
6. Operating Instructions
6.1 12/24 Hour Mode
To switch between 12-hour and 24-hour time formats:
- In normal time display mode, briefly press the '12/24' button (often combined with 'TIME SET' or a dedicated button) to toggle between 12-hour (with AM/PM indicator) and 24-hour formats.
6.2 Temperature Display (°F/°C)
The clock displays ambient temperature. To switch between Celsius and Fahrenheit:
- In normal time display mode, briefly press the 'UP' button (or a dedicated °C/°F button if available) to switch the temperature unit.
6.3 Brightness Adjustment
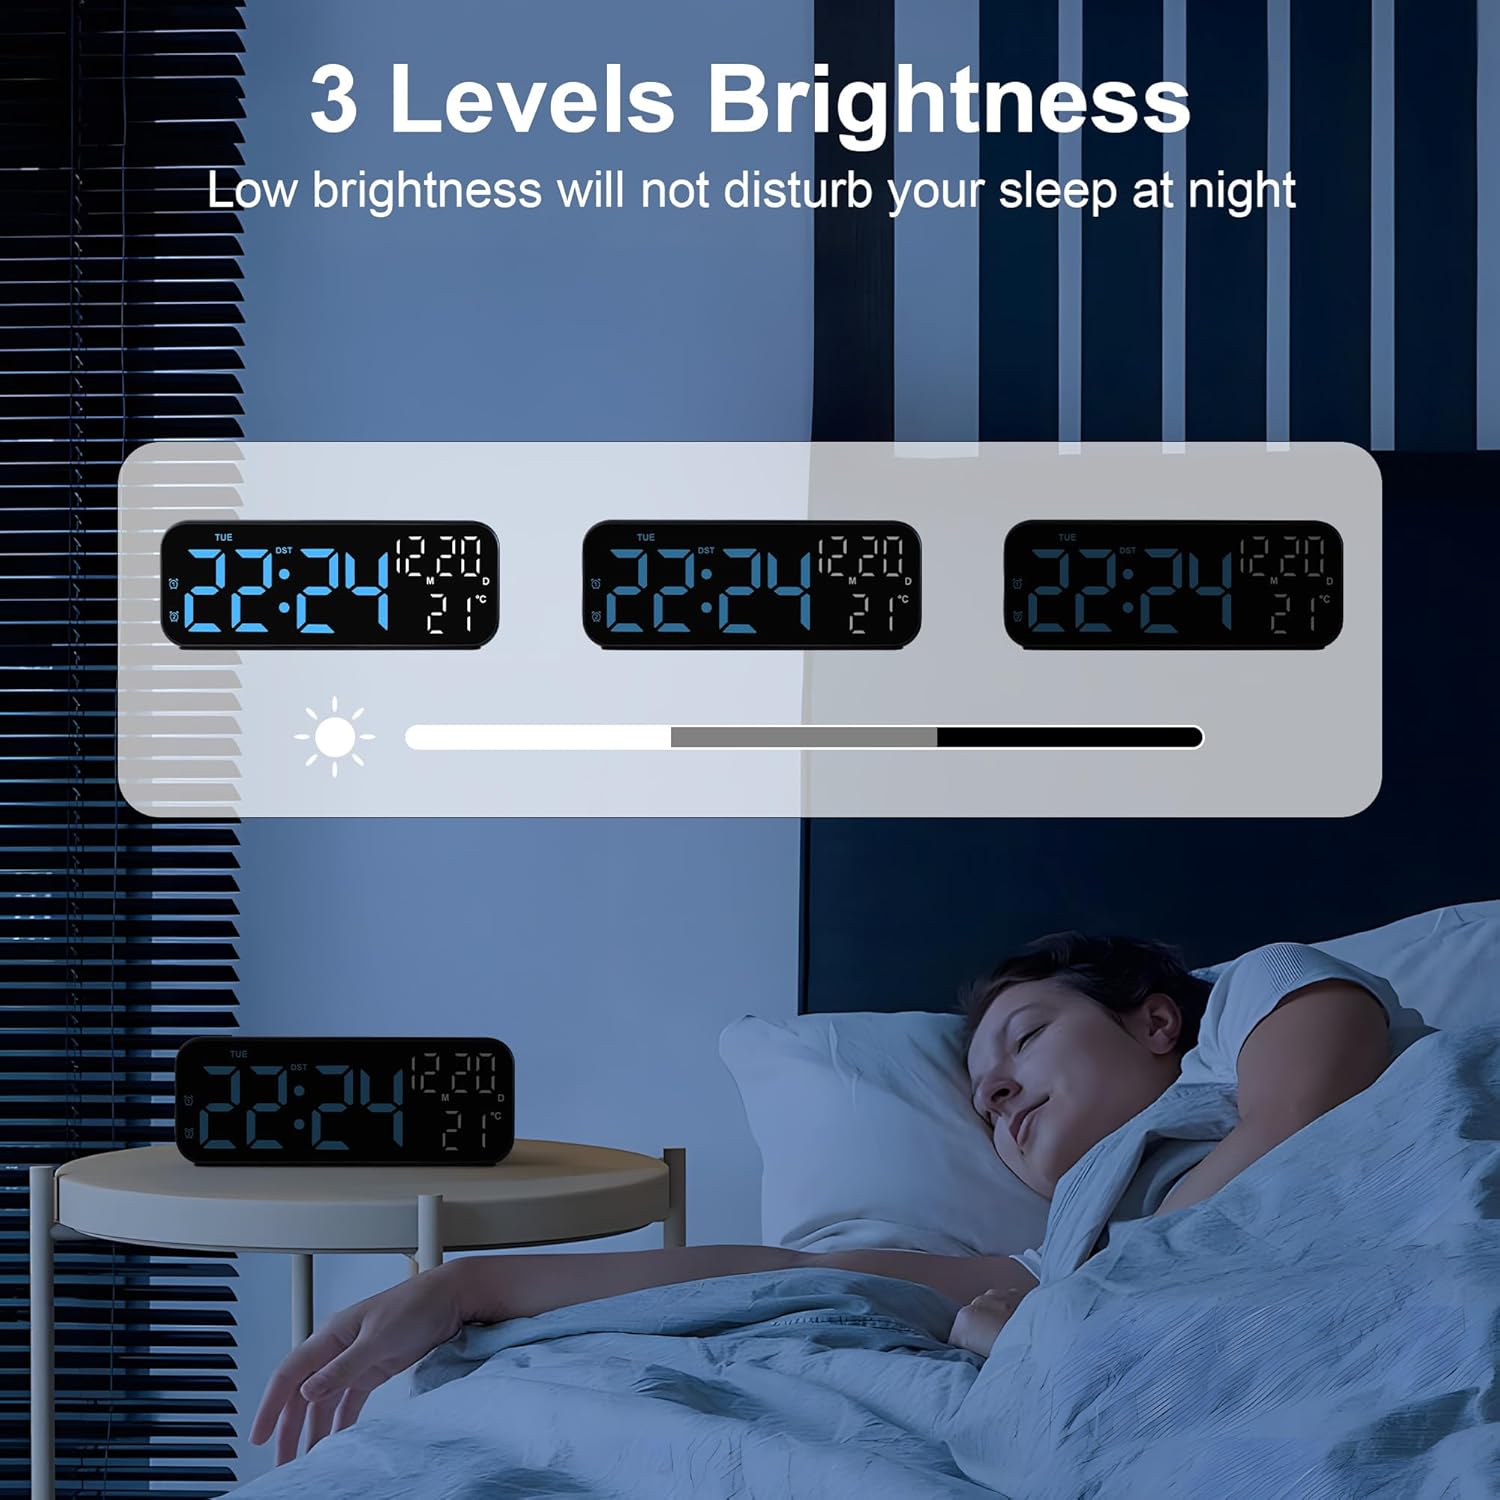
The clock offers 3 levels of brightness. To adjust:
- In normal time display mode, press the 'Dimmer/Snooze' button on top to cycle through the brightness levels (High > Medium > Low > Off).
- If the lowest brightness is still too strong for your bedside, you can press the 'SET' button to turn off the display completely.
6.4 Dual Alarms Setup
The clock supports two independent alarms (ALARM1 and ALARM2). To set an alarm:
- Press the 'ALARM1' or 'ALARM2' button briefly to activate/deactivate the respective alarm. The alarm icon will appear/disappear on the display.
- Press and hold the 'ALARM1' or 'ALARM2' button for 3 seconds to enter alarm setting mode. The hour will start flashing.
- Use the 'UP' or 'DOWN' buttons to adjust the alarm hour.
- Press the 'ALARM' button again to move to minute setting. Adjust with 'UP' or 'DOWN'.
- Press the 'ALARM' button again to set the snooze duration (1-60 minutes). Adjust with 'UP' or 'DOWN'.
- Press the 'ALARM' button again to select the alarm days: 1-5 (Monday-Friday), 1-6 (Monday-Saturday), or 1-7 (Every day). Adjust with 'UP' or 'DOWN'.
- Press the 'ALARM' button one last time to confirm and exit alarm setting mode.
For a visual guide on setting the alarm, refer to the video below:
6.5 Snooze Function
When the alarm sounds:
- Press the 'Dimmer/Snooze' button on top to temporarily pause the alarm. It will sound again after the set snooze duration.
- To completely turn off the alarm, press any other button (e.g., ALARM1/ALARM2, SET, UP, DOWN).
6.6 Countdown Timer
To use the countdown timer:
- Press the 'TIME' button briefly to cycle through time, date, and timer modes.
- When the timer display is active, press and hold the 'TIME' button to enter timer setting mode.
- Use the 'UP' or 'DOWN' buttons to set the desired countdown duration (up to 24 hours).
- Press 'TIME' again to start the countdown.
- To pause/resume the countdown, press 'TIME' briefly.
- To reset the timer, press and hold 'TIME' during the countdown.
6.7 USB Charging Port
The clock may feature a USB output port for charging other devices.
- Connect your device's charging cable to the USB output port on the clock.
- Ensure the clock is powered via the USB cable for this function to work effectively.
7. Maintenance
- Clean the clock with a soft, dry cloth. Do not use abrasive cleaners or solvents.
- Keep the device away from direct sunlight, extreme temperatures, and high humidity.
- If using batteries, remove them if the device will not be used for an extended period to prevent leakage.
8. Troubleshooting
| Problem | Solution |
|---|---|
| Display is blank or dim. | Check USB power connection. If using batteries, ensure they are fresh and correctly inserted. Tap the clock to activate the display if on battery power. Adjust brightness settings. |
| Alarm does not sound. | Ensure the alarm is activated (alarm icon visible). Check alarm time and day settings. Ensure volume is not set to zero (if applicable). |
| Time/Date is incorrect. | Follow the 'Initial Time and Date Setting' instructions to reset. |
| Snooze function not working. | Ensure the alarm is active and you are pressing the correct 'Dimmer/Snooze' button. Check snooze duration setting. |
9. Specifications
| Feature | Detail |
|---|---|
| Brand | Lafocuse |
| Model Number | ZH0185B |
| Color | Blue |
| Display Type | Digital LED |
| Screen Size | 7 inches |
| Dimensions (WxH) | 17.5 cm x 6.8 cm |
| Power Source | Battery Powered (3x AAA, not included), Corded Electric (USB cable included) |
| Special Features | Adjustable Brightness, Dual Alarms, Temperature Indicator, Large Display, Countdown Timer |
| Material | Plastic |
| Mounting Type | Tabletop |
10. Warranty and Support
For warranty information or technical support, please refer to the product packaging or contact Lafocuse customer service through your retailer. Keep your purchase receipt for any warranty claims.
