1. Introduction
The Fanttik F2 Master Pet Nail Grinder is a versatile and quiet grooming tool designed for safely trimming the nails of small to medium dogs and cats. It features a high-speed brushless motor, variable speed control, an integrated LED light, and a dual-window safety guard for enhanced precision and pet comfort. This manual provides essential information for the proper setup, operation, and maintenance of your device.
2. Product Overview
2.1 Package Contents
The Fanttik F2 Master Pet Nail Grinder kit includes the following items:
- F2 Master Pet Rotary Tool
- Engraving Bits (various sizes)
- Grinding Bits (various sizes)
- Diamond Nail Grinding Wheels (80 grit and 150 grit)
- Safety Shield for Pet Nail Grooming
- Collet
- Two (2) Dog Tags for DIY engraving
- Storage Case
- Type-C Charging Cable (5V 1A)

Image: All components included in the Fanttik F2 Master Pet Nail Grinder kit.
2.2 Device Components
Familiarize yourself with the main parts of the F2 Master Pet Nail Grinder:
- Shaft Lock Nut: Secures the grinding or engraving bit.
- Collet Nut: Holds the bit in place.
- Safety Shield: Protects the pet's paw and skin during grooming.
- LED Light: Illuminates the grooming area for better visibility.
- Speed Indicator Light Bar: Displays the current speed setting.
- Speed Control Area: Pressure-sensitive area to adjust grinding speed.
- Battery Indicator: Shows the remaining battery level.
- Type-C Charging Port: For recharging the device.
- On/Off Switch: To power the device on or off.

Image: Labeled diagram of the Fanttik F2 Master Pet Nail Grinder components.
3. Safety Information
- Always ensure the safety shield is properly installed before use to prevent accidental injury to your pet.
- Do not apply excessive pressure during grinding; let the tool do the work.
- Regularly check your pet's nails for the quick to avoid over-trimming, which can cause pain and bleeding. The built-in LED light assists in this.
- Keep the device and all accessories out of reach of children and pets when not in use.
- Do not immerse the device in water or use it in wet conditions.
4. Setup
4.1 Charging the Device
Before first use, fully charge the device. The 700 mAh rechargeable battery provides reliable power for multiple grooming sessions. A full charge typically takes about 1 hour using the provided 5V 1A Type-C cable.
- Locate the Type-C charging port on the device.
- Connect the Type-C cable to the device and a compatible USB power source.
- The battery indicator lights will show charging progress. Once fully charged, the lights will indicate a full battery.

Image: The Fanttik F2 Master Pet Nail Grinder charging via its Type-C port while stored in its case.
4.2 Attaching Grinding/Engraving Bits
- Ensure the device is turned OFF.
- Unscrew the shaft lock nut at the top of the device.
- Insert the desired grinding or engraving bit into the collet.
- Tighten the shaft lock nut securely to hold the bit in place.
4.3 Installing the Safety Guard
The dual-window grinding guard is designed to adapt to different pet sizes and habits, providing better coverage and preventing over-trimming or accidental skin contact.
- Align the safety shield with the top of the device.
- Push the safety shield down until it clicks securely into place. Ensure it is fully seated.
- Select the appropriate window size (Small, Medium, or Large) on the safety guard based on your pet's nail size.

Image: The dual-window safety guard on the Fanttik F2 Master Pet Nail Grinder, showing options for small and medium pets.
5. Operating Instructions
5.1 Preparing Your Pet
To ensure a positive grooming experience, introduce the grinder gradually:
- Allow your pet to sniff and investigate the grinder while it's off.
- Turn the grinder on briefly so your pet can get used to the quiet sound (as low as 32 dB).
- Offer treats and praise to create a positive association.
5.2 Selecting Speed
The F2 Master features 5 precision speeds (8,000–25,000 RPM) with pressure-sensitive control. For pet comfort, especially during initial grooming, it is recommended to use Speed 1 or 2.
- Turn the device ON using the On/Off switch.
- Press down firmly on the speed control area to cycle through the 5 speed settings. The speed indicator light bar will show the selected speed.

Image: Demonstrating the pressure-sensitive speed control on the Fanttik F2 Master Pet Nail Grinder.
5.3 Grinding Nails
The built-in LED light supports safe and accurate trimming by illuminating the nail and helping to identify the quick.
- Hold your pet's paw gently but firmly.
- Carefully place a small portion of the nail into the appropriate opening of the safety guard.
- Grind the nail for a few seconds at a time, then release and check your progress. Repeat as needed.
- Avoid grinding for too long in one spot to prevent heat buildup, which can be uncomfortable for your pet.
- Always use speed levels 1-2 for pet nail safety and comfort.
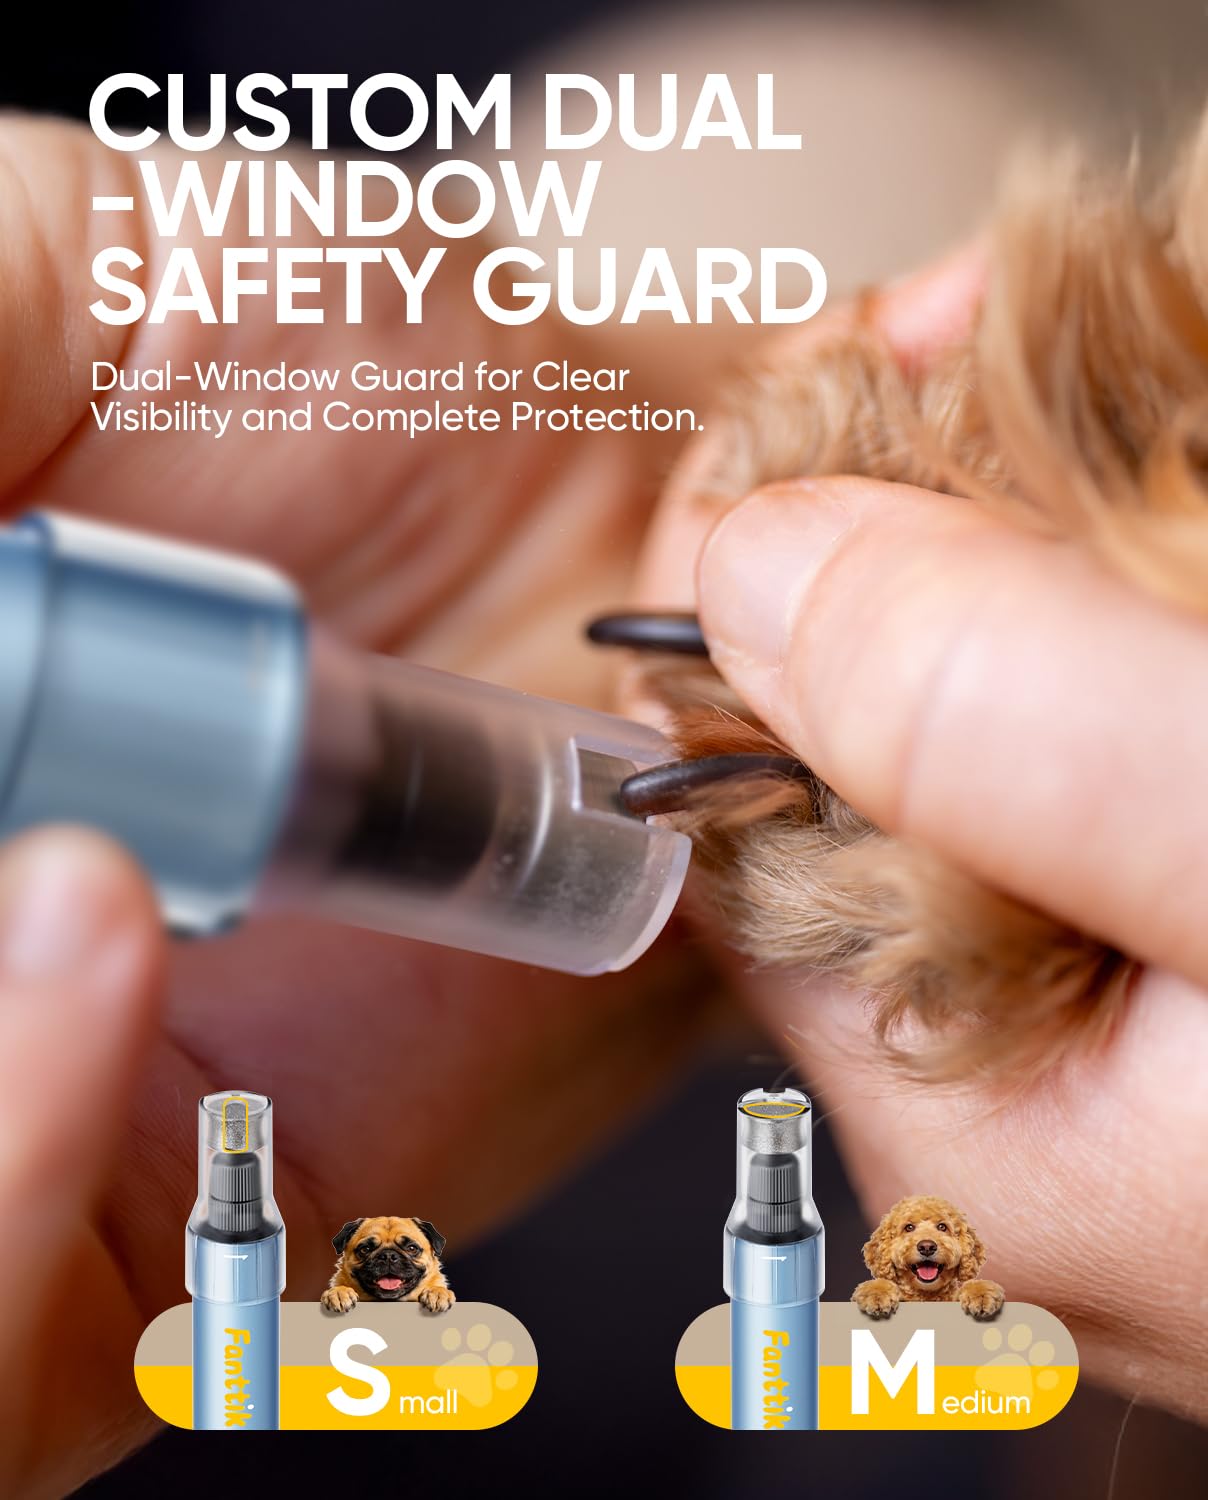
Image: The Fanttik F2 Master Pet Nail Grinder being used to trim a dog's nail, showing the LED light in action.
5.4 DIY Name Tags
The kit includes engraving bits and two blank dog tags, allowing you to personalize identification tags for your pet.
- Install an engraving bit as described in Section 4.2.
- Select a low speed setting (Speed 1 or 2).
- Gently engrave your desired text or design onto the provided dog tags.
Video: An overview of the Fanttik F2 Master Pet Nail Grooming Kit, demonstrating its features and use.
Video: A demonstration of the Fanttik F2 Master Pet Nail Grinder's quiet operation and effectiveness in pet nail care.
6. Maintenance
6.1 Cleaning the Grinding Head
Regular cleaning ensures optimal performance and hygiene.
- Ensure the device is turned OFF and unplugged.
- Remove the safety shield and the grinding bit.
- Use a soft brush or cloth to remove any nail dust or debris from the grinding head and the interior of the safety shield.
- Do not use harsh chemicals or abrasive materials for cleaning.
- Reassemble the device once all parts are clean and dry.
6.2 Storage
Store the Fanttik F2 Master Pet Nail Grinder and its accessories in the provided storage case in a cool, dry place, away from direct sunlight and moisture. Ensure the device is fully charged before long-term storage to maintain battery health.

Image: The Fanttik F2 Master Pet Nail Grinder and its accessories neatly organized within the storage case.
7. Troubleshooting
| Problem | Possible Cause | Solution |
|---|---|---|
| Device does not turn on. | Low battery. | Charge the device fully. |
| Grinding power is weak. | Low battery; grinding bit is worn out; speed setting is too low. | Charge the device; replace the grinding bit; increase the speed setting. |
| Excessive vibration or noise. | Grinding bit not properly installed; damaged bit. | Ensure bit is securely tightened; replace damaged bit. |
| Pet shows discomfort. | High speed setting; prolonged grinding in one spot; pet anxiety. | Reduce speed; grind in short intervals; introduce grinder gradually with positive reinforcement. |
8. Specifications
| Feature | Detail |
|---|---|
| Model Number | F2 Master Pet |
| Motor Type | High-speed brushless motor |
| RPM Range | 8,000–25,000 RPM (5-speed variable) |
| Noise Level | As low as 32 dB |
| Battery Capacity | 700 mAh Lithium Ion |
| Charging Time | Approx. 1 hour (with 5V 1A Type-C cable) |
| Weight | 0.22 lb (approx. 100g) |
| Dimensions | 0.83 x 7.09 inches (device); 8.07 x 3.03 x 1.58 inches (case) |
| Material | Unibody aluminum-alloy shell |
| Features | LED light, Dual-window safety guard, Pressure-sensitive speed control, Anti-slip, Waterproof, Dust-resistant |
9. Warranty & Support
Fanttik products are manufactured to high-quality standards. For warranty information, product support, or to inquire about replacement parts, please refer to the official Fanttik website or contact customer service directly. Keep your purchase receipt as proof of purchase.