1. Introduction
Thank you for choosing the Urageuxy Wireless Weather Station WS029TU. This device provides comprehensive real-time weather data, including indoor and outdoor temperature and humidity, wind speed and direction, rainfall, barometric pressure, moon phase, and weather forecasts. This manual will guide you through the setup, operation, and maintenance of your weather station to ensure optimal performance and accurate readings.
2. Package Contents
Please verify that all components are present and in good condition:
- 1 x Indoor Console Display Unit
- 1 x Outdoor Sensor Array (integrated wind vane, rain gauge, thermo-hygrometer)
- 1 x Power Adapter for Indoor Console
- 1 x Instruction Manual
3. Product Overview
3.1 Indoor Console Display Unit
The indoor console features a VA type clear display, providing a comprehensive overview of current and historical weather conditions. It includes dedicated sections for outdoor temperature and humidity, wind data (gust and average speed, direction), indoor temperature and humidity, rainfall, barometric pressure, time, date, moon phase, and a history graph.

Figure 3.1: Front and back view of the indoor console with labeled display areas and buttons.
3.2 Outdoor Sensor Array
The outdoor sensor array is a multi-functional unit designed to measure various outdoor weather parameters. It includes a rain gauge, wind cups for speed, a wind vane for direction, and a thermo-hygrometer with a radiation shield for accurate temperature and humidity readings. The sensor transmits data wirelessly to the indoor console.

Figure 3.2: Detailed diagram of the outdoor sensor array components.
4. Installation
4.1 Outdoor Sensor Installation
Proper placement of the outdoor sensor is crucial for accurate readings. Ensure it is installed in an open area, away from obstructions that could affect wind flow or rainfall collection. The transmission range between the outdoor sensor and the display console is up to 492ft (150m) in open areas.
- Battery Installation: Open the battery compartment on the outdoor sensor and insert the required batteries (not included), observing polarity.
- Mounting Location: Choose a location that is representative of your local weather conditions. Avoid placing it directly under eaves, trees, or other structures that might block rain or wind.
- Mounting Options: The sensor can be mounted on a pole, fence, or other suitable structure using the included mounting pole and hardware. Ensure the sensor is level for accurate rain gauge readings.

Figure 4.1: Examples of outdoor sensor placement in different environments.

Figure 4.2: Detailed illustrations of different mounting methods for the outdoor sensor.
4.2 Indoor Console Setup
- Power Connection: Connect the provided power adapter to the indoor console and plug it into a wall outlet. The console can also be powered by 3 AAA batteries (not included) for backup, but the backlight will be off by default when running on battery power only.
- Initial Pairing: Upon power-up, the console will automatically search for the outdoor sensor. Ensure the outdoor sensor has batteries installed and is within range. The console should display outdoor data within a few minutes.
- Placement: The console can be placed on a tabletop using its stand bracket or wall-mounted using the hanging hole on the back.
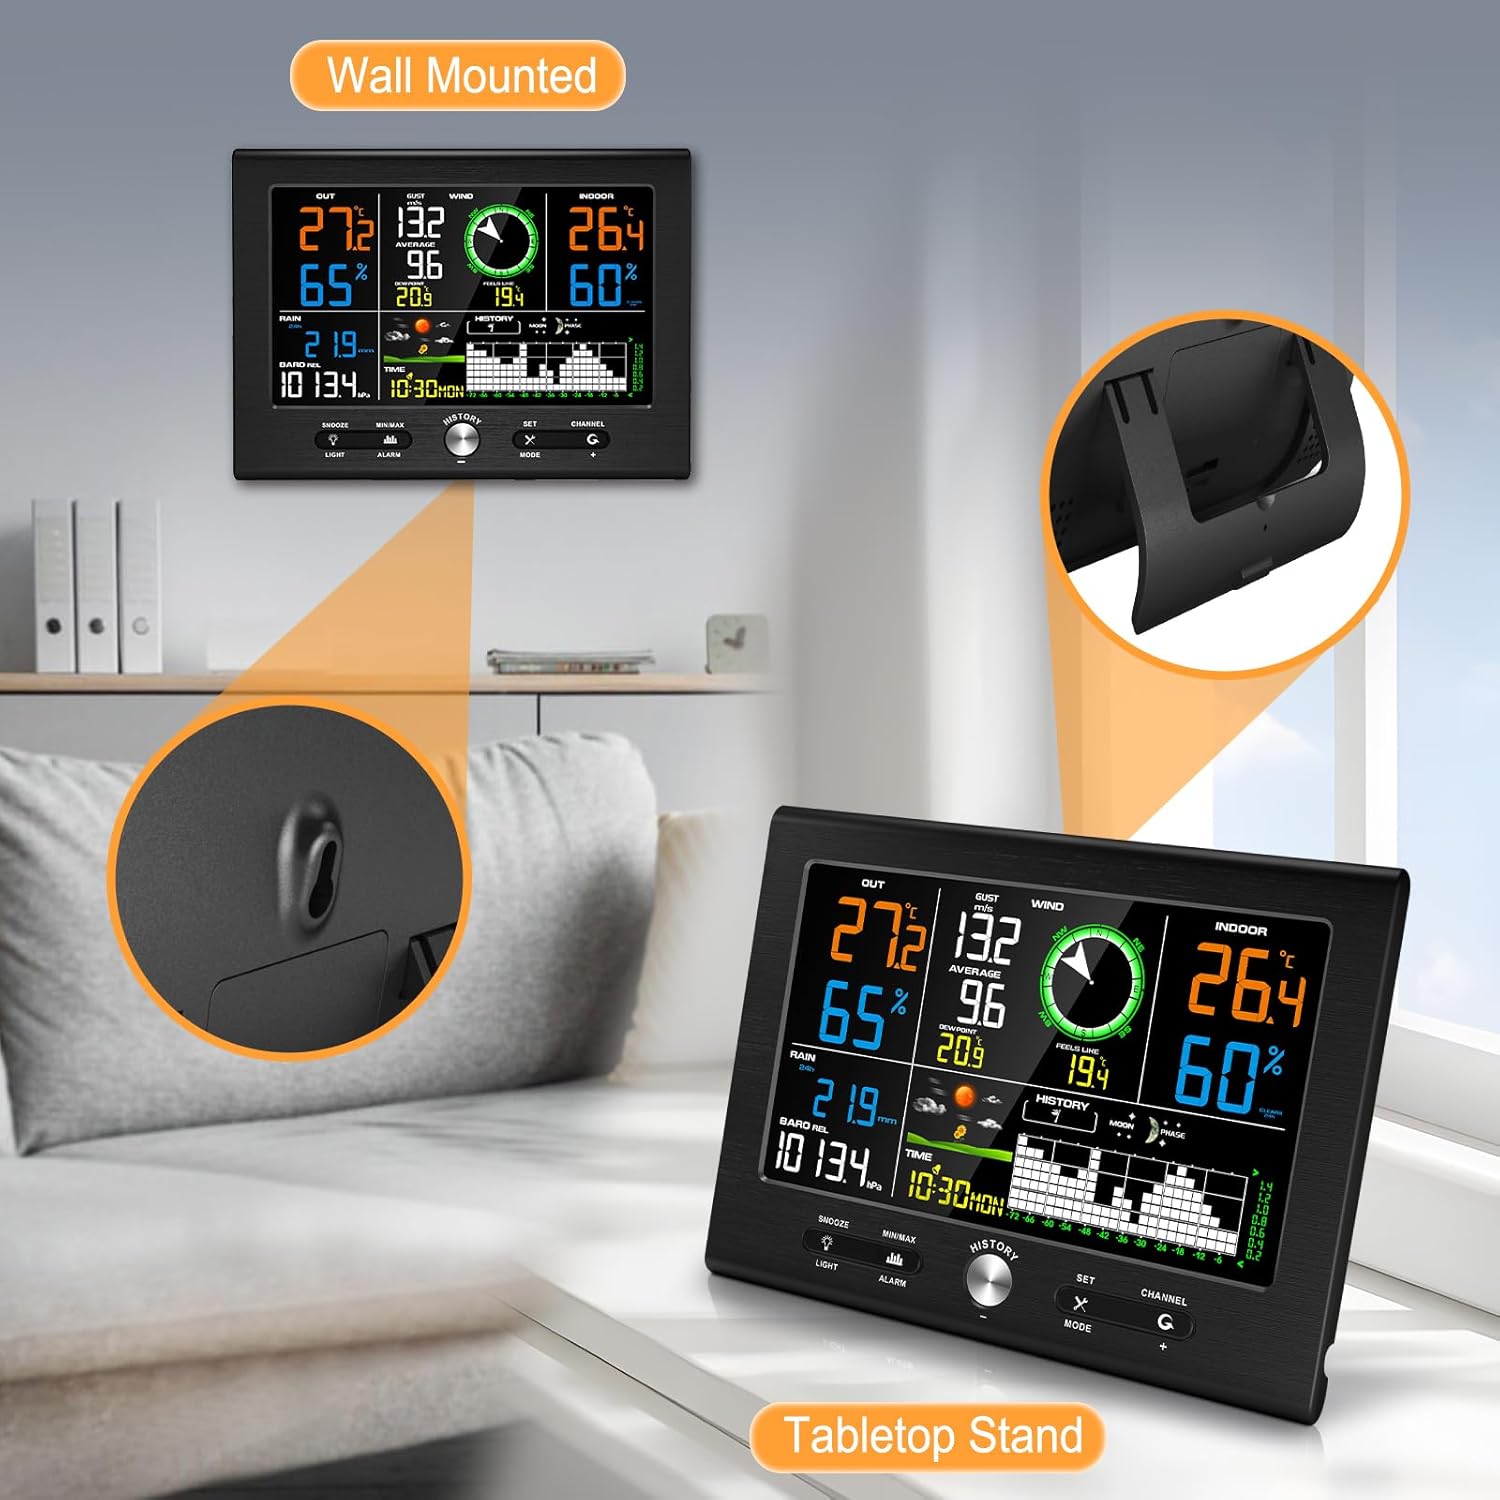
Figure 4.3: Indoor console display unit showing tabletop and wall-mounted setup options.

Figure 4.4: Power adapter connection and battery installation for the indoor console.
5. Basic Operation
5.1 Display Layout
The console display is organized into several sections, each showing specific weather data:
- OUT: Outdoor Temperature and Humidity
- WIND: Wind Gust, Average Speed, and Direction
- IN: Indoor Temperature and Humidity
- RAIN: Rainfall amount
- BARO: Barometric Pressure
- TIME/DATE: Current Time and Date
- HISTORY: 24/72-hour graph record
- MOON: Moon Phase
- FORECAST: Weather Forecast icons
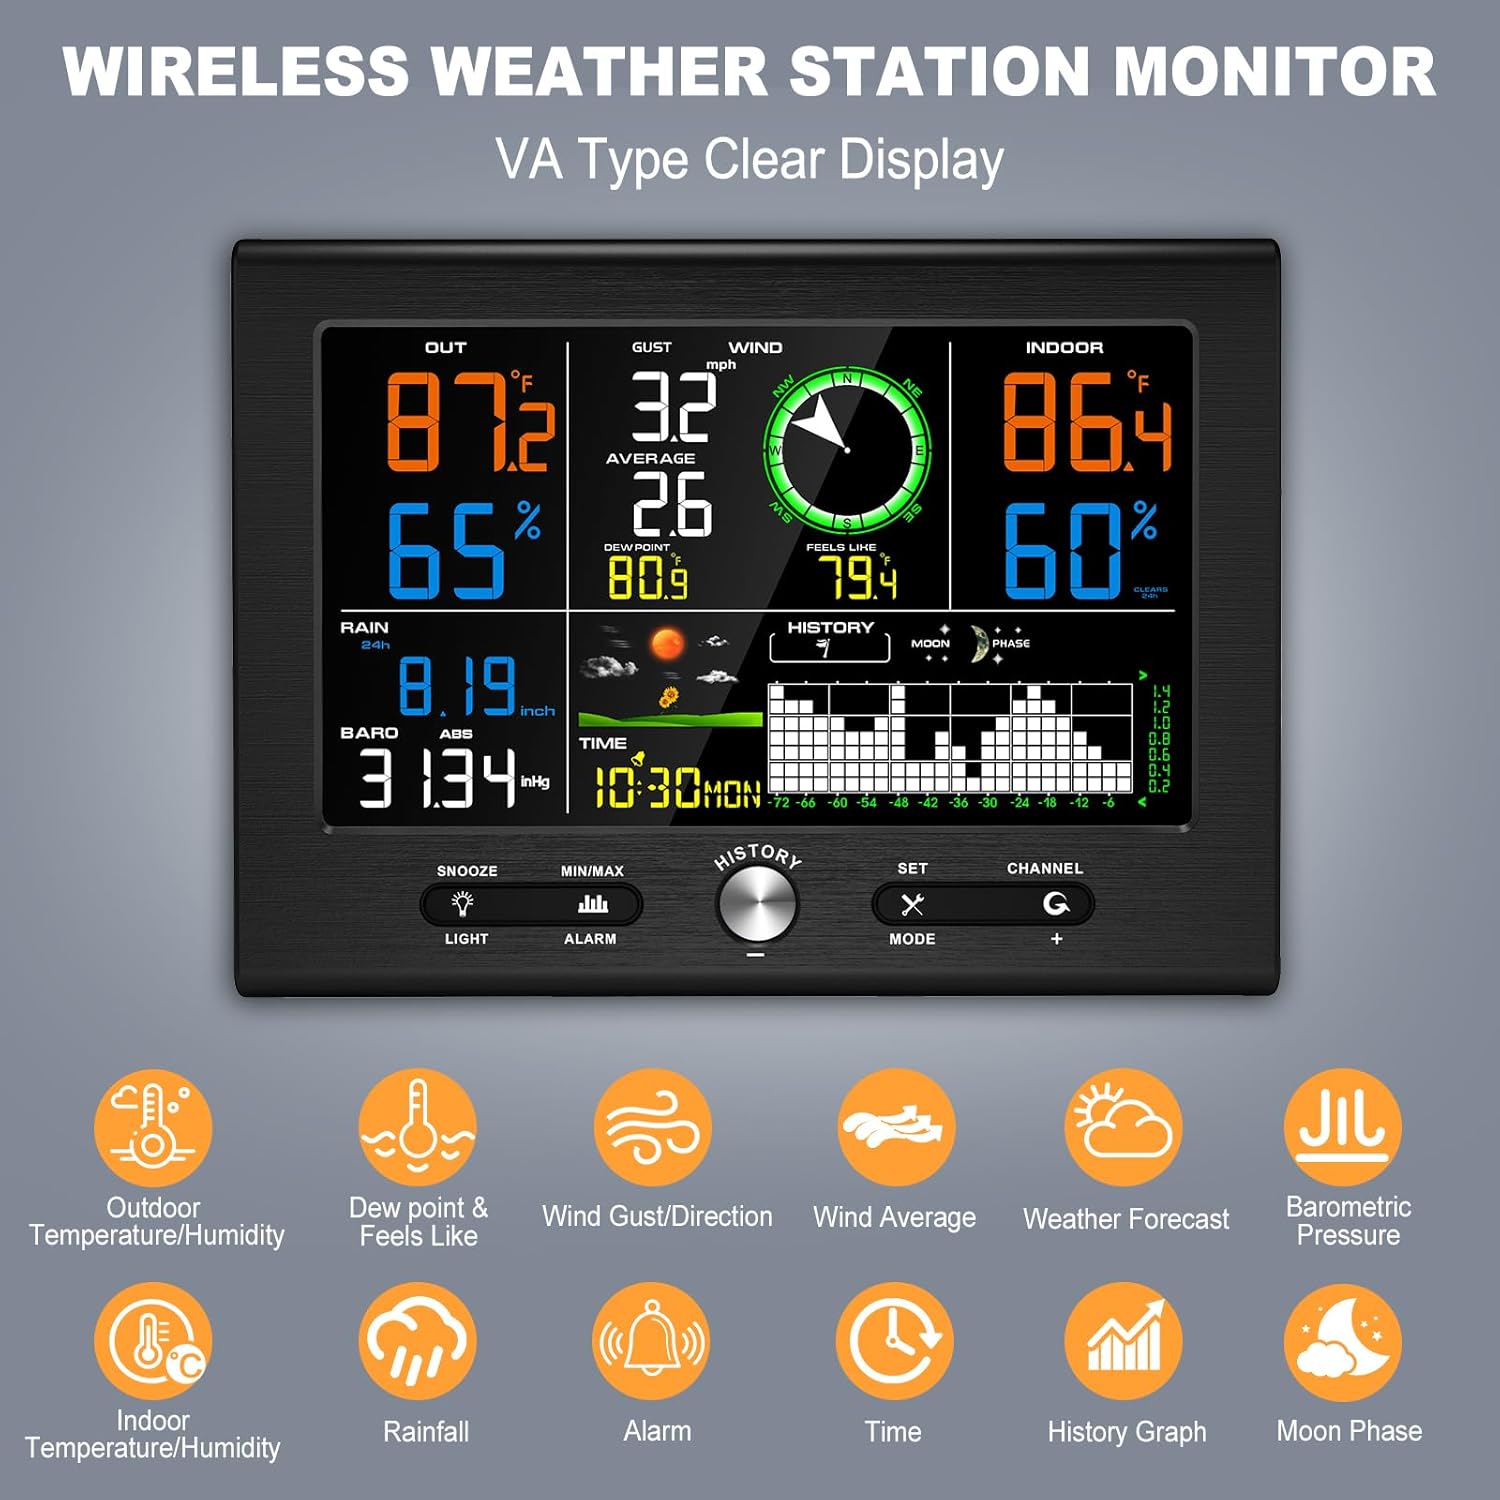
Figure 5.1: Overview of the console display with various weather data points.
5.2 Button Functions
The console features one push button and four touch buttons for navigation and settings:
- SNOOZE/LIGHT: Press to adjust backlight brightness (Low-Medium-High-Off). Touch for 3 seconds to activate snooze during an alarm.
- MIN/MAX/ALARM: Press to view minimum/maximum records. Touch for 3 seconds to enter alarm setting mode.
- SET/MODE: Press to cycle through display modes or confirm settings. Touch for 3 seconds to enter setup mode for time, date, and other parameters.
- CHANNEL (+): Press to switch between outdoor sensor channels (if multiple sensors are used, though this model supports one). In setup mode, use to increase values.
- HISTORY: Push button to view historical data.
5.3 Backlight Adjustment
The display backlight has 3 adjustable levels (Low, Medium, High) and an Off setting. Simply touch the SNOOZE/LIGHT button to cycle through the brightness options. For continuous backlight, ensure the power adapter is plugged in. The backlight is off by default when operating on battery power only.

Figure 5.2: Backlight brightness levels (100%, 50%, 30%, and off).
5.4 Atomic Clock Synchronization
The console features an atomic clock with WWVB function. It automatically scans for the WWVB signal at 2:00 AM each day to calibrate and ensure time accuracy. The console also supports automatic Daylight Saving Time (DST) adjustments. You can manually adjust the time if needed.

Figure 5.3: Atomic clock synchronization via WWVB signal and automatic DST function.
6. Advanced Features
6.1 Customizable Alerts
Set personalized alerts for specific weather conditions. This feature allows you to be notified when temperature, humidity, wind gust/average, feels like/dew point, rainfall, or absolute pressure levels exceed or fall below your set thresholds. Refer to the detailed settings section in the full manual for configuring alerts.
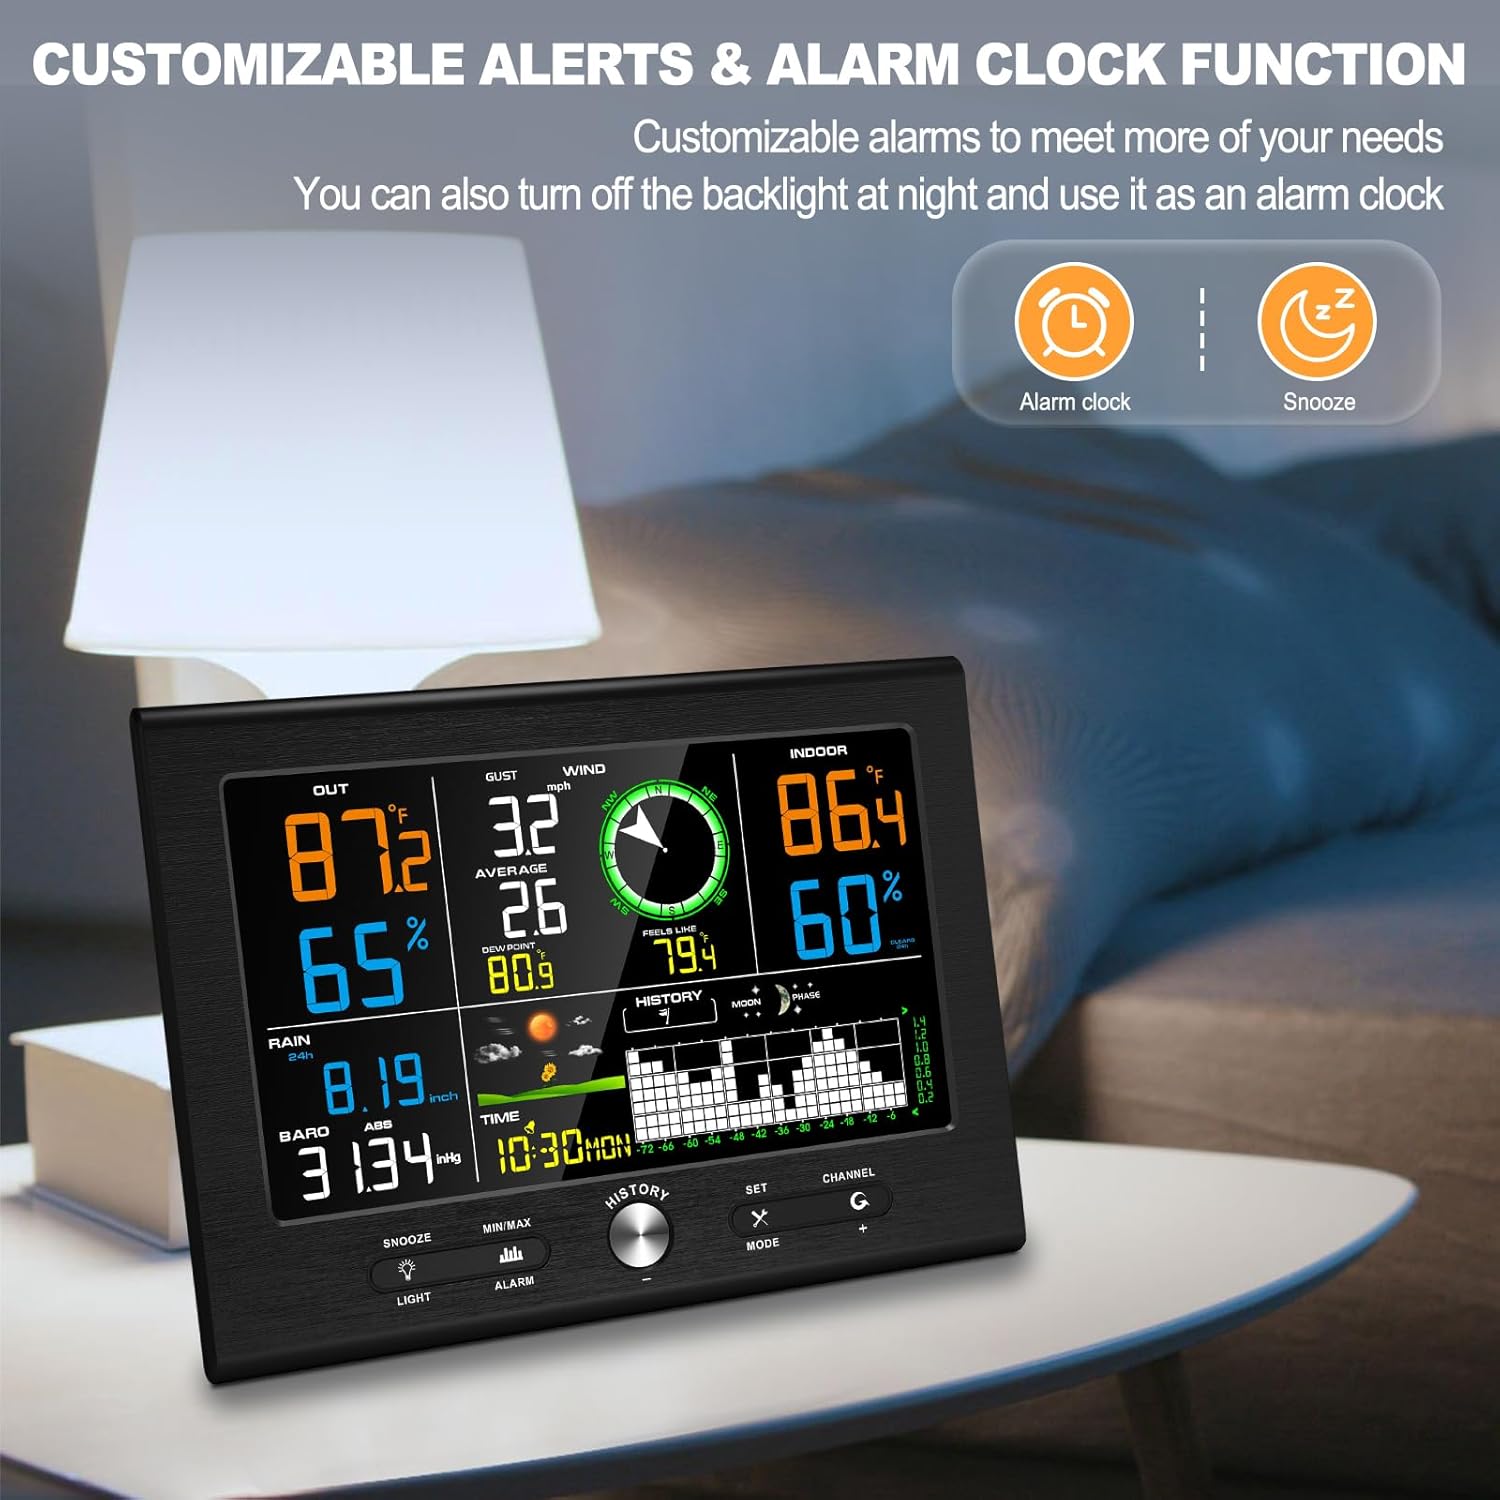
Figure 6.1: Console displaying alarm and snooze icons, indicating customizable alert functionality.
6.2 Historical Data Graph
The console can display a history graph for various parameters over 24 or 72 hours. This allows you to track trends in indoor/outdoor temperature, humidity, wind gust, rainfall, and atmospheric pressure. Use the HISTORY button to access and navigate through these graphs.

Figure 6.2: Historical data graphs for 24 and 72 hours on the console display.
7. Maintenance
Regular maintenance ensures the longevity and accuracy of your weather station.
- Outdoor Sensor Cleaning: Periodically check the rain gauge funnel for debris (leaves, insects) and clean as necessary. Ensure the wind cups and wind vane spin freely.
- Battery Replacement: Replace batteries in the outdoor sensor annually or when the low battery indicator appears on the console. For the indoor console, replace backup batteries when needed.
- General Care: Wipe the console and sensor with a soft, damp cloth. Avoid abrasive cleaners or solvents.
8. Troubleshooting
- No Outdoor Data Displayed:
- Ensure the outdoor sensor has fresh batteries and is powered on.
- Verify the sensor is within the wireless transmission range (up to 492ft/150m in open area) and free from major obstructions.
- Re-pair the sensor with the console by restarting both units. - Inaccurate Readings:
- Ensure the outdoor sensor is mounted level for accurate rain and wind measurements.
- Check for obstructions around the wind cups and rain gauge.
- Verify the thermo-hygrometer radiation shield is clean and intact. - Atomic Clock Not Synchronizing:
- Ensure the console is placed away from major electronic interference.
- Allow sufficient time for the console to receive the WWVB signal (typically overnight).
- Manually set the time if automatic synchronization fails consistently. - Display is Dim or Off:
- If using battery power only, the backlight is off by default. Plug in the power adapter for continuous backlight.
- Adjust backlight brightness using the SNOOZE/LIGHT button.
9. Specifications
Detailed measurement ranges and accuracies for the Urageuxy Wireless Weather Station WS029TU:

Figure 9.1: Measurement specifications for various weather parameters.
| Parameter | Range | Accuracy | Resolution |
|---|---|---|---|
| Indoor Temperature | 32 to 140 ℉ (0 to 60 ℃) | ±1 ℉ (±0.3 ℃) | 0.1 ℉ (0.1 ℃) |
| Outdoor Temperature | -40 to 140 ℉ (-40 to 60 ℃) | ±1 ℉ (±0.3 ℃) | 0.1 ℉ (0.1 ℃) |
| Indoor Humidity | 1 to 99 % | ±3% (20 to 90%) | 1% |
| Outdoor Humidity | 1 to 99 % | ±3% (20 to 90%) | 1% |
| Rainfall | 0 to 393 inch (0 to 9999mm) | ±15mm: ±1mm, >15mm: ±7% | <1000mm (0.3mm), >1000mm (1mm) |
| Wind Direction | 0 - 360° | ±10° (8 point compass) | 1° (8 point compass) |
| Wind Speed | 0 to 112 mph (0 to 50 m/s) | ±2 m/s: ±0.3m/s, >10m/s: ±10% | 0.1 m/s |
| Barometric Pressure | 8.85 to 32.50 inHg (300 to 1100 hpa) | ±0.08 inHg (±3 hpa) | 0.01 inHg (0.1 hpa) |
- Product Dimensions: 1.18"D x 7.6"W x 5.5"H
- Power Source: Power Adapter (console), Batteries (outdoor sensor, console backup)
- Connectivity: Wireless
- Material: Acrylonitrile Butadiene Styrene (ABS)
10. Warranty and Support
Urageuxy products are designed for reliability and performance. For warranty information, technical support, or service inquiries, please refer to the contact details provided with your purchase documentation or visit the official Urageuxy website. Please retain your proof of purchase for warranty claims.