
Introduction
This manual provides detailed instructions for the safe and effective use of your LORDEM Full Spectrum LED Grow Light. This light is designed to support the growth of indoor plants by providing a balanced light spectrum, adjustable brightness, and an automatic timer function. Please read this manual thoroughly before operation and retain it for future reference.
Safety Information
- Ensure the power source matches the voltage requirements of the grow light (12 Volts).
- Do not expose the grow light to water or high humidity environments. This product is for indoor use only.
- Avoid looking directly into the LED lights for extended periods, as this may cause eye strain.
- Keep the device away from heat sources and flammable materials.
- Do not attempt to disassemble or modify the grow light. Repairs should only be performed by qualified personnel.
- Unplug the grow light from the power outlet before cleaning or when not in use for an extended period.
- Keep out of reach of children and pets.
Package Contents
Verify that all items are present in the package:
- LORDEM Grow Light with Gooseneck
- Clip attachment
- Soil spike attachment
- Adapter
- User Manual (this document)
Product Features
- Full Spectrum LED Light: Equipped with 24 high-power 4200K LED beads, providing a balanced light spectrum for all plant growth stages.
- Adjustable Timer: Features 4 timer options (6, 8, 12, or 16 hours) for automatic daily on/off cycles.
- 5 Dimming Levels: Adjust light intensity to 20%, 40%, 60%, 80%, or 100% to suit different plant needs.
- Versatile Mounting: Includes a sturdy clip for attachment to surfaces and a soil spike for direct insertion into plant pots.
- 360° Flexible Gooseneck: Allows precise positioning of the light source for optimal plant coverage.
Setup
The LORDEM Grow Light offers two primary installation methods: clipping onto a surface or inserting into soil.
Method 1: Clip-on Installation
- Attach the clip to the base of the grow light's gooseneck.
- Securely clip the grow light onto a stable surface such as a pot rim, shelf, or desk edge. Ensure the clip has a firm grip.
- Adjust the 360° flexible gooseneck to position the light head directly above your plant.
Method 2: Soil Spike Installation
- Attach the soil spike to the base of the grow light's gooseneck.
- Carefully insert the soil spike into the soil of your plant pot. Ensure it is stable and upright.
- Adjust the 360° flexible gooseneck to position the light head directly above your plant.

Image: The grow light can be installed using either the included soil spike or the clip attachment for versatile placement.
Video: Demonstrates the adjustable clip-on and soil spike installation methods for the grow light.
Operating Instructions
The grow light is controlled via an inline remote on the power cord.
Power On/Off
- Plug the adapter into a standard electrical outlet.
- Press the Power Button (usually marked with a circle and vertical line) on the inline remote to turn the light on or off.
Setting the Timer
The timer function allows the light to automatically turn on and off daily for a set duration.
- With the light on, press the Timer Button (usually marked with a clock icon).
- Each press will cycle through the available timer settings: 6 hours, 8 hours, 12 hours, and 16 hours. An indicator light on the remote will confirm the selected duration.
- The light will automatically turn off after the set duration and turn on again at the same time the next day.

Image: The remote control displays options for 6, 8, 12, or 16-hour timer settings.
Adjusting Brightness (Dimming Levels)
The grow light has 5 dimming levels to adjust the light intensity.
- With the light on, press the "+" Button to increase brightness.
- Press the "-" Button to decrease brightness.
- The available levels are 20%, 40%, 60%, 80%, and 100%.

Image: Visual representation of the 5 dimming levels from 20% to 100% brightness.

Image: The 360° flexible gooseneck allows for precise light positioning.
Maintenance
- Cleaning: Disconnect the power before cleaning. Use a soft, dry cloth to wipe the light head and gooseneck. Do not use abrasive cleaners or immerse any part of the light in water.
- Storage: When not in use for extended periods, unplug the light and store it in a cool, dry place away from direct sunlight.
- Inspection: Periodically check the power cord and connections for any signs of damage. If damage is found, discontinue use and contact customer support.
Troubleshooting
| Problem | Possible Cause | Solution |
|---|---|---|
| Light does not turn on. | Not plugged in; power outlet issue; faulty connection. | Ensure the adapter is securely plugged into a working outlet. Check the connection between the light and the adapter. |
| Timer function not working. | Timer not set correctly; power interruption. | Re-set the timer by pressing the Timer button until the desired duration is selected. Ensure continuous power supply. |
| Brightness adjustment not responding. | Remote control issue; light is off. | Ensure the light is powered on. Press the '+' or '-' buttons firmly. If issues persist, contact support. |
| Gooseneck does not hold position. | Over-bending or wear over time. | Adjust the gooseneck carefully. If it consistently fails to hold position, contact customer support. |
Specifications
| Model Number | e1202 |
| Brand | LORDEM |
| Light Source Type | Light Emitting Diode (LED) |
| LED Beads | 24 PCS |
| Light Color Temperature | 4200K (Full Spectrum) |
| Wattage | 6 watts |
| Voltage | 12 Volts |
| Power Source | Corded Electric |
| Dimming Levels | 5 (20%, 40%, 60%, 80%, 100%) |
| Timer Settings | 6H, 8H, 12H, 16H (Automatic On/Off) |
| Gooseneck Flexibility | 360° Adjustable |
| Mounting Options | Clip-on, Soil Spike |
| Material | Plastic |
| Color | White |
| Item Dimensions (L x W x H) | 4"L x 2"W x 17"H |
| Wire Length | 90 inches (approx. 2.28 meters) |

Image: Key dimensions and wire length of the LORDEM Grow Light.
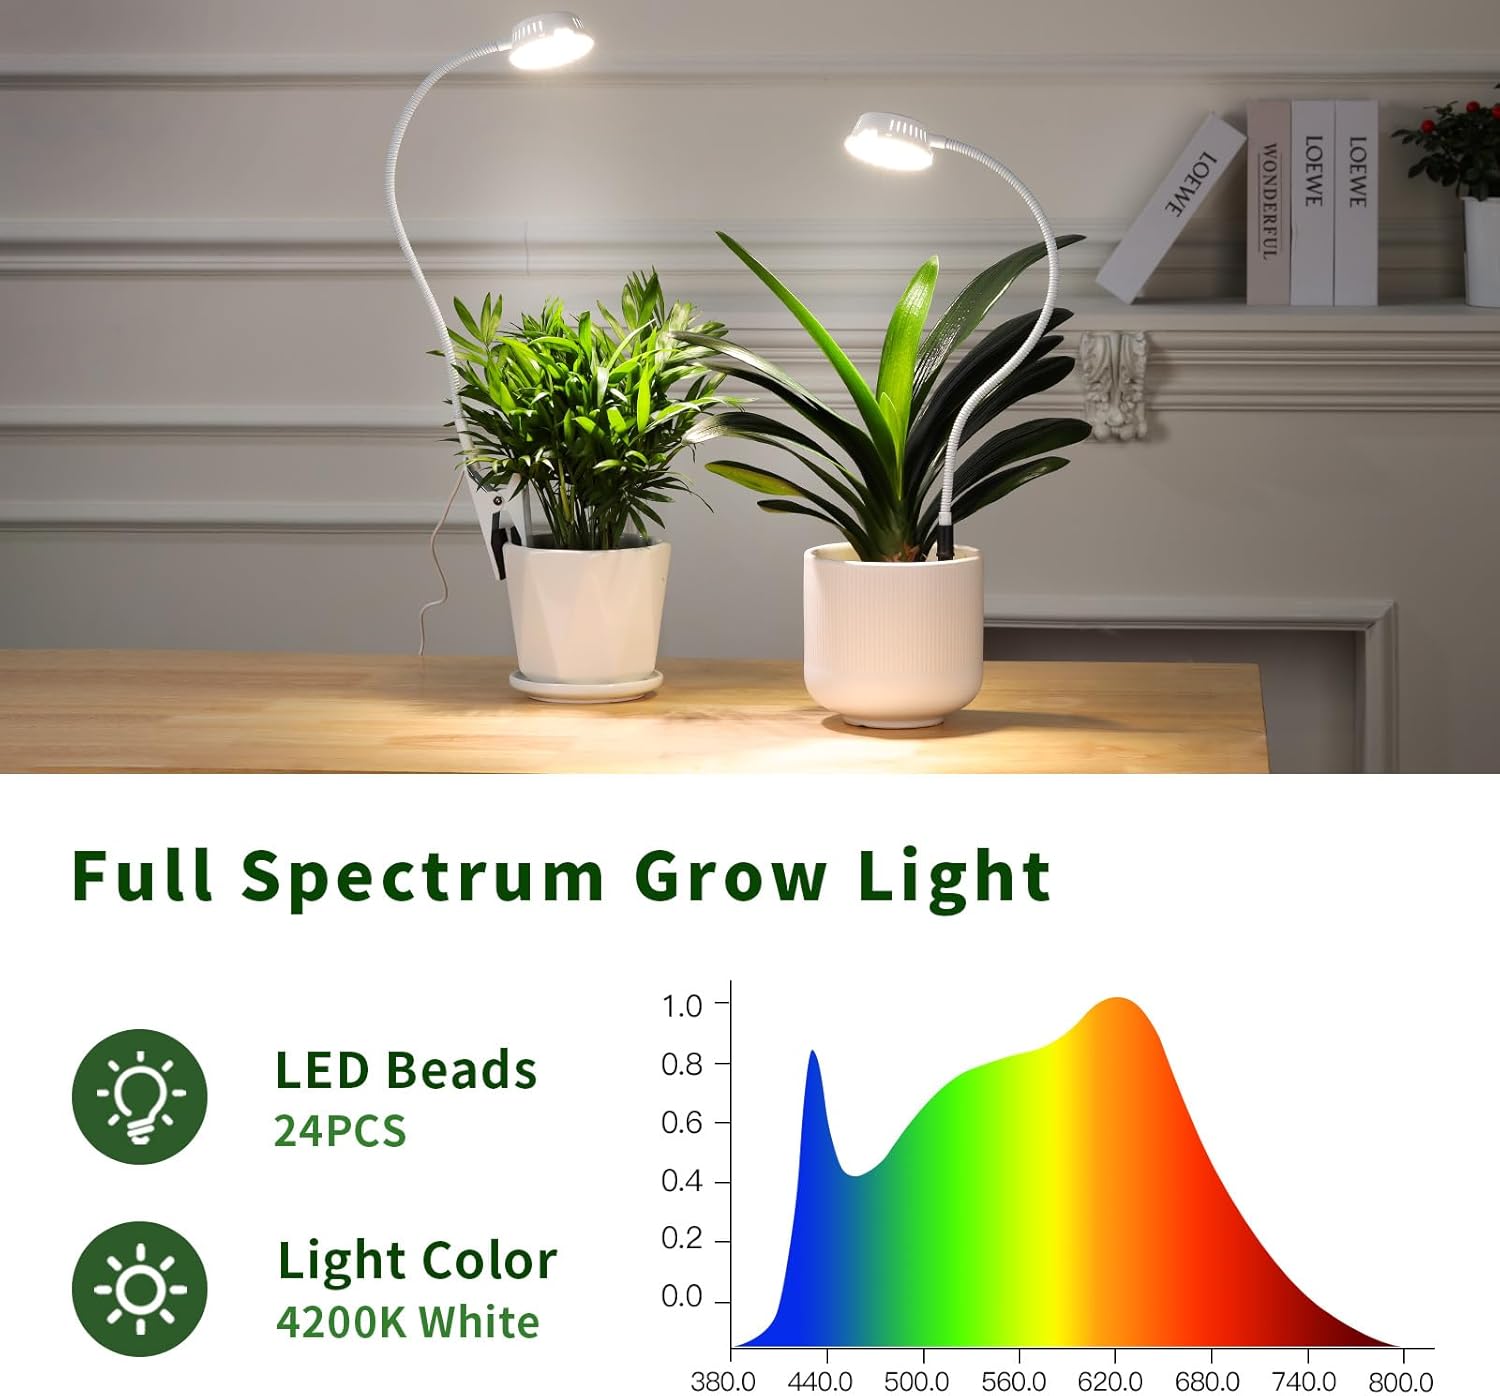
Image: Full spectrum light output details, including 24 LED beads and 4200K light color.
Warranty and Support
The LORDEM Grow Light (Model e1202) comes with a 12-month warranty and a 30-day money-back guarantee. Additionally, a one-year quality guarantee is provided.
For technical support, warranty claims, or any questions regarding your product, please contact LORDEM customer service. Refer to the packaging or the official LORDEM website for contact details.