1. Introduction
This manual provides comprehensive instructions for the installation, adjustment, and maintenance of your FAPO PS+ Coilovers. These high-performance suspension struts are designed to enhance your vehicle's handling and provide a customizable driving experience. Please read this manual thoroughly before installation and use.
2. Compatibility
The FAPO PS+ Coilovers (Model: PS006520-41) are compatible with the following BMW models:
- BMW 3 Series 6th Gen (2WD/AWD, 3-bolt top mount) F30: 2013-2019
- BMW 4 Series 1st Gen (2WD/AWD, 3-bolt top mount) F30/F32/F33/F36: 2013-2020
- BMW 2 Series 1st Gen Coupe and Convertible (2WD/AWD, 3-bolt top mount) F22/F23: 2014-2021
Note: These coilovers are not compatible with factory ride height and are designed for lowering applications (1-3 inches). Professional installation is required.
3. Key Features
- 16-Level Adjustable Damping: Allows precise tuning for various road conditions and driving preferences.
- Adjustable Camber Plates: Enhances tire grip and steering response.
- Spring Preload & Height Adjustment System: Enables customizable ride height and spring tension.
- Mono-Tube Design: Improves heat dissipation and maintains stable damping performance.
- High-Performance Shock Oil: Ensures consistent viscosity across temperature ranges.
- Silicone Dust Covers: Protects internal components from contaminants.
- Forged Top Mounts & Reinforced Rubber Bushings: Provides durability and improved performance.
4. Package Contents
Verify that all components are present and undamaged upon opening the package:
- 2 x Front Coilovers (with top mounts and springs)
- 2 x Rear Coilovers (shocks and separate springs)
- 2 x Adjustment Wrenches
- 2 x Sway Bar Links
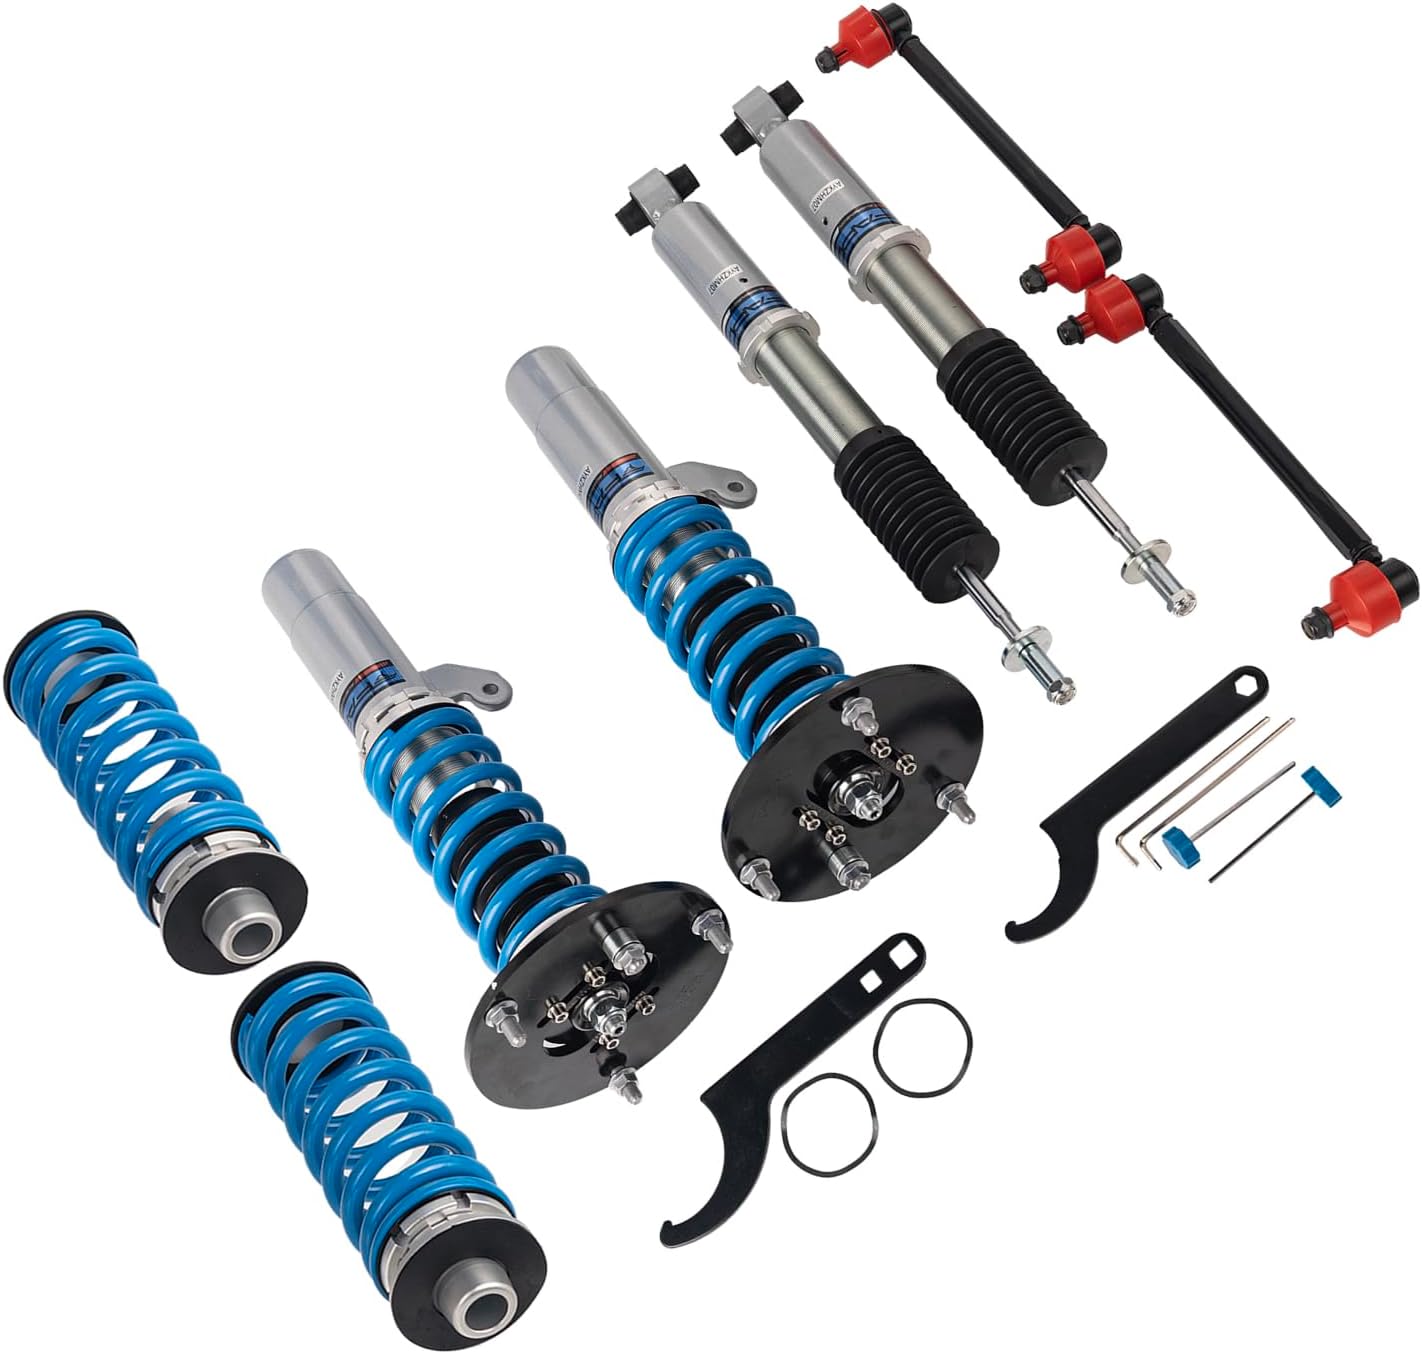
Image 4.1: Complete FAPO PS+ Coilover Kit. This image displays all components included in the package: two front coilover assemblies, two rear shock absorbers, two rear springs, two adjustment wrenches, and two sway bar links.
5. Setup and Installation
Professional installation by a qualified technician is strongly recommended. Improper installation can lead to vehicle damage, poor performance, or safety hazards. This section provides general guidance; always refer to your vehicle's service manual for specific torque specifications and procedures.
- Preparation: Safely lift the vehicle and secure it on jack stands. Remove wheels.
- Remove OEM Suspension: Disconnect brake lines, ABS sensors, and sway bar links. Unbolt the top mounts and lower shock/strut mounts. Carefully remove the factory suspension components.
- Install Front Coilovers:

Image 5.1: FAPO PS+ Front Coilover Assembly. This image shows a fully assembled front coilover, including the spring, shock body, and adjustable top mount.
Attach the new FAPO front coilovers. Ensure the top mount bolts are aligned with the vehicle's chassis mounting points. Secure the lower mount to the control arm or knuckle. Reconnect all lines and sensors. Install the provided sway bar links.
- Install Rear Coilovers:

Image 5.2: FAPO PS+ Rear Shock and Spring. This image displays the separate rear shock absorber and the rear coil spring, which are installed independently.
Install the rear shock absorbers and springs. The rear springs are separate from the shocks. Ensure proper seating of the springs in their upper and lower perches. Secure the shock mounts.
- Initial Adjustments: Before lowering the vehicle, set initial ride height and damping settings as desired (refer to Section 6).
- Final Checks: Re-install wheels, lower the vehicle, and perform a final torque check on all fasteners.
- Alignment: A professional wheel alignment is mandatory after coilover installation to ensure proper handling and tire wear.
6. Operating and Adjustments
6.1. Damping Adjustment (16 Levels)
The FAPO PS+ Coilovers feature 16 levels of damping adjustment, allowing you to fine-tune the ride stiffness. The adjustment knob is typically located at the top of the front coilovers and the bottom of the rear shocks.
- Turn the knob clockwise for a firmer ride (increased damping).
- Turn the knob counter-clockwise for a softer ride (decreased damping).
- Start with a middle setting (e.g., 8 clicks from full soft) and adjust incrementally to find your preferred balance of comfort and performance.
6.2. Ride Height Adjustment
Ride height is adjusted using the threaded shock body and locking collars. Use the provided wrenches for adjustment.
- Loosen the lower locking collar.
- Rotate the main spring perch (or lower shock body for front coilovers) to raise or lower the vehicle.
- Once the desired height is achieved, tighten the lower locking collar securely against the spring perch.
- Ensure both sides of the vehicle are adjusted evenly to maintain balance.
6.3. Spring Preload Adjustment
Spring preload affects initial suspension compression and can be adjusted independently of ride height on some designs. For these coilovers, spring preload is typically set to 7-10mm.
- With the vehicle lifted and suspension unloaded, measure the free length of the spring.
- Adjust the spring perch until the spring is compressed by 7-10mm from its free length.
- Secure the locking collar.
6.4. Camber Plate Adjustment (Front Only)
The front coilovers feature adjustable camber plates, allowing for fine-tuning of wheel alignment. This adjustment should be performed by a professional during a wheel alignment.
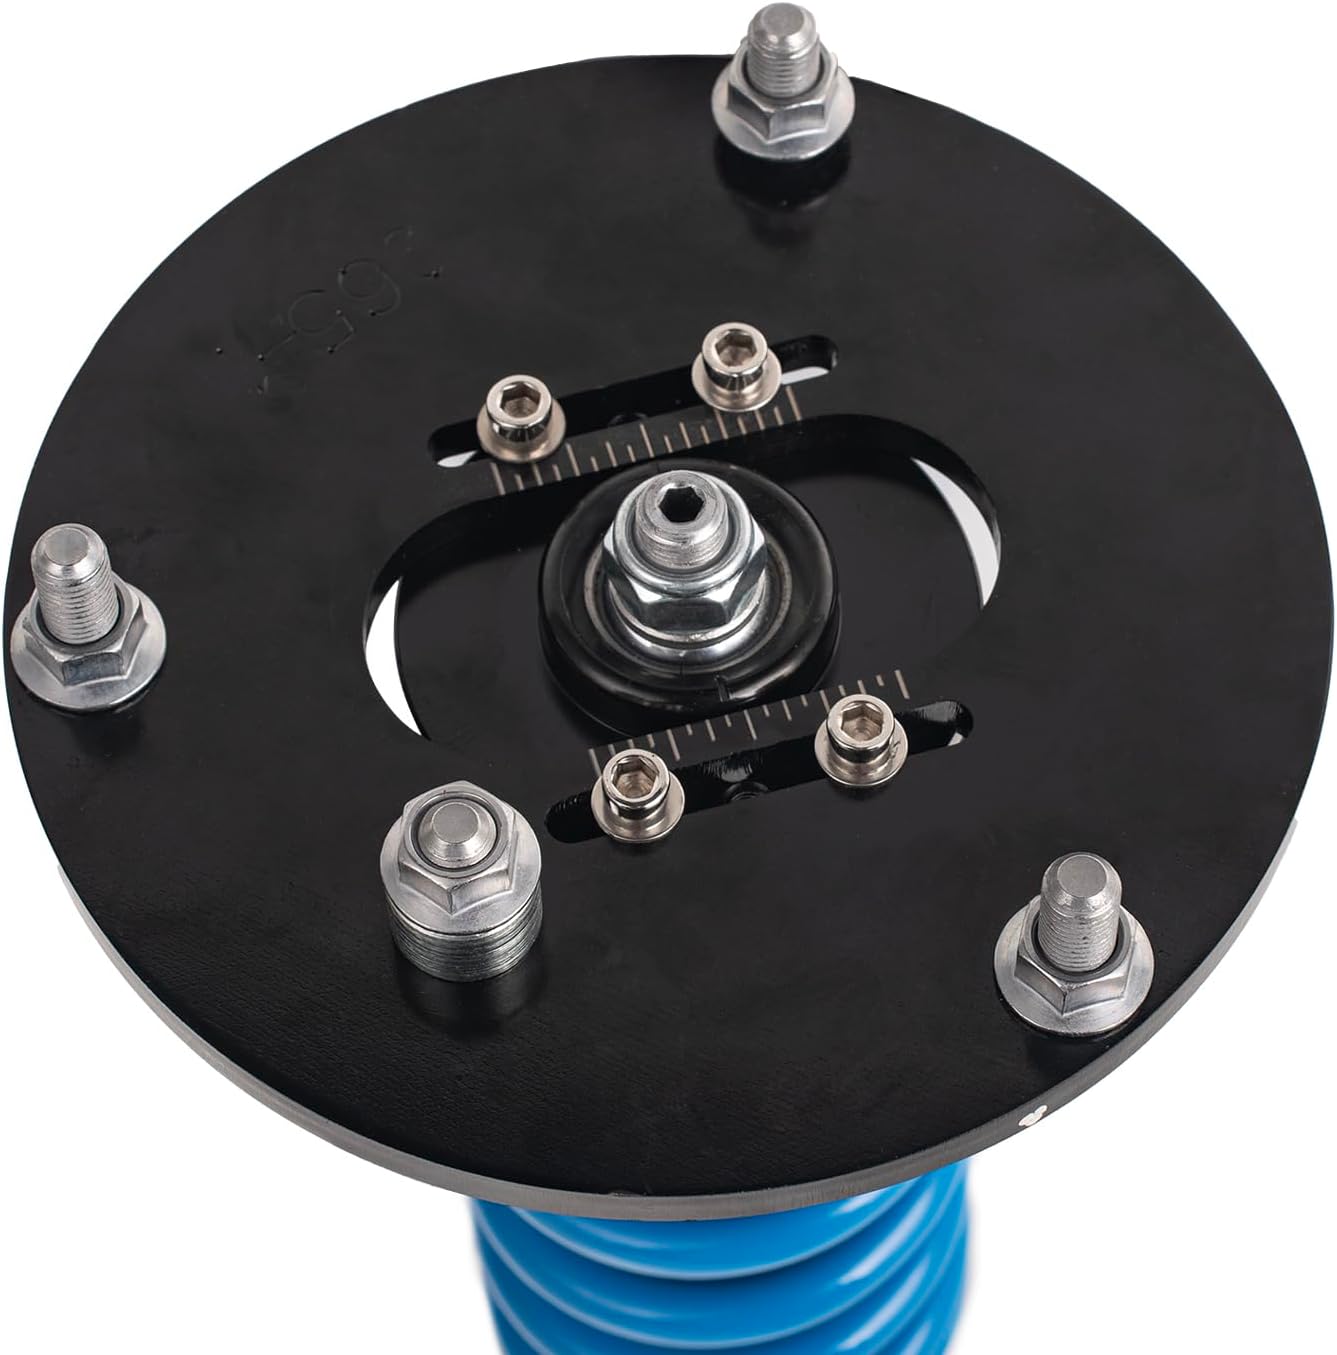
Image 6.1: Close-up of FAPO PS+ Adjustable Camber Plate. This image highlights the slotted design of the top mount, allowing for precise adjustment of the wheel's camber angle.
- Loosen the bolts on the camber plate.
- Slide the top mount to achieve the desired camber angle.
- Tighten the bolts securely once adjusted.
7. Maintenance
Regular maintenance ensures the longevity and performance of your coilovers.
- Regular Inspection: Periodically check for any signs of leaks, damage, or loose components.
- Cleaning: Keep the coilover bodies and threads clean, especially after driving in harsh conditions (salt, dirt). Use mild soap and water.
- Lubrication: Apply a thin layer of anti-seize grease to the threads of the shock body and locking collars to prevent seizing and facilitate future adjustments.
- Dust Covers: Ensure silicone dust covers are intact and properly seated to protect the shock shafts.
8. Troubleshooting
| Symptom | Possible Cause | Solution |
|---|---|---|
| Excessive Noise (clunking/squeaking) | Loose bolts, worn bushings, improper spring seating, damaged components. | Inspect all mounting points and bushings. Ensure springs are seated correctly. Tighten all bolts to specification. Replace damaged parts. |
| Uneven Ride Height | Incorrect height adjustment, spring sag. | Re-measure and adjust ride height on all four corners. Check for damaged springs. |
| Poor Handling/Unstable Ride | Incorrect damping settings, improper alignment, damaged shock. | Adjust damping settings. Perform a professional wheel alignment. Inspect shocks for leaks or damage. |
| Oil Leaks from Shock Body | Damaged seal, internal component failure. | Contact FAPO RACING support for warranty claim or replacement. |
9. Specifications
| Component | Specification |
|---|---|
| Damping Adjustment | 16 Levels |
| Front Spring Rate | 6 kg/mm (335 lbs/inch) |
| Rear Spring Rate | 10 kg/mm (559 lbs/inch) |
| Spring Preload | 7-10 mm |
| Front Spring Length | 200 mm (7.87") |
| Rear Spring Length | 220 mm (8.66") |
| Front Shock Body Diameter | Φ2.09" |
| Rear Shock Body Diameter | Φ1.69" |
| Front Piston Size | 1.77" |
| Rear Piston Size | 1.41" |
| Material | Aluminum, Spring Steel, Rubber |
10. Warranty and Support
Warranty: FAPO RACING provides a 1-year manufacturer's warranty on these coilovers from the date of purchase. This warranty covers defects in materials and workmanship under normal use.
Support: If you encounter any issues, believe the item is not as described, or if components are damaged during shipping, please contact FAPO RACING customer support directly. Provide your purchase details and a description of the issue for prompt assistance.
For further assistance, visit the official FAPO RACING store on Amazon: FAPO RACING Store