
1. Introduction
Thank you for purchasing the Hodozzy 1DIN Car Stereo. This manual provides detailed instructions for the installation, operation, and maintenance of your new car audio system. Please read this manual thoroughly before use to ensure proper functionality and to maximize your user experience. Keep this manual for future reference.
2. Safety Information
- Always operate the device safely and responsibly. Distracted driving can lead to accidents.
- Do not attempt to disassemble or modify the unit. This may cause damage and void the warranty.
- Ensure all wiring is correctly connected to prevent short circuits or electrical damage. Consult a professional for installation if you are unsure.
- Keep the unit away from water, moisture, and extreme temperatures.
- Clean the screen with a soft, dry cloth. Do not use abrasive cleaners.
3. Package Contents
Verify that all items are present in the package:
- 1 x Car MP5 Player Main Unit
- 1 x Power Cable
- 1 x Horn Cable
- 1 x Remote Control
- 2 x Brackets
- 1 x Rear View Camera
- 1 x User Manual (this document)
4. Product Overview
The Hodozzy 1DIN Car Stereo features a 7-inch HD touch screen and supports various multimedia functions. Below are images illustrating the unit's appearance and components.
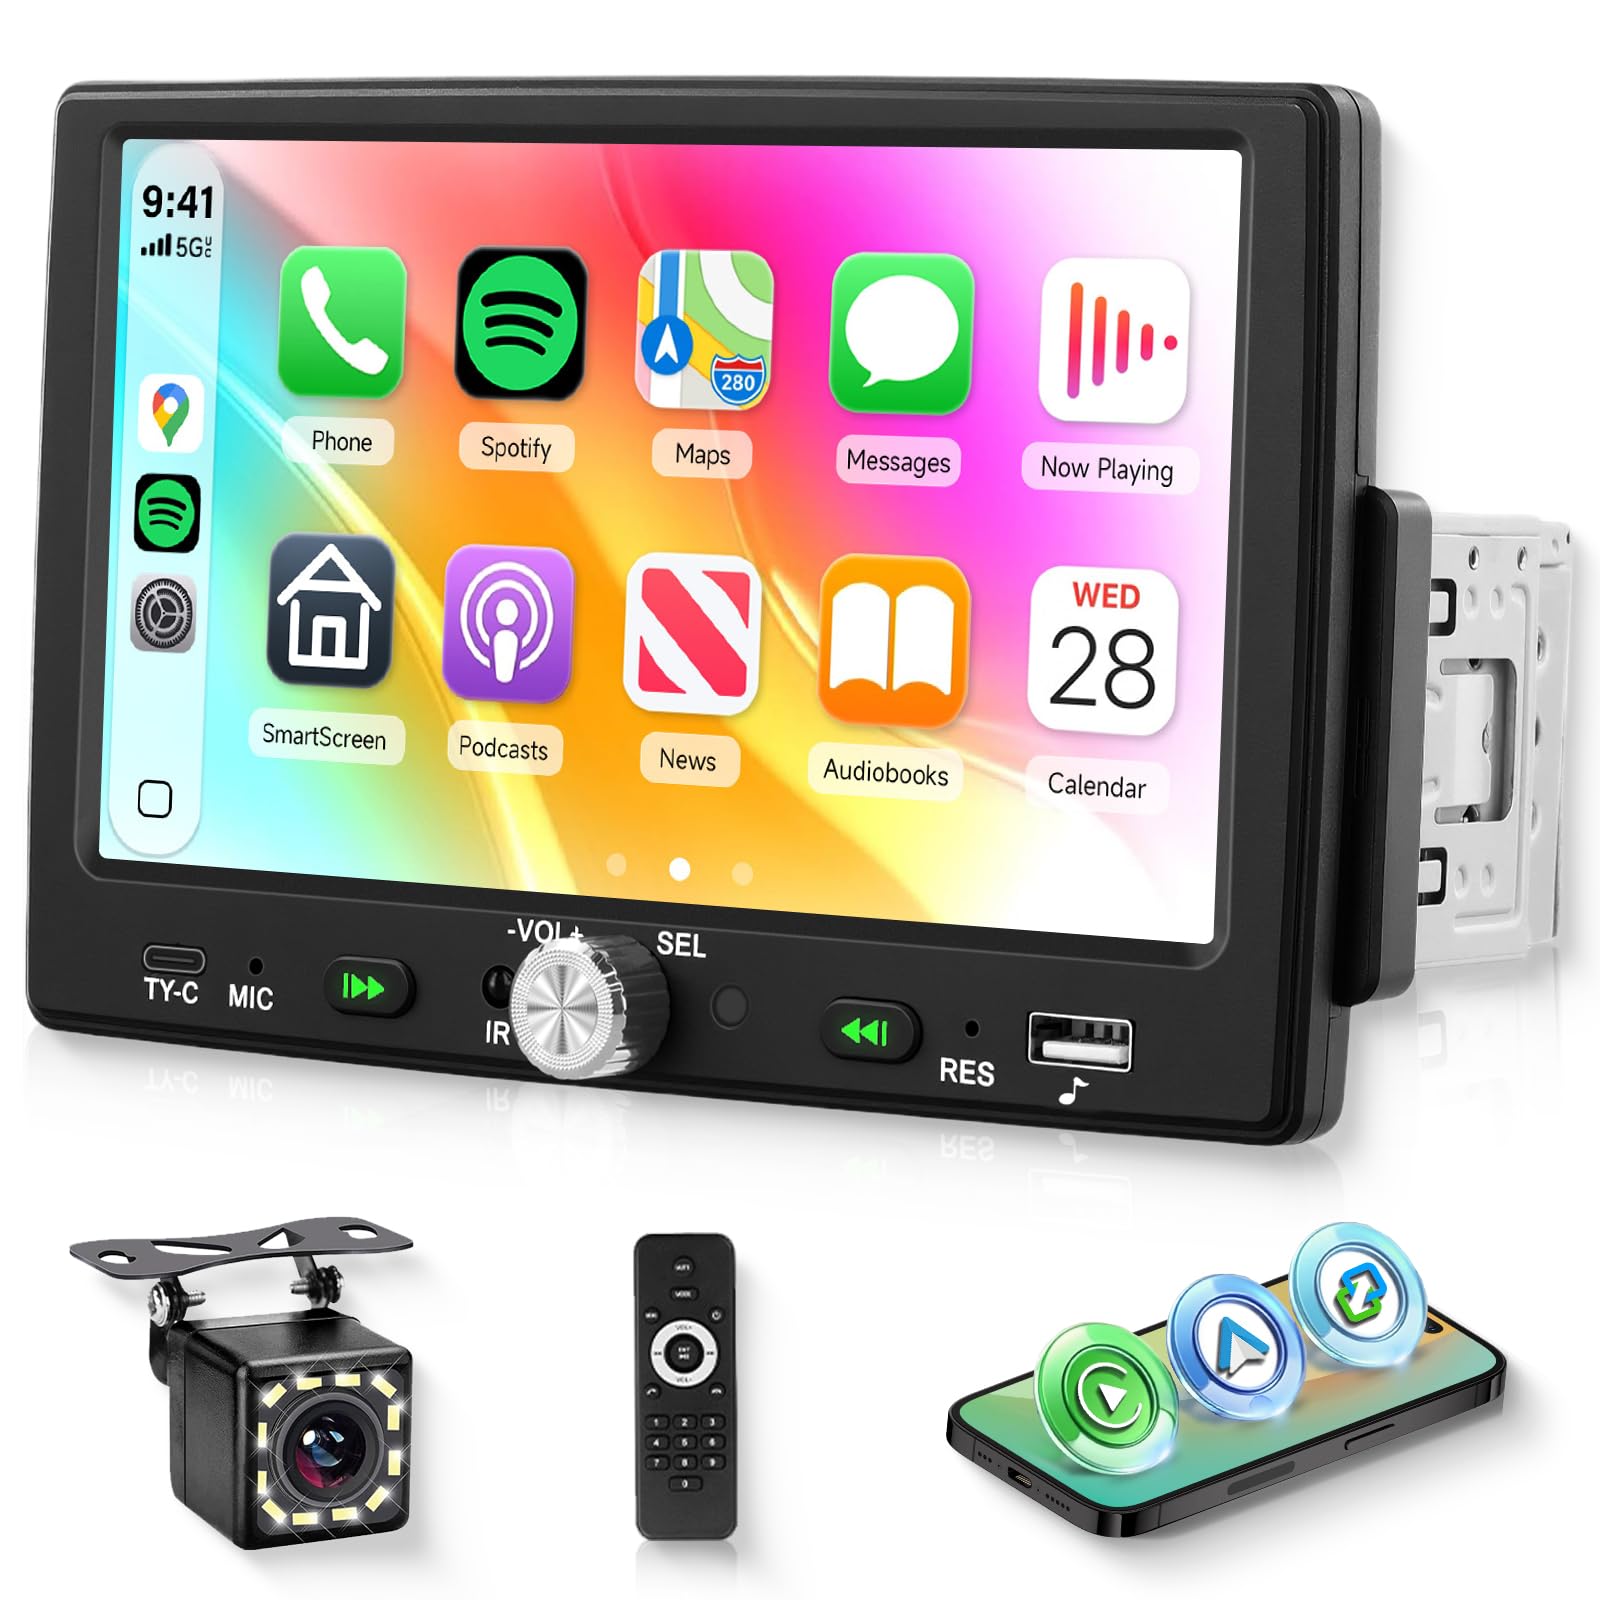
Front view of the Hodozzy 1DIN Car Stereo, showcasing the 7-inch HD touch screen and physical control buttons.

This detailed diagram provides the physical dimensions of the car stereo unit (18.8cm x 5.7cm x 9.0cm) and illustrates the various input/output ports on the rear panel, including power, horn, video out, audio out, microphone, and camera input, essential for installation.
5. Specifications
| Feature | Specification |
|---|---|
| Voltage | DC12V |
| CPU Chip | F133 |
| Screen Size | 7 inches |
| Screen Material | TN |
| Screen Resolution | 1024×600 |
| Integrated Functions | CarPlay/Android Auto, Mirror Link, Backup Camera, Steering Wheel Control, Bluetooth Hands-free, 14-band EQ, USB & Type-C Port, 7-color Backlight |
| Optional Functions | USB Memory, Subwoofer |
| Radio Band | FM (87.5-108MHz) |
| Radio Chip | QN8035 |
| Output Power | 45W×4 |
| Operating Temperature | -10~70℃ |
| Bluetooth Version | 5.0 |
| Backlight Colors | 7 colors |
| Backup Camera Input | CVBS |
| Power Amplifier Chip | TDA7388 |
| Audio Formats | MP3/WMA/WAV/APE/FLAC |
| Video Formats | RM/RMVB/AVI/MP4/MKV/3GP |
| Image Formats | JPG BMP PNG |
| Supported Languages | English, Chinese, Spanish, Portuguese, Russian, Italian, German, French, Turkish, Czech, Arabic, Polish, Hebrew |
| Installation Size | 178mm x 50mm |
6. Setup
6.1. Installation
This unit is designed for 1DIN car stereo slots. Ensure your vehicle has a compatible slot. Professional installation is recommended. Before installation, disconnect the vehicle's negative battery terminal to prevent electrical shorts.
- Remove the existing car stereo from the dashboard.
- Mount the provided brackets to the sides of the new Hodozzy unit.
- Connect all necessary wiring harnesses as described in the wiring section.
- Slide the unit into the 1DIN slot until it clicks into place.
- Secure the unit using screws or mounting clips.
- Reconnect the vehicle's negative battery terminal.
6.2. Wiring Diagram
Refer to the diagram below for proper wiring connections. Incorrect wiring can damage the unit or your vehicle's electrical system.
This diagram illustrates the rear panel connections, including the power cable, horn cable, video output (V-OUT1, V-OUT2), audio output (L-OUT, R-OUT), CVBSIN, MIC, and CAMIN (camera input).
- Power Cable: Connect to the vehicle's power supply (ACC, B+, Ground).
- Horn Cable: Connect to vehicle speakers. Ensure correct polarity.
- Rear View Camera: Connect the camera's video output to the CAMIN port and its power to the reverse light circuit.
- Steering Wheel Control (SWC): Connect to your vehicle's SWC wires. Refer to your vehicle's manual for specific wiring.
- USB/Type-C: For media playback and smartphone connection.
7. Operating Instructions
7.1. Basic Operation
- Power On/Off: Press the power button or turn the vehicle ignition on/off.
- Volume Control: Use the volume knob on the unit or steering wheel controls.
- Touch Screen: Navigate menus and select functions by touching the screen icons.
7.2. CarPlay & Android Auto
Connect your iPhone or Android smartphone via a genuine USB cable to enable CarPlay or Android Auto. This allows you to access navigation, music, calls, and messages directly from the car stereo screen.

This image illustrates the seamless integration of CarPlay, Android Auto, and Mirror Link functionalities, allowing users to access smartphone features directly on the car stereo's 7-inch HD touch screen. A smartphone is shown connected via USB, demonstrating the wired connection for these features.
- Connect your smartphone to the USB port.
- The unit will automatically detect and launch CarPlay or Android Auto.
- Use the touch screen or voice commands to control functions.
7.3. Mirror Link
Mirror Link allows you to display your smartphone's screen directly onto the car stereo. This feature supports both iOS and Android devices via a USB cable.
- Connect your smartphone to the USB port using a genuine cable.
- Select the 'Mirror Link' option on the car stereo.
- Follow the on-screen prompts to establish the connection.
7.4. Bluetooth Functionality
Pair your smartphone with the car stereo via Bluetooth for hands-free calling and audio streaming.

This image displays the FM Radio interface for tuning stations, the 14-band equalizer for sound customization, and the Bluetooth hands-free calling screen, highlighting the audio and communication features of the unit.
- Go to the Bluetooth menu on the car stereo.
- Enable Bluetooth on your smartphone and search for available devices.
- Select 'Hodozzy' (or similar device name) from the list and confirm pairing.
- Once paired, you can make/receive calls and play music wirelessly.
7.5. FM Radio
Access FM radio stations with automatic channel search and preset functions.
- Select the 'FM Radio' icon from the main menu.
- Use the auto-scan function to find and save available stations.
- Manually tune or select from preset stations.
7.6. EQ Settings
Customize your audio experience with the built-in 14-band equalizer and bass boost function.
- Access the 'EQ' settings from the audio menu.
- Adjust frequency bands, treble, and bass levels to your preference.
- Select from various preset EQ modes.
7.7. USB/Type-C Playback & Charging
The unit supports media playback from USB drives and provides charging for smartphones.

This image highlights the multi-functional aspects of the car stereo, including customizable 7-color LED backlighting, smartphone charging capability via USB and Type-C ports, and data transfer for media playback.
- Insert a USB drive or connect a smartphone to the USB/Type-C port.
- The unit will automatically detect media files for playback.
- The USB/Type-C ports also provide power for charging connected devices.
7.8. HD Video Playback
Enjoy high-definition video content on the 7-inch screen.

The image shows the 7-inch HD touch screen playing a high-definition video, demonstrating the unit's capability for clear and vibrant video playback with a resolution of 1024x600 pixels.
- Load supported video files (RM/RMVB/AVI/MP4/MKV/3GP) onto a USB drive.
- Select the video player application from the main menu.
- Browse and select your desired video for playback.
7.9. Backup Camera
The included waterproof backup camera provides a clear view of the area behind your vehicle when reversing.

The image shows the included waterproof backup camera, which automatically displays the rear view when reversing. Below, the car stereo screen illustrates the steering wheel control settings, allowing users to program and manage audio and call functions directly from their steering wheel.
- When the vehicle is shifted into reverse gear, the screen will automatically switch to the rear view camera display.
- Parking guidelines may be displayed to assist with maneuvering.
7.10. Steering Wheel Control (SWC)
Program your vehicle's existing steering wheel controls to operate the car stereo, enhancing driving safety.
- Access the 'Steering Wheel Control' settings in the system menu.
- Follow the on-screen instructions to map your steering wheel buttons to specific functions (e.g., volume up/down, next/previous track, answer/end call).
8. Maintenance
- Cleaning the Screen: Use a soft, lint-free cloth to gently wipe the screen. For stubborn smudges, slightly dampen the cloth with water. Avoid harsh chemicals or abrasive materials.
- General Cleaning: Keep the unit's exterior free from dust and debris. Use a soft, dry cloth.
- Software Updates: Periodically check the manufacturer's website for any available software updates to ensure optimal performance and new features.
9. Troubleshooting
If you encounter issues with your Hodozzy car stereo, refer to the following common problems and solutions:
| Problem | Possible Cause | Solution |
|---|---|---|
| Unit does not power on | Incorrect power wiring, blown fuse, vehicle battery issue. | Check power cable connections (B+, ACC, Ground). Inspect vehicle fuses. Ensure vehicle battery is charged. |
| No sound from speakers | Speaker wires incorrectly connected, volume too low, mute function active. | Verify speaker wiring polarity. Increase volume. Check if the unit is muted. |
| CarPlay/Android Auto not connecting | Non-genuine USB cable, phone software issue, incorrect settings. | Use a genuine USB cable. Restart your smartphone. Check phone settings for CarPlay/Android Auto permissions. |
| Backup camera not displaying | Camera wiring issue, camera power issue, reverse trigger wire not connected. | Check camera video input (CAMIN) and power connections. Ensure the reverse trigger wire is correctly connected to the vehicle's reverse light. |
| Bluetooth pairing fails | Bluetooth not enabled, device too far, incorrect pairing process. | Ensure Bluetooth is enabled on both devices. Place devices closer. Follow pairing instructions carefully. |
If the problem persists after trying these solutions, please contact Hodozzy customer support for assistance.
10. Warranty and Support
This product comes with a warranty. Please refer to the warranty card or documentation included with your purchase for specific terms and conditions. For technical support, troubleshooting assistance, or warranty claims, please contact Hodozzy customer service through the retailer where you purchased the product or visit the official Hodozzy website.