LONTEK Walking Pad Treadmill U18F User Manual
Model: U18F
1. Important Safety Information
Before operating the LONTEK Walking Pad Treadmill U18F, please read and understand all safety instructions. Keep this manual for future reference.
- Always consult with a healthcare professional before starting any new exercise program.
- Ensure the treadmill is placed on a flat, stable surface with adequate clear space around it (at least 2 meters behind and 0.6 meters on each side).
- Keep children and pets away from the treadmill during operation.
- Do not operate the treadmill if it is damaged or malfunctioning.
- Wear appropriate athletic footwear.
- The maximum user weight capacity for this treadmill is 136 kg (300 lbs).
- Use the handlebar for stability, especially when adjusting incline or speed.
2. Product Overview
The LONTEK Walking Pad Treadmill U18F is a compact, folding treadmill designed for home and office use. It features a handlebar for stability, a 12% maximum incline, and a quiet motor for low-impact exercise.
3. Setup and Assembly
The LONTEK Walking Pad Treadmill U18F requires minimal assembly. Follow these steps to prepare your treadmill for use:
- Unpacking: Carefully remove the treadmill from its packaging. Retain all packaging materials for potential future transport or returns.
- Placement: Place the treadmill on a firm, level surface. Ensure there is sufficient space around the unit for safe operation and access.
- Handlebar Installation: Lift the handlebar into its upright position and secure it using the provided locking mechanisms. Ensure it is firmly locked before use.
- Power Connection: Plug the power cord into a grounded electrical outlet. Ensure the power switch on the treadmill is in the 'OFF' position before plugging it in.
- Initial Check: Before first use, inspect the running belt for any signs of damage or misalignment.
4. Operating Instructions
Familiarize yourself with the treadmill's controls and display before beginning your workout.
4.1 Powering On/Off
- To power on, ensure the treadmill is plugged in and flip the main power switch to 'ON'. The display will illuminate.
- To power off, press the 'OFF' button on the remote control, then flip the main power switch to 'OFF' and unplug the unit from the wall when not in use for extended periods.
4.2 Remote Control Functions
The remote control allows you to manage the treadmill's functions conveniently.
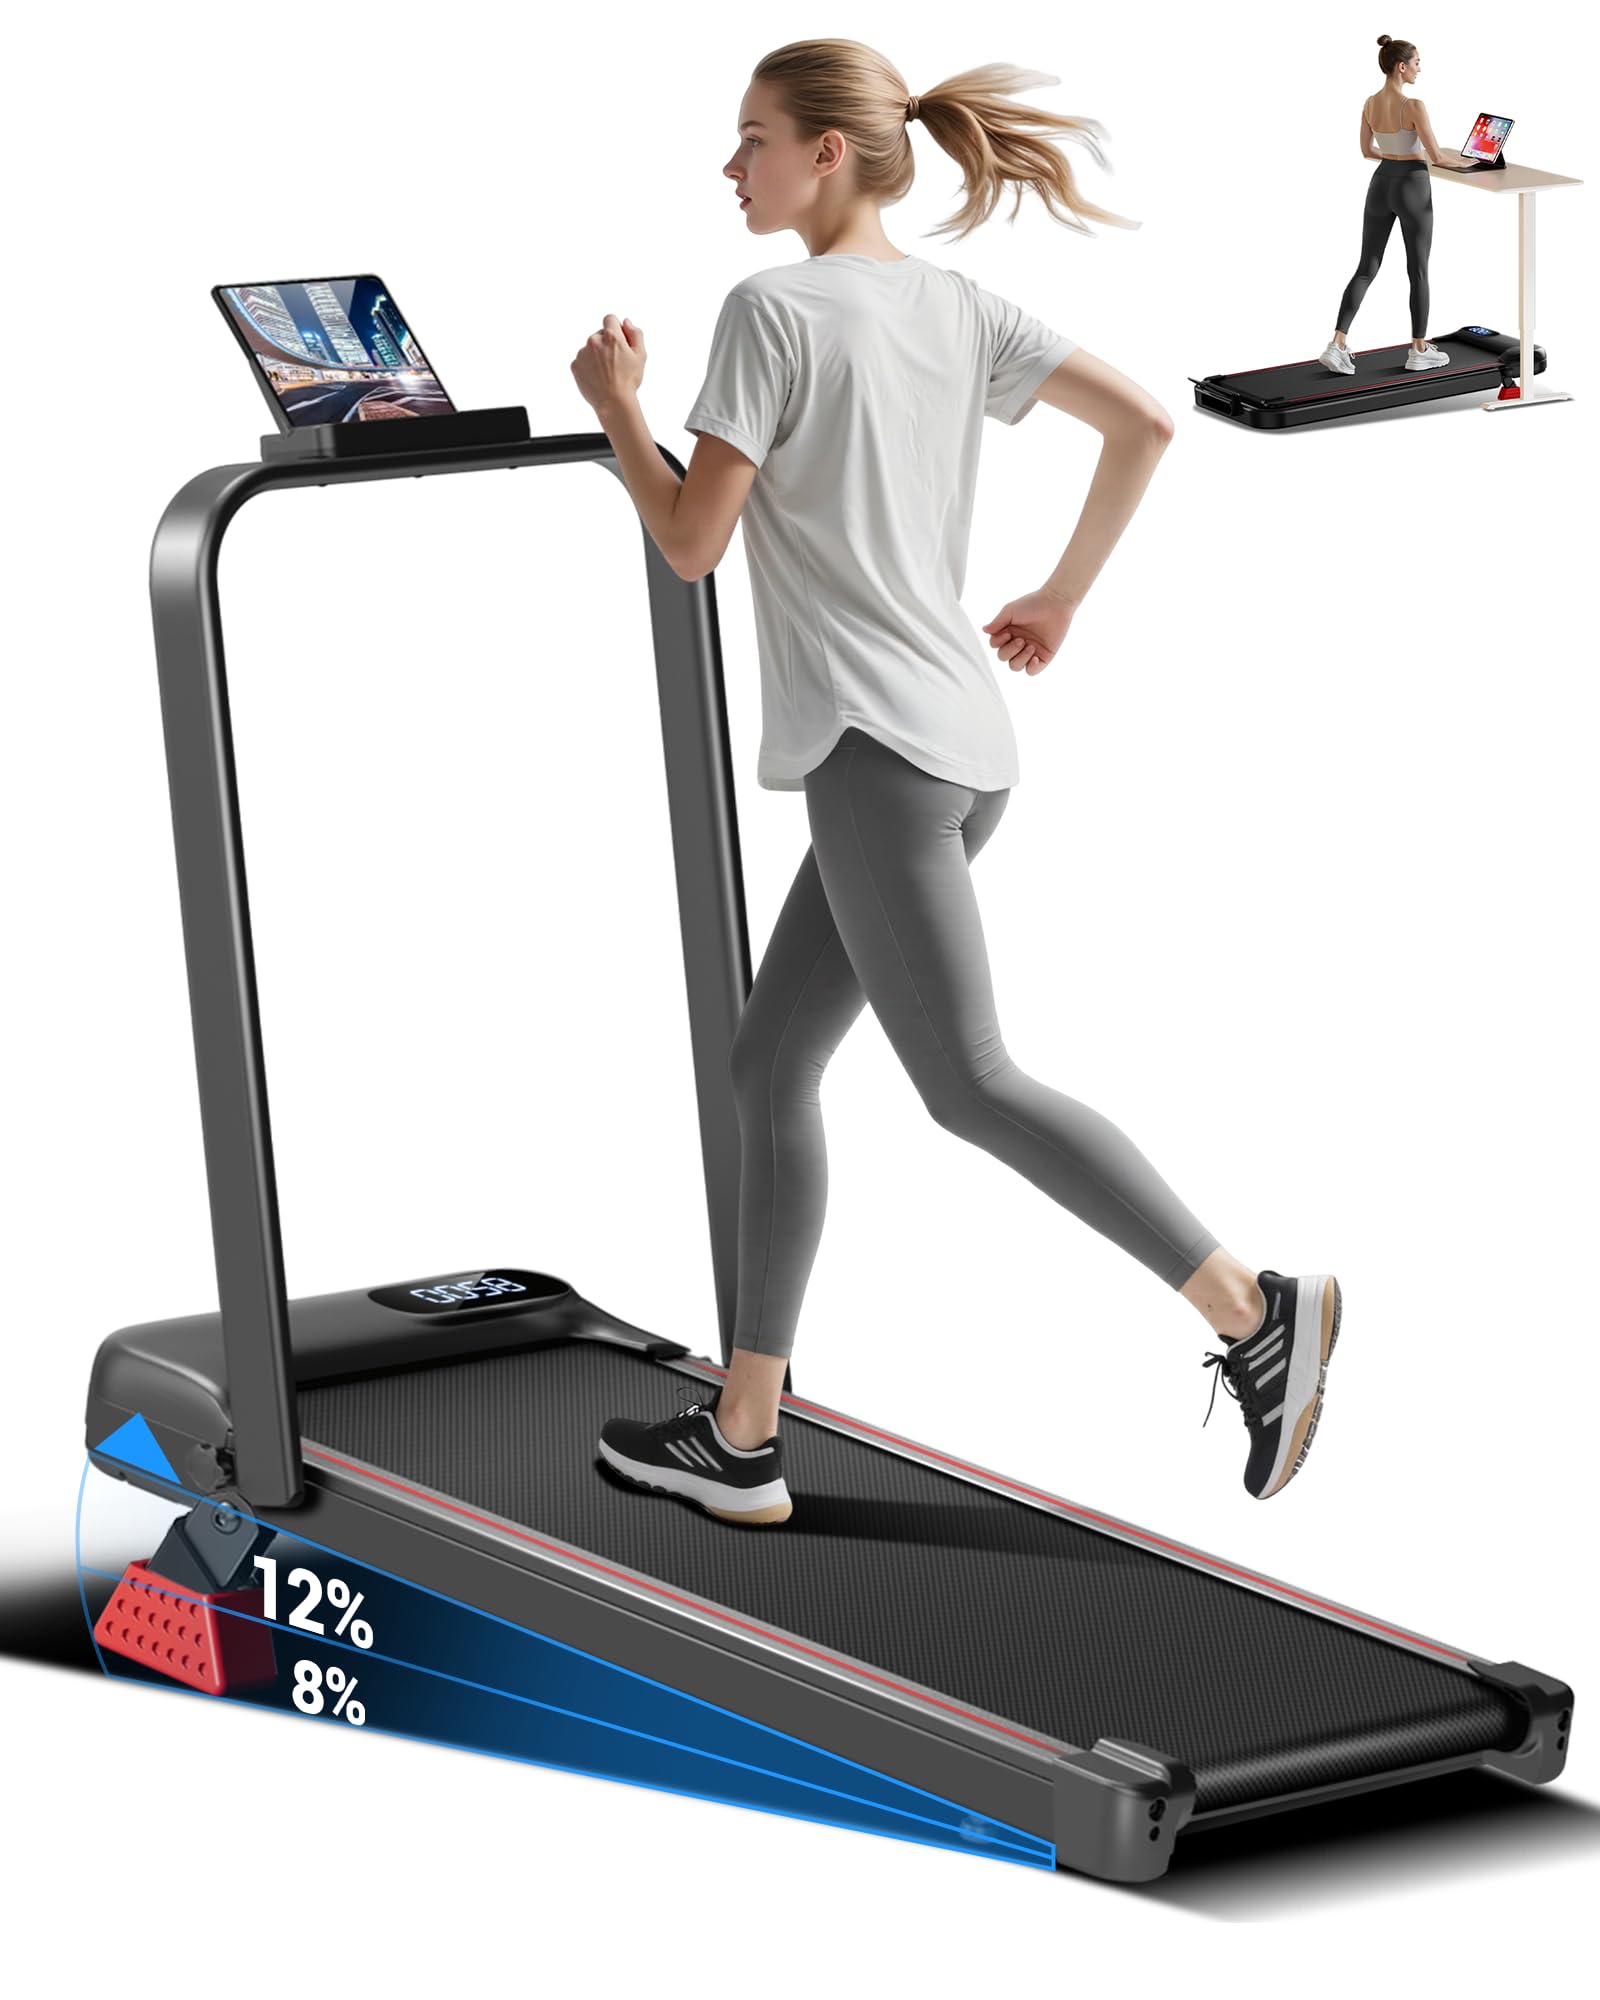
Image: The treadmill's LED display shows numerical data, likely representing time, distance, or calories. A remote control is shown in a hand, featuring buttons for increasing speed (+), mode selection (M), power on/off, and decreasing speed (-). Above the display, icons for Time, Speed, Distance, and Calories indicate the metrics tracked.
- ON/OFF Button: Starts and stops the treadmill belt.
- '+' Button: Increases the treadmill speed.
- '-' Button: Decreases the treadmill speed.
- 'M' (Mode) Button: Cycles through different display modes (Time, Speed, Distance, Calories).
4.3 Display Information
The LED display provides real-time workout data:
- Time: Duration of your workout.
- Speed: Current speed of the running belt (in Miles per Hour).
- Distance: Total distance covered during your workout.
- Calories: Estimated calories burned.
4.4 Speed and Incline Adjustment
- Speed: Use the '+' and '-' buttons on the remote control to adjust the speed from 0.6 MPH to 6.2 MPH. Start at a low speed and gradually increase.
- Incline: This model features a maximum incline of 12%. Refer to the specific instructions for manual or automatic incline adjustment, if applicable to your unit. Always adjust incline while standing safely on the side rails or holding the handlebar.
4.5 Emergency Stop
In case of an emergency, press the 'OFF' button on the remote control immediately to stop the treadmill belt.
5. Maintenance
Regular maintenance ensures the longevity and safe operation of your treadmill.
5.1 Cleaning
- Wipe down the treadmill frame and display with a damp cloth after each use. Avoid using abrasive cleaners or solvents.
- Periodically vacuum under the treadmill to prevent dust and debris buildup.
5.2 Running Belt Lubrication
The running belt requires periodic lubrication to reduce friction and extend its lifespan. Refer to the specific instructions provided with your treadmill for the recommended lubrication schedule and type of lubricant.
5.3 Running Belt Adjustment
If the running belt starts to slip or move off-center, it may need adjustment. Consult the detailed instructions in the full product manual or contact customer support for guidance on adjusting belt tension and alignment.
5.4 Storage
The LONTEK Walking Pad Treadmill U18F is designed for compact storage. To store, fold down the handlebar and carefully slide the unit under furniture or store it upright against a wall in a dry, cool place.
6. Troubleshooting
If you encounter issues with your treadmill, refer to the following common problems and solutions:
- Treadmill Not Starting: Ensure the power cord is securely plugged into a grounded outlet and the main power switch is 'ON'. Check if the safety key (if applicable) is correctly inserted.
- Belt Slipping: The running belt may need tension adjustment. Refer to the maintenance section or contact support.
- Unusual Noises: Check for loose parts or debris under the belt. Lubrication may be required. If the noise persists, discontinue use and contact customer support.
- Display Not Working: Ensure all connections are secure. If the issue persists, contact customer support.
For problems not listed here, or if troubleshooting steps do not resolve the issue, please contact LONTEK customer support.
7. Specifications
| Feature | Specification |
|---|---|
| Brand | LONTEK |
| Model Number | U18F |
| Product Dimensions (D x W x H) | 114.3D x 55.9W x 6.4H Centimeters |
| Item Weight | 17.6 Kilograms |
| Maximum Speed | 6.2 Miles per Hour |
| Minimum Speed | 0.6 Miles per Hour |
| Maximum Incline Percentage | 15.0% (Note: Product description states 12%, specifications state 15%. Please verify with product.) |
| Motor HP | 2.5 Horsepower |
| Maximum Weight Recommendation | 136 Kilograms |
| Material Type | Alloy Steel |
| Special Features | Lightweight |
| What's In The Box | Tool Kit |
8. Warranty and Support
LONTEK products are manufactured to high-quality standards. This product comes with a limited warranty against manufacturing defects. Please refer to the warranty card included with your purchase for specific terms and conditions.
For technical support, warranty claims, or replacement parts, please contact LONTEK customer service through the retailer where you purchased the product or visit the official LONTEK website for contact information.