1. Introduction
The OnRetul V510 OBD2 Scanner is a diagnostic tool designed for vehicle maintenance and troubleshooting. It provides capabilities to read and clear engine fault codes, access real-time vehicle data, and perform various diagnostic tests. This device is compatible with all OBD2-compliant vehicles manufactured from 1996 onwards in the US, 2000 onwards in the EU, and other global models. The V510 is constructed from durable ABS material, ensuring resilience in various operating conditions. Its user-friendly interface and direct power supply from the vehicle's OBD2 port make it suitable for both automotive enthusiasts and professional mechanics.
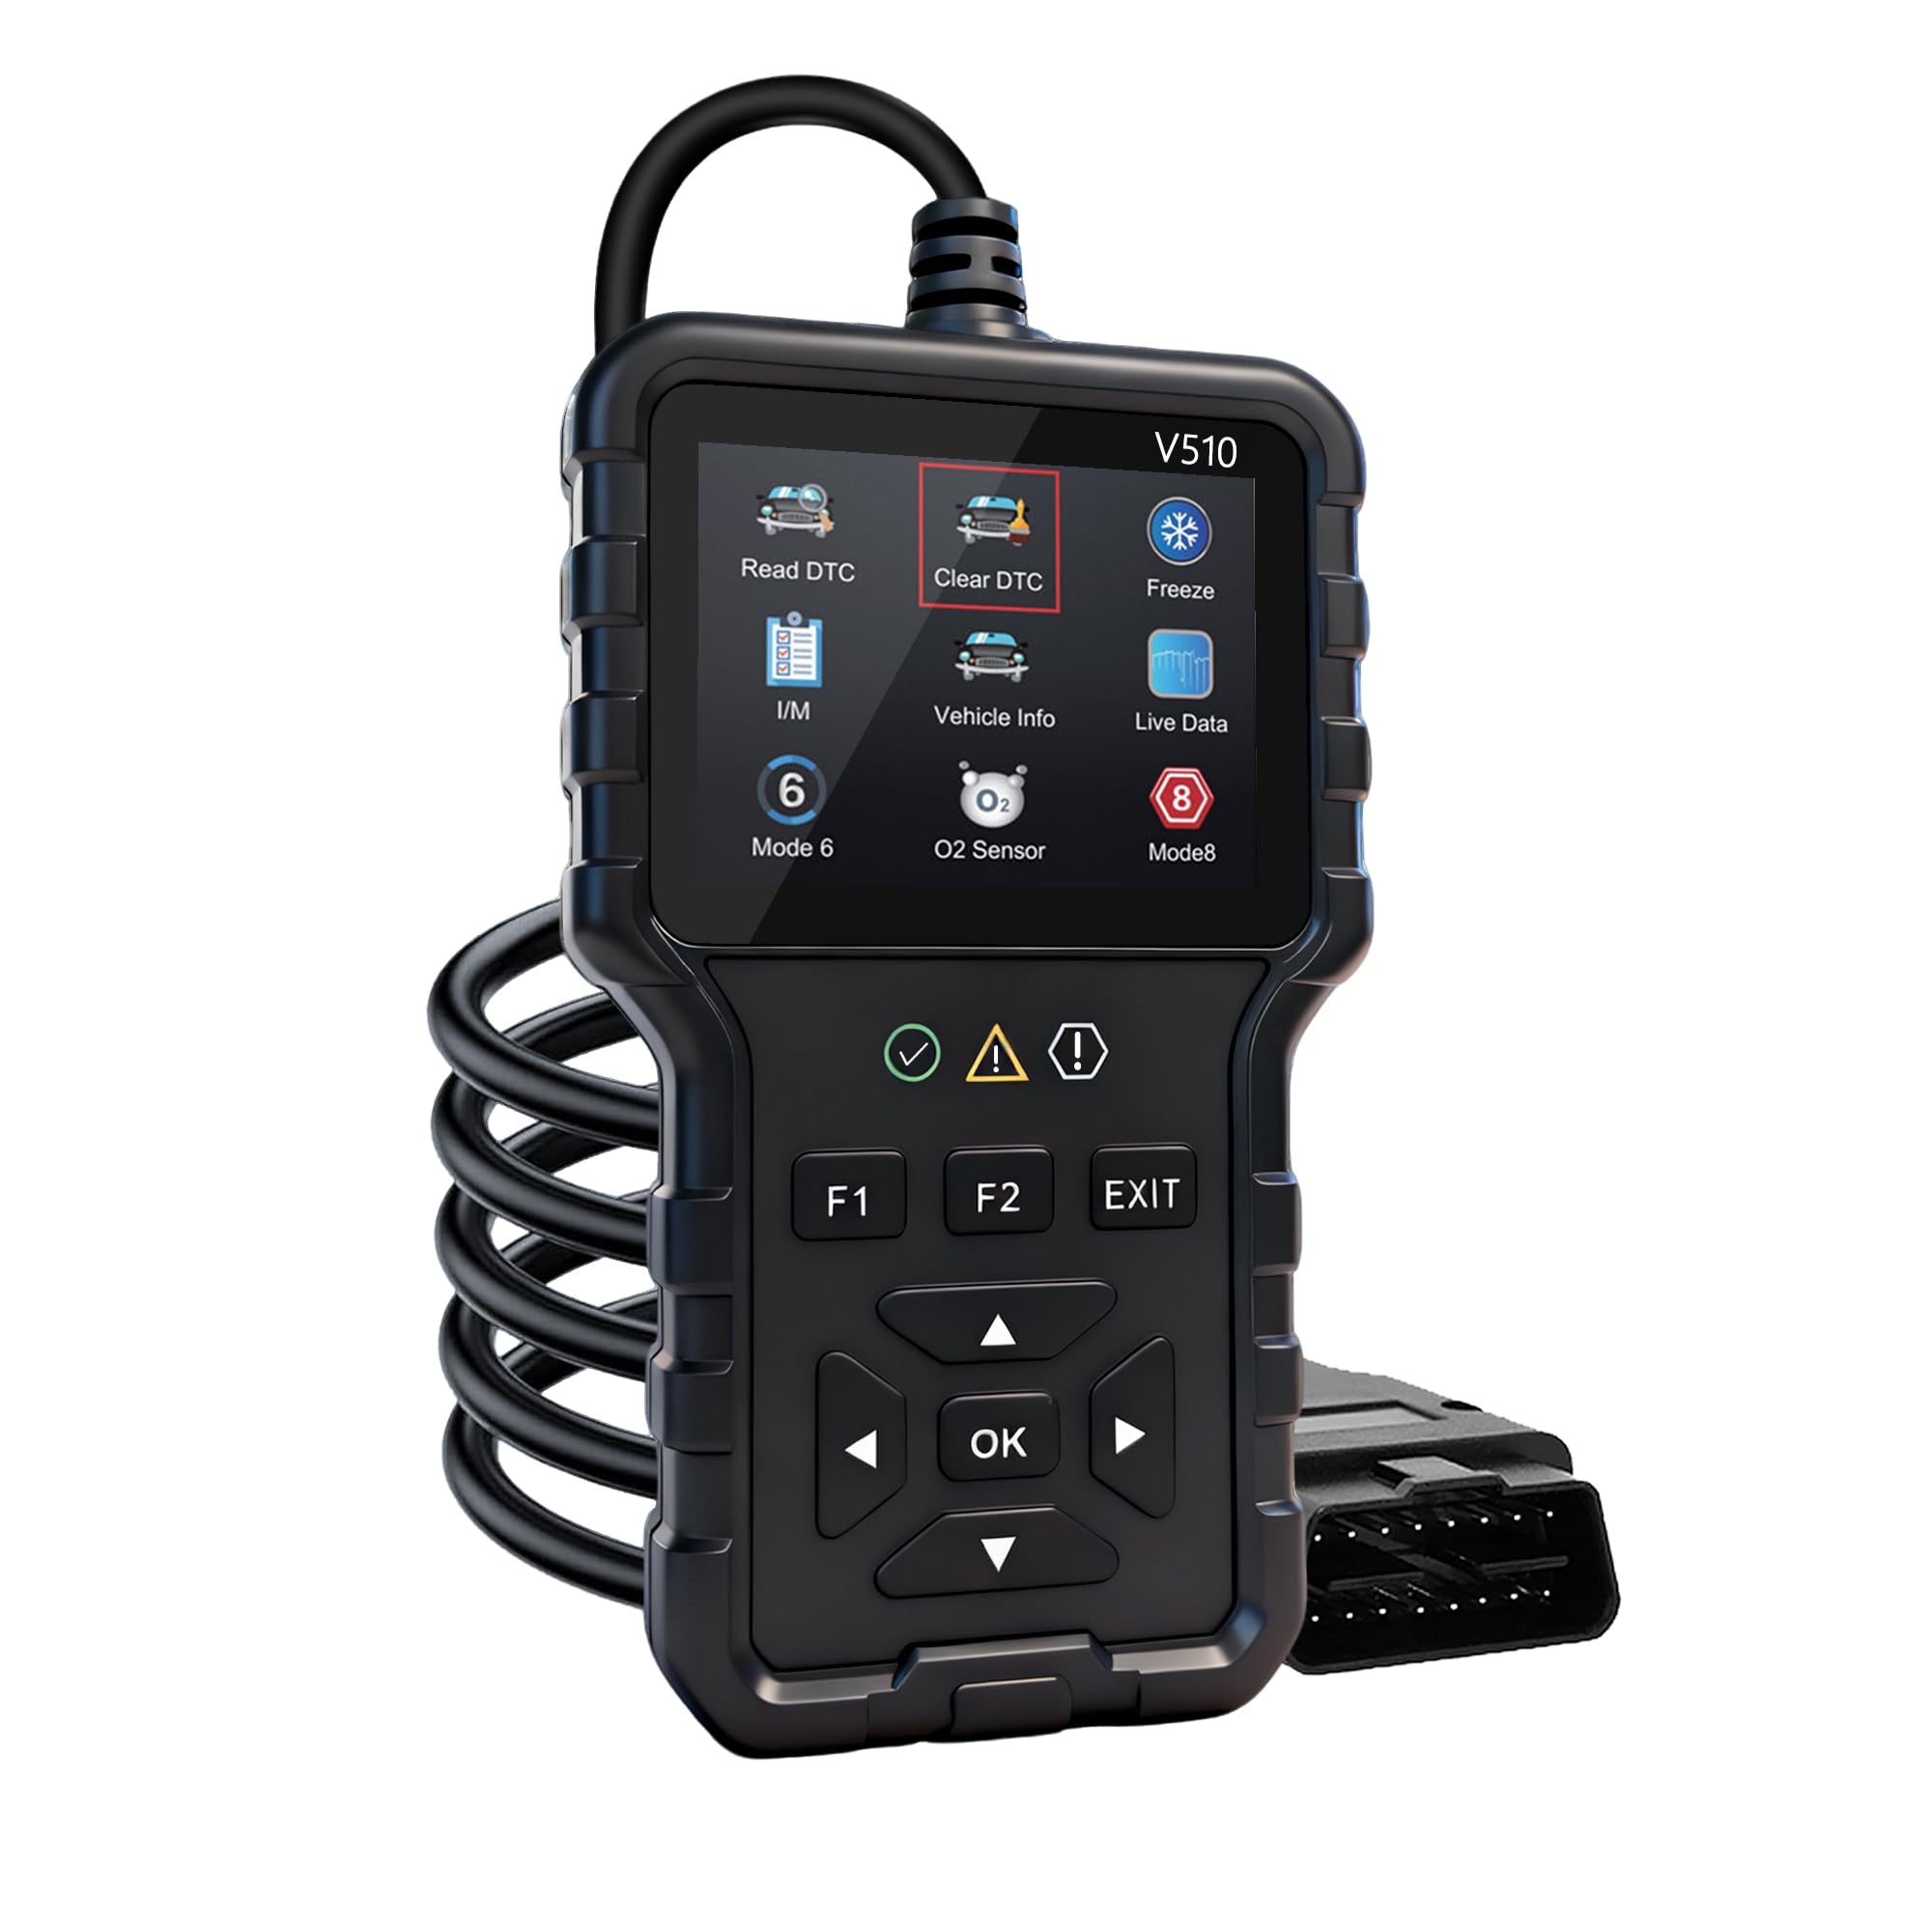
Figure 1.1: OnRetul V510 OBD2 Scanner main unit with display and control buttons.
2. Product Features
The V510 OBD2 Scanner offers a range of features to assist in vehicle diagnostics:
- Professional Diagnostic Power: Reads and clears engine fault codes (P0, P1, P2, P3 series) for various vehicle types. Displays real-time battery voltage, RPM, and engine load.
- Precision Data Tracking & Analysis: Monitors critical metrics in real-time with live data plotting and recording. Identifies suspicious trends and potential component failures.
- Durable Design: Features a high-quality ABS housing resistant to extreme temperatures (-4°F to 158°F). Includes shortcut keys for one-touch diagnostics and an ergonomic grip. Reinforced wiring and a secure 16-PIN connector ensure reliable operation.
- Plug-and-Play Convenience: Powers directly from the vehicle’s OBD2 port, eliminating the need for external batteries or chargers.
- Universal Compatibility & Extensive Code Library: Compatible with all OBD2-compliant vehicles (1996+ US, 2000+ EU, and global models). Contains a pre-loaded library of over 35,901 fault codes with instant definitions.

Figure 2.1: Overview of key features and functions of the V510 scanner.
3. Setup
The V510 OBD2 Scanner is designed for simple plug-and-play operation. Follow these steps to set up the device:
- Locate the OBD2 Port: The 16-pin OBD2 diagnostic port is typically located under the dashboard on the driver's side of the vehicle. Refer to your vehicle's owner's manual if you have difficulty locating it.
- Connect the Scanner: Firmly plug the V510 scanner's 16-pin connector into the vehicle's OBD2 port. Ensure a secure connection.
- Start the Vehicle: Turn the vehicle's ignition to the "ON" position or start the engine. The scanner will power on automatically as it draws power directly from the vehicle's OBD2 port.
- Initial Boot-up: The scanner will display a boot-up sequence and then present the main menu.

Figure 3.1: The V510 scanner connected via its OBD2 cable.
4. Operating Instructions
Navigate the scanner using the directional buttons (Up, Down, Left, Right) and the "OK" button for selection. "EXIT" returns to the previous screen or the main menu. "F1" and "F2" are shortcut keys for specific functions.

Figure 4.1: Main menu interface of the V510 scanner.
4.1. Read DTC (Diagnostic Trouble Codes)
This function retrieves diagnostic trouble codes (DTCs) from the vehicle's onboard computer. These codes indicate specific issues detected by the vehicle's systems.
- From the main menu, select "Read DTC" and press "OK".
- The scanner will communicate with the vehicle and display any stored DTCs.
- Use the Up/Down buttons to scroll through the codes. The scanner provides definitions for most common codes.
4.2. Clear DTC (Diagnostic Trouble Codes)
This function erases all diagnostic trouble codes from the vehicle's computer and turns off the Check Engine Light (MIL). Warning: Clearing codes does not fix the underlying problem. Ensure the issue is resolved before clearing codes, or the light will likely reappear.
- From the main menu, select "Clear DTC" and press "OK".
- Confirm the action when prompted.
- The scanner will clear the codes and confirm the action. The Check Engine Light should turn off.
4.3. I/M Readiness (Inspection/Maintenance Readiness)
This function checks the status of the vehicle's emission-related monitoring systems to determine if they are ready for an emissions test. "I/M" stands for Inspection/Maintenance.
- From the main menu, select "I/M" and press "OK".
- The scanner will display the readiness status for various monitors (e.g., O2 Sensor, Catalyst, EVAP System). A "Ready" status indicates the monitor has completed its self-test.
- A "Not Ready" or "Incomplete" status means the monitor has not yet completed its test cycle. This may require further driving under specific conditions.

Figure 4.2: I/M Readiness status display, indicating emission monitor completion.
4.4. Live Data
This function displays real-time operational parameters from the vehicle's sensors and systems. Data can be viewed in text or graphical format.
- From the main menu, select "Live Data" and press "OK".
- Choose to view data in "List" (text) or "Graph" format.
- Scroll through the available parameters such as engine RPM, vehicle speed, coolant temperature, O2 sensor readings, etc.
- In graph mode, multiple parameters can be displayed simultaneously for comparison and trend analysis.
4.5. DTC Lookup
The scanner includes an extensive library of Diagnostic Trouble Code definitions. If a code is not automatically defined, you can manually look it up.
- From the main menu, select "DTC Lookup" (or similar option) and press "OK".
- Enter the DTC using the directional buttons to select characters and positions.
- Press "OK" to view the definition of the entered code.

Figure 4.3: DTC Lookup interface for manual code entry and definition retrieval.
4.6. Other Functions (Modes 6 & 8, O2 Sensor Test, Freeze Frame)
The V510 also supports advanced OBD2 functions:
- Mode 6 (On-Board Monitoring Test Results): Accesses the results for on-board diagnostic monitoring tests for specific components/systems that are not continuously monitored.
- Mode 8 (Component/System Control): Allows bidirectional control of certain components for testing purposes (e.g., EVAP leak test).
- O2 Sensor Test: Retrieves O2 sensor monitoring test results.
- Freeze Frame Data: Captures a snapshot of vehicle operating conditions at the moment a fault code was set, providing valuable context for diagnosis.
Navigate to these options from the main menu or sub-menus as displayed on the scanner screen.
5. Maintenance
Proper maintenance ensures the longevity and reliable operation of your OnRetul V510 OBD2 Scanner.
- Cleaning: Wipe the scanner's exterior with a soft, damp cloth. Do not use abrasive cleaners or solvents. Ensure no liquids enter the device.
- Storage: Store the scanner in a clean, dry environment away from direct sunlight and extreme temperatures. The device is designed to withstand temperatures between -4°F to 158°F, but prolonged exposure to extremes should be avoided.
- Cable Care: Avoid bending or crimping the OBD2 cable excessively. Store the cable neatly to prevent damage to the wiring or connector pins.
- Software Updates: Check the manufacturer's website periodically for any available software updates to ensure optimal performance and compatibility with newer vehicle models.
6. Troubleshooting
If you encounter issues with your V510 scanner, refer to the following common troubleshooting steps:
- Scanner Does Not Power On:
- Ensure the scanner is securely plugged into the vehicle's 16-pin OBD2 port.
- Verify the vehicle's ignition is in the "ON" position or the engine is running.
- Check the vehicle's fuse for the OBD2 port (consult your vehicle's manual).
- Communication Error:
- Confirm the vehicle is OBD2 compliant (1996+ US, 2000+ EU, etc.).
- Ensure the connection to the OBD2 port is firm and secure.
- Turn off the ignition, disconnect the scanner, wait 10 seconds, then reconnect and restart the vehicle.
- Try the scanner on another OBD2-compliant vehicle to rule out a vehicle-specific issue.
- Codes Not Clearing:
- Ensure the ignition is in the "ON" position (engine off or running, depending on vehicle).
- If the underlying fault is still present, codes may reappear immediately after clearing. Address the vehicle's issue first.
- Screen Freezes or Malfunctions:
- Disconnect the scanner from the vehicle and reconnect it.
- If the issue persists, contact OnRetul customer support.
7. Specifications
| Feature | Detail |
|---|---|
| Brand | OnRetul |
| Model Number | V519 |
| Power Source | Corded Electric (via OBD2 port) |
| Product Dimensions (L x W x H) | 6"L x 1"W x 3.4"H |
| Screen Size | 2.8 Inches |
| Automotive Fit Type | Universal Fit (OBD2 compliant vehicles) |
| Operating Temperature | -4°F to 158°F (-20°C to 70°C) |
| Included Components | V510 OBD2 Scanner, User Manual |
8. Warranty Information
The OnRetul V510 OBD2 Scanner comes with a 3-month manufacturer's warranty from the date of purchase. This warranty covers defects in materials and workmanship under normal use. It does not cover damage caused by misuse, accident, unauthorized modification, or improper installation. Please retain your proof of purchase for warranty claims.
9. Support
For technical assistance, troubleshooting beyond this manual, or warranty inquiries, please contact OnRetul customer support through the retailer where the product was purchased or refer to the official OnRetul website for contact information.


