1. Product Overview
This dishwasher door gasket seal is designed to create a tight, leak-proof barrier around the dishwasher door. Its primary function is to contain water during wash cycles, preventing leaks, moisture buildup, and ensuring optimal cleaning performance. Constructed from flexible, durable rubber, it provides a precise fit to restore proper sealing and maintain your dishwasher's efficiency.
A properly functioning door gasket is crucial for preventing common dishwasher issues such as water leaks, a door that won't close securely, and inefficient cleaning due to water escaping the wash tub.
2. Compatibility
This door gasket seal is compatible with a wide range of Kenmore dishwasher models. Please verify your dishwasher's model number against the list below to ensure compatibility:
- 665.1691190, 665.1691191, 665.1691192
- 665.1691590, 665.1691591, 665.1691592, 665.1691593
- 665.1694190, 665.1694191, 665.1694192, 665.1694193
- 665.1694990, 665.1694991, 665.1694992, 665.1694993
- 665.16962990, 665.16962992
- 665.16964990, 665.16964992
- 665.16969990, 665.16969992
- 665.16992400, 665.16992401
- 665.16994400, 665.16994401
- 665.16999400, 665.16999401
- 665.17002400, 665.17002401
- 665.17003400, 665.17003401
- 665.17004400, 665.17009400
3. Installation Instructions
Replacing a dishwasher door gasket can be performed by the user. Follow these steps to install the new gasket:
- Safety First: Before beginning, ensure the dishwasher is turned off and unplugged from the power outlet to prevent electrical hazards. Turn off the water supply to the dishwasher.
- Open the Door: Fully open the dishwasher door to access the old gasket.
- Remove the Old Gasket: Carefully pull the old gasket out of the channel around the dishwasher tub. It is usually held in place by friction or small clips. Note its orientation for reference.
- Clean the Gasket Channel: Thoroughly clean the channel where the gasket sits. Remove any food debris, grime, or detergent residue that may have accumulated. A clean channel ensures a proper seal for the new gasket.
- Install the New Gasket: Starting from the top center of the dishwasher tub, press the new gasket firmly into the channel. Work your way around the entire perimeter, ensuring the gasket is fully seated and flush. Pay attention to the corners and ensure there are no twists or kinks.
- Secure the Gasket: Once the gasket is fully installed, gently run your hand along its length to ensure it is evenly seated and secure.
- Seat the Gasket: Close the dishwasher door and leave it shut for several hours (e.g., overnight). This allows the new gasket to compress and properly seat itself, forming a tight seal.
- Restore Power and Water: After the gasket has seated, plug the dishwasher back in and turn on the water supply.
- Test for Leaks: Run a short wash cycle and carefully check for any leaks around the door.

Figure 1: The new dishwasher door gasket seal, coiled for packaging.

Figure 2: A different view of the coiled dishwasher door gasket seal.
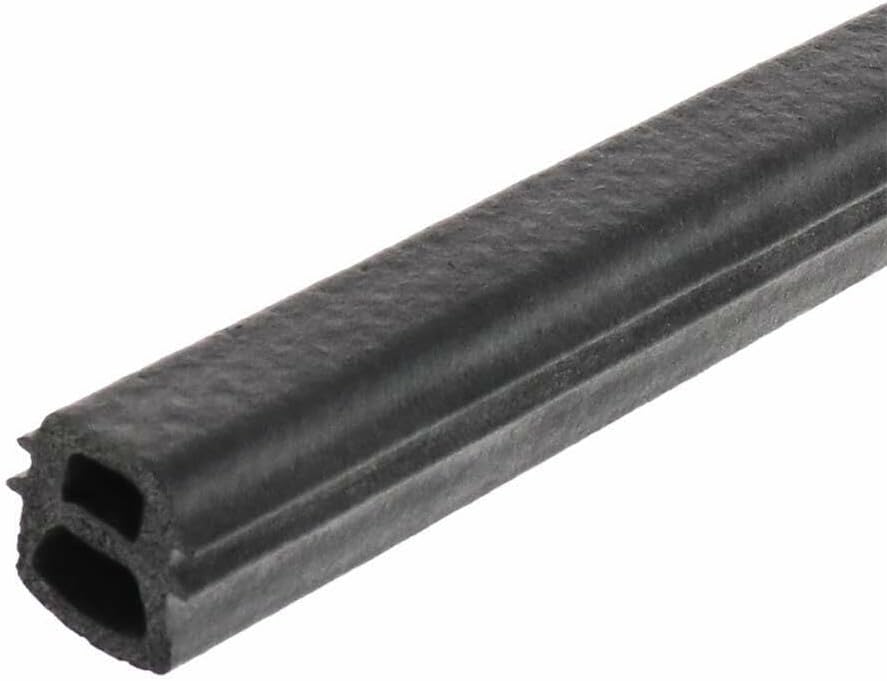
Figure 3: Close-up view of the gasket's profile, showing its sealing design.
4. Operating Considerations
Once the new gasket is installed and properly seated, your dishwasher should operate as intended, with a secure, leak-free door seal. Ensure the door latches completely after closing to maintain the seal during operation.
5. Maintenance
To prolong the life of your dishwasher door gasket and maintain its effectiveness:
- Regular Cleaning: Periodically wipe down the gasket and the surrounding channel with a damp cloth to remove food particles, grease, and detergent residue. This prevents buildup that can compromise the seal.
- Inspect for Damage: Routinely inspect the gasket for any signs of wear, cracks, tears, or hardening. A damaged gasket should be replaced promptly to prevent leaks.
- Avoid Harsh Cleaners: Do not use abrasive cleaners or harsh chemicals on the gasket, as these can degrade the rubber material over time.
6. Troubleshooting
If you experience issues after installing the new gasket, consider the following:
- Water Leaking:
- Ensure the gasket is fully and evenly seated in its channel.
- Check for any twists or kinks in the gasket.
- Verify that the dishwasher door latches securely and applies even pressure to the gasket.
- Door Not Closing Properly:
- The new gasket may need more time to compress and seat. Leave the door closed for an extended period.
- Ensure no part of the gasket is obstructing the door's closing mechanism.
- Dishes Not Cleaning Properly:
- While less common for a gasket issue, a poor seal can affect water pressure and distribution. Re-check the gasket installation.
If issues persist, consult your dishwasher's specific service manual or contact a qualified appliance technician.
7. Specifications
| Part Name: | Dishwasher Door Gasket Seal |
| Manufacturer: | dangkhoa |
| Part Number: | 665.1696999, 665.169924 |
| Material: | Durable Rubber |
| ASIN: | B0G6DPWJG2 |
8. Support and Warranty
This product is designed to be a high-quality replacement part. For any questions regarding installation, compatibility, or performance, please contact the seller or manufacturer's support team. The product is backed by a satisfaction guarantee.
For assistance, refer to the contact information provided with your purchase or on the product listing page.