Important Safety Instructions
Please read all instructions carefully before using this appliance. Failure to follow these instructions may result in electric shock, fire, or serious injury.
- This appliance is for household use only. Do not use outdoors or on wet surfaces.
- Do not allow children to operate the vacuum cleaner. Close supervision is necessary when used near children.
- Do not pick up flammable or combustible liquids, such as gasoline, or use in areas where they may be present.
- Do not pick up anything that is burning or smoking, such as cigarettes, matches, or hot ashes.
- Do not use without the dust cup and filters in place.
- Turn off the appliance before connecting or disconnecting the battery pack, or before performing any maintenance.
- Use only manufacturer-recommended attachments.
- Store the vacuum cleaner indoors in a dry place.
Package Contents
Verify that all components are present in the package:
- SunSare X7A Pro Main Unit (Motor and Dust Cup)
- Extension Wand
- Motorized Floor Brush
- Crevice Tool
- 2-in-1 Brush Tool
- Flexible Hose
- Wall Mount Bracket
- Power Adapter
- User Manual
- 3 x Replacement Filters
- Aromatherapy Tablets (Quantity may vary)

Figure 1: Included components of the SunSare X7A Pro vacuum cleaner.

Figure 2: Included replacement filters and aromatherapy tablets.
Product Overview
The SunSare X7A Pro is a versatile cordless vacuum cleaner designed for efficient cleaning across various surfaces. It features a powerful 600W motor, multiple suction modes, and a self-standing design for convenience.

Figure 3: Self-standing design for convenient storage and pausing during cleaning.
Assembly and Setup
1. Charging the Battery
Before first use, fully charge the vacuum cleaner's battery. Connect the power adapter to the charging port on the main unit and plug it into a wall outlet. The LED display will indicate charging status.
2. Assembling the Vacuum
- Insert the extension wand into the main unit until it clicks securely.
- Attach the motorized floor brush to the other end of the extension wand until it clicks.
- For handheld use, attach desired accessories (crevice tool, 2-in-1 brush) directly to the main unit.
3. Installing Aromatherapy Tablets
Locate the aromatherapy compartment, typically near the exhaust or filter area. Insert an aromatherapy tablet as directed in the compartment. This feature helps to release a pleasant scent during cleaning.
Operating Instructions
1. Powering On/Off
Press the power button on the main unit to turn the vacuum cleaner on or off.
2. Selecting Suction Modes
The X7A Pro features an LED touch display to switch between four suction modes: ECO, MID, MAX, and AUTO. The display also shows real-time battery status.
- ECO Mode: Provides up to 65 minutes of runtime, suitable for light cleaning tasks.
- MID Mode: Balanced power for everyday cleaning.
- MAX Mode: Offers maximum suction power for stubborn dirt and deep cleaning (15-20 minutes runtime).
- AUTO Mode: Intelligently adjusts suction power based on floor type and debris, optimizing battery life and cleaning efficiency.

Figure 4: LED Smart Touch Display for mode selection and battery status.

Figure 5: Suction power levels for different modes.
3. Battery Runtime
The 8-cell lithium-ion battery provides extended cleaning time. In ECO mode, the vacuum can operate for up to 65 minutes, sufficient for larger homes. In MAX mode, the runtime is approximately 15-20 minutes for intensive cleaning.

Figure 6: Extended runtime for cleaning large areas.
4. Cleaning Performance
The 600W high-performance motor provides strong suction for various debris. The 5-series upright floor brush is designed to effectively clean carpets, hard floors, edges, and corners.
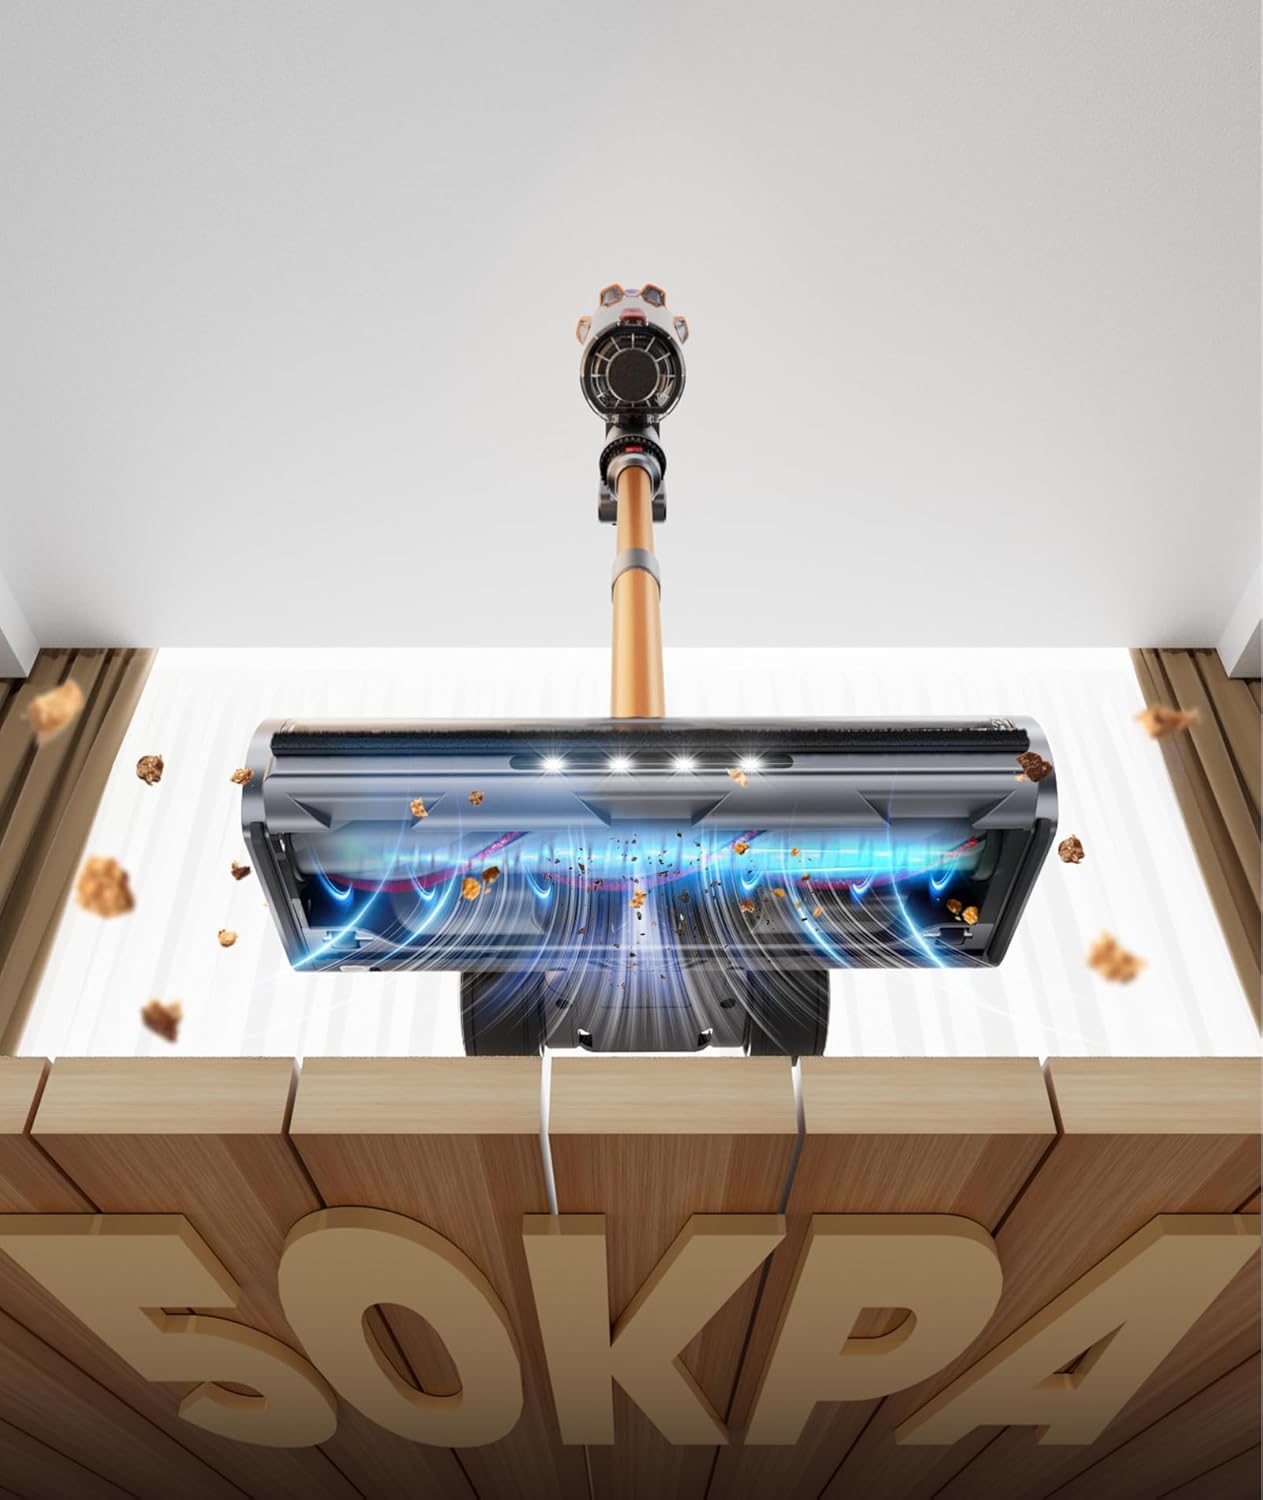
Figure 7: Powerful suction capability of the vacuum.

Figure 8: Internal view of the floor brush and airflow for effective cleaning.
5. Automatic Powerful Suction on Shutdown
When the vacuum is turned off in ECO mode, it automatically activates 3 seconds of strong suction. This feature helps to clear hair and debris from the roller brush and air ducts, preventing clogs and maintaining optimal performance.
Maintenance
Regular maintenance ensures the longevity and optimal performance of your SunSare X7A Pro vacuum cleaner.
1. Emptying the Dust Cup
Empty the dust cup regularly, especially when it reaches the MAX fill line. Press the release button to detach the dust cup and empty its contents into a waste bin.
2. Cleaning and Replacing Filters
The filters should be cleaned periodically to maintain suction power. Remove the filters from the dust cup and tap off loose dirt. Rinse them under cold water if necessary, ensuring they are completely dry before reinstallation. Replace filters every 3-6 months, or as needed, using the provided replacement filters.
3. Cleaning the Roller Brush
Periodically check the roller brush for tangled hair or debris. To remove, follow the instructions in the manual for detaching the brush bar. Use scissors to cut away any tangled hair and clean the brush thoroughly before reinserting.
Troubleshooting
| Problem | Possible Cause | Solution |
|---|---|---|
| Vacuum does not turn on. | Battery is not charged. Battery is not properly installed. | Charge the battery fully. Ensure the battery pack is securely clicked into place. |
| Loss of suction. | Dust cup is full. Filters are clogged. Roller brush is obstructed. | Empty the dust cup. Clean or replace filters. Remove any obstructions from the roller brush. |
| Roller brush not spinning. | Obstruction in the brush bar. Floor brush attachment not properly connected. | Remove any tangled hair or debris. Reattach the floor brush securely. |
| Short runtime. | Using MAX mode frequently. Battery not fully charged. | Use ECO or AUTO mode for longer runtime. Ensure battery is fully charged before use. |
Specifications
- Model: X7A Pro
- Motor Power: 600W
- Battery Type: 8-cell Lithium-ion
- Runtime: Up to 65 minutes (ECO mode), 15-20 minutes (MAX mode)
- Suction Modes: ECO, MID, MAX, AUTO
Warranty and Support
SunSare products are manufactured to high-quality standards. For warranty information, technical support, or to purchase replacement parts, please refer to the warranty card included with your product or visit the official SunSare website.
Contact Information: Please refer to your purchase documentation or the manufacturer's website for the most current contact details.