1. Important Safety Information
Read all instructions carefully before assembly and use. Failure to follow these instructions may result in injury or damage to the product.
- Wear Protective Gear: Always wear work gloves and eye protection during assembly to prevent cuts and eye injuries.
- Two-Person Assembly: Assembly requires at least two adults due to the size and weight of components.
- Site Preparation: Choose a level, stable surface for installation. Ensure the area is clear of obstacles and debris.
- Secure Anchoring: The greenhouse must be securely anchored to the ground to prevent wind damage. Refer to the assembly steps for proper anchoring methods.
- Sharp Edges: Be aware of potential sharp edges on metal components and polycarbonate panels. Handle with care.
- Children and Pets: Keep children and pets away from the assembly area. Do not allow them to play inside the greenhouse unsupervised.
- Weather Conditions: Do not attempt assembly in strong winds, rain, or other adverse weather conditions.
2. Product Overview
The Garvee 6x8 FT Outdoor Greenhouse provides a protected environment for cultivating plants. It features a durable aluminum frame, clear polycarbonate panels, a sliding door for easy access, and an adjustable roof vent for climate control. A built-in water gutter system aids in efficient drainage.
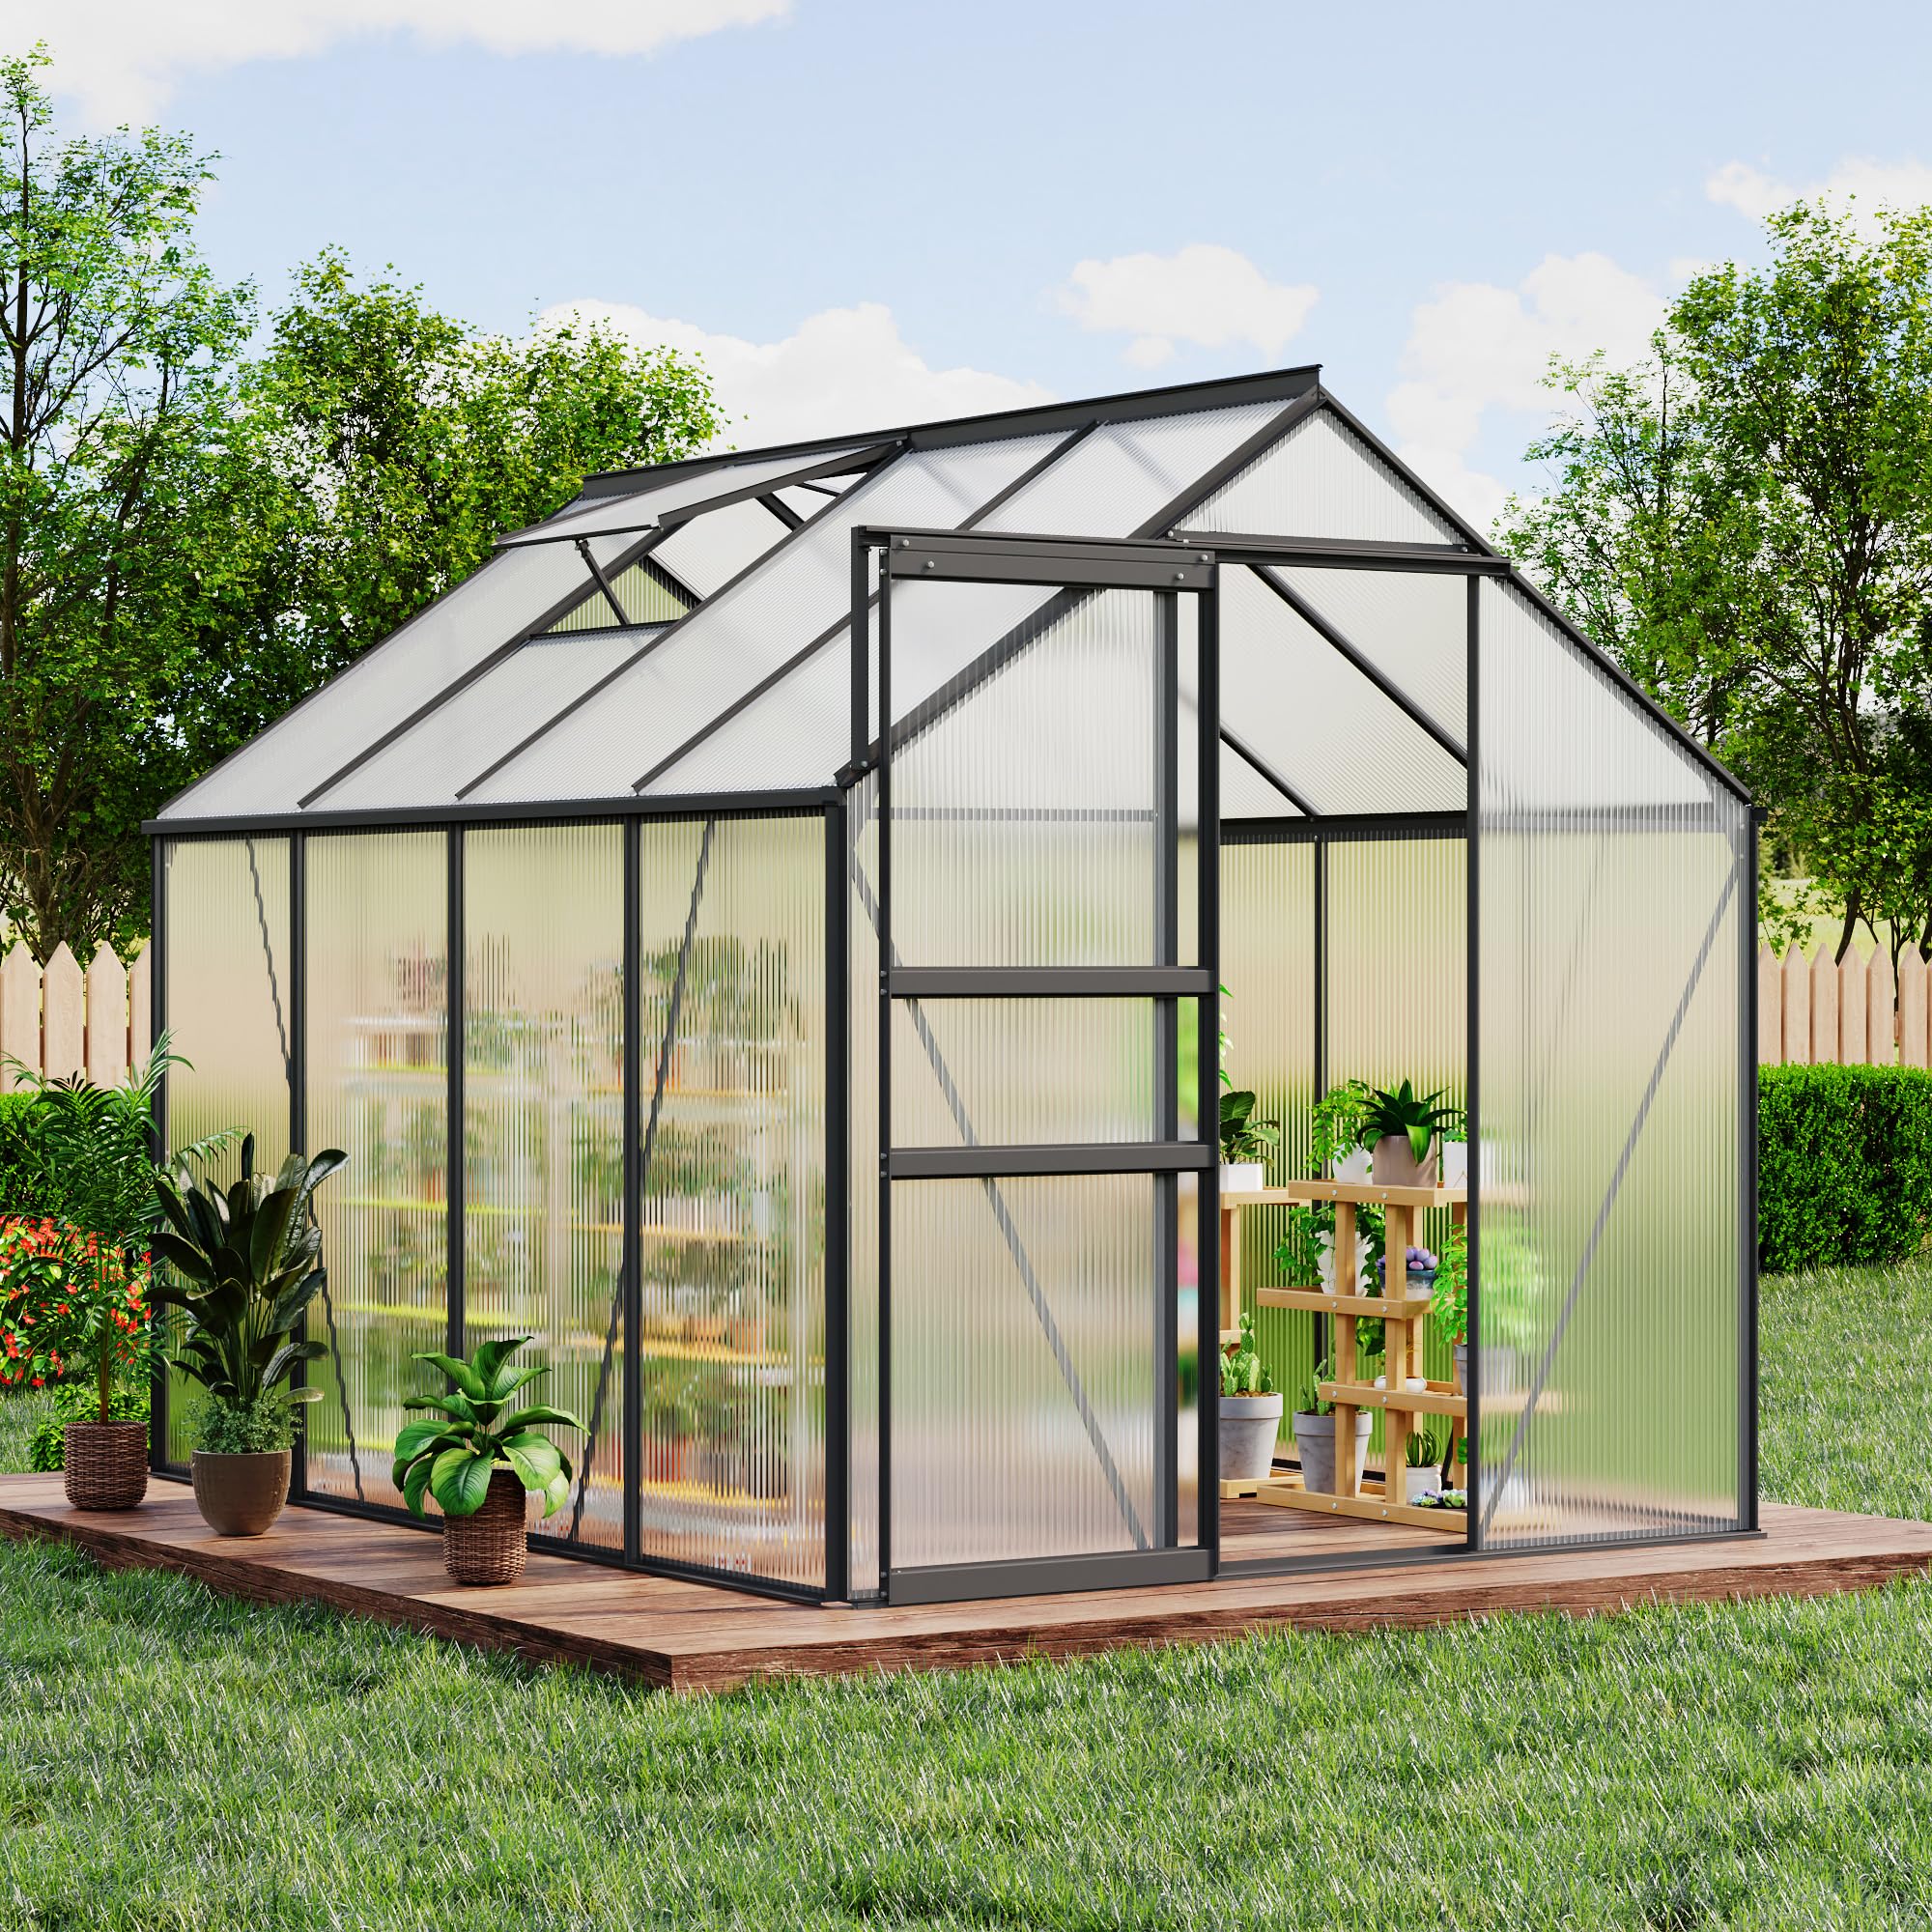
An exterior view of the Garvee 6x8 FT Outdoor Greenhouse, showcasing its black aluminum frame and clear polycarbonate panels. The greenhouse is situated on a wooden deck in a garden, illuminated from within, highlighting plants and shelving.
3. Assembly Instructions
This greenhouse is designed for straightforward assembly. Please follow the steps below carefully. It is recommended to lay out all parts and identify them using the included parts list (not provided here, refer to your physical manual) before beginning.
3.1 Site Preparation
- Select a level, well-drained area that receives adequate sunlight.
- Clear the chosen site of any rocks, roots, or debris.
- Ensure sufficient space around the greenhouse for assembly and future access.
3.2 Frame Assembly
- Unpack all frame components and verify against the parts list.
- Assemble the base frame first, ensuring all corners are square and secure.
- Attach the vertical support beams to the base frame.
- Construct the roof frame, paying attention to the triangular support designs for enhanced stability.
- Connect the roof frame to the vertical supports. Ensure all pre-drilled holes align correctly. If minor adjustments are needed, proceed with caution and use appropriate tools.
- Install diagonal braces as indicated in your manual to enhance wind resistance.

A close-up image showing the robust connection points of the aluminum frame and the corrugated polycarbonate panels, emphasizing the structural integrity.

A wide shot of the greenhouse in a garden, with an overlay indicating "DIAGONAL BRACE" and explaining that it enhances wind resistance, capable of withstanding Force 6 winds.
3.3 Panel Installation
- Carefully slide the polycarbonate panels into the designated frame channels. The slide-in PC panels are designed for faster and more secure installation.
- Ensure panels are oriented correctly and fit snugly. If minor trimming is required for a perfect fit, use appropriate tools carefully and wear protective gear.
- Secure panels with clips or fasteners as directed in your manual.
3.4 Door and Vent Installation
- Assemble the sliding door according to the instructions and install it into its track. Ensure it slides smoothly.
- Install the adjustable roof vent(s). These are designed for multi-speed adjustment to control airflow.
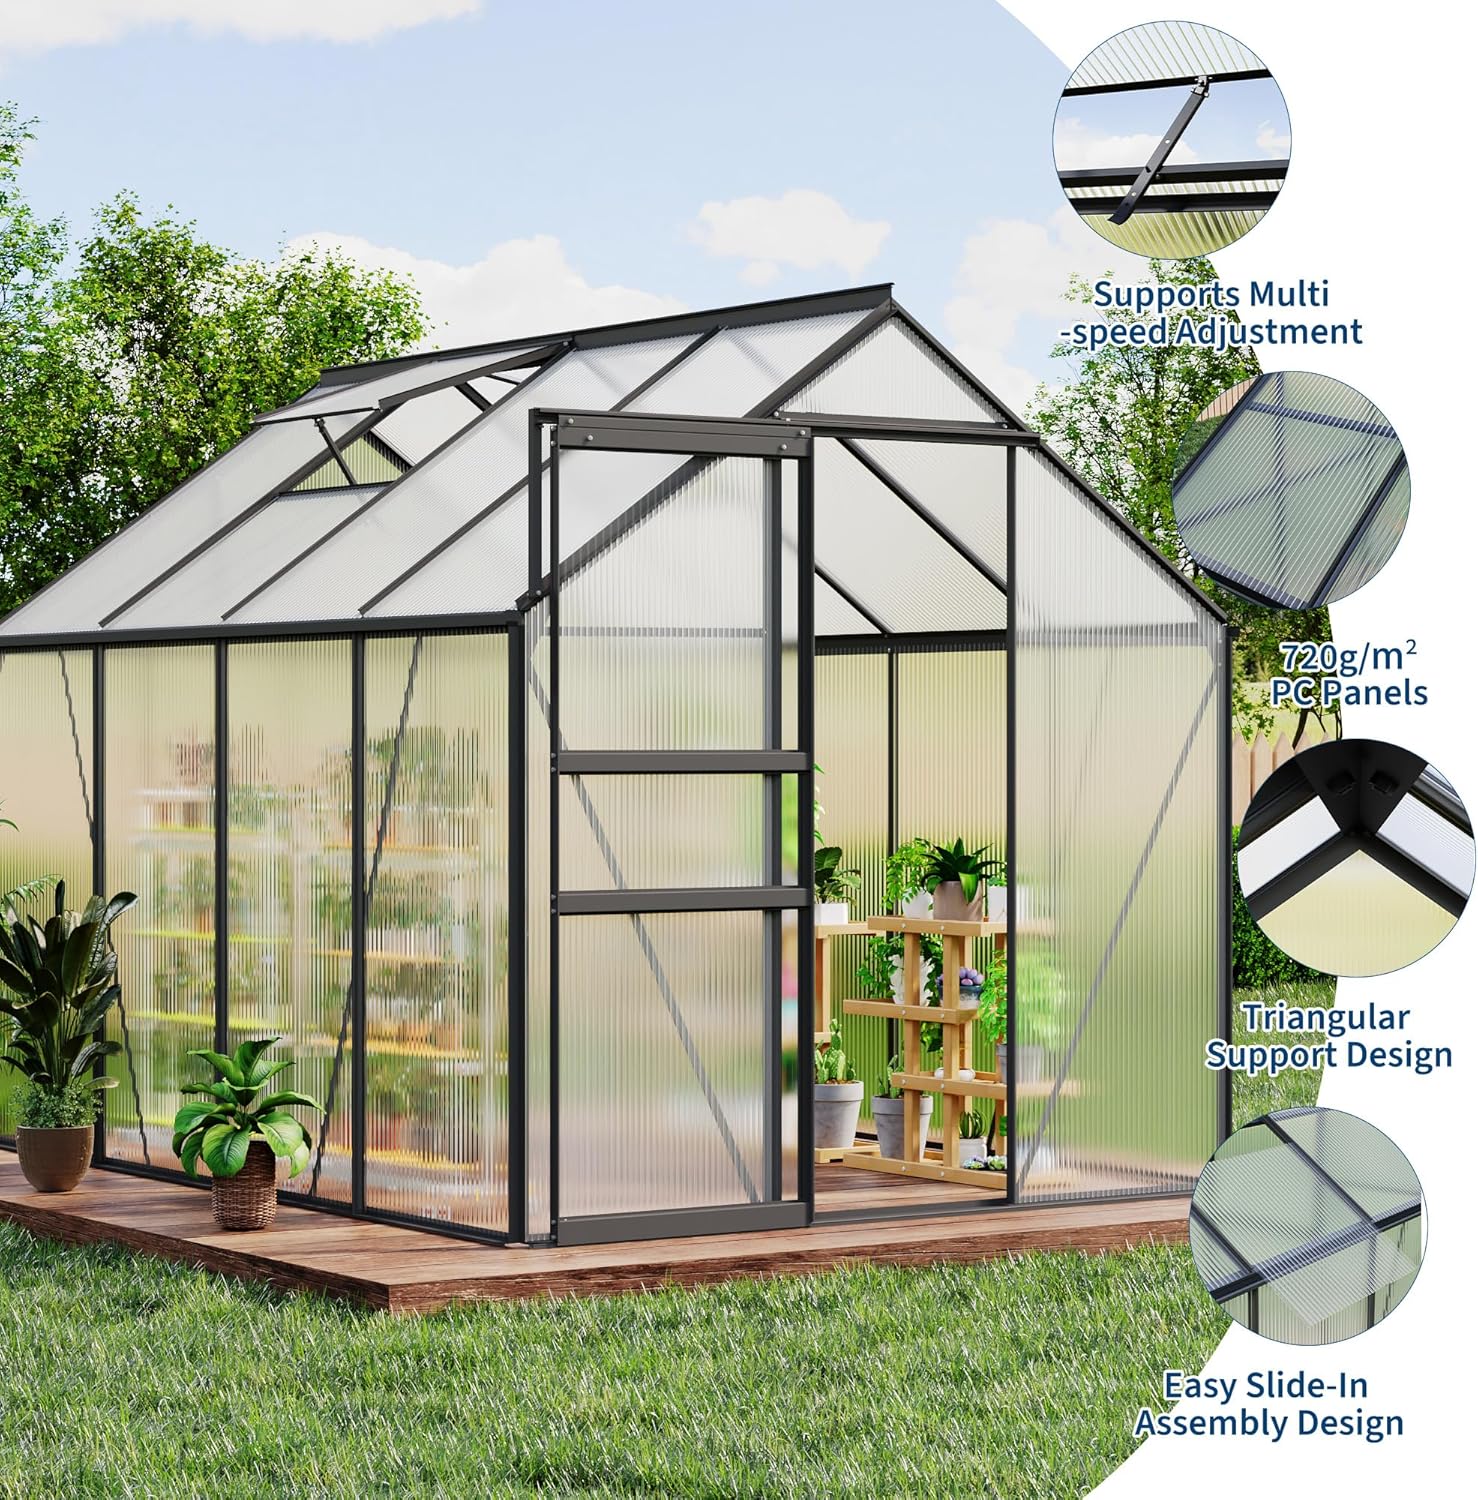
An image highlighting specific design elements of the greenhouse, including the multi-speed adjustable roof vent, the durable 720g/m² polycarbonate panels, the triangular support structure for stability, and the easy slide-in assembly design.
3.5 Anchoring the Greenhouse
- Once the frame is fully assembled, securely anchor the greenhouse to the ground using the provided anchoring hardware. This is crucial for stability, especially in windy conditions.
4. Operating Instructions
4.1 Ventilation Control
The adjustable roof vent allows you to regulate the internal temperature and humidity. Open the vent to increase airflow and reduce heat, and close it to retain warmth. Adjust the vent position based on external weather conditions and the specific needs of your plants.

A detailed view of the adjustable push-open roof window, with arrows indicating airflow, highlighting its function in providing adequate ventilation for the greenhouse interior.
4.2 Sliding Door Operation
The sliding door provides easy access to your greenhouse. Ensure the track is clear of debris for smooth operation. Gently slide the door open or closed as needed.
4.3 Water Management System
The integrated water gutter system along the sides of the greenhouse is designed to collect rainwater. This aids in effective drainage and can be utilized for water collection if desired. Regularly check and clear the gutters of any leaves or debris to ensure proper function.
5. Maintenance
- Cleaning Panels: Clean polycarbonate panels periodically with mild soap and water using a soft cloth or sponge. Avoid abrasive cleaners or brushes that could scratch the surface.
- Frame Inspection: Regularly inspect the aluminum frame for any signs of damage, loose bolts, or corrosion. Tighten any loose fasteners.
- Gutter Maintenance: Keep the water gutter system clear of leaves, dirt, and other debris to ensure proper drainage.
- Door Track: Clean the sliding door track regularly to prevent debris buildup, which can hinder smooth operation.
- Winter Preparation: In areas with heavy snowfall, regularly clear snow from the roof to prevent excessive load. The greenhouse is designed to withstand snow loads up to 150 lbs/ft², but excessive accumulation should be avoided.

The greenhouse standing in a snowy landscape, with snow accumulated on its roof, illustrating its robust construction and ability to withstand snow loads up to 150 lbs/ft². Icons below indicate features like easy setup, windproof, rainproof, and snow protection.
6. Troubleshooting
- Panels Not Fitting:
Solution: Double-check that the frame is square and level. Ensure panels are inserted into the correct channels. If minor trimming is necessary, do so carefully with appropriate tools. - Door Sticking or Not Sliding Smoothly:
Solution: Inspect the door track for any debris (dirt, leaves, small stones) and clean it thoroughly. Ensure the door rollers are free of obstructions. A silicone-based lubricant can be applied to the track if needed. - Water Leakage:
Solution: Check all panel seals and ensure they are properly seated. Inspect the water gutter system for blockages or damage. Ensure all frame connections are tight. - Greenhouse Instability:
Solution: Verify that the greenhouse is securely anchored to the ground as per assembly instructions. Ensure all frame bolts are tightened. Re-check the levelness of the base.
7. Specifications

A technical diagram illustrating the key dimensions of the greenhouse, including height (76.8 inches), width (98 inches), and depth (75.2 inches), along with roof vent and door measurements.
| Feature | Detail |
|---|---|
| Model Number | ssw-PPG_345CYS4P-gaAYr4z |
| Product Dimensions (L x W x H) | 98.43 x 74.8 x 76.77 inches (250 x 190 x 195 cm) |
| Size | 6x8 FT |
| Item Weight | 62.6 pounds (28.4 kg) |
| Frame Material | Alloy Steel (Aluminum) |
| Panel Material | Polycarbonate (720 g/m²) |
| Number of Doors | 1 (Sliding) |
| Number of Vents | 2 (Adjustable Roof Vents) |
| Indoor/Outdoor Usage | Outdoor |
| Color | Black |
| GTIN/UPC | 199913321514 |
8. Warranty and Customer Support
Garvee is committed to providing outstanding support. If you encounter any issues during assembly, operation, or maintenance, or have any questions regarding your greenhouse, please do not hesitate to contact our dedicated customer service team.
Our customer service is available to address your concerns and ensure a satisfying experience with your product.
- Contact Information: Please refer to the contact details provided in your purchase documentation or on the Garvee official website.
- Warranty: Information regarding product warranty coverage can be found in your purchase details or by contacting customer support.


