1. Important Safety Instructions
Read all instructions before using this appliance. Failure to follow these instructions may result in electric shock, fire, or serious injury.
- Always unplug the air purifier before moving, cleaning, or performing any maintenance.
- Do not operate the air purifier if the power cord or plug is damaged.
- Keep the air purifier away from water or other liquids.
- Ensure proper ventilation around the unit. Do not block air inlets or outlets.
- This appliance is not intended for use by persons (including children) with reduced physical, sensory, or mental capabilities, or lack of experience and knowledge, unless they have been given supervision or instruction concerning use of the appliance by a person responsible for their safety.
- Children should be supervised to ensure that they do not play with the appliance.
- Use only DAYETTE official replacement filters.
2. Product Overview
The DAYETTE AP309 Air Purifier is designed to improve indoor air quality by filtering various airborne particles and odors. It features an H14 HEPA filter, washable pre-filter, aromatherapy function, AQI display, and multiple operating modes.

Figure 2.1: Front view of the DAYETTE AP309 Air Purifier.
2.1 Components
- Main Unit
- H14 True HEPA 4-Stage Original Filter (Pre-Installed)
- Power Cord
2.2 Control Panel Overview

Figure 2.2: Control panel with Sleep, Auto, and Pet Modes, and fan speed indicators.
The control panel features a PM2.5 display, mode indicators (Sleep, Auto, Pet), fan speed settings (1, 2, 3), power button, timer, and child lock.
3. Setup and Installation
- Unpack the Air Purifier: Carefully remove the air purifier from its packaging.
- Remove Filter Packaging: Open the back cover of the air purifier. The H14 True HEPA 4-Stage Original Filter is pre-installed but may have protective plastic packaging. Remove all packaging from the filter before use.
- Install Filter: Insert the filter back into the unit with the front facing forward. Close the back cover securely.
- Placement: Place the air purifier on a flat, stable surface. Ensure there is adequate space around the unit for optimal airflow (at least 6 inches from walls or furniture).
- Power Connection: Plug the power cord into a standard electrical outlet.

Figure 3.1: Filter removal and installation process.
4. Operating Instructions
4.1 Power On/Off
- Press the Power button to turn the unit on or off.
- Upon powering on, the unit will display the current PM2.5 level and start in Auto Mode.
4.2 Fan Speed Adjustment
- Press the Fan Speed button to cycle through fan speeds: 1 (Low), 2 (Medium), 3 (High).
4.3 Operating Modes
The air purifier offers several modes for different needs:
- Auto Mode: The unit automatically adjusts fan speed based on real-time air quality detected by the PM2.5 sensor.

Figure 4.1: Auto Mode adjusts fan speed based on air quality.
- Sleep Mode: Reduces fan speed to the lowest setting (22dB) and turns off display lights for quiet operation during sleep. Press the Sleep Mode button to activate.
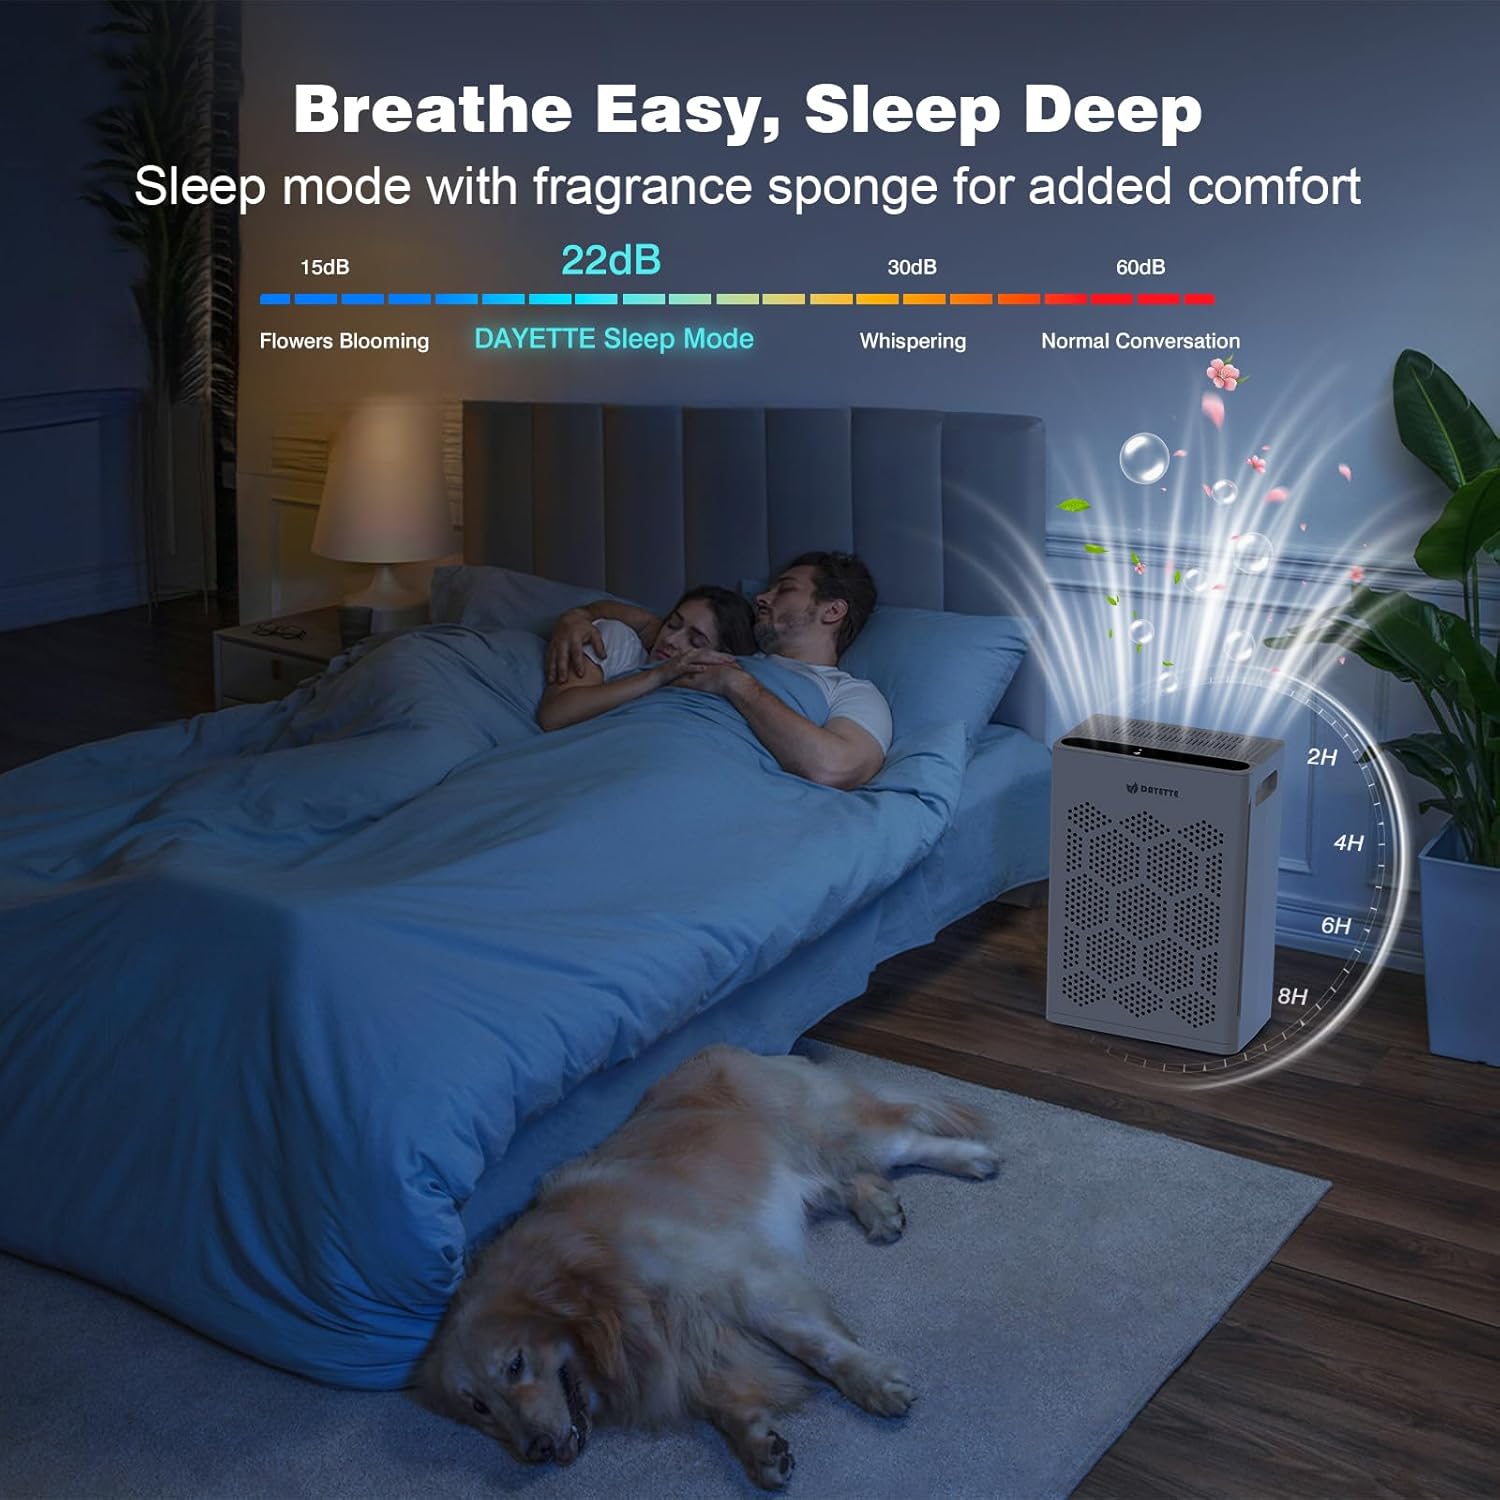
Figure 4.2: Sleep Mode provides quiet operation.
- Pet Mode: Optimized for homes with pets, this mode enhances filtration to capture pet hair and dander more effectively. Press the Pet Mode button to activate.

Figure 4.3: Pet Mode for enhanced pet dander and odor removal.
4.4 Timer Function
- Press the Timer button to set the operating time for 2, 4, 6, or 8 hours. The unit will automatically turn off after the set time.

Figure 4.4: Timer function for scheduled operation.
4.5 Child Lock
- Press and hold the Child Lock button for 3 seconds to activate or deactivate the child lock. When active, other buttons will not respond to prevent accidental adjustments.
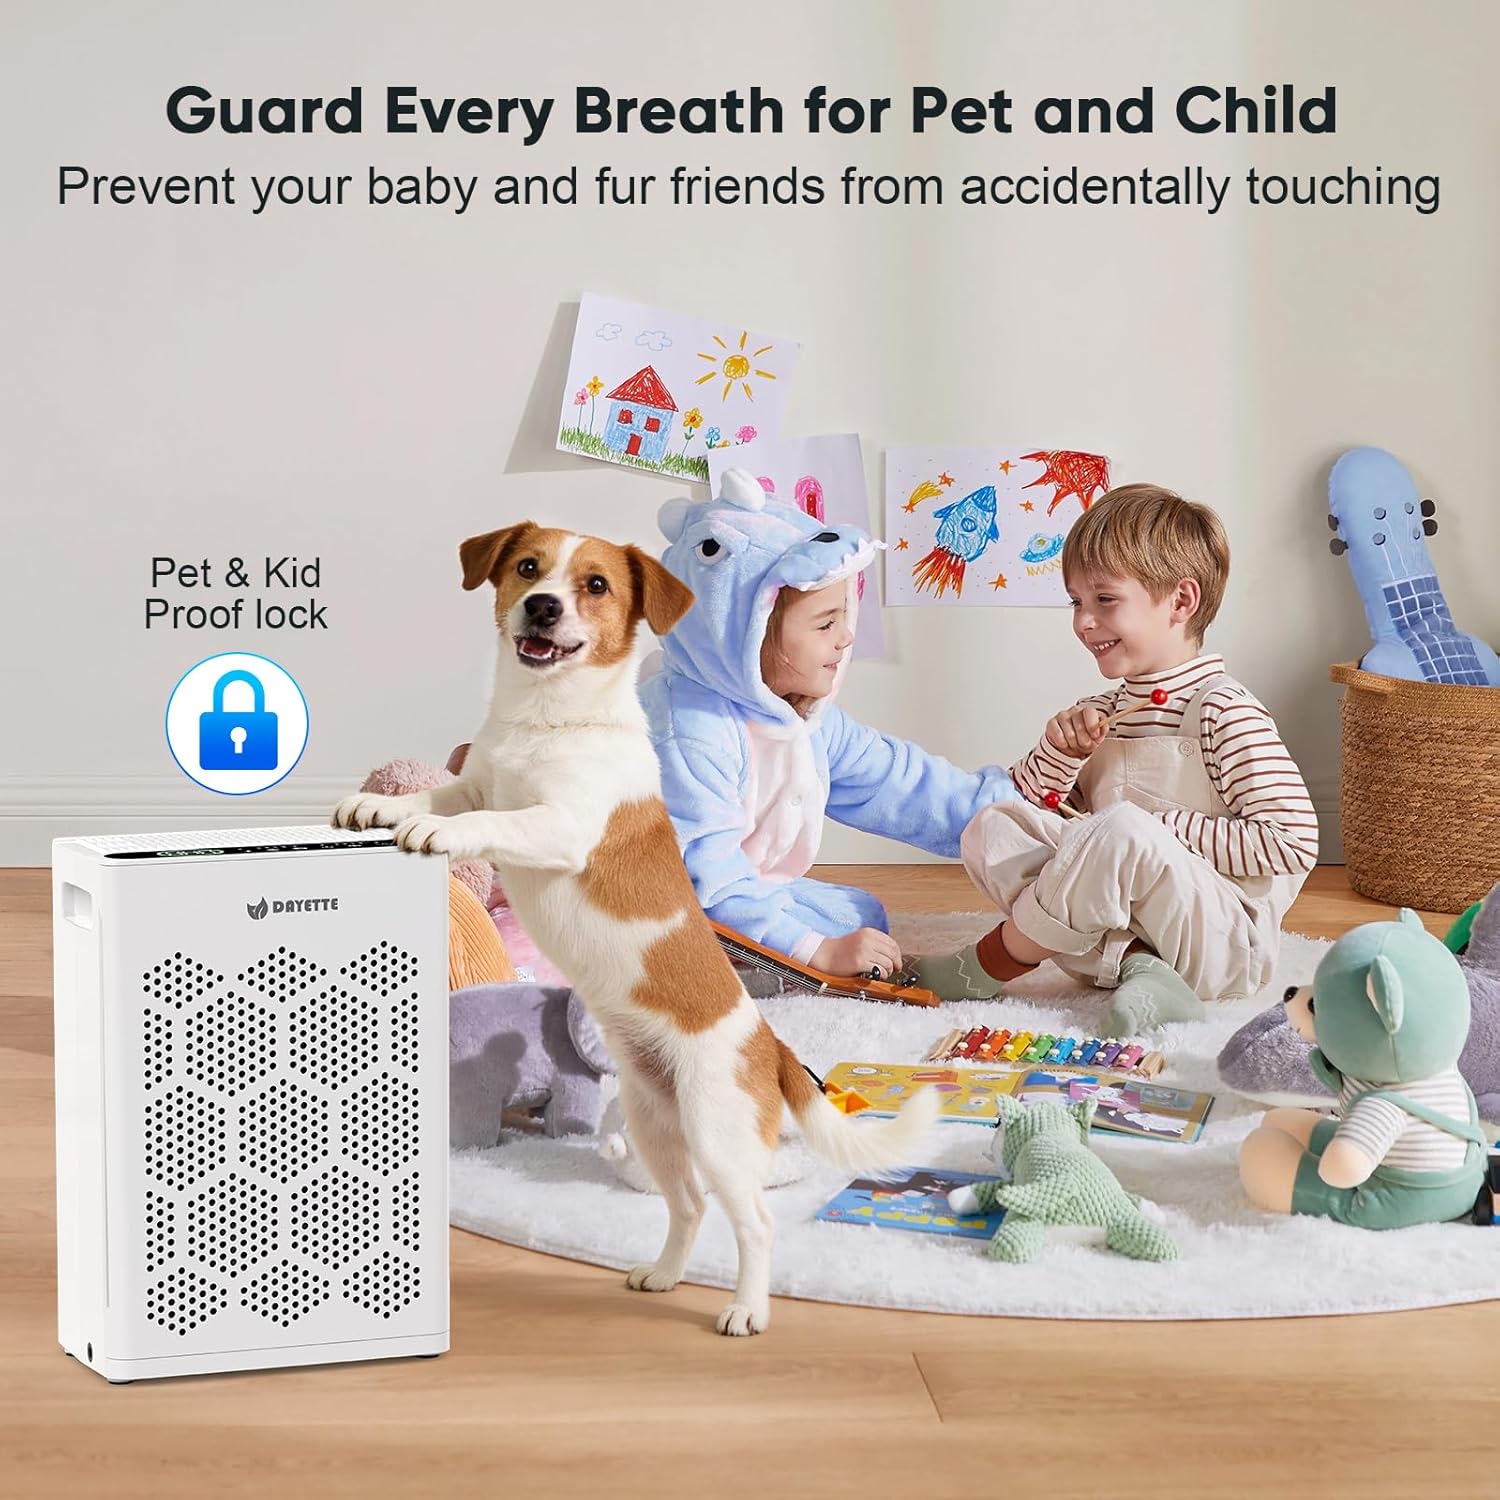
Figure 4.5: Child Lock prevents unintended changes to settings.
4.6 Aromatherapy Function
- Locate the aromatherapy pad on the unit. Add 6-10 drops of your preferred essential oil to the pad. The air purifier will diffuse the scent as it operates.

Figure 4.6: Adding essential oils for aromatherapy.
5. Maintenance
Regular maintenance ensures optimal performance and extends the lifespan of your air purifier.
5.1 Filter Replacement
- The Filter Reset Light will illuminate after approximately 3-6 months of use, indicating it's time to replace the filter.
- To Replace:
- Unplug the air purifier.
- Open the back cover.
- Remove the old filter.
- Insert a new H14 True HEPA 4-Stage Original Filter (ensure plastic wrap is removed and the front faces forward).
- Close the back cover.
- Turn on the purifier, then press and hold the Filter Reset Light button for 3-5 seconds until the light turns off.
Figure 5.1: Filter replacement steps.
Note: Use only genuine DAYETTE official replacement filters for optimal performance.

Figure 5.2: Genuine DAYETTE replacement filters.
5.2 Washable Pre-Filter Cleaning
- The pre-filter can be cleaned to extend its lifespan.
- To Clean:
- Unplug the air purifier and remove the filter assembly.
- Gently remove the washable pre-filter.
- Clean the pre-filter with a vacuum cleaner or rinse it with soapy water.
- Ensure the pre-filter is completely dry before re-installing it.

Figure 5.3: Cleaning the washable pre-filter.
5.3 Exterior Cleaning
- Wipe the exterior of the air purifier with a soft, dry cloth.
- Do not use abrasive cleaners or solvents.
6. Troubleshooting
| Problem | Possible Cause | Solution |
|---|---|---|
| Unit does not turn on. |
|
|
| Airflow is weak or noisy. |
|
|
| Odor persists. |
|
|
| PM2.5 display shows high numbers despite operation. |
|
|
7. Specifications
| Feature | Detail |
|---|---|
| Model Number | AP309 |
| Product Dimensions | 5 x 12 x 15 inches |
| Item Weight | 5 Pounds |
| Power Source | AC/DC |
| Control Method | Touch Panel |
| Filter Type | H14 HEPA |
| Floor Area Coverage | Up to 2400 Square Feet |
| Noise Level | 22 Decibels (Sleep Mode) |
| Particle Retention Size | 0.1 Micron |
| Wattage | 36 watts |
| Contaminant Filtration | Dust, PM2.5, Pet Dander, Pet Hair, Pollen, Smoke |
| Special Features | 22dB Quiet Operation, 2400 Sq Ft Coverage, PM2.5 Air Quality Display, Smart Auto Mode, True H14 HEPA Filter, Aromatherapy, Pet Mode, Timer, Child Lock |
| Certifications | CARB Certified |
8. Warranty and Support
For warranty information, technical support, or to purchase replacement filters, please contact DAYETTE customer service or visit the official DAYETTE website.
- Customer Service: Refer to your product packaging or the official DAYETTE website for contact details.
- Replacement Filters: Ensure to use genuine DAYETTE filters for optimal performance and to maintain warranty validity.


