Vevitts 136 Eggs Incubator
Vevitts 136 Eggs Automatic Egg Incubator User Manual
Model: 136 Eggs Incubator
Brand: Vevitts
1. Introduction
This manual provides detailed instructions for the safe and efficient operation of your Vevitts 136 Eggs Automatic Egg Incubator. Please read all instructions carefully before use to ensure optimal performance and successful hatching results. This incubator is designed for hatching various poultry eggs, including chicken, duck, goose, quail, and pigeon eggs.
2. Safety Information
Always follow basic safety precautions when using electrical appliances. Keep the incubator away from water sources and ensure it is placed on a stable, level surface. Do not operate the incubator with damaged cords or plugs. Disconnect power before cleaning or performing maintenance. Keep out of reach of children and pets.
3. Components Overview
Familiarize yourself with the main components of your incubator:
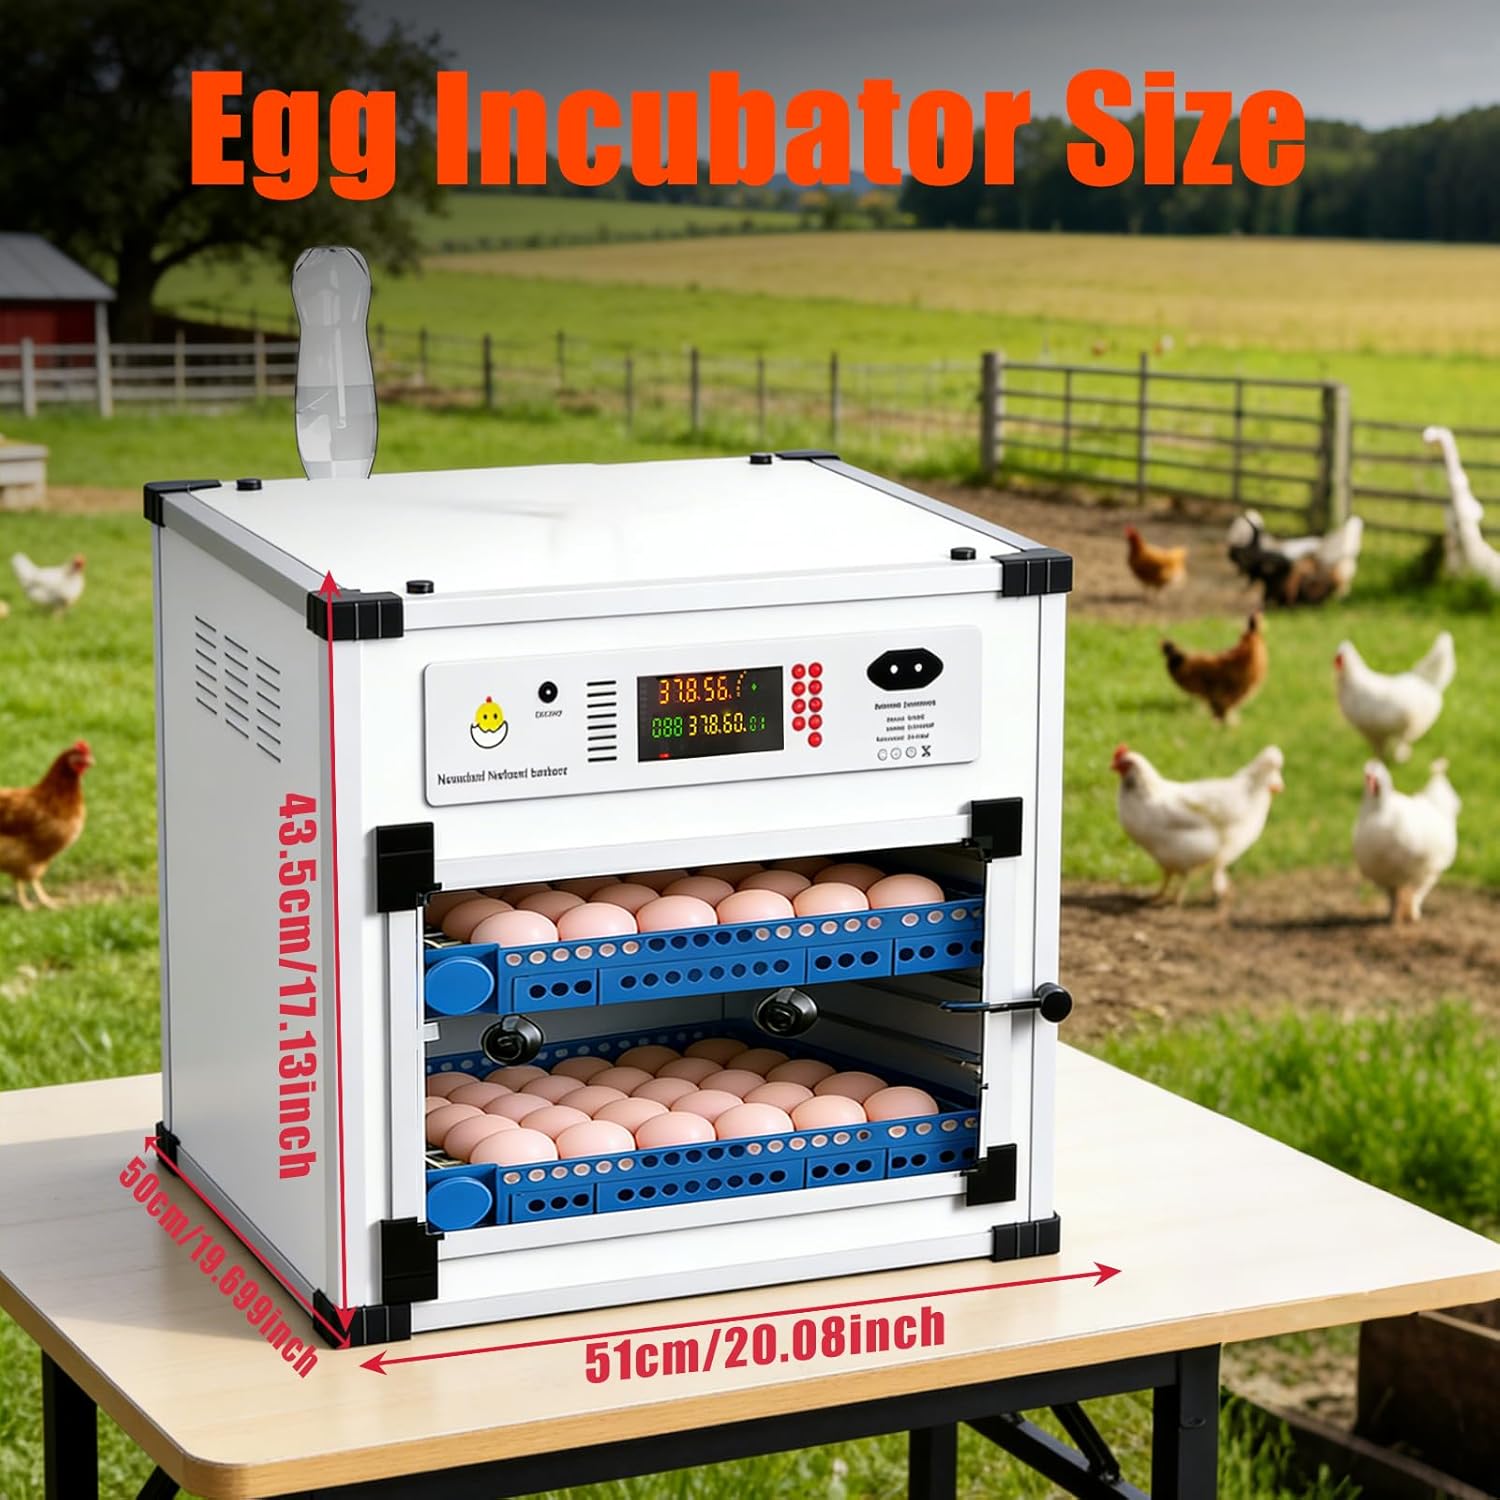
Figure 1: Exploded view of the Vevitts 136 Eggs Automatic Egg Incubator components. This diagram illustrates the various parts including the heating fans, control panel, egg rollers, hatching pad, and water system components.
- Control Panel: Digital display for temperature, humidity, and incubation day, with control buttons.
- Heating Fans: Dual fans for uniform temperature distribution.
- Egg Rollers/Trays: Automatic egg turning mechanism with adjustable cradle gaps.
- Hatching Pad: Located at the bottom for the final hatching stage.
- Vent Hole: For internal and external air circulation.
- External Water Refill System: Allows adding water without opening the incubator.
- Humidity Sensor: Monitors internal humidity levels.
- Transparent Window: For non-intrusive monitoring of eggs.
- Rubber Corner Protectors: For stacking multiple units safely.
4. Setup
4.1 Unpacking and Placement
- Carefully remove all components from the packaging.
- Place the incubator on a stable, level surface in a room with a consistent ambient temperature, away from direct sunlight, drafts, or extreme temperature fluctuations.
- Remove the protective film from the transparent window.
4.2 Assembly of Egg Trays and Wiring
Insert the egg rollers into the blue trays. Connect the wiring for the egg turning mechanism. The bottom tray will have an extra connector for expanding to additional trays if applicable. Ensure all connections are secure.
4.3 Power Connection
- Connect the AC power cord to a standard electrical outlet.
- The incubator also features a DC 12V input for backup power. In case of a power outage, you can connect a 12V battery (not included) using the provided wires to maintain operation.
4.4 Initial Water Filling
Locate the rear external water system. Use an empty water bottle (not included) to fill the water channels. This system allows for hassle-free refilling without opening the incubator, helping to maintain stable humidity and conserve energy.
5. Operating Instructions
5.1 Control Panel Functions
The intuitive digital control panel displays real-time temperature (TEMP), humidity (HUM), and incubation day (DAY). It features the following buttons:
- Temp (Temperature): Adjusts the target temperature.
- Humid (Humidity): Adjusts the target humidity.
- Func (Function): Cycles through various settings.
- Mode: Selects preset incubation modes for different poultry types.
- Up/Down Arrows: Adjust values for temperature and humidity.
- Reset: Resets settings or alarms.
- Egg Turning: Manually activates the automatic egg turning mechanism.
- Lighting: Controls internal lighting for observation.
5.2 Selecting Egg Type (Preset Modes)
The incubator offers preset settings for common poultry eggs. To select a mode:
- Press and hold the Mode button for approximately 5 seconds.
- The display will cycle through different poultry icons (chicken, duck, goose, quail, pigeon).
- Release the Mode button when the desired poultry icon is displayed. The incubator will automatically adjust temperature and humidity settings to the recommended levels for that egg type.
5.3 Manual Temperature and Humidity Adjustment
While preset modes are convenient, you can manually fine-tune settings:
- Press the Temp button, then use the Up/Down arrows to set the desired temperature.
- Press the Humid button, then use the Up/Down arrows to set the desired humidity.
5.4 Automatic Egg Turning
The incubator features an integrated automatic egg turner that rotates eggs every 1.5 hours for 13 seconds. This prevents embryo adhesion and ensures even heating. To manually activate the egg turning for inspection, press the Egg Turning button.

Figure 2: Internal view showing the dual fan ultrasonic humidifier for uniform temperature and humidity.
5.5 Egg Placement and Capacity
The adjustable cradle gaps on the egg trays ensure a secure fit for various egg sizes. The incubator can accommodate up to 136 chicken eggs. Arrange eggs carefully to allow for proper turning.
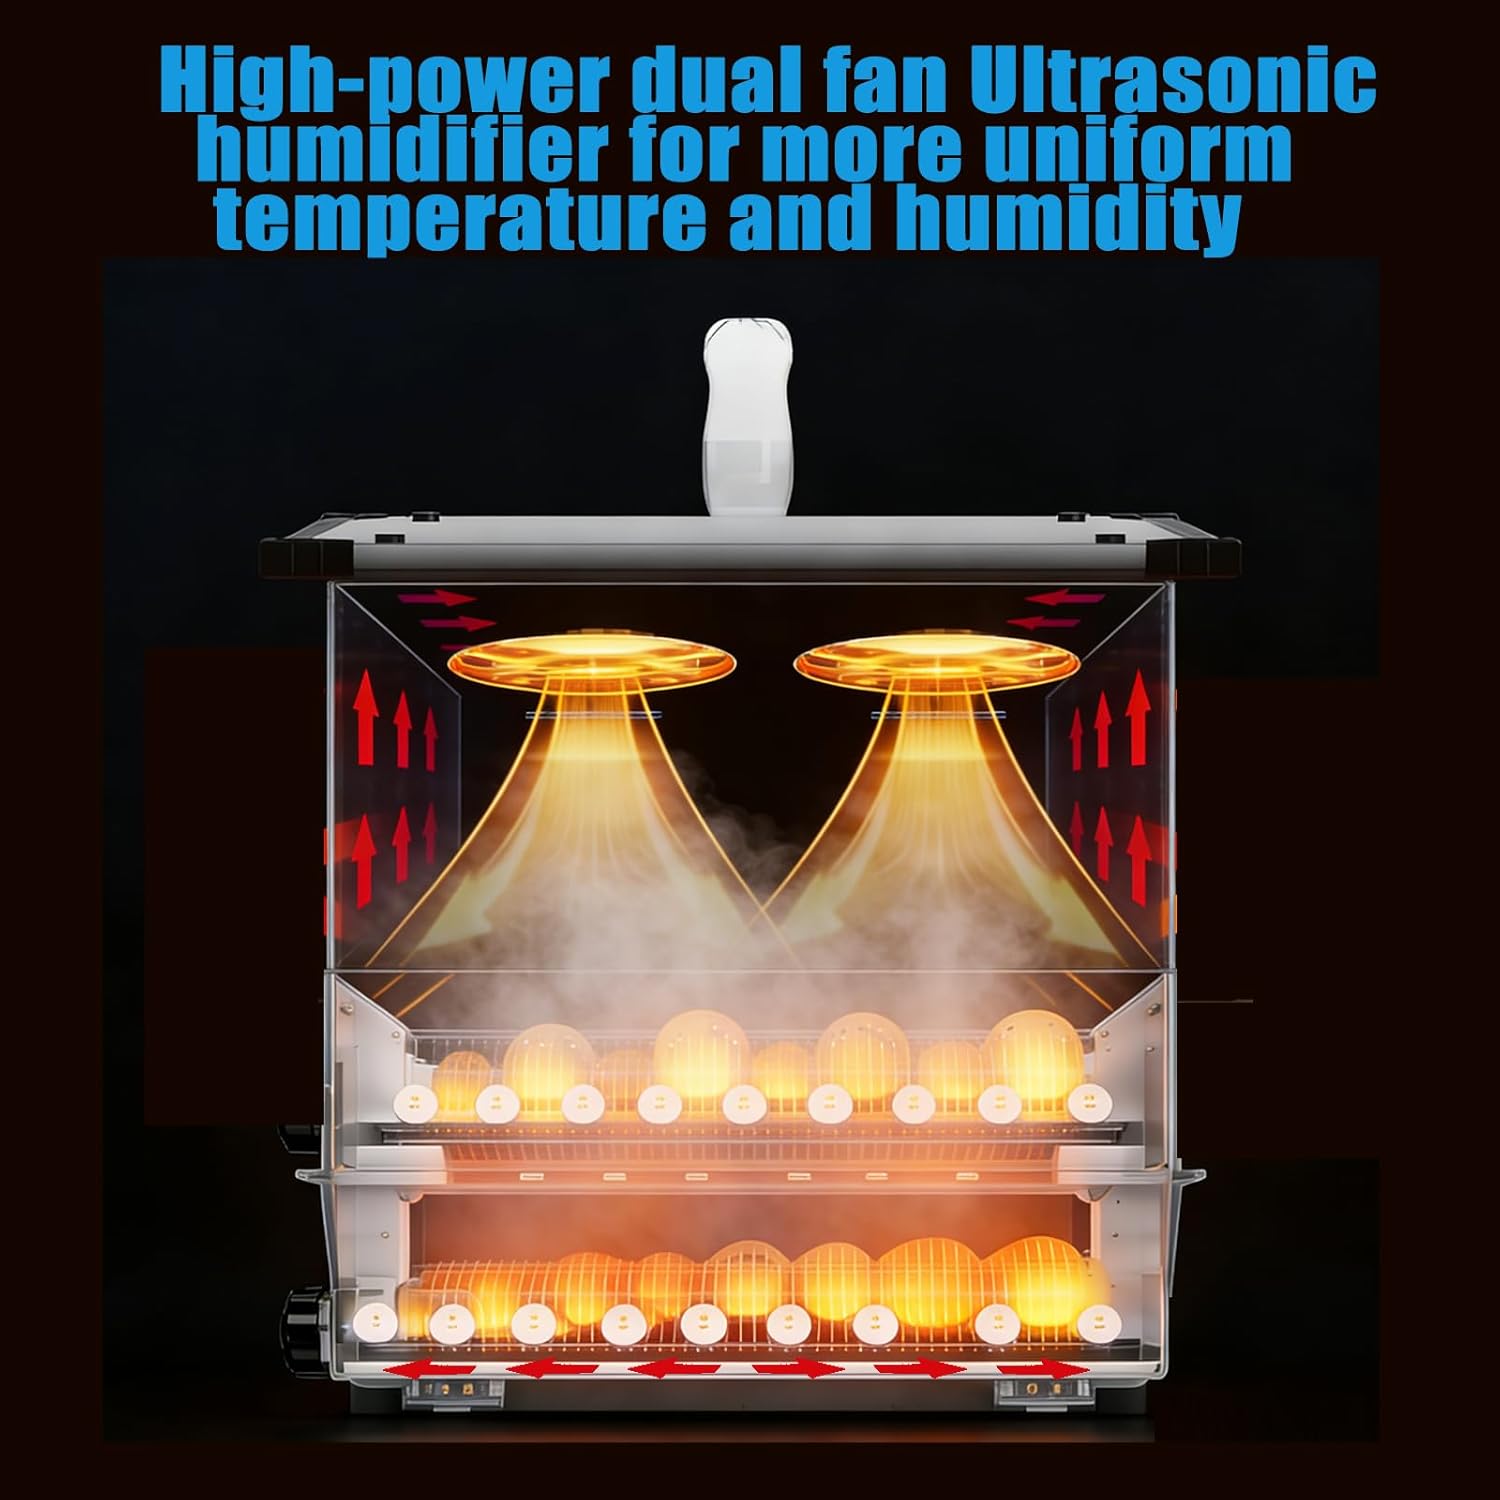
Figure 3: Adjustable egg trays for different egg sizes, accommodating quail, partridge, pheasant, chicken, duck, and goose eggs.
6. Maintenance
6.1 Cleaning
The incubator features a smooth interior for easy and hygienic cleaning. After each hatch, disconnect power and clean all surfaces with a mild disinfectant solution. Ensure all parts are dry before reassembly or storage.
6.2 Humidity Sensor
Ensure the humidity sensor is properly positioned, hanging freely from the top of the incubator, not flush against the ceiling, to ensure accurate readings.

Figure 4: Key features including the vent hole, rolling egg tray, transparent window, and rubber corner protectors.
7. Troubleshooting
7.1 Alarm System
The intelligent alarm system will alert you to deviations from preset parameters. If an alarm sounds, check the display for the specific alert (e.g., temperature too high/low, humidity too high/low). A beeping sound also indicates if the incubator door is open, prompting you to close it to maintain stable conditions.
7.2 Power Interruption
In the event of a power outage, the incubator can be connected to a 12V DC battery using the provided cables to ensure continuous operation and protect your eggs.
8. Specifications
| Feature | Detail |
|---|---|
| Model Number | 136 Eggs Incubator |
| Capacity | Up to 136 Chicken Eggs (varies by egg size) |
| Automatic Egg Turning | Yes (every 1.5 hours for 13 seconds) |
| Temperature Control | Digital |
| Humidity Control | Digital with External Refill System |
| Power Input | AC (standard), DC 12V (backup) |
| Material | Polypropylene (PE) |
| Item Weight | 32 pounds |
| Package Dimensions | 22.5 x 22.5 x 20 inches |
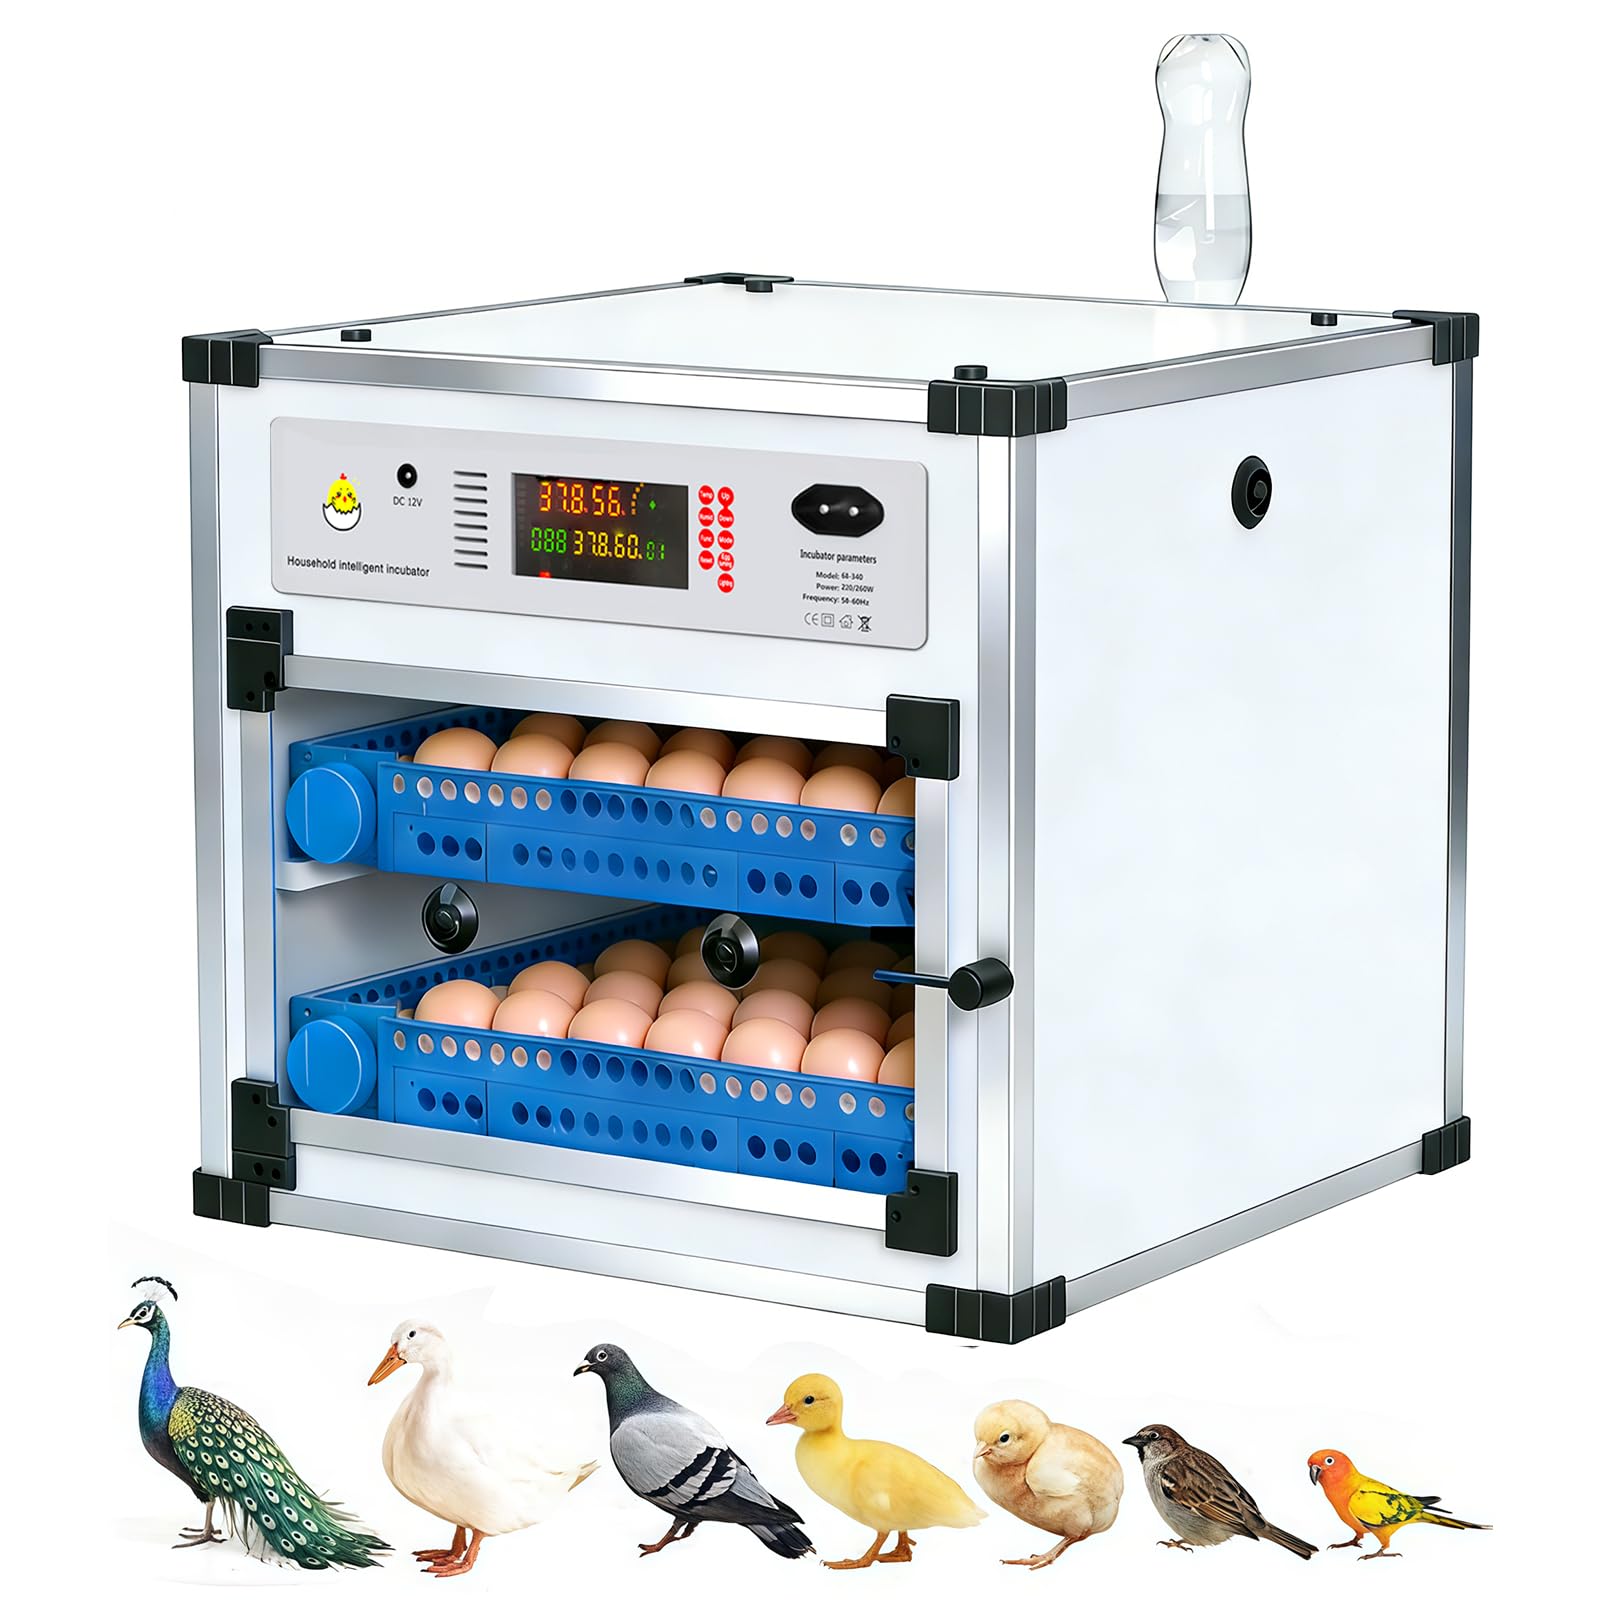
Figure 5: Vevitts 136 Eggs Automatic Egg Incubator with approximate dimensions.
9. Warranty and Support
Specific warranty and customer support details are not provided in the product information. Please refer to the retailer or manufacturer's website for the most current warranty information and contact details for technical support.
Ask a question about this manual
Ask about setup, troubleshooting, compatibility, parts, safety, or missing instructions. Manuals+ will review the question and use this page’s manual context to help answer it.