
1. Introduction
The YKASEK R40 is a portable retro handheld game console designed to provide a wide range of classic gaming experiences. Featuring an open-source system, a 3.5-inch IPS screen, and a large library of pre-installed games, it offers versatile entertainment on the go. This manual provides essential information for setting up, operating, maintaining, and troubleshooting your R40 console.
2. Package Contents
Verify that all items listed below are included in your package:
- R40 Handheld Game Console x1
- Storage Case x1
- Thumb Joysticks x4
- 128GB TF Card x1 (pre-installed or separate)
- Type-C Charging Cable x1
- User Manual x1

Image: YKASEK R40 console and included accessories, showing the console, carry case, charging cable, and joystick caps.
3. Product Overview
The R40 console features a compact design with a clear 3.5-inch IPS screen. It is equipped with a dual-core 1.2GHz processor for smooth operation and includes a 128GB TF card for game storage, expandable via an additional TF card slot. The built-in 3000mAh battery provides extended playtime.
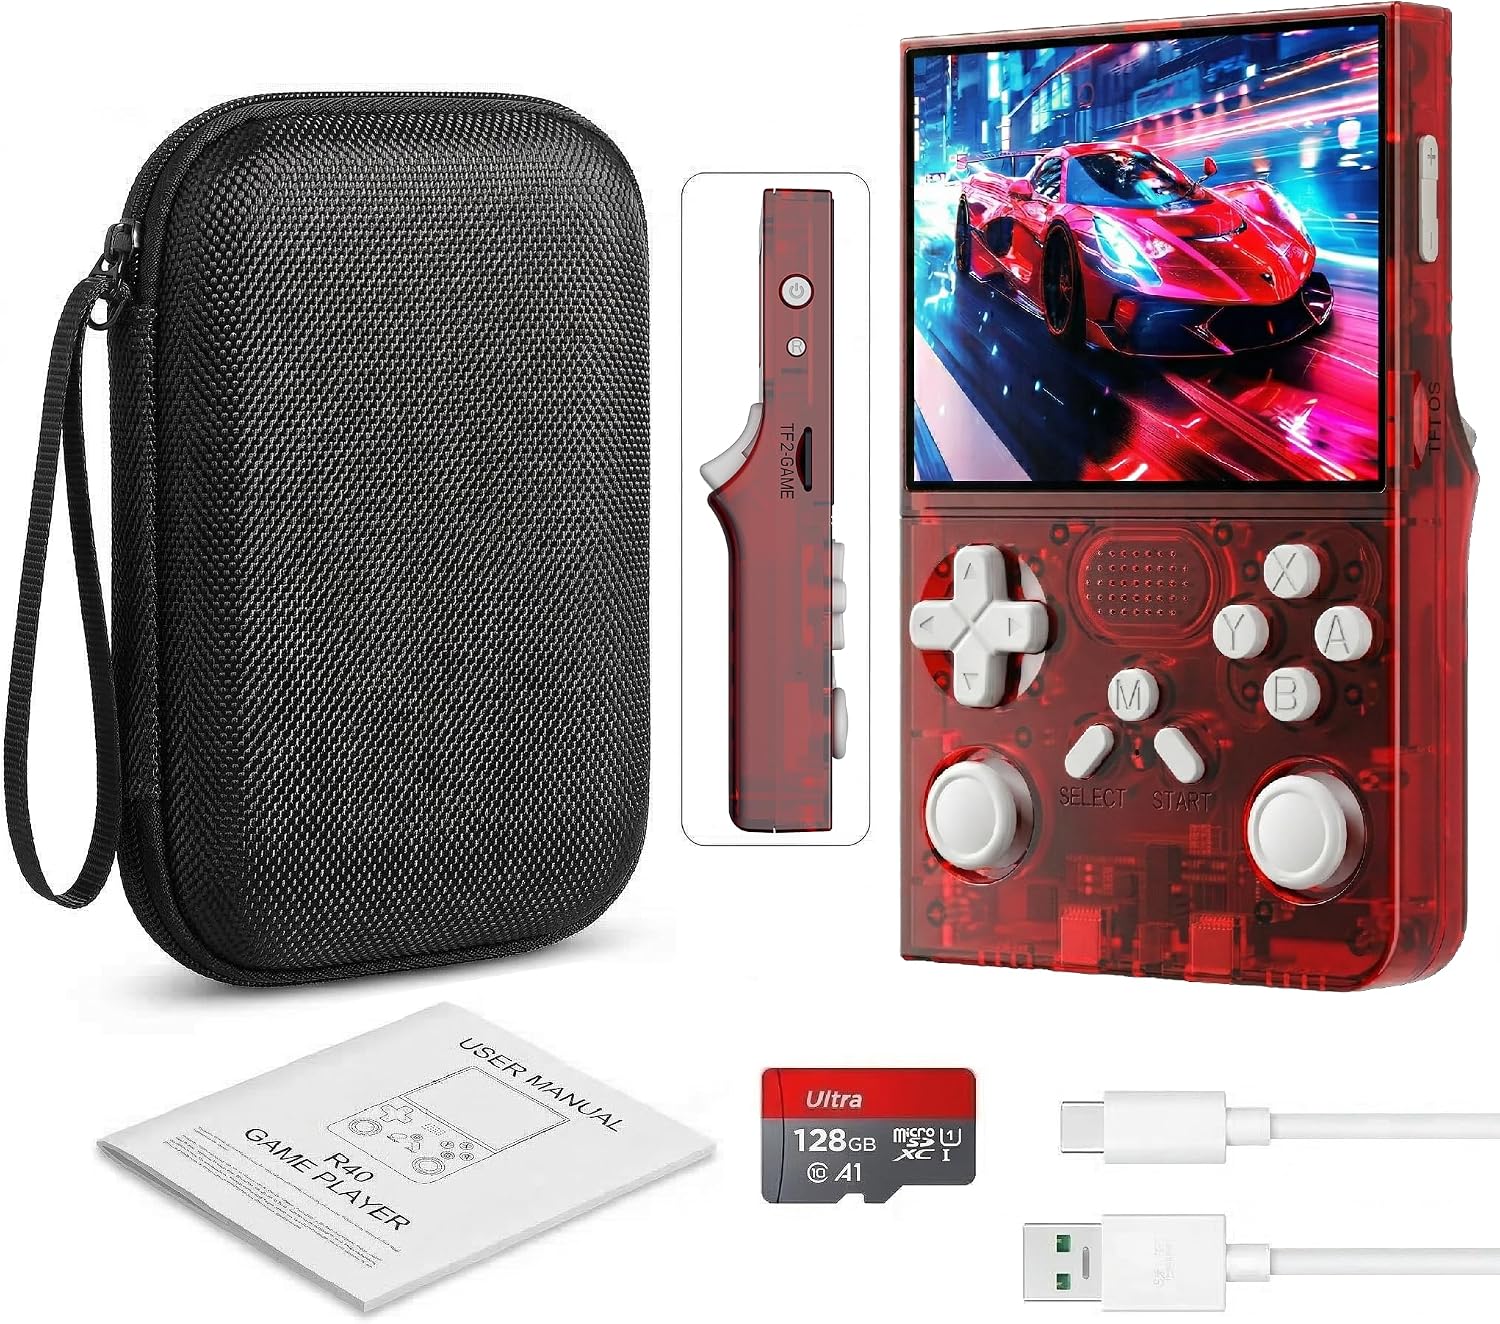
Image: Front view of the YKASEK R40 console, detailing its 3.5-inch IPS full screen, 128GB storage capacity, dual-core 1.2G processor, and 3000mAh battery.
3.1. Ports and Connectivity
The console includes a Type-C OTG port for data transfer and reverse charging. This port also allows connection to larger screens, such as TVs and projectors, using a compatible HD interface adapter.

Image: Side view of the YKASEK R40 console, illustrating the Type-C OTG port and its functions for data transfer and reverse charging.
3.2. Built-in Simulators
The R40 supports dozens of built-in simulators, enabling compatibility with a wide variety of classic game titles from different platforms.

Image: Front view of the YKASEK R40 console, emphasizing its capability to run various built-in simulators for classic games.
4. Setup
4.1. Charging the Console
Before first use, fully charge the console. Connect the provided Type-C charging cable to the console's Type-C port and the other end to a compatible USB power adapter (not included) or a computer's USB port. The charging indicator will typically show the charging status and turn off or change color when fully charged. A full charge provides approximately 5-7 hours of gameplay.
4.2. Inserting/Removing TF Card
The console comes with a 128GB TF card pre-installed, containing over 18,000 games. To insert or remove a TF card, gently push the card into its slot until it clicks into place. To remove, push it again until it springs out. Ensure the console is powered off before inserting or removing the TF card to prevent data corruption.
4.3. Powering On/Off
To power on the console, press and hold the power button for a few seconds until the screen illuminates. To power off, press and hold the power button again until the shutdown options appear, then select 'Power Off' or continue holding until the device shuts down completely.
4.4. Connecting to an External Display (Type-C OTG)
To connect the R40 to a larger screen, such as a TV or projector, you will need a Type-C OTG to HD interface adapter (not included). Connect the adapter to the console's Type-C port, then connect an HD cable from the adapter to your external display. Select the appropriate input source on your display.
5. Operating Instructions
5.1. Navigating the Interface
Use the directional pad (D-pad) or analog joysticks to navigate through menus and select options. The 'A' button typically confirms selections, while the 'B' button usually cancels or goes back. The 'SELECT' and 'START' buttons have various functions depending on the menu or game.
5.2. Playing Games
From the main menu, select the desired emulator or game list. Browse through the available games and press the 'A' button to launch a game. To exit a game and return to the main menu, simultaneously press the 'SELECT' and 'START' buttons. A menu will appear, allowing you to exit the game or access emulator-specific options.
5.3. Saving and Loading Game Progress
Many games support in-game saving mechanisms. Additionally, the console's emulator system often provides 'save state' and 'load state' functions. To access these, press 'SELECT' + 'START' simultaneously during gameplay to bring up the emulator menu. From this menu, you can typically save your current game progress (save state) or load a previously saved state. It is recommended to use both in-game saves and save states for critical progress.
5.4. Customizing Controls
Due to the variety of emulators and games, default button mappings may not always be optimal. Within the emulator menu (accessed by 'SELECT' + 'START' during gameplay), you can usually find options to remap controls for the specific emulator or even for individual games. Refer to the emulator's settings for detailed instructions on control customization.
5.5. Adding/Removing Games
The open-source nature of the system allows for adding more games. To add games, connect the TF card to a computer and transfer compatible game ROMs to the appropriate emulator folders on the card. To remove games, delete the corresponding ROM files from the TF card. Ensure ROMs are legally obtained.
6. Maintenance
6.1. Cleaning
Use a soft, dry cloth to clean the console's exterior. For the screen, use a microfiber cloth specifically designed for electronics. Avoid using harsh chemicals or abrasive materials, as these can damage the finish or screen.
6.2. Storage
When not in use, store the R40 console in the provided carry case to protect it from dust, scratches, and minor impacts. The case features a soft lining and a rigid exterior for optimal protection.

Image: The YKASEK R40 console securely placed inside its protective carry case.
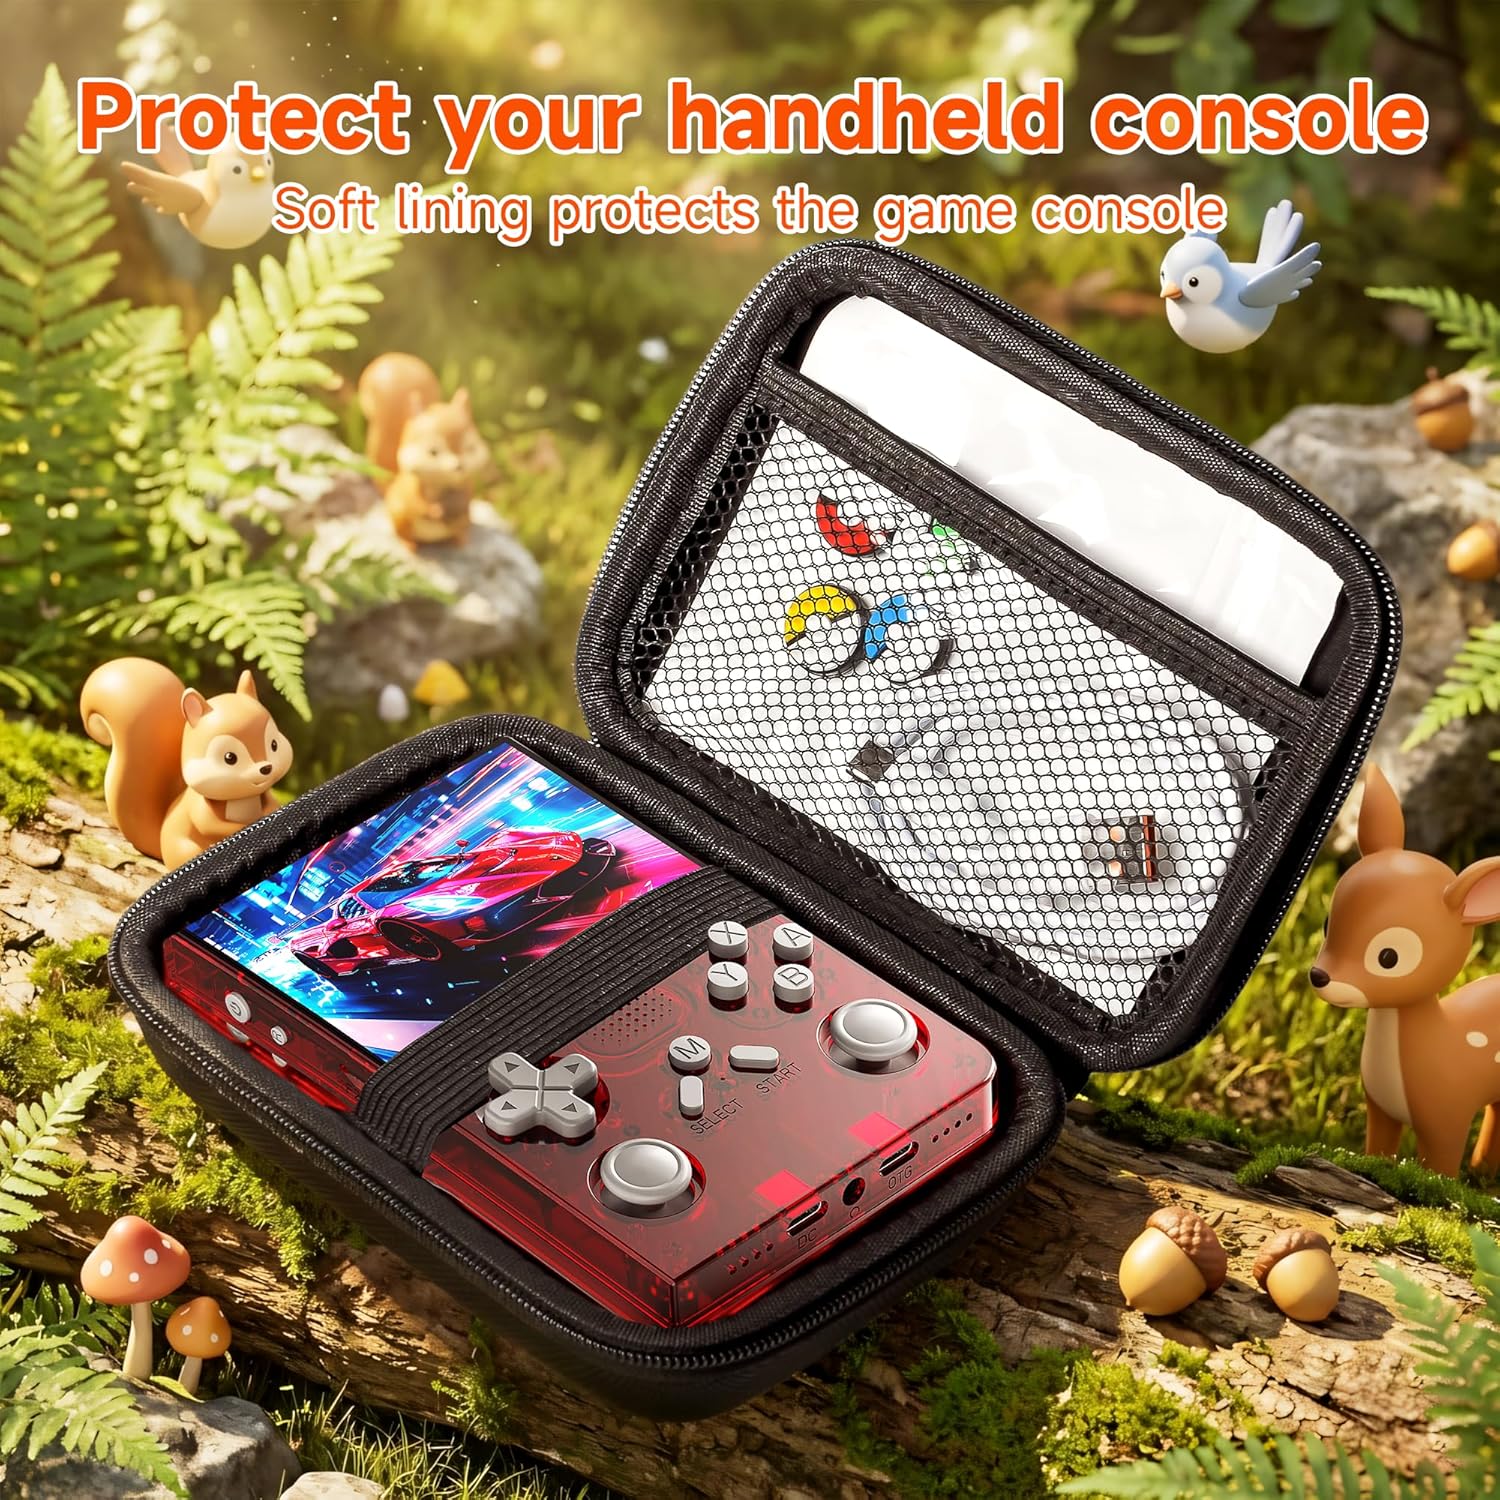
Image: Interior view of the YKASEK R40 carry case, highlighting its soft lining and mesh pocket for accessories.
The carry case is also made from waterproof fabric, offering protection against splashes.

Image: The YKASEK R40 carry case on a wet surface, illustrating its waterproof fabric construction.
7. Troubleshooting
- Console does not power on: Ensure the battery is charged. Connect the console to a power source using the Type-C cable and allow it to charge for at least 30 minutes before attempting to power on again.
- Cannot save game progress: Some games have specific in-game save mechanisms. For emulator-based saves, press 'SELECT' + 'START' during gameplay to access the emulator menu and use the 'Save State' function. Ensure the TF card is properly inserted and has sufficient free space.
- Controls are not working correctly or are awkward: Button mappings can vary between emulators and games. Access the emulator menu ('SELECT' + 'START' during gameplay) and navigate to the control settings to remap buttons as needed for optimal play.
- Games run slowly or lag (especially N64 titles): Some more demanding 3D games, particularly from platforms like Nintendo 64, may experience occasional performance slowdowns due to emulation limitations. Ensure no background processes are running if applicable.
- Cannot find specific games: The console has a search function within its interface. If a game is not found, verify that the game ROM is correctly placed in the appropriate emulator folder on the TF card.
8. Specifications
| Model | R40 |
| Screen Size | 3.5 inches IPS |
| Processor | Dual-core 1.2GHz |
| Memory Storage Capacity | 128 GB (TF card included) |
| Battery | 3000mAh Nonstandard Battery (included) |
| Battery Life | Approx. 5-7 hours |
| Charging Port | Type-C |
| Product Dimensions | 15.75 x 10.67 x 3.3 cm |
| Weight | 370 g |
| Controller Type | Joystick |

Image: Diagram illustrating the physical dimensions of the YKASEK R40 console and its accompanying carry case.
9. Warranty and Support
For warranty information, technical support, or service inquiries, please refer to the contact information provided with your purchase or visit the official YKASEK website. Keep your proof of purchase for warranty claims.