1. Introduction
Thank you for choosing the Devoko L-Shaped Corner Desk. This manual provides essential information for the safe assembly, operation, and maintenance of your new desk. Designed for both office and gaming environments, this desk features a spacious L-shaped work surface, integrated LED lighting, built-in power outlets with USB ports, an ergonomic monitor stand, and convenient storage drawers. Please read these instructions carefully before assembly and retain them for future reference.
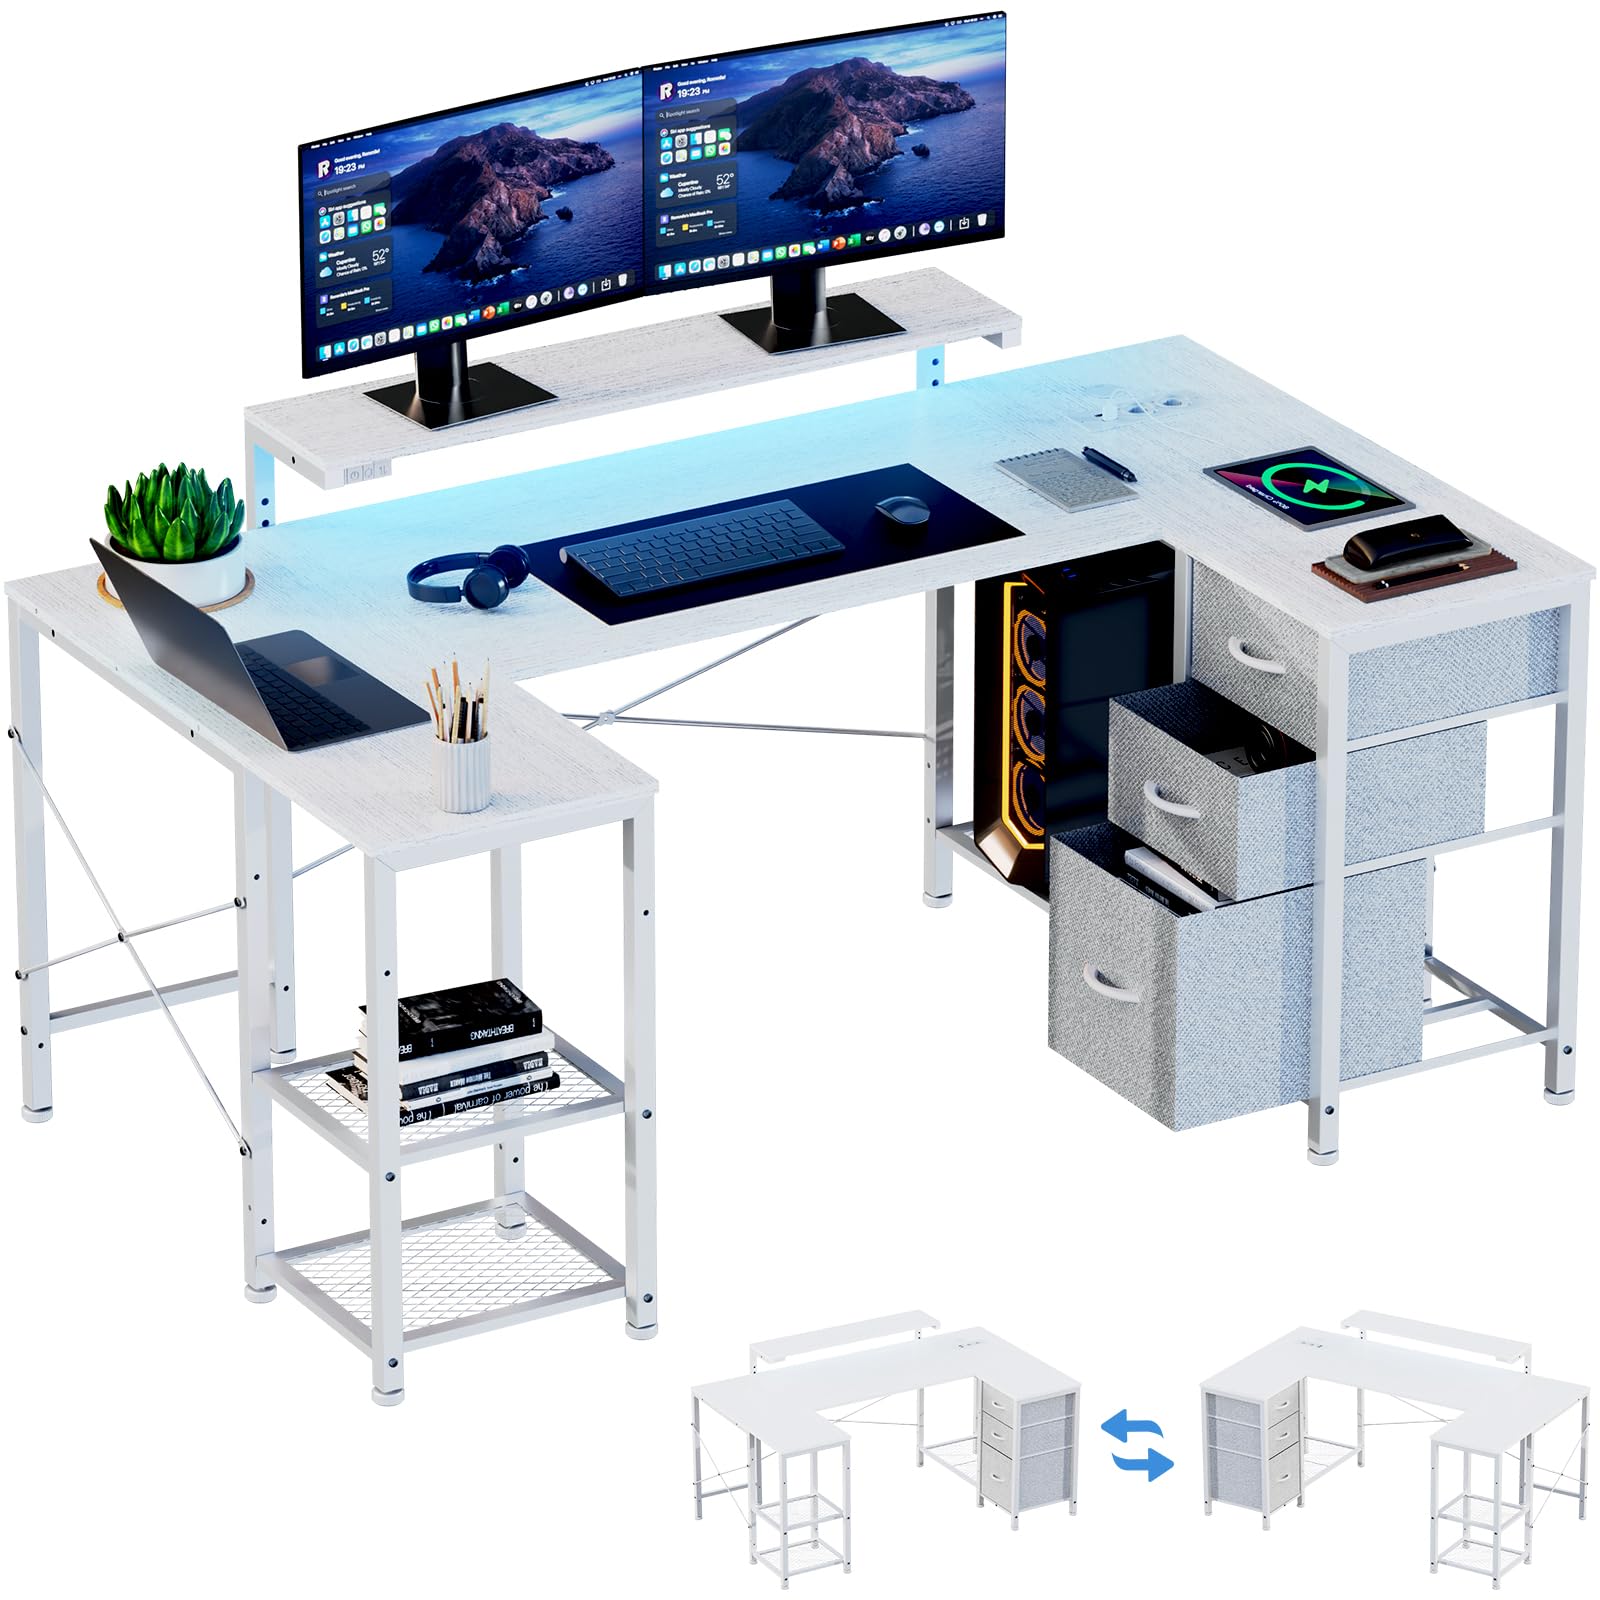
Figure 1: Overview of the Devoko L-Shaped Corner Desk.
2. Product Specifications
| Feature | Detail |
|---|---|
| Brand | Devoko |
| Shape | L-Shape |
| Product Dimensions (D x W x H) | 66.93" x 37.4" x 29.53" (170 x 95 x 75 cm) |
| Color | White |
| Top Material Type | Wood |
| Frame Material Type | Metal |
| Number of Drawers | 3 (Fabric) |
| Monitor Stand | Adjustable Height |
| Power Outlets | 2 AC Sockets (220-250V/15A) |
| USB Ports | 2 USB Ports (5V/2.1A) |
| LED Lighting | RGB LED Strips (7 colors) |
| Assembly Required | Yes (Tools Included) |

Figure 2: Detailed product dimensions. The desk measures 170cm (66.93 inches) along the longer side and 95cm (37.4 inches) along the shorter side, with a height of 75cm (29.53 inches). The monitor stand is adjustable in height.
3. Setup and Assembly
Assembly of the Devoko L-Shaped Corner Desk is designed to be straightforward. All necessary tools and hardware are included. It is recommended to assemble the desk with two people for ease and safety. Please follow the steps below carefully.
- Unpack Components: Carefully unpack all parts and hardware. Verify that all components listed in the packing list are present and undamaged.
- Identify Parts: Lay out all metal frame pieces, wooden panels, and hardware. Each part is typically labeled for easy identification.
- Assemble Frame: Begin by assembling the metal frame structure according to the provided diagrams. Ensure all screws are tightened securely but do not overtighten until the entire frame is assembled.
- Attach Desk Panels: Secure the wooden desk panels to the assembled metal frame. Pay attention to the orientation of the L-shape and ensure the pre-drilled holes align.
- Install Monitor Stand: Attach the monitor stand to the designated area on the desk. The height can be adjusted during or after assembly.
- Integrate Power Unit: Carefully place the power outlet and USB unit into its designated cutout on the desk surface. Connect the power cable.
- Install LED Strips: Adhere the LED light strips to the underside of the monitor stand or desired location. Connect the LED controller and power supply.
- Insert Drawers: Assemble the fabric drawers and slide them into the designated compartments.
- Final Tightening: Once all components are in place and aligned, fully tighten all screws and bolts to ensure stability.
Note: The desk features a reversible layout, allowing the storage unit to be placed on either the left or right side during assembly to best fit your room configuration.
4. Operating Instructions
4.1. Integrated Power Outlets and USB Ports
The desk includes a built-in power strip with two AC sockets and two USB charging ports, providing convenient access to power for your devices.
- AC Sockets: Rated for 220-250V/15A. Use for laptops, monitors, and other standard electronics.
- USB Ports: Rated for 5V/2.1A. Ideal for charging smartphones, tablets, headphones, and other USB-powered devices.

Figure 3: Close-up of the integrated power outlets and USB ports. Connect your devices directly to the desk for charging and power.
To use, simply plug the desk's main power cable into a wall outlet. Then, plug your devices into the integrated sockets or USB ports.
4.2. LED Lighting System
The desk features RGB LED light strips to enhance your workspace ambiance. The LED strips are controlled via a dedicated controller.
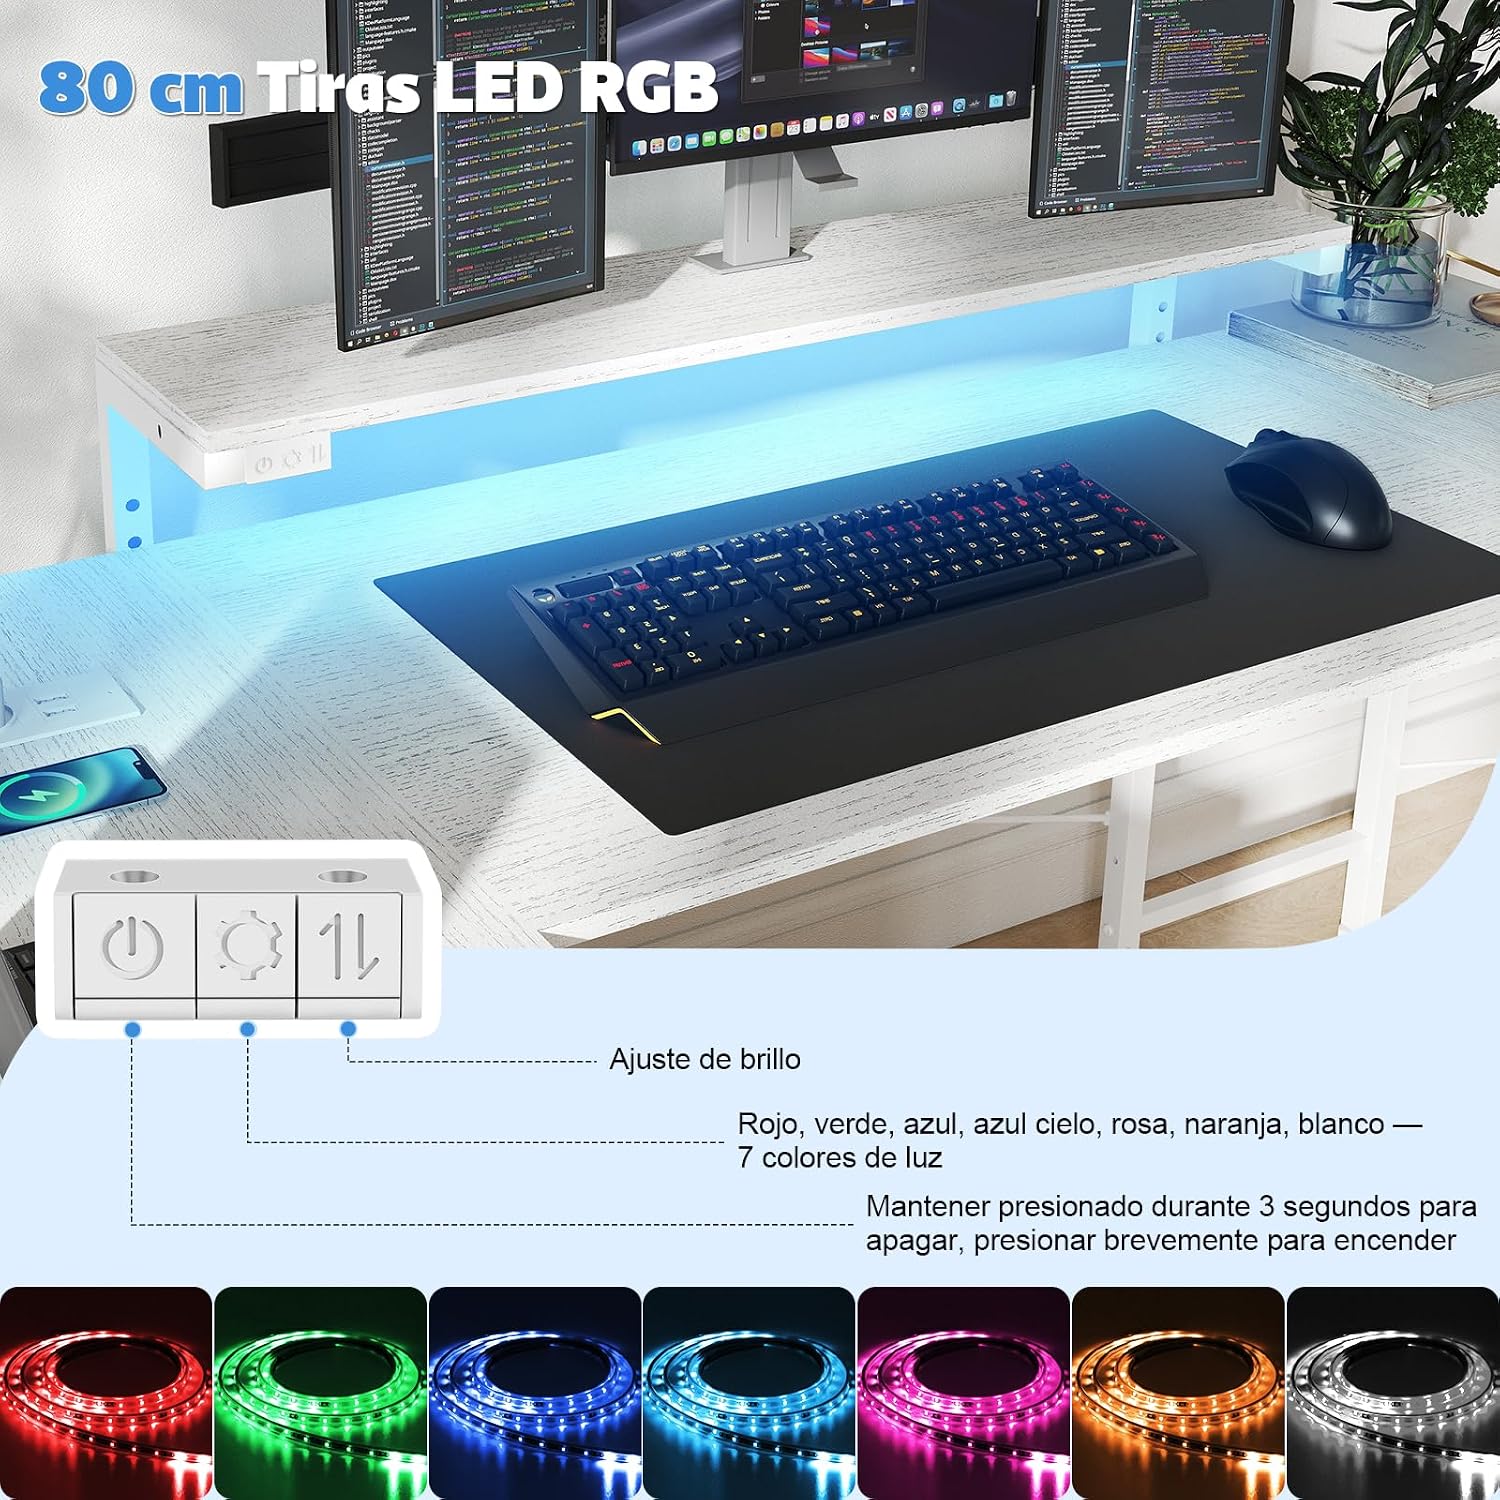
Figure 4: LED lighting controller with power, mode, and brightness adjustment buttons. The system offers 7 color options: Red, Green, Blue, Sky Blue, Pink, Orange, White.
- Power On/Off: Briefly press the power button to turn the LEDs on. Press and hold for 3 seconds to turn them off.
- Color Selection: Use the mode button to cycle through the 7 available colors (Red, Green, Blue, Sky Blue, Pink, Orange, White) and various lighting effects.
- Brightness Adjustment: Use the brightness buttons to increase or decrease the intensity of the LED lights.

Figure 5: The desk illuminated by its integrated LED lighting, creating an immersive environment.
4.3. Adjustable Monitor Stand
The ergonomic monitor stand is designed to optimize your viewing height, reducing neck and eye strain. It can be adjusted to different heights.

Figure 6: Illustration of the adjustable monitor stand, showing different height settings (e.g., 10cm, 13cm, 16cm above the main desk surface).
To adjust the monitor stand height, carefully lift the stand and reposition it into the desired slots on the desk frame. Ensure it is securely seated before placing monitors or other equipment on it.
4.4. Storage Drawers
The desk includes three spacious fabric drawers for organizing your office supplies, documents, and gaming accessories.

Figure 7: The three fabric drawers provide ample storage for stationery, documents, electronic accessories, and other personal items, helping to keep your workspace tidy.
To use the drawers, simply pull them out by their handles. Ensure not to overload them to maintain smooth operation and prevent damage.
5. Maintenance
Regular maintenance will help prolong the life and appearance of your Devoko L-Shaped Corner Desk.
- Cleaning Surfaces: Wipe desk surfaces with a soft, damp cloth. Avoid abrasive cleaners or harsh chemicals that may damage the finish. For stubborn marks, a mild soap solution can be used, followed by drying with a clean cloth.
- Frame Care: The metal frame can be cleaned with a damp cloth. Ensure it is dried thoroughly to prevent rust.
- Drawer Care: The fabric drawers can be spot cleaned with a mild detergent and water. Allow them to air dry completely before reinserting.
- Check Connections: Periodically check all screws and bolts to ensure they remain tight. Retighten if necessary to maintain desk stability.
- Electrical Components: Ensure the power outlets, USB ports, and LED lighting components are kept dry. Do not attempt to disassemble or repair electrical components yourself.
6. Troubleshooting
If you encounter any issues with your Devoko L-Shaped Corner Desk, please refer to the following common problems and solutions:
| Problem | Possible Cause | Solution |
|---|---|---|
| Desk is wobbly/unstable. | Loose screws or uneven floor. | Ensure all assembly screws are fully tightened. Adjust leveling feet if present, or place shims under legs on uneven surfaces. |
| Power outlets/USB ports not working. | Desk not plugged into wall outlet, wall outlet not active, or internal connection issue. | Verify the desk's main power cable is securely plugged into a functional wall outlet. Test the wall outlet with another device. If the issue persists, contact customer support. |
| LED lights not turning on. | LED power cable disconnected, controller malfunction, or power issue. | Check that the LED power cable is securely connected to the controller and the power source. Ensure the desk's main power is on. Try pressing the power button on the LED controller briefly. |
| Drawers are difficult to open/close. | Overloaded or improperly inserted. | Reduce the weight in the drawers. Ensure the fabric drawers are correctly folded and inserted into their compartments. |
If these solutions do not resolve your issue, please contact Devoko customer support for further assistance.
7. Warranty and Support
Devoko stands behind the quality of its products. For specific warranty information regarding your L-Shaped Corner Desk, please refer to the warranty card included with your purchase or visit the official Devoko website. For technical support, replacement parts, or any other inquiries, please contact Devoko customer service through their official channels.
Contact Information: Please refer to your purchase documentation or the Devoko brand website for the most current customer support contact details.