1. Product Overview
The JANGKLIFE USB Rechargeable Engraving Pen is a versatile mini rotary tool designed for precision engraving, grinding, polishing, and carving. Its compact and cordless design makes it suitable for various crafting projects on materials such as metal, glass, wood, plastic, ceramics, and leather.
This tool features three adjustable speed levels, ranging from 5,000 to 18,000 RPM, allowing for customized power based on the material's hardness. It is powered by a high-performance motor with built-in overload protection, ensuring durability and safe operation. The kit includes 42 bits for a wide range of applications.
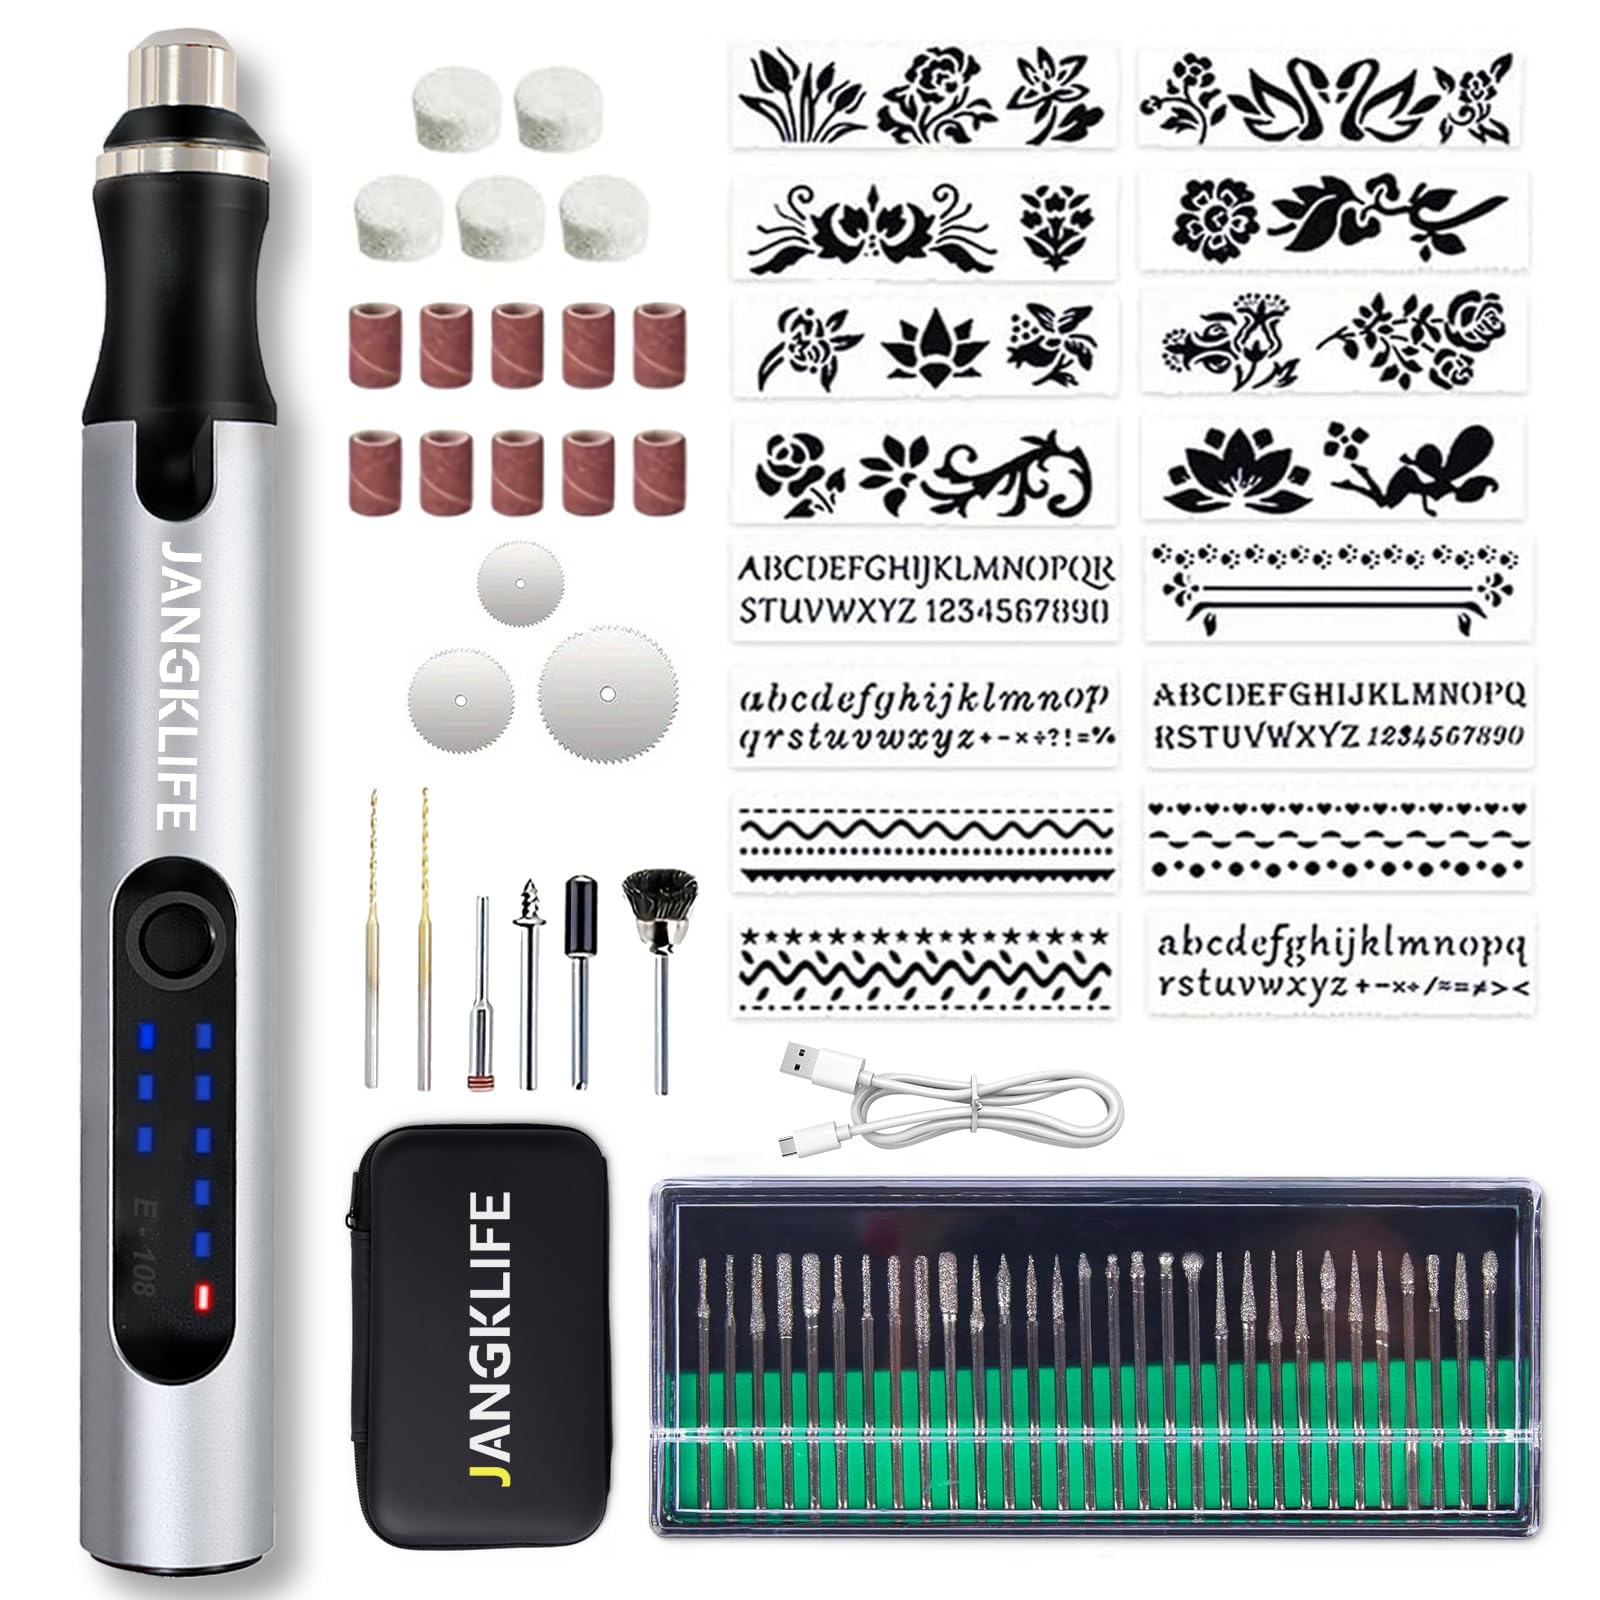
Image 1.1: JANGKLIFE USB Rechargeable Engraving Pen with various accessories, including different bits and a charging cable.
2. Package Contents
Verify that all items are present in the package:
- JANGKLIFE USB Rechargeable Engraving Pen (Model E-108)
- USB Type-C Charging Cable
- Assorted Engraving Bits (42 pieces, including grinding, polishing, and carving tips)
- Storage Case/Toolkit

Image 2.1: Diagram showing the engraving pen, various engraving heads, accessories, Type-C charging cable, and toolkit included in the package.
3. Product Components
Familiarize yourself with the main parts of the engraving pen:

Image 3.1: Labeled diagram of the engraving pen showing the Load Indicator Light, Speed Indicator Light, On/Off & Speed Control Button, Overload Indicator Light, Power Indicator Light, Locking Collar, Nut, Collets (Φ 2.35mm), and Type-C charging interface.
- On/Off & Speed Control Button: Used to power the device on/off and cycle through speed settings.
- Speed Indicator Light: Displays the current operating speed.
- Power Indicator Light: Shows the battery charge level.
- Overload Indicator Light: Illuminates if the tool experiences excessive resistance, indicating overload protection activation.
- Locking Collar: Secures the accessory bits in place.
- Collets: Holds the engraving bits. Standard size is Φ 2.35mm.
- Type-C Charging Interface: Port for charging the internal battery.
4. Setup
4.1 Charging the Engraving Pen
- Before first use, fully charge the engraving pen.
- Connect the provided USB Type-C charging cable to the charging interface on the pen.
- Connect the other end of the USB cable to a compatible USB power adapter (not included) or a computer USB port.
- The Power Indicator Lights will show the charging status. Once fully charged, the lights will indicate a full battery.
A full charge allows for approximately one hour of continuous operation.
4.2 Installing/Changing Engraving Bits
- Ensure the engraving pen is turned OFF before changing bits.
- Loosen the Locking Collar by rotating it counter-clockwise.
- Insert the desired engraving bit into the collet. Ensure the bit is fully seated.
- Tighten the Locking Collar by rotating it clockwise until the bit is securely held. Do not overtighten.
- Gently pull on the bit to confirm it is firmly in place before operation.
5. Operating Instructions
5.1 Power On/Off and Speed Adjustment
- To power on the device, press and hold the On/Off & Speed Control Button for a few seconds until the Speed Indicator Lights illuminate.
- To adjust the speed, press the On/Off & Speed Control Button briefly. Each press will cycle through the three available speed levels:
- Low Speed (approx. 5,000 RPM)
- Medium Speed (approx. 10,000 RPM)
- High Speed (approx. 18,000 RPM)
- Select the appropriate speed based on the material and the task. Lower speeds are suitable for softer materials like plastic and leather, while higher speeds are for harder materials such as metal, wood, stone, and glass.
- To power off the device, press and hold the On/Off & Speed Control Button again for a few seconds until the lights turn off.
5.2 Engraving and Crafting Techniques
Always wear appropriate safety glasses when operating the tool.
- Material Preparation: Ensure your workpiece is clean and securely held. For delicate materials, practice on scrap pieces first.
- Grip: Hold the engraving pen like a regular pen for precise control.
- Pressure: Apply light, consistent pressure. Excessive force can activate the overload protection or damage the bit/material.
- Movement: Use smooth, controlled movements. For engraving, trace your design slowly. For grinding or polishing, move the tool evenly across the surface.
- Overload Protection: The built-in overload protection chip will automatically shut down the motor if resistance is too high. If this occurs, reduce pressure or check for obstructions, then restart the tool.

Image 5.1: Examples of the engraving pen being used on glass, shell, jade, and wood, demonstrating simple operation.

Image 5.2: Visual representation of the engraving pen's versatility, showing it used for grinding a walnut, engraving wood, sanding wood, drilling a shell, carving glass, and polishing a pet's nail.
6. Maintenance
6.1 Cleaning
- Always ensure the tool is turned OFF and disconnected from the charger before cleaning.
- Wipe the body of the engraving pen with a soft, dry cloth.
- Use a small brush or compressed air to remove dust and debris from the collet area and ventilation openings.
- Do not use harsh chemicals or abrasive cleaners, as these can damage the tool's finish or internal components.
6.2 Bit Care and Storage
- Clean bits after each use to prevent material buildup, which can affect performance.
- Store bits in their designated storage case to prevent damage and loss.
- Replace worn or damaged bits to maintain optimal performance and safety.
6.3 Battery Care
- For optimal battery life, avoid completely draining the battery frequently.
- Store the tool in a cool, dry place when not in use.
- If storing for an extended period, charge the battery to approximately 50% every few months.
7. Troubleshooting
| Problem | Possible Cause | Solution |
|---|---|---|
| Tool does not turn on. | Battery is depleted. | Charge the engraving pen using the provided USB Type-C cable. |
| Bit stops spinning during operation. | Overload protection activated due to excessive pressure or material resistance. | Reduce pressure on the workpiece. Turn the tool off and then on again to reset. Ensure the bit is not jammed. |
| Bit is loose or wobbles. | Locking collar not tightened sufficiently. Incorrect bit size for collet. | Ensure the locking collar is securely tightened. Verify the bit shank diameter matches the collet size (Φ 2.35mm). |
| Reduced performance or poor engraving quality. | Worn or dull bit. Incorrect speed setting for material. | Replace the bit with a new one. Adjust the speed setting to match the material's hardness. |
8. Specifications
| Feature | Detail |
|---|---|
| Model Number | E-108 |
| Brand | JANGKLIFE |
| Product Dimensions | 4.92 x 0.59 x 0.59 inches (125mm length) |
| Item Weight | 1.41 ounces |
| Battery Type | 1 Lithium Ion battery (included) |
| Voltage | 3.7V (Safe Voltage) |
| Speed Levels | 3 (5,000 - 18,000 RPM) |
| Charging Interface | USB Type-C |
| Included Bits | 42 assorted bits (engraving, grinding, polishing, carving) |

Image 8.1: The engraving pen's compact size, measuring 125mm (4.92 inches) in length, highlighting its portability.
9. Safety Information
- Always wear appropriate personal protective equipment, such as safety glasses, when operating the tool.
- Keep hands and loose clothing away from rotating parts.
- Do not operate the tool near flammable liquids or gases.
- Keep the tool out of reach of children.
- Do not immerse the tool in water or expose it to excessive moisture.
- Use only original or recommended accessories and bits.
- If the tool becomes damaged, discontinue use immediately and contact customer support.
10. Warranty and Support
JANGKLIFE provides a return policy for this product. Please refer to your purchase documentation or the retailer's website for specific details regarding warranty coverage and return periods.
For technical support, troubleshooting assistance, or inquiries about replacement parts, please contact JANGKLIFE customer service through the retailer where the product was purchased or visit the official JANGKLIFE store online.
Manufacturer: JANGKLIFE